Today, we had to take down a cherry ... it was too sick with that black plague. In our area, there are a lot of wild cherry shrubs and they carry that sickness, it doe not affect them since new one grow and replace the sick one. But for the prunus type and more special cherry trees, it is a battle to take out all the sick limbs every year and clean all cutters to make sure you do not transport the sickness to another tree ... anyway that is not the purpose of this thread ... I wanted to ask :
What do you put at the ends so you can dry without splitting ?
I was thinking of turning something, I do not have big pieces ( 2 inches diameter ) is there something that can be done with it.
I will also have some apple trunk and some walnut.
thanks
Cherry ...
Moderator: admin
-
camerio

- Platinum Member
- Posts: 602
- Joined: Fri Aug 11, 2006 8:01 am
- Location: Valcartier, just north of Quebec City, CANADA
Cherry ...
Camerio
MarkV 520 & Band saw
MarkV 520 & Band saw

You can use something like this.
http://www.woodcraft.com/Product/2080619/29483/Anchorseal-2-Green-Wood-Sealer-Quart.aspx
http://www.woodcraft.com/Product/2080619/29483/Anchorseal-2-Green-Wood-Sealer-Quart.aspx
SS 500(09/1980), DC3300, jointer, bandsaw, belt sander, Strip Sander, drum sanders,molder, dado, biscuit joiner, universal lathe tool rest, Oneway talon chuck, router bits & chucks and a De Walt 735 planer,a #5,#6, block planes. ALL in a 100 square foot shop.
.
.
Bob
.
.
Bob
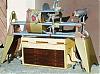
Keep the bark on!
2" size is about right for Tree Craftprojects! Other books by Chris Lubkemann are interesting. Also see 3 projects from Steveinmarin
Also consider wet turning to rough size, microwave to dry, and final turning , sanding, after it has dried in microwave.
Another Tree Craft project, where the end product looks good and works well is a napkin holder. Napkin holders (right) vase (left) vase on box (middle).
[ATTACH]14678[/ATTACH]
Also consider wet turning to rough size, microwave to dry, and final turning , sanding, after it has dried in microwave.
Another Tree Craft project, where the end product looks good and works well is a napkin holder. Napkin holders (right) vase (left) vase on box (middle).
[ATTACH]14678[/ATTACH]
- Attachments
-
- 50621474.jpg (45.6 KiB) Viewed 2069 times
MK V 520; MK V 510 w/PP DIY Upgrade; MK 5 500; Jointer; Bandsaw; Sliding Table; Conical Sanding Disk; Sharpening Guide, Lathe Duplicator, Jigsaw, Scrollsaw, Beltsander, Ring Master, Biscuit Joiner.
-
terrydowning

- Platinum Member
- Posts: 1678
- Joined: Mon Jul 19, 2010 3:26 pm
- Location: Windsor, CO
Use Anchorseal or latex paint on the end cuts. I use latex paint since I always seem to have some around left over from projects and I'm frugal (cheap).
Weigh the branch.
Store in dry location.
Wait a few months and weigh it again, then weigh weekly, once the weight stabilizes, it is acclimatized and dry.
You may also want to rough out your turnings while the wood is green and use the paper bag method of drying same weighing process as above to determine acclimatization. If using this method, it's a good idea to acclimatize the project in the are it will be displayed. I have few bowls in bags drying in my hall closet now.
Weigh the branch.
Store in dry location.
Wait a few months and weigh it again, then weigh weekly, once the weight stabilizes, it is acclimatized and dry.
You may also want to rough out your turnings while the wood is green and use the paper bag method of drying same weighing process as above to determine acclimatization. If using this method, it's a good idea to acclimatize the project in the are it will be displayed. I have few bowls in bags drying in my hall closet now.
--
Terry
Copy and paste the URLs into your browser if you want to see the photos.
1955 Shopsmith Mark 5 S/N 296860 Workshop and Tools
https://1drv.ms/i/s!AmpX5k8IhN7ahFCo9VvTDsCpoV_g
Public Photos of Projects
http://sdrv.ms/MaXNLX
Terry
Copy and paste the URLs into your browser if you want to see the photos.
1955 Shopsmith Mark 5 S/N 296860 Workshop and Tools
https://1drv.ms/i/s!AmpX5k8IhN7ahFCo9VvTDsCpoV_g
Public Photos of Projects
http://sdrv.ms/MaXNLX
You can pack them is sawdust and that will reduce or prevent splitting. The saw dust will absorb the moisture but at a much slower rate than air allowing a more even shrinkage of the wood. It worked for me when I cut down an apple tree and wanted to save some of the wood for handles. I had over 20 pieces and none of them split or cracked. The wood dries very slowly. Check them from time to time to be sure the saw dust is not starting to mold. It works with wet sawdust also but the mold can become a problem if you are not careful.
Cheers,
Merle
Cheers,
Merle
If the wood molds, it causes an effective spalting to occur. I had that happen to a nice rough hackberry bowl that I did not get back to for a month, and the resultant bowl had green spots of mold in the wood, which had to be turned out (with a face mask on). The bowl went from pure white to a dark grey with mapping. Nice.
Hand Engraver of Metals; Maker of Exquisite Kindling; 1955 Greenie Mark V (NOW with a 1989 Headstock); Magna Band Saw; Magna 4" Jointer; Miscellaneous Craftsman & Porter-Cable electric woodworking tools.
3D CADCAM Designs - Gemstone Facetor
3D CADCAM Designs - Gemstone Facetor