Lousy jointer technique or maybe I just don't get it?
Moderator: admin
-
wannabewoodworker

- Platinum Member
- Posts: 626
- Joined: Mon Feb 15, 2010 11:36 am
- Location: Milford, CT
With my new sharp knives in place I can like I used to joint quite long boards. You have to stay focused on the outfeed table and keeping the wood flush to the table but i have jointed some very long 8'+ boards with no issues. Extended outfeed support would be a huge help but I am not going to even try to fabricate extended outfeed support for the jointer. Done that already with my tablesaw and it was quite a project and I had plenty of material to work with on the tablesaw nothing like the jointer on the SS. I would be curious to see anyones extended outfeed support that they have fabricated for the SS.
Michael Mayo
Senior IT Support Engineer
Soft Designs Inc.
albiemanmike@gmail.com
1960's SS Mark VII, 1954 Greenie, 1983 Mark V, Jointer, Bandsaw, Jigsaw, Dewalt Slider, Delta Super 10, Delta 8" Grinder, Craftsman compressor, Drill Doctor, Kreg PH Jig, Bosch Jigsaw, Craftsman Router and Table...........and adding more all the time....
Senior IT Support Engineer
Soft Designs Inc.
albiemanmike@gmail.com
1960's SS Mark VII, 1954 Greenie, 1983 Mark V, Jointer, Bandsaw, Jigsaw, Dewalt Slider, Delta Super 10, Delta 8" Grinder, Craftsman compressor, Drill Doctor, Kreg PH Jig, Bosch Jigsaw, Craftsman Router and Table...........and adding more all the time....
-
dusty

- Platinum Member
- Posts: 21530
- Joined: Wed Nov 22, 2006 6:52 am
- Location: Tucson (Wildcat Country), Arizona
wannabewoodworker wrote:With my new sharp knives in place I can like I used to joint quite long boards. You have to stay focused on the outfeed table and keeping the wood flush to the table but i have jointed some very long 8'+ boards with no issues. Extended outfeed support would be a huge help but I am not going to even try to fabricate extended outfeed support for the jointer. Done that already with my tablesaw and it was quite a project and I had plenty of material to work with on the tablesaw nothing like the jointer on the SS. I would be curious to see anyones extended outfeed support that they have fabricated for the SS.
I'll see if I have pictures.
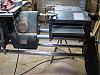
[ATTACH]16579[/ATTACH]
[ATTACH]16580[/ATTACH]
[ATTACH]16581[/ATTACH]
[ATTACH]16582[/ATTACH]
This application needs some modifications. The support leg is not as stable as it needs to be. I also need to devise a clamp that would allow me to get rid of that spring clamp.
- Attachments
-
- Jointer Extension 002 (Custom).JPG (41.77 KiB) Viewed 7569 times
-
- Jointer Extension 003 (Custom).JPG (36.42 KiB) Viewed 7570 times
-
- Jointer Extension 006 (Custom).JPG (35.99 KiB) Viewed 7570 times
-
- Jointer Extension 008 (Custom).JPG (35.19 KiB) Viewed 7569 times
"Making Sawdust Safely"
Dusty
Sent from my Dell XPS using Firefox.
Dusty
Sent from my Dell XPS using Firefox.
-
wannabewoodworker
- Platinum Member
- Posts: 626
- Joined: Mon Feb 15, 2010 11:36 am
- Location: Milford, CT
Thanks Dusty that gives me some idea'ers!
Michael Mayo
Senior IT Support Engineer
Soft Designs Inc.
albiemanmike@gmail.com
1960's SS Mark VII, 1954 Greenie, 1983 Mark V, Jointer, Bandsaw, Jigsaw, Dewalt Slider, Delta Super 10, Delta 8" Grinder, Craftsman compressor, Drill Doctor, Kreg PH Jig, Bosch Jigsaw, Craftsman Router and Table...........and adding more all the time....
Senior IT Support Engineer
Soft Designs Inc.
albiemanmike@gmail.com
1960's SS Mark VII, 1954 Greenie, 1983 Mark V, Jointer, Bandsaw, Jigsaw, Dewalt Slider, Delta Super 10, Delta 8" Grinder, Craftsman compressor, Drill Doctor, Kreg PH Jig, Bosch Jigsaw, Craftsman Router and Table...........and adding more all the time....
-
dusty
- Platinum Member
- Posts: 21530
- Joined: Wed Nov 22, 2006 6:52 am
- Location: Tucson (Wildcat Country), Arizona
These pictures do not do justice. The point at which the home made table mates with the outfeed table is, in my opinion, critical. You do NOT WANT a lip there that will impair movement of the work piece across the joint.wannabewoodworker wrote:Thanks Dusty that gives me some idea'ers!
Also equally important is the plane of the extension table. It must be absolutely in the same plane as the top surface of the outfeed table. If it is not, you will tend to cut tapers. It may not be noticeable but it will be there and you will become aware sometime during assembly.
NOTE: I did not say the table needs to be level. That would be true only if your jointer outfeed table is absolutely level.
"Making Sawdust Safely"
Dusty
Sent from my Dell XPS using Firefox.
Dusty
Sent from my Dell XPS using Firefox.
I have been giving some thought to the adjustable legs and those thoughts have brought me to wonder about making them similar to the adjustable legs on crutches. Only instead of having holes in the center portion to cut a slot. Then the upper portion could be mounted on a hinge to the table. When not in use the legs could be retracted to their shortest position and folded out of the way for storage. Has anyone made anything like that? Sorry I do not have any pictures, but I have not progressed that far with the idea yet.

I seem to remember seeing a Sawdust Session where Nick created and mounted an extension out feed table for the jointer. But I'll be darned if I can find it now on the ShopSmith website. It included taking advantage of a step in the casting to support and align the table. Did I just dream it?
________________________________________________________________________________________________
1981 Mark V 500, bandsaw, belt sander, jig saw, jointer; contractor's table saw; multiple circular saws and miter saws; and a trailer full of tools.
"It is better to remain silent and thought a fool than to speak out and remove all doubt"
Abraham Lincoln
1981 Mark V 500, bandsaw, belt sander, jig saw, jointer; contractor's table saw; multiple circular saws and miter saws; and a trailer full of tools.
"It is better to remain silent and thought a fool than to speak out and remove all doubt"
Abraham Lincoln
delayed brain function. http://www.youtube.com/watch?v=ZxAd-t2VBV0 I think this is what you are looking for. There are a bunch of these hands on line videos on U-tube
Saw dust heals many wounds. RLTW
Dave
Dave
-
dusty
- Platinum Member
- Posts: 21530
- Joined: Wed Nov 22, 2006 6:52 am
- Location: Tucson (Wildcat Country), Arizona
dlbristol wrote:delayed brain function. http://www.youtube.com/watch?v=ZxAd-t2VBV0 I think this is what you are looking for. There are a bunch of these hands on line videos on U-tube
Extreme Overkill.
I usually do not have any criticism for Nick's projects and jigs but this one is extreme. Too big and bulky and tied to the jointer fence. The quadrant on the jointer is susceptible as is without stressing it anymore.
I'll do my own thing on this one.
Luv ya man, wish you would come back. The forum is just not quite the same without you. Those Saturday morning SawDust Sessions were great and getting better with each one.
"Making Sawdust Safely"
Dusty
Sent from my Dell XPS using Firefox.
Dusty
Sent from my Dell XPS using Firefox.
-
robinson46176

- Platinum Member
- Posts: 4182
- Joined: Mon Mar 09, 2009 9:00 pm
- Location: Central Indiana (Shelbyville)
dusty wrote:This application needs some modifications. The support leg is not as stable as it needs to be. I also need to devise a clamp that would allow me to get rid of that spring clamp.
Very very nice...
What if you drill horizontally through the forked end of the table and on through the skirts of the jointer table and use one pin (or bolt) all of the way across?
.
--
farmer
Francis Robinson
I did not equip with Shopsmiths in spite of the setups but because of them.
1 1988 - Mark V 510 (bought new), 4 Poly vee 1 1/8th HP Mark V's, Mark VII, 1 Mark V Mini, 1 Frankensmith, 1 10-ER, 1 Mark V Push-me-Pull-me Drillpress, SS bandsaw, belt sander, jointer, jigsaw, shaper attach, mortising attach, TS-3650 Rigid tablesaw, RAS, 6" long bed jointer, Foley/Belsaw Planer/molder/ripsaw, 1" sander, oscillating spindle/belt sander, Scroll saw, Woodmizer sawmill
farmer
Francis Robinson
I did not equip with Shopsmiths in spite of the setups but because of them.
1 1988 - Mark V 510 (bought new), 4 Poly vee 1 1/8th HP Mark V's, Mark VII, 1 Mark V Mini, 1 Frankensmith, 1 10-ER, 1 Mark V Push-me-Pull-me Drillpress, SS bandsaw, belt sander, jointer, jigsaw, shaper attach, mortising attach, TS-3650 Rigid tablesaw, RAS, 6" long bed jointer, Foley/Belsaw Planer/molder/ripsaw, 1" sander, oscillating spindle/belt sander, Scroll saw, Woodmizer sawmill