dusty wrote:I understand what you are saying but why is that procedure 'improper'? I did that same thing with the 510 fence for years and often wondered why there wasn't a screw on the other side.
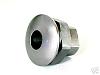
There is nothing wrong with using that screw(the one on the right) to temporarily intentionally skew the fence for some operation. It was originally added to allow thickness(width) sanding with a flat sanding disc. The screw is advanced so as to impart a clockwise motion at the rear. That opens the fence from the rear of the disc. The workpiece is then fed from the rear. FWIW, the older aluminum disk works better since it has a slight taper relief at the periphery that the abrasive covers.
It is not intended as a fine tuning alignment of the fence parallel to 'anything'.
The screws securing the front casting to the fence is where that alignment is made.
As far as the second on the left ala 500, I have no inkling why that was added. IMHO it just caused folks to 'mis'use it to align the fence.
As Farmer has said previously, he removes those screws so they cannot cause inadvertent skewing.
End mild rant!;)
╔═══╗
╟JPG ╢
╚═══╝
Goldie(Bought New SN 377425)/4" jointer/6" beltsander/12" planer/stripsander/bandsaw/powerstation /Scroll saw/Jig saw /Craftsman 10" ras/Craftsman 6" thicknessplaner/ Dayton10"tablesaw(restoredfromneighborstrashpile)/ Mark VII restoration in 'progress'/ 10E[/size](SN E3779) restoration in progress, a 510 on the back burner and a growing pile of items to be eventually returned to useful life. - aka Red Grange
[quote="TheBigE"]My first question for all you veterans is, how do you over come the "fussiness" of using the 500 table? I find the table saw very capable. With patients it does everything a table saw can do. But, when moving the fence back and forth one finds it, well]
Hi Erich;
One thing I have done on my 500 that helps make the fence adjustment a bit quicker is to etch a series of lines across the guide bar on the front of the table every 1/4 inch. I used an engraving tool to make the lines. I bring the fence up close as I can to the intended width, using the edge of the fence base as the index point, then remeasure from blade to fence and using my 1/4 inch marks move the fence. Its pretty easy to eyeball down to about 1/32 using the marks. If you tighten the fence front lock down a little, not all the way, you can use thumb pressure to slide the fence. This usually gets me really close and if I need to I can extend the quill. Many times, though two measurements is all that is needed. Especially if you are going to leave a little width for planing after ripping. The last thing I do before making the cut is check that the fence is parallel to the blade by using a try square to measure along the side of the table to the off side of the fence, sliding the square along the fence from front of the table to the back.
Sounds like a lot of work, but really it takes longer to tell than to do.
Ed
Idaho Panhandle
Mark 5 of various vintages, Mini with reversing motor, bs, dc3300, jointer, increaser, decreaser
Agreed on all accounts. JPG, yes the knob is hard to tighten with that extension fence. It is the very plan from PTWFE. Works well, especially with the flip top stand. I was just using that as an example. I also hear you on the clamping of the fence along the table edges. I think what is more PITA is many things are cut to 6"-7" widths and that just happens to be about where that is.
Ed, I use a square set to an 1/8" more then I want (to accommodate the blade) that works real well. Slide it against the blade and then while pushing the fence as square as possible up to the blade of the square. I've also seen in a magazine about a tip like yours where someone engraved a rule into the cast iron top. It appeared they had an older Delta saw with the tubes for fence glides.
I guess sometimes it seems like I'm fiddling with the fence, headstock, knobs, etc. rather then cutting! I do have a contractor table saw with a nice fence. Just slide it over, check, and lock down. Still can get a wider cut on the Mark V though! And fiddling can be the fun of it
Any one else with some tricks on these fences? I've tried in the past while I was a lurker to see if anybody had good ideas setting the fence just right. Especially with the fence on the extension table for a wider cut. Thanks again!
1986 Mark V 500, SS Bandsaw, SS Belt Sander, Shaper Package, SS Molder, SS Oscillating Drum Sander, Excalibur EX-II scrollsaw, Central Machine 6 1/8" Jointer, Rigid 13" planer, Various routers and table.
"Remeber, you're unique. Just like everyone else."
A way I have gotten around the fence bridging the tables is to use a spacer between the fence and the workpiece. That allows the fence to be fully on the extension table.
Also my M5 has the 'extra slot', so that is the quickest way around that.
╔═══╗
╟JPG ╢
╚═══╝
Goldie(Bought New SN 377425)/4" jointer/6" beltsander/12" planer/stripsander/bandsaw/powerstation /Scroll saw/Jig saw /Craftsman 10" ras/Craftsman 6" thicknessplaner/ Dayton10"tablesaw(restoredfromneighborstrashpile)/ Mark VII restoration in 'progress'/ 10E[/size](SN E3779) restoration in progress, a 510 on the back burner and a growing pile of items to be eventually returned to useful life. - aka Red Grange
This discussion is one of the reasons (other than just talking with friends) that I check this forum almost every day!
While I knew that the set screws allowed skewing for sanding operations, I did NOT know that there was an adjustment on the front casting. Occasionally I need to replace the Jointech table for one operation or another. Knowing that I can adjust the fence correctly from the front is great.
Thanks JPG.
Gene
[quote="JPG40504"]There is nothing wrong with using that screw(the one on the right) to temporarily intentionally skew the fence for some operation. It was originally added to allow thickness(width) sanding with a flat sanding disc. The screw is advanced so as to impart a clockwise motion at the rear. That opens the fence from the rear of the disc. The workpiece is then fed from the rear. FWIW, the older aluminum disk works better since it has a slight taper relief at the periphery that the abrasive covers.
It is not intended as a fine tuning alignment of the fence parallel to 'anything'.
The screws securing the front casting to the fence is where that alignment is made.
As far as the second on the left ala 500, I have no inkling why that was added. IMHO it just caused folks to 'mis'use it to align the fence.
As Farmer has said previously, he removes those screws so they cannot cause inadvertent skewing.
End mild rant!]
Gene
'The true soldier fights not because he hates what is in front of him, but because he loves what is behind him.' G. K. Chesterton
Gene Howe wrote:This discussion is one of the reasons (other than just talking with friends) that I check this forum almost every day!
While I knew that the set screws allowed skewing for sanding operations, I did NOT know that there was an adjustment on the front casting. Occasionally I need to replace the Jointech table for one operation or another. Knowing that I can adjust the fence correctly from the front is great.
Thanks JPG.
Gene
Not sure what you meant by that. The 'normal' alignment is by way of screws underneath. Not a particularly pleasant endeavor.
╔═══╗
╟JPG ╢
╚═══╝
Goldie(Bought New SN 377425)/4" jointer/6" beltsander/12" planer/stripsander/bandsaw/powerstation /Scroll saw/Jig saw /Craftsman 10" ras/Craftsman 6" thicknessplaner/ Dayton10"tablesaw(restoredfromneighborstrashpile)/ Mark VII restoration in 'progress'/ 10E[/size](SN E3779) restoration in progress, a 510 on the back burner and a growing pile of items to be eventually returned to useful life. - aka Red Grange
[quote="JPG40504"]Not sure what you meant by that. The 'normal' alignment is by way of screws underneath. Not a particularly pleasant endeavor.]
Time to break out some diagrams, I guess. I've never messed with those screws. In fact, I never knew, till your posts, that they were there or what they were for. I've only had this machine since '75. Give me a break.
Seriously, I'm still learning about it, due greatly to the innovative and helpful guys like you on this forum.
I really did think the set screws were for alignment to square.
Gene
'The true soldier fights not because he hates what is in front of him, but because he loves what is behind him.' G. K. Chesterton
Like JPG, I also have the extra-slot 500 table and use it. I also have found that slightly tightening and tapping the 500 fence allows pretty accurate minute adjustments. I like your sled. I use one as well and it is great. I have two of the mitre gauge table extensions and sometimes put both of them them under the sled for particularly wide cuts. I also see you have the wide extension tables - those are great - I just got my first one. A nice improvement over the standard one. I really like the model 520, but I decided to go with the PowerPro upgrade rather than the 520 upgrade since the 500 table is perfectly capable. Alec
1960 Aniversary Model Mark 5 500 "Goldie" with most SPT's
The secret to having the Shopsmith be less fussy to work with is .......................................................................................................................................................................................................................................................................................................(drum roll) ...................................................................................................................................................................
Just work less fussy...
This is "woodworking" not "wood micro-machining.
Don't get me wrong... There are cuts that I am quite "fussy" about but the key is knowing when you need to be "fussy" and when just a decently accurate cut is needed.
Back in my DP executive days our bookkeeper's husband was building a bedroom onto their house. The problem was that he in addition to being a great guy was a high level engineer... He just couldn't accept the fact that he was building a small bedroom and not a space ship... She feared that their marriage would not survive the job. He worked so slowly she would have to get in her car and leave to keep from screaming at him...
In a similar tale in the little village in the next county where our mini-farm is, the best friends of a friend there bought a tired but solid old house that had been built in the 1840's. They bought a mobile home and parked it nearby to live in until he could fix up the old house. You guessed it, he was another high level engineer. I was told that he was the top in his field. He started on the old house remodel and just couldn't stop. By the end of the first year he had not only gutted it but ended up stripping the whole outside of its siding. By the next year it was standing there with no insides, no outsides and no roof. He just couldn't live with the inaccuracies of the 1840's construction. He kept pulling out studs and re cutting them and trying to fit them back in. Of course they would not fit properly since they were originally hand hewn to fit each spot as needed. Sitting there in the weather the frame members began to split, the wrought iron nails rusted more than they already were and the previously solid field-stone foundation began to come apart. He then started trying to fix the foundation. He was unable, due to his work habits to just tuck-point the mortar and move on and he started pulling rocks out to reset them. He was fixing about 2' of foundation a week and before he got it done a storm came up one night and the whole thing collapsed into the cellar...
He could not stand living there anymore and sold the lot to our friends who burned the remains, filled the hole and today it is just another patch of grass. The historic house and all of its appurtances are long gone.
Learn to control what you do. Don't let it control you.
The Rx is to learn to grab up a hatchet now and then and whack something... then spend some time watching Roy Underhill...
.
--
farmer
Francis Robinson
I did not equip with Shopsmiths in spite of the setups but because of them.
1 1988 - Mark V 510 (bought new), 4 Poly vee 1 1/8th HP Mark V's, Mark VII, 1 Mark V Mini, 1 Frankensmith, 1 10-ER, 1 Mark V Push-me-Pull-me Drillpress, SS bandsaw, belt sander, jointer, jigsaw, shaper attach, mortising attach, TS-3650 Rigid tablesaw, RAS, 6" long bed jointer, Foley/Belsaw Planer/molder/ripsaw, 1" sander, oscillating spindle/belt sander, Scroll saw, Woodmizer sawmill
Oh I like Roy . I know what you mean. I have a degree in Indutrial Technology with some minors. Boils down to a manufacturing engineer degree. However, I started in mechanical. Way to anthetical for me! My engineering displine is way more hands on. I know many who "get in their own way." Believe me. I'm in no hurry while I'm woodworking. It's a hobby. If I was paid by the hour I would definently lose money.
Farmer, I noticed you have a Ridgid contractor saw as well. I have the proceeding model to yours. It's all gray. I really like it. However it takes up room and throws sawdust everywhere. That's the bane of a contractor saw I suppose. Being used to that saw's nice fence, it takes getting used to the 500 fence. But the 500 is still a capable saw nonetheless.
easterngray, I find that kinda refreshing that given the choice to spend money on a major upgrade you choose the power pro because of you comfort with the 500 table. The 510/520 upgrade is no doubt great. But it seems lately many people, myself included, have been grabbing up used 500s. So I thought it would be neat to throw out some tricks people use with them.
I had some epiphanies yesterday and snapped some shots of some setups. I'll pose them later.
1986 Mark V 500, SS Bandsaw, SS Belt Sander, Shaper Package, SS Molder, SS Oscillating Drum Sander, Excalibur EX-II scrollsaw, Central Machine 6 1/8" Jointer, Rigid 13" planer, Various routers and table.
"Remeber, you're unique. Just like everyone else."