Cutting Sailbox In Half
Moderator: admin

I vote for using a circular saw with a straight edge as a guide but cutting most of the way through, not all (leave about 1/4" web). Then finish the cut with (gasp!) a hand saw. Easier to control the saw(s) than the box and with a straight edge as a guide, you should get a clean, straight cut. Safety first!
________________________________________________________________________________________________
1981 Mark V 500, bandsaw, belt sander, jig saw, jointer; contractor's table saw; multiple circular saws and miter saws; and a trailer full of tools.
"It is better to remain silent and thought a fool than to speak out and remove all doubt"
Abraham Lincoln
1981 Mark V 500, bandsaw, belt sander, jig saw, jointer; contractor's table saw; multiple circular saws and miter saws; and a trailer full of tools.
"It is better to remain silent and thought a fool than to speak out and remove all doubt"
Abraham Lincoln

I see no reason to not cut the two long sides on the table saw. Safety issues will require you to have a tall fence and using a push stick/block to feed the frame into the blade. I'd think that having the back installed would make it ridged enough (against tall fence).
I'm assuming that the back/bottom is in a rabbet. Once installed the structure should be OK to cut with power tools. I would not trust the joints by themselves.
I'd even worry about using a hand saw for the cut unless you can clamp/brace the joints before you start.
In my opinion if the joints are just glued that is the most likely failure point however you go about doing the cutting.
Ed
I'm assuming that the back/bottom is in a rabbet. Once installed the structure should be OK to cut with power tools. I would not trust the joints by themselves.
I'd even worry about using a hand saw for the cut unless you can clamp/brace the joints before you start.
In my opinion if the joints are just glued that is the most likely failure point however you go about doing the cutting.
Ed
-
Ed in Tampa

- Platinum Member
- Posts: 5834
- Joined: Fri Jul 21, 2006 12:45 am
- Location: North Tampa Bay area Florida
I made a Fishing Rod box similar to this many many years ago. I didn't own a table saw at the time. I know I built the box then cut it in half but I can't remember how I did it. I think I remember cutting it on my radial arm saw and using a hand saw for the short sides. In any case what every I did worked well since I have used the box for over 35 years.
If I was doing it today I would use a guided saw and be done with it.
I would cut the first narrow end and shim it. Then the second narrow end and shim it. Then I would I would clamp the completed box so the first long side was level with my bench and then setting a guide on the bench cut the first side. I would then stick shims in the cut and turn the box so the other side was up and clamped as the first side and I would cut make that cut.
Piece of cake.
If I was doing it today I would use a guided saw and be done with it.
I would cut the first narrow end and shim it. Then the second narrow end and shim it. Then I would I would clamp the completed box so the first long side was level with my bench and then setting a guide on the bench cut the first side. I would then stick shims in the cut and turn the box so the other side was up and clamped as the first side and I would cut make that cut.
Piece of cake.
Ed in Tampa
Stay out of trouble!
Stay out of trouble!
-
dusty

- Platinum Member
- Posts: 21530
- Joined: Wed Nov 22, 2006 6:52 am
- Location: Tucson (Wildcat Country), Arizona
I would readily cut all but the short side on the table saw. If already assembled, I would suggest cutting the short side some other way.
If I had built this, I would have cut the short side before it was assembled and then cut the remaining sides on the table saw.
If I had built this, I would have cut the short side before it was assembled and then cut the remaining sides on the table saw.
"Making Sawdust Safely"
Dusty
Sent from my Dell XPS using Firefox.
Dusty
Sent from my Dell XPS using Firefox.
-
terrydowning

- Platinum Member
- Posts: 1678
- Joined: Mon Jul 19, 2010 3:26 pm
- Location: Windsor, CO
-
fredsheldon

- Platinum Member
- Posts: 1175
- Joined: Tue Jan 17, 2012 1:31 pm
- Location: The Woodlands, Texas
Well I made a decision, and I went with using the table saw for the long sides and hand saw for the short sides. I started out using the sabre saw but it was taking too long. I had no issues with the table saw. Just took my time and went slow.
[ATTACH]20744[/ATTACH]
[ATTACH]20745[/ATTACH]
[ATTACH]20746[/ATTACH]
[ATTACH]20744[/ATTACH]
[ATTACH]20745[/ATTACH]
[ATTACH]20746[/ATTACH]
- Attachments
-
- 2013-03-28_19-05-34_169.jpg (90.92 KiB) Viewed 2642 times
-
- 2013-03-28_19-13-33_731.jpg (80.43 KiB) Viewed 2642 times
-
- 2013-03-28_21-51-26_527.jpg (79.36 KiB) Viewed 2642 times
Fred Sheldon
The Woodlands, Tx
'52 10ER # 60869 (restored in 2012, used as a dedicated drill press), '52 10ER # 88712 (restored 01/2013), 52 10ER # 71368 (in process of restoring), '83 500 Shorty with OPR installed, '83 520 PowerPro with Lift Assist, 6" Joiner, 6" Belt Sander, 18" Jig Saw, 11" Band Saw, 12" ProPlaner, SS Crosscut Table. SS Dust Collector, Hitachi 1/2" router, Work Sharp 3000 with all attachement, Nova G3 Chuck, Universal Tool Rest, Appalachia Tool Works Sled.
The Woodlands, Tx
'52 10ER # 60869 (restored in 2012, used as a dedicated drill press), '52 10ER # 88712 (restored 01/2013), 52 10ER # 71368 (in process of restoring), '83 500 Shorty with OPR installed, '83 520 PowerPro with Lift Assist, 6" Joiner, 6" Belt Sander, 18" Jig Saw, 11" Band Saw, 12" ProPlaner, SS Crosscut Table. SS Dust Collector, Hitachi 1/2" router, Work Sharp 3000 with all attachement, Nova G3 Chuck, Universal Tool Rest, Appalachia Tool Works Sled.
-
JPG

- Platinum Member
- Posts: 35600
- Joined: Wed Dec 10, 2008 7:42 pm
- Location: Lexington, Ky (TAMECAT territory)
Humph! I was considering a different cut plane!:o A far more difficult one!:D
This makes much more sense! I thought you wanted to make it 'narrower' by folding.
This makes much more sense! I thought you wanted to make it 'narrower' by folding.
╔═══╗
╟JPG ╢
╚═══╝
Goldie(Bought New SN 377425)/4" jointer/6" beltsander/12" planer/stripsander/bandsaw/powerstation /Scroll saw/Jig saw /Craftsman 10" ras/Craftsman 6" thicknessplaner/ Dayton10"tablesaw(restoredfromneighborstrashpile)/ Mark VII restoration in 'progress'/ 10E[/size](SN E3779) restoration in progress, a 510 on the back burner and a growing pile of items to be eventually returned to useful life. - aka Red Grange
╟JPG ╢
╚═══╝
Goldie(Bought New SN 377425)/4" jointer/6" beltsander/12" planer/stripsander/bandsaw/powerstation /Scroll saw/Jig saw /Craftsman 10" ras/Craftsman 6" thicknessplaner/ Dayton10"tablesaw(restoredfromneighborstrashpile)/ Mark VII restoration in 'progress'/ 10E[/size](SN E3779) restoration in progress, a 510 on the back burner and a growing pile of items to be eventually returned to useful life. - aka Red Grange
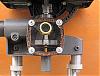
I was about to suggest putting the Shopsmith in drill press mode, mount a small (7.5"?) circular blade on the quill and rest the box flat on the table. Mount the fence so the blade just cuts through horizontally.
I am pleased to see the job is done and my idea does not need to be "tested":eek:
I am pleased to see the job is done and my idea does not need to be "tested":eek:
Peter
a 510,a Mini, dedicated SS drillpress, SS spt's, home made SS belt grinder, SS piston air system, Southbend 10k lathe, mill/drill, Taig
a 510,a Mini, dedicated SS drillpress, SS spt's, home made SS belt grinder, SS piston air system, Southbend 10k lathe, mill/drill, Taig
-
fredsheldon
- Platinum Member
- Posts: 1175
- Joined: Tue Jan 17, 2012 1:31 pm
- Location: The Woodlands, Texas
Ouch!! It's bad enough that I had to remove the saw guard cover because it was in the way, but with that saw blade spinning away out there in the open really gives me pause.prmindartmouth wrote:I was about to suggest putting the Shopsmith in drill press mode, mount a small (7.5"?) circular blade on the quill and rest the box flat on the table. Mount the fence so the blade just cuts through horizontally.
I am pleased to see the job is done and my idea does not need to be "tested":eek:
Fred Sheldon
The Woodlands, Tx
'52 10ER # 60869 (restored in 2012, used as a dedicated drill press), '52 10ER # 88712 (restored 01/2013), 52 10ER # 71368 (in process of restoring), '83 500 Shorty with OPR installed, '83 520 PowerPro with Lift Assist, 6" Joiner, 6" Belt Sander, 18" Jig Saw, 11" Band Saw, 12" ProPlaner, SS Crosscut Table. SS Dust Collector, Hitachi 1/2" router, Work Sharp 3000 with all attachement, Nova G3 Chuck, Universal Tool Rest, Appalachia Tool Works Sled.
The Woodlands, Tx
'52 10ER # 60869 (restored in 2012, used as a dedicated drill press), '52 10ER # 88712 (restored 01/2013), 52 10ER # 71368 (in process of restoring), '83 500 Shorty with OPR installed, '83 520 PowerPro with Lift Assist, 6" Joiner, 6" Belt Sander, 18" Jig Saw, 11" Band Saw, 12" ProPlaner, SS Crosscut Table. SS Dust Collector, Hitachi 1/2" router, Work Sharp 3000 with all attachement, Nova G3 Chuck, Universal Tool Rest, Appalachia Tool Works Sled.
-
fredsheldon
- Platinum Member
- Posts: 1175
- Joined: Tue Jan 17, 2012 1:31 pm
- Location: The Woodlands, Texas
Finished except for the handle and locking lever. This is the type of project I had in mind when I decided to get a Shopsmith in the first place. This being only the third woodworking project I have ever attempted I have come to realize how much I lack in experience. But I'm having fun learning thru trial and error, (Lots of errors), and researching the archives on this site.
[ATTACH]20793[/ATTACH]
Two sections hinged together.
[ATTACH]20795[/ATTACH]
Three sets of remote controlled sailboat rigs and sails will be stored in this transporter. The smaller of the 3 will be stored in the swinging center section.
[ATTACH]20793[/ATTACH]
Two sections hinged together.
[ATTACH]20795[/ATTACH]
Three sets of remote controlled sailboat rigs and sails will be stored in this transporter. The smaller of the 3 will be stored in the swinging center section.
- Attachments
-
- 2013-03-31_10-44-41_961.jpg (54.74 KiB) Viewed 2588 times
-
- 2013-03-31_10-47-01_398.jpg (56.73 KiB) Viewed 2591 times
Fred Sheldon
The Woodlands, Tx
'52 10ER # 60869 (restored in 2012, used as a dedicated drill press), '52 10ER # 88712 (restored 01/2013), 52 10ER # 71368 (in process of restoring), '83 500 Shorty with OPR installed, '83 520 PowerPro with Lift Assist, 6" Joiner, 6" Belt Sander, 18" Jig Saw, 11" Band Saw, 12" ProPlaner, SS Crosscut Table. SS Dust Collector, Hitachi 1/2" router, Work Sharp 3000 with all attachement, Nova G3 Chuck, Universal Tool Rest, Appalachia Tool Works Sled.
The Woodlands, Tx
'52 10ER # 60869 (restored in 2012, used as a dedicated drill press), '52 10ER # 88712 (restored 01/2013), 52 10ER # 71368 (in process of restoring), '83 500 Shorty with OPR installed, '83 520 PowerPro with Lift Assist, 6" Joiner, 6" Belt Sander, 18" Jig Saw, 11" Band Saw, 12" ProPlaner, SS Crosscut Table. SS Dust Collector, Hitachi 1/2" router, Work Sharp 3000 with all attachement, Nova G3 Chuck, Universal Tool Rest, Appalachia Tool Works Sled.