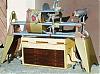
Washer Dryer Gap Bridged.
Replacement of a top load W/D set ignited a search for a solution to the retrieval of items that fall into the gap behind the units. The problem is exacerbated with front load models that do not have a raised control panel at the back of the W/D set. The problem existed with the top load W/D set but the problem is worse with the front sited controls of the front load set. A solution for both Top load and Front load set is needed because the gap seems to be as big as the Grand Canyon.
The problems were:
1. adapting a shelf to fit a gap that may change frequently
2. stay across the gap
3. allow the hoses and cords to reach outlets, faucets, and drains
4. prevent items from dropping off the shelf, into the gap
5. a shelf that can thread its way past switch plates, outlets and plumbing fixtures
[ATTACH]22037[/ATTACH]
Picture 1: W/D set and utilities on wall. There was a line between the plumbing services, 240 V outlet, and the 120 outlets which determined the height of the shelf above the W/D.
The concern was how can I build something that will adjust to a gap which may change when the set moves or the width of the gap requirements change. A cleat on the bottom of the shelf would not be easy to change. The ability to adjust the mechanism seemed to be critical because of the possibility that the shelf could slide down the wall and dump the contents into the gap. A pair of eccentrics was selected to provide push against the back edge of thew/d set because they could be adjusted independently. The eccentrics are used to adjust the position of the shelf, keep it level, and touching the sweet spot between the utilities on the wall. The eccentrics were used because they were simpler than a french cleat attached to the lower edge of the upper shelf.
Clearance for the hoses and cords was achieved by offsetting the back edge of the lower shelf by 3 ½ inches. The offset allowed the supply hoses and drain hose to run under the top shelf and clearance for the 240 V pigtail. The same width was used for both shelves, allowing the lower shelf to extend 3 ½ inches beyond the vertical shelf supports. The upper shelf was flush with front edge of the shelf and the back edge of the upper shelf sets against the wall.
[ATTACH]22035[/ATTACH]
Picture 2 : Assembled shelf supports (fronts) and rails and unattached shelves:
The shelf supports on the ends were 8” (H) x 9“ (L) x 3/4” (W) melamine covered particle board. The center shelf support was 8” (H) x 5 ½ “ (L) x 3/4” (W) melamine covered shelf stock, rounded leading vertical edge. The shelves were 9” (W) x 47” (L) x 1/8” (T) melamine sheet. The 9“ width was influenced by the gap and the damaged corners of the originally 12” wide melamine sheet offcuts.
[ATTACH]22038[/ATTACH]
Picture 3: Shelves attached to rails and eccentrics attached through shelves to rails, bottom view. Two rails, upper and lower, were used to support the shelves. Screws were used only at the supports to attach the shelves and rails. The bottom rail serves two purposes, a backstop for the lower shelf and a place to fasten the eccentrics.
[ATTACH]22034[/ATTACH]
Picture 4: Shelves on W/D set, hole was drilled through the upper shelf for the washer's 120 V electrical plug.
[ATTACH]22033[/ATTACH]
Picture 5: Shelves on W/D showing access to faucets, upper shelf leading edge reinforcement with 2 “ strip of melamine and lower shelf rail as backstop.
The eccentrics appear to hold the shelf in place and so far have not exhibited a tendency to loosen and dump the shelf contents behind the W/D set. The eccentrics had a diameter of 3 1/2” x 1 1/2” (T) and would be useful for gaps of 3 ½ + 2 ¾ = 6 1/4”
This is might use the minimum of materials, I could have concealed fasteners, the shelf supports be more ornate reaching to the lower shelf's front edge, and the width match the W/D set's width.
This was a prototype built to bridge the w/d set gap, to accommodate utilities beneath the top shelf, implement adjustable eccentrics to hold and level the shelves. Measurements must be adjusted to conform to your site and materials. Melamine offcuts were used for the prototype because it eliminated finishing and most surfaces matched the W/D set. The shelf is needed for front load and top load sets w/d sets. It could be built for top load/ back control w/d sets when dropping something into the gap presents a retrieval problem. Most W/D sets will be installed with a gap behind them to allow for dryer vent tubing, hoses, pigtails, faucets, soap boxes, dryer sheets, a gap for truant and runaway socks.
The shelf has set and stayed in position after a month of use, The back of the shelf is against the wall. No adjustments have been required. I haven't pushed anything over the 1 x 2's that form the shelf backstop. The wild edge at the lower front of the shelf holds a towel across the set, in spite of the raised spine in the middle.
Copyright C 2013 Joel N. Gessele
All Rights Reserved
Washer Dryer Gap Bridge Shelf.
Moderator: admin
Washer Dryer Gap Bridge Shelf.
- Attachments
-
- Washer Dryer Gap Bridged_html_65a6eb12.jpg (116.15 KiB) Viewed 5856 times
-
- Washer Dryer Gap Bridged_html_699c4c53.jpg (136.85 KiB) Viewed 5849 times
-
- Washer Dryer Gap Bridged_html_a30a10b.jpg (83.85 KiB) Viewed 5866 times
-
- IMG_0103.JPG (121.44 KiB) Viewed 5868 times
-
- IMG_0102.JPG (66.62 KiB) Viewed 5840 times
MK V 520; MK V 510 w/PP DIY Upgrade; MK 5 500; Jointer; Bandsaw; Sliding Table; Conical Sanding Disk; Sharpening Guide, Lathe Duplicator, Jigsaw, Scrollsaw, Beltsander, Ring Master, Biscuit Joiner.

Looks like a good solution to a big problem. We keep mechanical fingers handy for that reason, but this would be better. What is this
(Copyright C 2013 Joel N. Gessele All Rights Reserved)? Does that mean we can't copy it?
(Copyright C 2013 Joel N. Gessele All Rights Reserved)? Does that mean we can't copy it?
Joe
520, Bandsaw, Beltsander, Delta Drill Press, Delta Lathe, Craftsman Planner/Jointer, Delta Planner, Mini "Greenie" Shorty 500
Being a VETERAN is an honor
Being a GRANDPA is priceless
520, Bandsaw, Beltsander, Delta Drill Press, Delta Lathe, Craftsman Planner/Jointer, Delta Planner, Mini "Greenie" Shorty 500
Being a VETERAN is an honor
Being a GRANDPA is priceless
-
Ed in Tampa

- Platinum Member
- Posts: 5834
- Joined: Fri Jul 21, 2006 12:45 am
- Location: North Tampa Bay area Florida
After all the problems caused by front load washers I solved the problem by going back to top load.
Biggest problem was mold or fungi build up in the closed washer when it wasn't washing.
They now sell tabs you are to use regularily to kill them off. But I figure if they can live in between I don't want my clothes in there with them.
Thank you very much. But I will just go back to washer that dries by evaporation completely after it washes a few loads.
Biggest problem was mold or fungi build up in the closed washer when it wasn't washing.
They now sell tabs you are to use regularily to kill them off. But I figure if they can live in between I don't want my clothes in there with them.
Thank you very much. But I will just go back to washer that dries by evaporation completely after it washes a few loads.
Ed in Tampa
Stay out of trouble!
Stay out of trouble!

Even with a top load washer, I think you're supposed to keep the lid open to prevent mildew.
Heath
Central Louisiana
-10ER - SN 13927, Born 1949, Acquired October 2008, Restored November, 2008
-10ER - SN 35630, Born 1950, Acquired April 2009, Restored May 2009, A34 Jigsaw
-Mark V - SN 212052, Born 1986, Acquired Sept 2009, Restored March 2010, Bandsaw
-10ER - SN 39722, Born 1950, Acquired March 2011, awaiting restoration
Central Louisiana
-10ER - SN 13927, Born 1949, Acquired October 2008, Restored November, 2008
-10ER - SN 35630, Born 1950, Acquired April 2009, Restored May 2009, A34 Jigsaw
-Mark V - SN 212052, Born 1986, Acquired Sept 2009, Restored March 2010, Bandsaw
-10ER - SN 39722, Born 1950, Acquired March 2011, awaiting restoration

-
fredsheldon

- Platinum Member
- Posts: 1175
- Joined: Tue Jan 17, 2012 1:31 pm
- Location: The Woodlands, Texas
I suspect a set of cabinets mounted just above the units would do the job as well.
Fred Sheldon
The Woodlands, Tx
'52 10ER # 60869 (restored in 2012, used as a dedicated drill press), '52 10ER # 88712 (restored 01/2013), 52 10ER # 71368 (in process of restoring), '83 500 Shorty with OPR installed, '83 520 PowerPro with Lift Assist, 6" Joiner, 6" Belt Sander, 18" Jig Saw, 11" Band Saw, 12" ProPlaner, SS Crosscut Table. SS Dust Collector, Hitachi 1/2" router, Work Sharp 3000 with all attachement, Nova G3 Chuck, Universal Tool Rest, Appalachia Tool Works Sled.
The Woodlands, Tx
'52 10ER # 60869 (restored in 2012, used as a dedicated drill press), '52 10ER # 88712 (restored 01/2013), 52 10ER # 71368 (in process of restoring), '83 500 Shorty with OPR installed, '83 520 PowerPro with Lift Assist, 6" Joiner, 6" Belt Sander, 18" Jig Saw, 11" Band Saw, 12" ProPlaner, SS Crosscut Table. SS Dust Collector, Hitachi 1/2" router, Work Sharp 3000 with all attachement, Nova G3 Chuck, Universal Tool Rest, Appalachia Tool Works Sled.
-
JPG

- Platinum Member
- Posts: 35600
- Joined: Wed Dec 10, 2008 7:42 pm
- Location: Lexington, Ky (TAMECAT territory)
fredsheldon wrote:I suspect a set of cabinets mounted just above the units would do the job as well.
Covering up the electrical outlets and plumbing center???:rolleyes:
╔═══╗
╟JPG ╢
╚═══╝
Goldie(Bought New SN 377425)/4" jointer/6" beltsander/12" planer/stripsander/bandsaw/powerstation /Scroll saw/Jig saw /Craftsman 10" ras/Craftsman 6" thicknessplaner/ Dayton10"tablesaw(restoredfromneighborstrashpile)/ Mark VII restoration in 'progress'/ 10E[/size](SN E3779) restoration in progress, a 510 on the back burner and a growing pile of items to be eventually returned to useful life. - aka Red Grange
╟JPG ╢
╚═══╝
Goldie(Bought New SN 377425)/4" jointer/6" beltsander/12" planer/stripsander/bandsaw/powerstation /Scroll saw/Jig saw /Craftsman 10" ras/Craftsman 6" thicknessplaner/ Dayton10"tablesaw(restoredfromneighborstrashpile)/ Mark VII restoration in 'progress'/ 10E[/size](SN E3779) restoration in progress, a 510 on the back burner and a growing pile of items to be eventually returned to useful life. - aka Red Grange
-
fredsheldon
- Platinum Member
- Posts: 1175
- Joined: Tue Jan 17, 2012 1:31 pm
- Location: The Woodlands, Texas
Ok ok, a small access cutout might be necessary.JPG40504 wrote:Covering up the electrical outlets and plumbing center???:rolleyes:

Fred Sheldon
The Woodlands, Tx
'52 10ER # 60869 (restored in 2012, used as a dedicated drill press), '52 10ER # 88712 (restored 01/2013), 52 10ER # 71368 (in process of restoring), '83 500 Shorty with OPR installed, '83 520 PowerPro with Lift Assist, 6" Joiner, 6" Belt Sander, 18" Jig Saw, 11" Band Saw, 12" ProPlaner, SS Crosscut Table. SS Dust Collector, Hitachi 1/2" router, Work Sharp 3000 with all attachement, Nova G3 Chuck, Universal Tool Rest, Appalachia Tool Works Sled.
The Woodlands, Tx
'52 10ER # 60869 (restored in 2012, used as a dedicated drill press), '52 10ER # 88712 (restored 01/2013), 52 10ER # 71368 (in process of restoring), '83 500 Shorty with OPR installed, '83 520 PowerPro with Lift Assist, 6" Joiner, 6" Belt Sander, 18" Jig Saw, 11" Band Saw, 12" ProPlaner, SS Crosscut Table. SS Dust Collector, Hitachi 1/2" router, Work Sharp 3000 with all attachement, Nova G3 Chuck, Universal Tool Rest, Appalachia Tool Works Sled.
-
JPG
- Platinum Member
- Posts: 35600
- Joined: Wed Dec 10, 2008 7:42 pm
- Location: Lexington, Ky (TAMECAT territory)
Y'all are ignoring the original 'need'.
Lack of a back upward projection that previously prevented 'stuff' from falling into the 'grand canyon' behind the machines.
Wall mounted cabinets will not prevent 'the original problem'.
Lack of a back upward projection that previously prevented 'stuff' from falling into the 'grand canyon' behind the machines.
Wall mounted cabinets will not prevent 'the original problem'.
╔═══╗
╟JPG ╢
╚═══╝
Goldie(Bought New SN 377425)/4" jointer/6" beltsander/12" planer/stripsander/bandsaw/powerstation /Scroll saw/Jig saw /Craftsman 10" ras/Craftsman 6" thicknessplaner/ Dayton10"tablesaw(restoredfromneighborstrashpile)/ Mark VII restoration in 'progress'/ 10E[/size](SN E3779) restoration in progress, a 510 on the back burner and a growing pile of items to be eventually returned to useful life. - aka Red Grange
╟JPG ╢
╚═══╝
Goldie(Bought New SN 377425)/4" jointer/6" beltsander/12" planer/stripsander/bandsaw/powerstation /Scroll saw/Jig saw /Craftsman 10" ras/Craftsman 6" thicknessplaner/ Dayton10"tablesaw(restoredfromneighborstrashpile)/ Mark VII restoration in 'progress'/ 10E[/size](SN E3779) restoration in progress, a 510 on the back burner and a growing pile of items to be eventually returned to useful life. - aka Red Grange