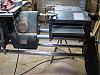
I have an upcoming project that will necessitate I joint a large number of long pieces. I taught it would be good to have a bit more outfeed support than my jointer provides.
[ATTACH]11475[/ATTACH]
[ATTACH]11476[/ATTACH]
Now I am ready.
Extension Table, Jointer
Moderator: admin
-
dusty

- Platinum Member
- Posts: 21530
- Joined: Wed Nov 22, 2006 6:52 am
- Location: Tucson (Wildcat Country), Arizona
Extension Table, Jointer
- Attachments
-
- P1150004 (Medium).JPG (74.19 KiB) Viewed 4988 times
-
- P1150005 (Medium).JPG (76.23 KiB) Viewed 5173 times
"Making Sawdust Safely"
Dusty
Sent from my Dell XPS using Firefox.
Dusty
Sent from my Dell XPS using Firefox.
-
JPG

- Platinum Member
- Posts: 35600
- Joined: Wed Dec 10, 2008 7:42 pm
- Location: Lexington, Ky (TAMECAT territory)
Interesting attachment method to the outfeed table. Since my older jointer does not have the 'lip' the later ones have I had not determined how to do so.
Thank You for 'doing it for me'.
Excellent 'improv'!
Whatcha gonna make?
Thank You for 'doing it for me'.
Excellent 'improv'!
Whatcha gonna make?
╔═══╗
╟JPG ╢
╚═══╝
Goldie(Bought New SN 377425)/4" jointer/6" beltsander/12" planer/stripsander/bandsaw/powerstation /Scroll saw/Jig saw /Craftsman 10" ras/Craftsman 6" thicknessplaner/ Dayton10"tablesaw(restoredfromneighborstrashpile)/ Mark VII restoration in 'progress'/ 10E[/size](SN E3779) restoration in progress, a 510 on the back burner and a growing pile of items to be eventually returned to useful life. - aka Red Grange
╟JPG ╢
╚═══╝
Goldie(Bought New SN 377425)/4" jointer/6" beltsander/12" planer/stripsander/bandsaw/powerstation /Scroll saw/Jig saw /Craftsman 10" ras/Craftsman 6" thicknessplaner/ Dayton10"tablesaw(restoredfromneighborstrashpile)/ Mark VII restoration in 'progress'/ 10E[/size](SN E3779) restoration in progress, a 510 on the back burner and a growing pile of items to be eventually returned to useful life. - aka Red Grange
-
robinson46176

- Platinum Member
- Posts: 4182
- Joined: Mon Mar 09, 2009 9:00 pm
- Location: Central Indiana (Shelbyville)
Looks like a good effective common sense approach to me...
Of course you are not ready yet. You will still need a drive coupling.
.
Of course you are not ready yet. You will still need a drive coupling.
.
--
farmer
Francis Robinson
I did not equip with Shopsmiths in spite of the setups but because of them.
1 1988 - Mark V 510 (bought new), 4 Poly vee 1 1/8th HP Mark V's, Mark VII, 1 Mark V Mini, 1 Frankensmith, 1 10-ER, 1 Mark V Push-me-Pull-me Drillpress, SS bandsaw, belt sander, jointer, jigsaw, shaper attach, mortising attach, TS-3650 Rigid tablesaw, RAS, 6" long bed jointer, Foley/Belsaw Planer/molder/ripsaw, 1" sander, oscillating spindle/belt sander, Scroll saw, Woodmizer sawmill
farmer
Francis Robinson
I did not equip with Shopsmiths in spite of the setups but because of them.
1 1988 - Mark V 510 (bought new), 4 Poly vee 1 1/8th HP Mark V's, Mark VII, 1 Mark V Mini, 1 Frankensmith, 1 10-ER, 1 Mark V Push-me-Pull-me Drillpress, SS bandsaw, belt sander, jointer, jigsaw, shaper attach, mortising attach, TS-3650 Rigid tablesaw, RAS, 6" long bed jointer, Foley/Belsaw Planer/molder/ripsaw, 1" sander, oscillating spindle/belt sander, Scroll saw, Woodmizer sawmill
Dusty:
Back in '08, at the Shopsmith week-end in Dayton, I saw a jointer outfeed table extension designed and built by Nick Engler. I made a sketch and measurements, and even tho Nick said that it would be OK for me to build one for my own use only, I was not comfortable with that so I destroyed the sketch. Nick also said that Shopsmith was considering this extension.
Since then, many times I have successfully jointed and glued boards as long as 104 inches. I purchased Rockler's Heavy-Duty "flip top" roller stand. Placing this stand about 3 ft beyond the outfeed table, I adjust the height perfectly level with the outfeed table using a Veritas 50" aluminum straightedge. I also place another roller stand about 3 ft in front of the infeed side, and also level it with the infeed, again using the straightedge. It actually doesn't take a great deal of time to affect this set-up, and it really works.
Taking a tip that I gleaned from a woodworking video, for long boards I clamp the newly jointed board in my workbench, edge up, and taking a #5 hand plane set to remove extremely thin shavings, I hand plane the edge so that it is slightly concave. Thus when the boards are glued & clamped there is a small amount of "spring" making the ends very tight so that they will not split apart over time.
Back in '08, at the Shopsmith week-end in Dayton, I saw a jointer outfeed table extension designed and built by Nick Engler. I made a sketch and measurements, and even tho Nick said that it would be OK for me to build one for my own use only, I was not comfortable with that so I destroyed the sketch. Nick also said that Shopsmith was considering this extension.
Since then, many times I have successfully jointed and glued boards as long as 104 inches. I purchased Rockler's Heavy-Duty "flip top" roller stand. Placing this stand about 3 ft beyond the outfeed table, I adjust the height perfectly level with the outfeed table using a Veritas 50" aluminum straightedge. I also place another roller stand about 3 ft in front of the infeed side, and also level it with the infeed, again using the straightedge. It actually doesn't take a great deal of time to affect this set-up, and it really works.
Taking a tip that I gleaned from a woodworking video, for long boards I clamp the newly jointed board in my workbench, edge up, and taking a #5 hand plane set to remove extremely thin shavings, I hand plane the edge so that it is slightly concave. Thus when the boards are glued & clamped there is a small amount of "spring" making the ends very tight so that they will not split apart over time.