Hi Guys,
I made a simple workbench with recycled materials and left overs. I bought 3 used base cabinets all for $35, and the top for $10 at a local thrift store. (The top is a commercial, solid core door 1 3/4" thick). I put pegboard around 3 sides to hang clamps, etc. The pegboard cost me $16. I used some leftover plywood for the base and 2 X 4's scraps left over from another project. i used my Shopsmith to cut the pegboard, plywood and 2 X 4's and my circular saw to cut the top. Some white paint and 3 coats of poly urethane on the top and I had my workbench. Not as fancy as the solid maple workbench I just viewed on this site, but it is sturdy and cheap. For you newbies out there is was simple and fun. I found an 8" vice on Amazon on sale for $35, and will mount that next week. So for around $100 I have my first workbench! :-)
New Workbench
Moderator: admin
New Workbench
- Attachments
-
- IMG_0045.jpg (15.78 KiB) Viewed 3420 times
-
- IMG_0046.jpg (10 KiB) Viewed 3347 times
-
- IMG_0047.jpg (10.83 KiB) Viewed 3329 times
Beginning Sawdust Maker
MarK V Model #555540 Serial #031291
Jacksonville, Alabama
MarK V Model #555540 Serial #031291
Jacksonville, Alabama
-
JPG

- Platinum Member
- Posts: 35600
- Joined: Wed Dec 10, 2008 7:42 pm
- Location: Lexington, Ky (TAMECAT territory)
That looks nice!
╔═══╗
╟JPG ╢
╚═══╝
Goldie(Bought New SN 377425)/4" jointer/6" beltsander/12" planer/stripsander/bandsaw/powerstation /Scroll saw/Jig saw /Craftsman 10" ras/Craftsman 6" thicknessplaner/ Dayton10"tablesaw(restoredfromneighborstrashpile)/ Mark VII restoration in 'progress'/ 10E[/size](SN E3779) restoration in progress, a 510 on the back burner and a growing pile of items to be eventually returned to useful life. - aka Red Grange
╟JPG ╢
╚═══╝
Goldie(Bought New SN 377425)/4" jointer/6" beltsander/12" planer/stripsander/bandsaw/powerstation /Scroll saw/Jig saw /Craftsman 10" ras/Craftsman 6" thicknessplaner/ Dayton10"tablesaw(restoredfromneighborstrashpile)/ Mark VII restoration in 'progress'/ 10E[/size](SN E3779) restoration in progress, a 510 on the back burner and a growing pile of items to be eventually returned to useful life. - aka Red Grange
-
kd6vpe
- Platinum Member
- Posts: 585
- Joined: Mon Jun 11, 2007 8:53 pm
- Location: Owasso, Oklahoma
- Contact:
Very nice job there. And cheap does not mean not useful congratulations
SS 500 upgraded to 510; SS bandsaw; SS jointer
SS Oscillating Drum Sander; Universal Lathe Rest;
lathe duplicatior, shaper fence and shapers; SS Belt
Sander
Jim
www.youtube.com/kd6vpe
SS Oscillating Drum Sander; Universal Lathe Rest;
lathe duplicatior, shaper fence and shapers; SS Belt
Sander
Jim
www.youtube.com/kd6vpe
From the pictures, looks like you are progressing along quite well. My first workbench was also made using a kitchen cabinet which was put out for a trash pickup and I purchased a counter top on sale and added a vice. Served me well for many years. These days I am using one I purchased at Woodcraft during a sale many years ago. What ever works and gets the job done will do.
Ron from Lewisburg, TN
Nicely Done! I have a " Bench" made out of a recycled stuff. The frame is part of a training table from our old school training room. The top is made from the box from an old water bed. (2X 8s) If I need a bigger surface for assembly, I have a hollow core interior door salvaged from an old house that fits on top. Just saying, you have done pretty much what I did, only a lot prettier! Thanks for sharing. ( Might use your model for inspiration and do a better one for me.)
Saw dust heals many wounds. RLTW
Dave
Dave
Good plan, Jon! Your bench should hold up for a long time. One of my benches has the same base. It is solid as a rock! Difference is the top, which I made from 3 sheets of MDF. The 3 sheets allowed me to make an expanding top rack that will hold sheets of plywood, for further breakdown.
- Attachments
-
- shop_innards.jpg (133.01 KiB) Viewed 3264 times
-
- table with expanded work bench.jpg (126.48 KiB) Viewed 3266 times
Octogenarian's have an earned right to be a curmudgeon.
Chuck in Lancaster, CA
Chuck in Lancaster, CA

Good looking unit. Now the fun part. Getting it dirty.jon wrote:Hi Guys,
I made a simple workbench with recycled materials and left overs. I bought 3 used base cabinets all for $35, and the top for $10 at a local thrift store. (The top is a commercial, solid core door 1 3/4" thick). I put pegboard around 3 sides to hang clamps, etc. The pegboard cost me $16. I used some leftover plywood for the base and 2 X 4's scraps left over from another project. i used my Shopsmith to cut the pegboard, plywood and 2 X 4's and my circular saw to cut the top. Some white paint and 3 coats of poly urethane on the top and I had my workbench. Not as fancy as the solid maple workbench I just viewed on this site, but it is sturdy and cheap. For you newbies out there is was simple and fun. I found an 8" vice on Amazon on sale for $35, and will mount that next week. So for around $100 I have my first workbench! :-)
Make today a day that lets you smile!
CV
Mobile Al.
MARK V 520 - Band saw and Jointer. DeWalt scroll saw.
CV
Mobile Al.
MARK V 520 - Band saw and Jointer. DeWalt scroll saw.
-
robinson46176

- Platinum Member
- Posts: 4182
- Joined: Mon Mar 09, 2009 9:00 pm
- Location: Central Indiana (Shelbyville)
An extra bench feature - rambling
There is a feature that I like on a bench that is normally only ever on a bench by accident. That is a place to occasionally put one foot up for a shift of balance much like the old brass bar-rails. No, I haven't spent a lot of my time hanging on bars. 
On the old shoe finishing machines used for decades in shoe factories and shoe repair shops the end frames were heavy cast iron and the horizontal members were steel pipe which were clamped into place. A concept not much distant from the SS bench tubes. There were 4 tubes (hey, like Shopsmith again). The upper two were maybe 30" or so off of the floor and the Lower tubes were about 6" off of the floor. The tube lengths ran about 10' long or longer on many of the older units. When my father left the shoe trade around 1941 he had accumulated several of the very heavy old beast and he used them as parts for all manner of things from home-made farm machinery to building several workbenches. The mechanics bench that I grew up using, and still use, was built from one of those heavy frames. I have spent about forever working at that bench and have propped one foot or the other up on that bottom pipe while working maybe 10,000 times. Maybe more.
Then when I sat up a shoe repair business myself back in the mid 1970's I used one of those old finishers (actually several different ones but all that style) and spent 20 years working at that machine while propping one foot or the other up on that lower pipe while I worked. Doing so really helps limit backaches and fatigue. Just start watching horses They almost never stand on 4 legs... Even sleeping they almost always take the weight off of one leg or the other changing now and then.
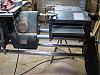
When I built my current woodworking bench back in the late 1970's I made sure it had a strong lower shelf about 6" above the floor where I could rest a foot. I'm not sure I could ever enjoy working at a bench where I could not put a foot up... Here is a pic showing the castings and pipes frame.
[ATTACH]12123[/ATTACH]
.
On the old shoe finishing machines used for decades in shoe factories and shoe repair shops the end frames were heavy cast iron and the horizontal members were steel pipe which were clamped into place. A concept not much distant from the SS bench tubes. There were 4 tubes (hey, like Shopsmith again). The upper two were maybe 30" or so off of the floor and the Lower tubes were about 6" off of the floor. The tube lengths ran about 10' long or longer on many of the older units. When my father left the shoe trade around 1941 he had accumulated several of the very heavy old beast and he used them as parts for all manner of things from home-made farm machinery to building several workbenches. The mechanics bench that I grew up using, and still use, was built from one of those heavy frames. I have spent about forever working at that bench and have propped one foot or the other up on that bottom pipe while working maybe 10,000 times. Maybe more.
Then when I sat up a shoe repair business myself back in the mid 1970's I used one of those old finishers (actually several different ones but all that style) and spent 20 years working at that machine while propping one foot or the other up on that lower pipe while I worked. Doing so really helps limit backaches and fatigue. Just start watching horses
They almost never stand on 4 legs... Even sleeping they almost always take the weight off of one leg or the other changing now and then.When I built my current woodworking bench back in the late 1970's I made sure it had a strong lower shelf about 6" above the floor where I could rest a foot. I'm not sure I could ever enjoy working at a bench where I could not put a foot up... Here is a pic showing the castings and pipes frame.
[ATTACH]12123[/ATTACH]
.
- Attachments
-
- landis finisher.jpg (52.36 KiB) Viewed 3428 times
--
farmer
Francis Robinson
I did not equip with Shopsmiths in spite of the setups but because of them.
1 1988 - Mark V 510 (bought new), 4 Poly vee 1 1/8th HP Mark V's, Mark VII, 1 Mark V Mini, 1 Frankensmith, 1 10-ER, 1 Mark V Push-me-Pull-me Drillpress, SS bandsaw, belt sander, jointer, jigsaw, shaper attach, mortising attach, TS-3650 Rigid tablesaw, RAS, 6" long bed jointer, Foley/Belsaw Planer/molder/ripsaw, 1" sander, oscillating spindle/belt sander, Scroll saw, Woodmizer sawmill
farmer
Francis Robinson
I did not equip with Shopsmiths in spite of the setups but because of them.
1 1988 - Mark V 510 (bought new), 4 Poly vee 1 1/8th HP Mark V's, Mark VII, 1 Mark V Mini, 1 Frankensmith, 1 10-ER, 1 Mark V Push-me-Pull-me Drillpress, SS bandsaw, belt sander, jointer, jigsaw, shaper attach, mortising attach, TS-3650 Rigid tablesaw, RAS, 6" long bed jointer, Foley/Belsaw Planer/molder/ripsaw, 1" sander, oscillating spindle/belt sander, Scroll saw, Woodmizer sawmill
Hey Everyone,
Thanks for the kind words, and great ideas. I like "cruising" this website because I learn a lot from all of you. Now if only I had more time. . .
By the way, I showed my wife the workbench and now she has some ideas for me too! Guess who will get priority on my time and projects?????
Thanks for the kind words, and great ideas. I like "cruising" this website because I learn a lot from all of you. Now if only I had more time. . .
By the way, I showed my wife the workbench and now she has some ideas for me too! Guess who will get priority on my time and projects?????
Beginning Sawdust Maker
MarK V Model #555540 Serial #031291
Jacksonville, Alabama
MarK V Model #555540 Serial #031291
Jacksonville, Alabama