Page 2 of 3
Re: Old bandsaw attachment
Posted: Fri Jan 30, 2026 2:30 pm
by chapmanruss
Karl,
You asked,
If you use the offset tubes, can you simply push the head stock left to engage it and push right to use the other features?
Yes.
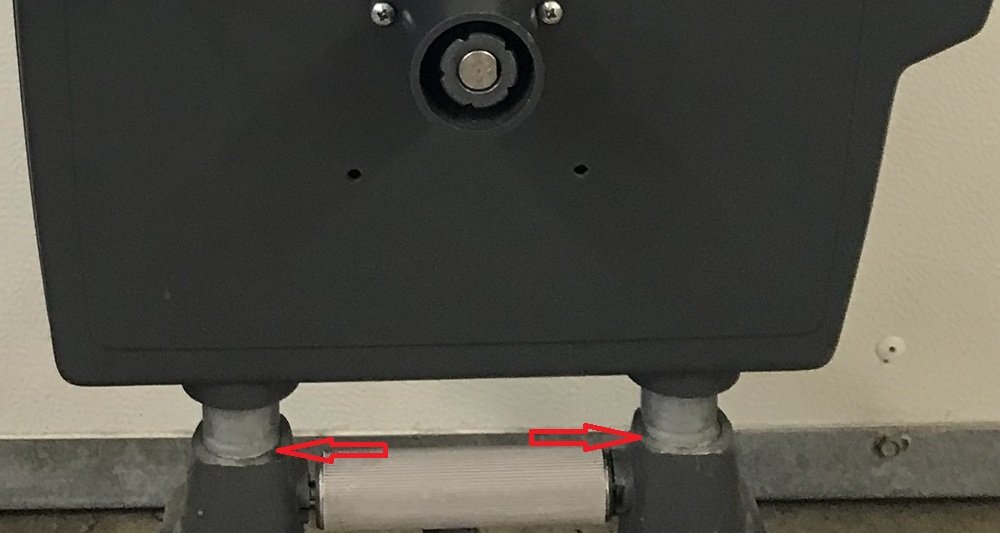
As for any of the SPT's (Bandsaw, Belt Sanders, Jointer, etc.) powered by the Headstock Hubs on the left side you engage them for power by sliding the Headstock to the left with a Power Coupler between the Headstock and the SPT. Sliding the Headstock to the right disengages the Power Coupler. When installing the Eccentric Mounting Posts set them so the offset has the SPT farthest from the Headstock as shown in the picture below. This gives you the most clearance possible for raising into Drill Press mode with a SPT mounted. Some have commented that the Offset Eccentric Mounting Tubes I showed in my last post do not hold the Bandsaw as stable as the regular Eccentric Mounting Posts.
_
- Mounting Posts arrows.jpg (56.78 KiB) Viewed 48646 times
.
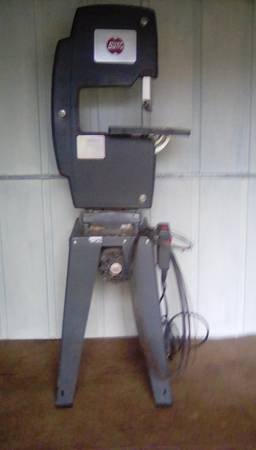
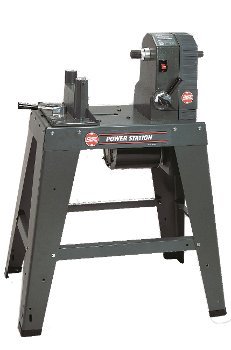
An option for the Bandsaw or any SPT would be to have it on its own stand. You can build your own, buy a Shopsmith Power Stand or a Shopsmith Power Station. The Power Station was discontinued so that option would be to find a used one. The Power Stand holds an STP and uses pulleys of different sizes to set the speed to power a single SPT. The Power Station has a variable speed Headstock and makes it easy to change between different SPT's. I like the Power Station for my SPT's and have 2. My Scroll Saw on one all the time unless needed for a different SPT.
Below is a Bandsaw on a Shopsmith Power Stand.
_
- Bandsaw on Power Stand.jpg (11.63 KiB) Viewed 48646 times
.
Below is a Power Station.
_
- power station SS pic.jpg (13.11 KiB) Viewed 48646 times
.
Some users find it handy to set up their Mark for Table Saw Operations with the Jointer connected to the Headstock for jointing and cutting stock to width without having to change the setups back and forth. Another combined operation would be having the Belt Sander mounted with the Sanding Disk on the Quill of the Headstock and even the Drum Sander attached to the outboard shaft of the Belt Sander. A great sanding station setup. There is so much you can do with Shopsmith Tools and accessories.
Re: Old bandsaw attachment
Posted: Thu Feb 19, 2026 3:49 pm
by kas20amc02
Hi guys. I found a used bandsaw finally for $200. Looks like a Mark V model but I leave that to you experts. I would say it is in fair condition but I have been looking for 6 months in my area with limited success. The tires are cracked. I have not taken it apart yet to spin the bearings. The tension mechanism looks good. The wheels look true and not bent, when I spin them by hand. It came with a single blade, looks like 3-4 TPI ½”.
What would you suggest I replace to make it hum again? My plan was to scrub the table, replace the tires with urethane tires, replace the bearings with new SS ones, and replace the guide blocks with Olson cool blocks. Does anyone agree or disagree? I saw SS sells an overhaul kit with all the above plus wheels but I don't understand why I would need to do that if the wheels are true and spinning fine. I would prefer to sink $75 and not $250 into it unless necessary.
Many thanks,
Karl
Re: Old bandsaw attachment
Posted: Thu Feb 19, 2026 3:50 pm
by kas20amc02
Another few pics
Re: Old bandsaw attachment
Posted: Thu Feb 19, 2026 3:50 pm
by kas20amc02
Last pic
Re: Old bandsaw attachment
Posted: Fri Feb 20, 2026 1:23 pm
by chapmanruss
A clean up is a good place to start. If the wheels are true and the bearings are good there isn't a need to replace them. The upper wheel bearing likely needs to be greased. It is not a sealed bearing like the lower wheel. Do the greasing as you put the upper wheel back on after removing the bad tires. Removing the cracked tires is more easily done, in my opinion, with the wheels out of the Main Frame casting.
Your Bandsaw already has the sealed bearings for the auto track and upper & lower Guides. They probably do not need replacing.
I use the Olsen Cool Blocks on my Bandsaws and prefer them to the original metal Blocks.
There has been a lot of debate over which urethane tires to use. Most seem to prefer the blue ones sold by Bandsaw Tire Warehouse over the orange ones sold by Shopsmith. There have been complaints of the orange tires coming off during use. My Bandsaws have the original type rubber glue on tires even for ones I have replaced. I did put the blue urethane tires on one Bandsaw I restored and haven't had any complaints from the buyer.
For $200 it looks like you got a nice Bandsaw.
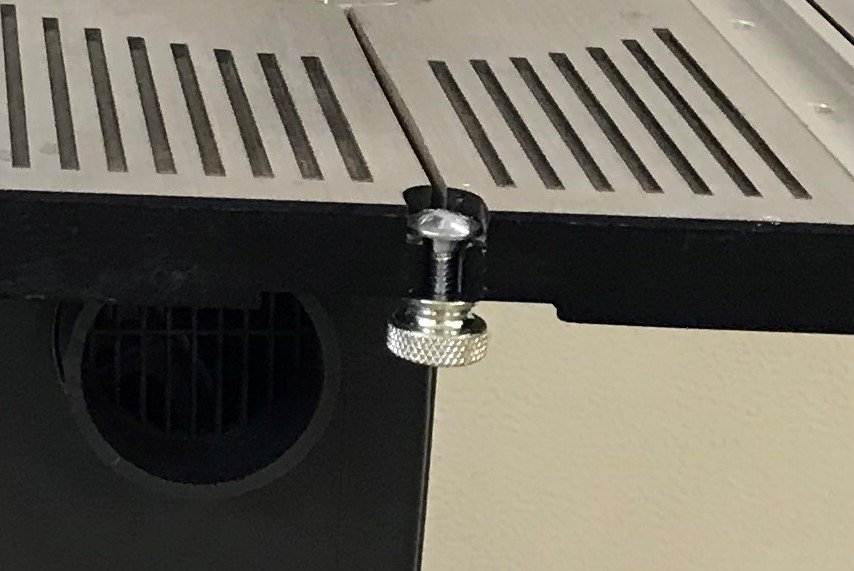
Something I noticed in the pictures is the Carriage Blot and Knurled Nut are missing that keeps the opening level on the Table as seen below.
_
- BS Table bolt and nut.jpg (69.25 KiB) Viewed 42519 times
Re: Old bandsaw attachment
Posted: Fri Feb 20, 2026 2:22 pm
by kas20amc02
Many thanks Russ. I will take your advice on the overhaul and also replace the missing knurled knob from the table.
Re: Old bandsaw attachment
Posted: Fri Feb 20, 2026 3:56 pm
by kas20amc02
Last question, what size are the bandsaw tires? Do you have a link to a model that you like?
Re: Old bandsaw attachment
Posted: Sat Feb 21, 2026 12:32 pm
by chapmanruss
The carriage bolt and knurled knob are fairly common hardware parts and I have found them at my local Ace store when I needed to replace a missing set.
The Bandsaw tires either the rubber or orange urethane tires from Shopsmith are the correct and only size they sell. The Blue Max urethane tires from Band Saw Tire Warehouse are ordered as ones for the Shopsmith Bandsaw and can be found on eBay. Search Shopsmith Bandsaw. The Wheel size for the Magna/Shopsmith Bandsaw hasn't changed since its introduction in 1955 so there is only one tire size for Magna/Shopsmith Bandsaws. There are a couple other eBay sellers with either blue or orange urethane tires for sale. I do not have any experience with these other seller's Bandsaw tires and have not seen any reviews of them.
Just a note as to why I call it the Magna/Shopsmith Bandsaw is that prior to 1973 after Shopsmith Inc. formed and restarted the Magna/Shopsmith line of tools only the Mark 5, Mark VII from the 1960's and the Model 10E and 10ER were Shopsmith as the tools name. All the SPT's were Magna brand tools. When Shopsmith Inc. formed all the tools and SPT's became Shopsmith and no longer Magna although the Magna name and/or logo remained on tools for some time after 1973 until the existing stock of parts ran out and casting molds were changed.
Something I want to add about checking the condition of a Magna/Shopsmith Bandsaw is from the description of the Bandsaw Overhaul Kit 556084 and reads as follows.
The Bandsaw Complete Overhaul Tune-up Kit will make your Shopsmith Bandsaw run like new again! This tune-up kit fixes any squealing from the bandsaw back-up rollers and improper tracking from the blades, which can affect the accuracy of your cuts. Additionally, if your blades seem to dull quickly (even after installing a new blade), if your machine seems to generate excessive heat, if it vibrates, or if either (or both) of the blade wheels can be wiggled easily when the blades are removed, you likely need the Overhaul Kit.
That is a good description as to what may be needed to make the Bandsaw work like new. It may not be necessary to buy the Overhaul Kit if you only need the rollers/bearings for tracking and the guides or just to replace either the upper or lower wheel. These can be purchased separately but if all the parts in the overhaul kit are needed it is a better buy than the individual parts.
Re: Old bandsaw attachment
Posted: Sun Feb 22, 2026 10:55 pm
by kas20amc02
Thanks again. I ordered all the parts and will let you know how it turns out.
Re: Old bandsaw attachment
Posted: Mon Feb 23, 2026 1:48 pm
by chapmanruss
One of the biggest challenges when reassembling the Bandsaw after restorations is adjusting the Upper Guide Assembly. It needs to be adjusted so that the Guide Column stays in line with the Blade as it is raised and lowered keeping the Upper Guide bearing from barely
not touching the Blade. This is done by adjusting the screws in the Guide Column Bracket to keep the column in line front to back when looking at the teeth side of the Blade. The Guide Column Bracket also sets the tension of the lock to hold the Upper Guide at the proper height for the material being cut. Generally, 1/4" to 1/2" above the material being cut.
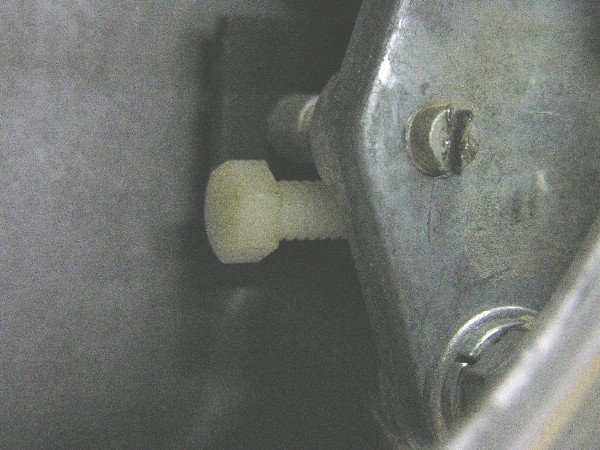
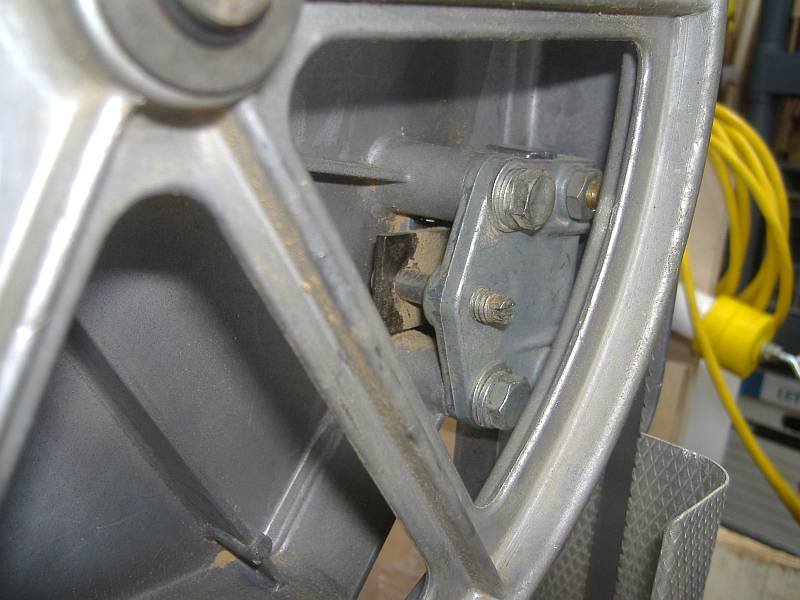
Newer Bandsaws have a nylon Bolt in the Guide Column Bracket to better keep it aligned side to side. The first picture below shows the Guide Column Bracket with the nylon bolt. The second picture shows an earlier Guide Column Bracket without the nylon bolt. For Bandsaws that do not have the nylon bolt in the Guide Column Bracket it can easily be added. I do recommend this addition for early Bandsaws without the nylon bolt already.
_
- Guide Bracket.JPG (75.17 KiB) Viewed 40499 times
- DSCF1607sc.jpg (62.23 KiB) Viewed 40499 times
.
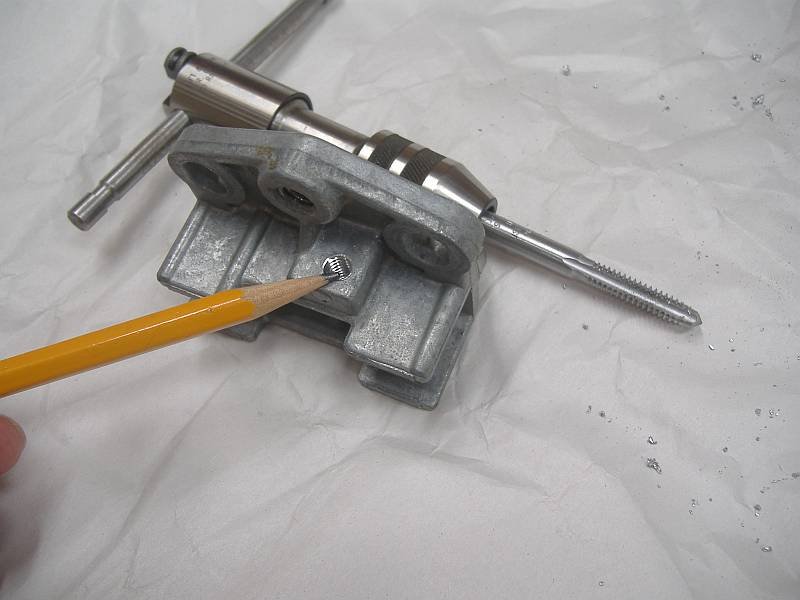
Adding the nylon bolt requires drilling a hole in the bracket in the location shown below and tapping threads for the bolt. Use a 1/4" x 20 x 1-1/2" nylon bolt. These can be found at some hardware stores that have a larger selection of nuts. bolts, screws, etc. Shopsmith sells the Bandsaw Upper Guide Nylon Guide Bolt SKU: 517908 for $6.95 and shows it currently available. Drill and tap for the size of the bolt you get. It can be one size smaller or larger than 1/4".
_
- DSCF1609sc.jpg (46.06 KiB) Viewed 40499 times