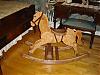
I'm not sure which rocking horse plan you have, but Charlese's suggestion (wedges) is basically the method used in the rocking horses I have built.
I prepare a six inch square piece about 3/4" thick and use the band saw to resaw from one edge to the other creating two wedges measuring 6" x 6". I then saw them to shape as they have to be rounded at the bottom (thicker) edge. If you need a 7" wedge, maybe you could get away with a using a 7" x 6" piece of wood and using the same method.
The weges are then placed between the body and upper leg to give a splayed effect. This may not look as good as tapered legs, but it works.
I would vote for the use of hand tools. I'd clamp the wood in my workbench and make the initial cut with a tennon saw. Then I would use a #4 or #5 hand plane to finish the surface and bring the taper to the penciled lines.
Recently I did this type of operation, making eight short tapered legs for two chests. My pieces were small enough to cut on the bandsaw, but sometimes it's just a lot of fun to take an opportunity to renew your hand tool skills.
Sorry about the previous posting here. I was trying to get it done before supper and rushed it too much. If you saw the previews please re-read it again as I think this one does a much better job of the technique presentation.
===============================================
The technique presented in this post is simply yet another way that one might want to approach the cuts. It is with the use of the table saw and a very simple jig running along the rip fence. It can be done with just a normal blade but if you have a dado blade it will be a lot faster. It will likely need some clean up work with either a block plane or some sanding tool such as a hand held belt sander or if you have it the shopsmith 6” belt sander.
The first thing is to explain how this should work. You first need to make a jig that will be two runners and a connecting board the width of the work piece. Most people will find you have the material in the scrap bin. The idea is that while you are removing material from the work piece you will need to support the piece that is remaining, that is the “finished” part from the process.
The runners will need to be at least as long as the work piece. The top piece could be one or several pieces so long as it has enough to support the work piece. I would use a pressure activated double side tape, carpet tape or the like. You may also want to add a couple of wood screws if they can be hidden in the final use, or make the part a bit longer then needed and put the screws at the ends then when trimming to size they can be cut off.
The fact that want a uniform taper could require a wider work piece. The final part then can maintain a sharp edge, other wise it may get cut off and be a bit short depending on how well that cut is made.
In the following sketch I have labeled the runners that set on the ends and the finished part holder or top if you see it that way. The diagonal dash line will need to added to the work piece, it will need to be a clearly visible line as you will be using your visual acuity to adjust blade height to just short of the line as pictured.
[ATTACH]6396[/ATTACH]
(As you cut you will be left with a stair step like surface. After we discuss a few more things we can mention a way of doing away with that but we need to get the concept presented first.)
Next you can see that depending on which blade you use you might be left with more steps or less steps and it also determines how large the steps are. I should also mention that you need to move the rip fence the same distance as the width of your cut for each cut as you go across.
[ATTACH]6397[/ATTACH]
[ATTACH]6398[/ATTACH]
If your work piece is easy to handle and not to large you can then opt to match the slope of the cut to the angle of the table setting as show below. This will do away with the stair steps and would be the preferred method and might end up as the smoothest surface.
[ATTACH]6399[/ATTACH]
The one thing that could go wrong would be hitting the nails or screws used to attach the work piece so think about placement. I've shown a sketch to help with that planning.
[ATTACH]6400[/ATTACH]
Got any questions ask away.
Ed
Attachments
set up 1s.jpg (18.82 KiB) Viewed 5941 times
set up 2cs.jpg (21.54 KiB) Viewed 5941 times
set up 3cs.jpg (19.7 KiB) Viewed 5941 times
set up 4s.jpg (15.69 KiB) Viewed 5940 times
set up 5sc.jpg (15 KiB) Viewed 5941 times
{Knight of the Shopsmith} [Hero's don't wear capes, they wear dog tags]
Wow, I have to say that I am truly impressed by the quantity and quality of the responses on this forum. I posted this same question an another forum (which shall remain anonymous) and only got a few responses.
I am even more excited about using my newly acquired Shopsmith, especially now that I know I can get good support from this forum.
chuckk2333 wrote:Wow, I have to say that I am truly impressed by the quantity and quality of the responses on this forum. I posted this same question an another forum (which shall remain anonymous) and only got a few responses.
I am even more excited about using my newly acquired Shopsmith, especially now that I know I can get good support from this forum.
Chuck
Hi Chuck!
I am glad that we have helped you (I hope). Since we have impressed you, wood you mind sharing where you are from? We ARE a curious bunch.
Tim
Buying US made products will help keep YOUR job or retirement funds safer.

See this post.