Page 5 of 5
Posted: Sun Feb 19, 2012 4:27 pm
by heathicus
dusty wrote:What are going to do with all of the stuff that was going to be in those drawers?:rolleyes:
I wasn't sure what I was going to be putting in them to begin with...
Posted: Sun Feb 19, 2012 5:24 pm
by JPG
If you are still concerned with the weight of the saw, double the front and back top rails and middle cross pieces. Provide a shoulder for the cross pieces on the rails.

P.S. Make sure the side panels are a snug fit(provides anti-racking).
Posted: Sun Feb 19, 2012 8:28 pm
by pennview
If you want to create some inexpensive leg levelers, set a nut in the bottom of each leg and use a bolt (something like 5/8" bolt should do nicely) to level the leg and add another nut as a jamb nut to lock the bolt in place.
You can drill a hole in the bottom of the legs as deep as the nut is thick, with the diameter matching the width of the nut across two opposite flats; use the nut as a template and mark a hexagon centered on the hole; use a chisel to carve the round hole into a hex shaped recess with the nut fitting tightly; drill a hole 5/8" to accept the bolt; epoxy the nut into the recess; and, you have leg adjusters for the price of four bolts and eight nuts.
Posted: Sun Feb 19, 2012 8:48 pm
by heathicus
The saw is just sheet metal and aluminum (not cast iron), so I think it will be OK. I'll follow your suggestions anyway.
Posted: Mon Feb 20, 2012 2:13 pm
by terrydowning
heathicus wrote:
Instead of drawers under the saw cabinet, just one open area for storage of small cutoffs.
Any obvious problems with this?
I have open storage under my SS. It drives me crazy. It is nothing but a dust collector. One of these days I'm going to add doors or drawers. Do yourself a favor and plan for a shelf (miter gauge, feather boards, and other small stuff on a top shelf, these tend to get lost on bottom shelves.) and a door if not drawers.
Posted: Sat Mar 03, 2012 11:03 pm
by heathicus
Haven't had much time in the shop the last couple weekends, but put in a good day today and I'm just about almost finished with the saw cabinet and outfeed table.
This is the before.
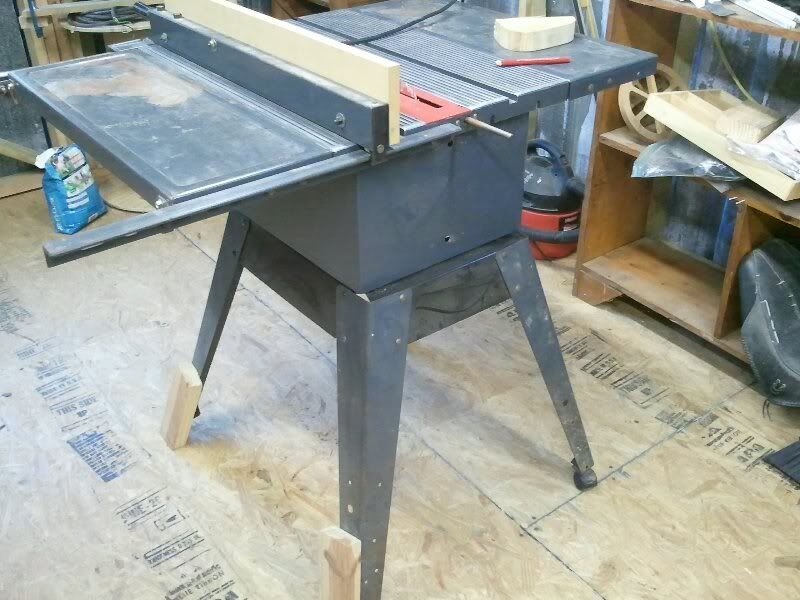
The beginnings of the saw base.

When I built the base for the saw I incorporated a dust collection port.

My shop vac plugs right in. I haven't really tested it yet but I bet I'll need to seal all the gaps and holes around the saw body.

Posted: Sat Mar 03, 2012 11:28 pm
by heathicus
To bolt the saw base to the cabinet top, I had to remove the table from the base, mark and drill the holes in the cabinet top for the bolts, then use JB Weld to attach bolts to the base.
On to the outfeed table.
The frame was built with the same construction and to the same dimensions except taller.

I used OSB instead of plywood to keep costs down. But for the outfeed table I added tempered hardboard to the top. It was labeled "Eucaboard" but I guess that's the same thing.

Routed some channels for the miter bar.

I cut the table top long on one side so I could then trim it to fit close to the saw.

Posted: Sat Mar 03, 2012 11:58 pm
by heathicus
Still to do: finish the lower shelf on the outfeed table and add the side panels to the saw cabinet. I can take care of that tomorrow.
For now the area under the saw is just open. At some point I'll either put a shelf and doors under the saw, or I'll put in some drawers or something. I figured I'd use it as is for a while and see what I wish I had there.
I might also add an extension to the outfeed table that could fold down when not needed.
I did make one little mistake. I had meant for the outside to outside measurement to be 4' on the long sides. But when I cut the long rails, I didn't subtract enough. So I ended up being 4' between the inside of each leg. I didn't realize it until the base was assembled and the glue was dry.
One thing I would do differently if I had it to do over again: Instead of the top rails being even with the top of the legs, I would lower them by the thickness of the top material. Then put another board between the legs and even with the top to cover the edges of the OSB and dress it up a little.
Posted: Sat Mar 17, 2012 11:42 am
by beeg
Spammer reported.