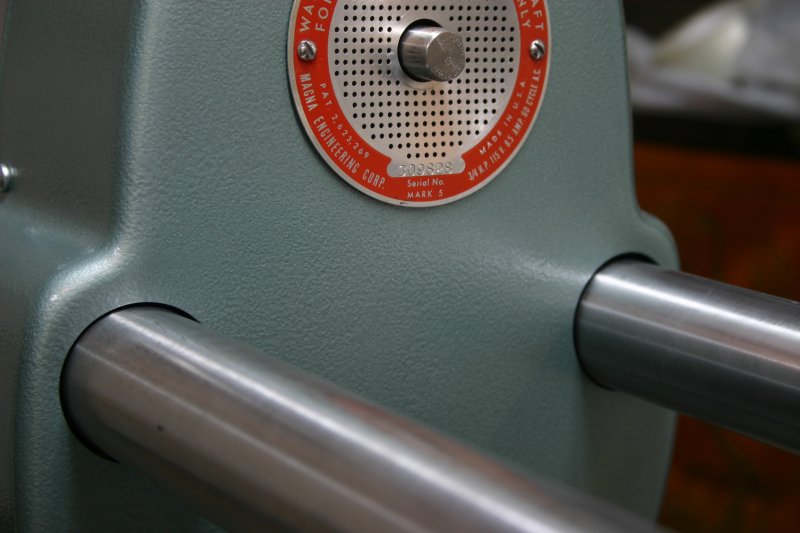
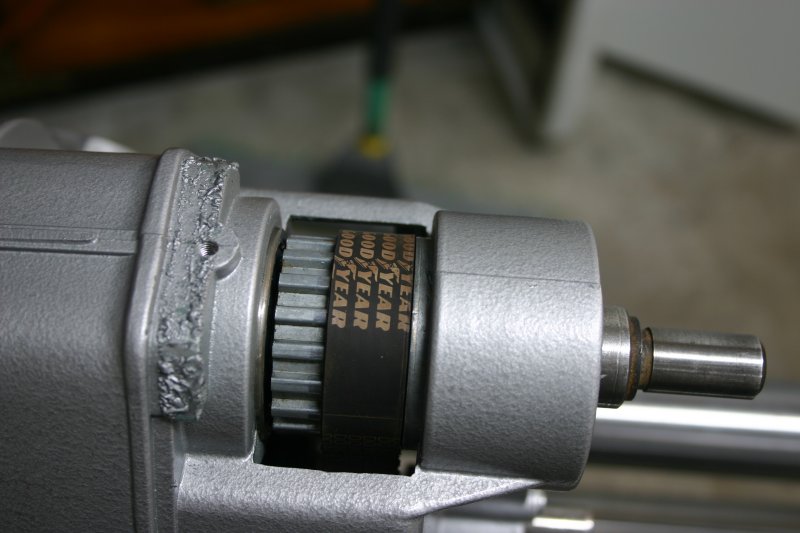
[font=Times New Roman]The issue with the belt cover rubbing against the top of the way tube is RESOLVED!!! Previously, it looked like this. My Greenie now has adequate clearance between the way tube hole in the belt cover and the top surface of the way tube. No more dragging across making the sound of a scratchy tuning fork.[/font]
[font=Times New Roman]The fix was a “CORRECT” fix. CORRECT fix = determining the ROOT CAUSE of the problem and eliminating it as compared to the “EASY” fix method which is doing what ever it takes, with what ever you got, and in as little time possible, in order to be on with your life. This method has no regard for cosmetics or concern in maintain design originality (i.e. duct tape, bailing wire, clamps, tie wraps, coat hangers etc…..). I don’t want to say that there is anything wrong with the EASY fix method. I’ve done MANY. But when it came to this restoration project, which I took on in February, an EASY fix approach wasn't’t going to be an option unless there was big $$$$ impact.[/font]
[font=Times New Roman]I want you guys who participated in this troubleshooting brainstorm session that your input was great. The cool thing about this forum is the quality, sanity checking, and promptness of replies from everyone. Just like the issue that came up with my need for caution label that was no longer available for purchase which went from an initial postto my putting the sticker on my Greenie is just 48 hours, this problem and solution followed with equal expedience. My initial post was on 4/27/09 at 10:30 pm and within 24 hours, there were 17 member posts and a FIXED ShopSmith, wrapping up the project last night at 10:00 pm. Unbelievable!![/font]
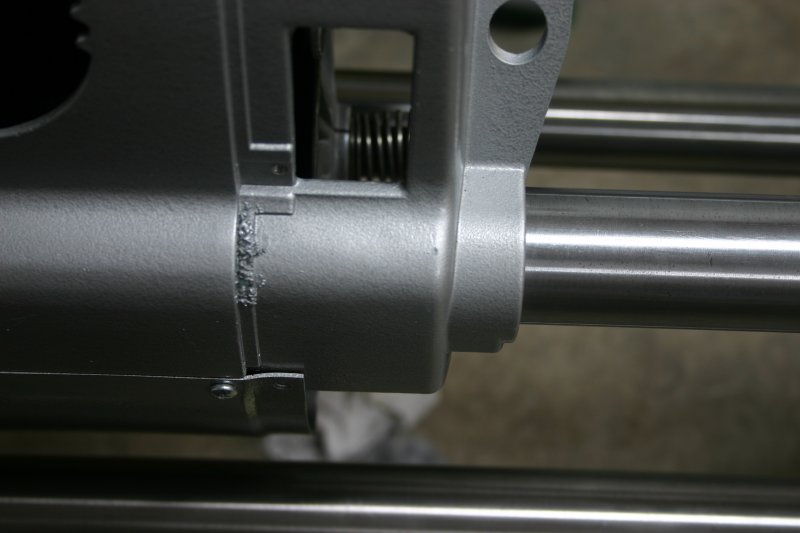
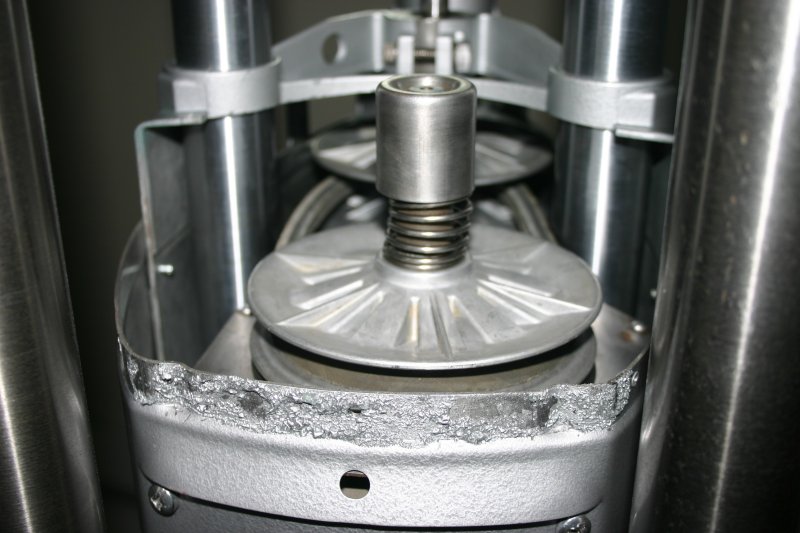
[font=Times New Roman]Before I digress too much, here's the Greenie fixed followed by a few pics of what the root cause was.[/font]
[font=Times New Roman]-[/font]
[font=Times New Roman]-[/font]
[font=Times New Roman]-[/font]
--Note the uniform gap with no contact.
-
-
-
--Guess
-
-
-
-
--Guess again
-
-
-
-
[font=Verdana]And again....look like paint remover in action?[/font]
[font=Times New Roman]-[/font]
[font=Times New Roman]-[/font]
[font=Times New Roman]-[/font]
[font=Times New Roman]Three components went into resolving this problem.[/font]
[font=Times New Roman]1.Paint on the major contact surfaces of the headstock housing and motor pan was removed.[/font]
[font=Times New Roman]2. Lacquer on the inside contact surface of the belt cover was removed[/font]
[font=Times New Roman]3. Tweaking the cover around once all paint and lacquer was removed[/font]
[font=Times New Roman]WHODATHUNK??[/font]
[font=Times New Roman]Judaspre1982 (aka Dave) obviously did in his post #206questioning paint thickness followed up by jpg40504 (aka J) suggesting the tweak method on the belt cover in his post #202. These two approaches are what resolved the issue.[/font]
[font=Times New Roman]Regarding the paint..... As I thought about using that solution,, it started to make a lot of sense since the interference of the belt cover hole and top of way tube was only a few thousandth of an inch. I figured that if I remove the paint on the bottom of the motor pan, it would allow me to raise the belt cover by the thickness of the paint in turn eliminating the interference. I removed the paint with stripper, cleaned the area well with mineral spirits to neutralize the stripper, and put the cover back on. Unfortunately, that didn't’t fix it.[/font]
[font=Times New Roman]I looked at where the 6 screw holes were on the belt cover vs. their mating thread holes and they looked perfectly centered. I tried to tweak the cover to bias it a little but it wouldn't’t budge in any direction. I was able to pull the belt cover off with a little persuasion and decided that I needed to try to get a smidgen of “slop” to see if biasing the cover over the threaded holes would help. To do this, I then removed the paint on the other primary HORIZONTAL contact surface (top of headstock, the top surface of the two angled sides where the cover transitions outward to accommodate the motor pan) and I also removed the lacquer I had sprayed inside the belt cover but only where it contacted the motor pan. When I put the belt cover back on, it was still quite snug BUT, I was able to tweak it around just a little. Well, I found out that just a little tweak makes a BIG difference on how the cover way tube hole lines up with the way tube. Looking at the headstock from the operators side, I biased the cover in a clockwise direction, which RAISED the belt cover way tube hole UP off the way tubes. I kept my fingers cross hoping that the 3 through holes in the belt cover still lined up with the mating threaded holes AND THEY DID. They were biased toward the outer edge of the through holes but I was just able to get the screws started. Screwed ‘em in “Good’n Tight” and bingo, problem RESOLVED.[/font]
-
-
-
[font=Times New Roman]Thought I'd include the first picture of the completed Greenie.....just scroll down to see it.[/font]
[font=Times New Roman]-[/font]
[font=Times New Roman]-[/font]
[font=Times New Roman]-[/font]
[font=Times New Roman]-[/font]
[font=Times New Roman]-[/font]
[font=Times New Roman]-[/font]
[font=Times New Roman]-[/font]
[font=Times New Roman]-[/font]
[font=Times New Roman]-[/font]
[font=Times New Roman]-[/font]
[font=Times New Roman]-[/font]
[font=Times New Roman]-[/font]
[font=Times New Roman]-[/font]
[font=Times New Roman]-[/font]
[font=Times New Roman]-[/font]
[font=Times New Roman]-[/font]
[font=Times New Roman]-[/font]
[font=Times New Roman]-[/font]
[font=Times New Roman]-[/font]
[font=Times New Roman]-[/font]
[font=Times New Roman]-[/font]
[font=Times New Roman]-[/font]
[font=Times New Roman]-[/font]
[font=Times New Roman]-[/font]
[font=Times New Roman]-[/font]
REAL SOON!!