Page 2 of 6
Posted: Mon Apr 29, 2013 3:55 pm
by joshh
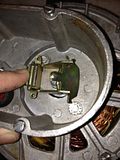
Posted: Mon Apr 29, 2013 3:56 pm
by joshh
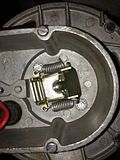
Posted: Mon Apr 29, 2013 3:56 pm
by joshh
Posted: Mon Apr 29, 2013 3:57 pm
by joshh
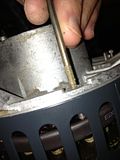
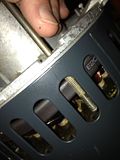
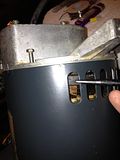
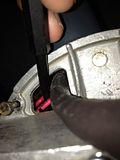
Reserved for pictures of final installation...coming soon.
A special thank you goes to:
Skip Campbell at
MKC Tools for replacing the bearings with me. This gave me an idea of how to disassemble / reassemble the motor for the reversal. Great guy with great products.
JPG, who checked over this guide to find any errors. He found quite a few =)
Dusty for numerous posts in other threads with all the information that anyone could ever need.
Culprit, for
this and
that.
Bill Mayo for PM's along the way

Posted: Mon Apr 29, 2013 5:25 pm
by dusty
This is a very informative and well done photo presentation. It will likely become a "go to" thread for anyone with an AO Smith motor problem. Thanks for the time and effort that went into its production.
Posted: Mon Apr 29, 2013 11:05 pm
by Culprit
Awesome job, Josh! Nicely done and thank you.
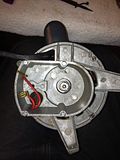
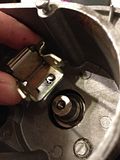
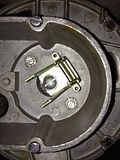
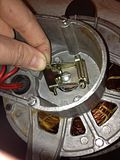
I'm looking forward to seeing a picture of the reverse switch location.
Posted: Tue Apr 30, 2013 6:05 am
by eartigas
Excellent posting, thanks. The problem is now I have to buy an AO Smith motor to try this!
Much appreciated, as Dusty said this posting will be a reference to consult often.
Ed
Posted: Tue Apr 30, 2013 1:11 pm
by billmayo
This information can be used for the GE motors. Same procedures to find the start winding wires. I find all the wires on the older GE motors will need replacing as the wire insulation appears to break down on these older GE motors. I have never been able to find the start winding wires on the 1 1/8 HP Emerson motor. Another Forum member tells me he was successful doing the Emerson motor. Pershaps the wiring locations inside this motor did change over time.
Posted: Tue Apr 30, 2013 2:20 pm
by joshh
The 510 I picked up in Houston has an Emerson motor. I had planned on using it for a mini bandsaw and jointer station. This will only work for me if I can reverse it, so I'll do another thread for the Emerson motor where we will find out if and when I'm successful at it.
Thanks for the feedback everyone. There are some corrections to this thread that JPG is helping me sort out in PM. I'll update everyone once it's considered complete.
Posted: Tue Apr 30, 2013 8:53 pm
by joedw00
joshh wrote:The 510 I picked up in Houston has an Emerson motor. I had planned on using it for a mini bandsaw and jointer station. This will only work for me if I can reverse it, so I'll do another thread for the Emerson motor where we will find out if and when I'm successful at it.
Thanks for the feedback everyone. There are some corrections to this thread that JPG is helping me sort out in PM. I'll update everyone once it's considered complete.
I will be waiting for the Emerson motor. The Greenie I bought this weekend has a Emerson motor on it. I am going to make a Mini out of it, and reverse would be nice. Thanks for the great job you are doing,