Page 1 of 2
AO Smith 3/4 HP Motor Rebuild
Posted: Tue Oct 08, 2019 9:18 pm
by johnkgerken
Hi all,
I'm sure this has been asked before, so I apologize in advance for not being able to find the reference. I've read through threads on the AO Smith motor, Mickyd's rebuild thread, ShopSmith's exploded diagrams and the docs on Everett's Google Docs archive, but I've been unable to find a reference to what appears to be an anomaly in how my motor was assembled.
I inherited a 1955 Greenie, S/N 294169 that hadn't been run in at least 25 years. So I've begun the process of attempting to restore it and get it running. After getting the motor out I replaced the switch and power cord and that enabled the motor to start. However, slowing turning the motor shaft produces a grinding sound. So while I've got the thing apart, I thought I would try to replace the bearings.
At the end of the motor drive shaft is what looks like a nut. The parallel sides of it are 1" apart because it fits my 1" wrench perfectly, but I can't figure out how to remove it given that the shaft spins of course, and I can't seem to compress the spring enough to get something on the shaft to hold it in place. The spring appears to press right up against the nut and I don't see the retaining ring and washer that are described in the resources I found.
It is not uncommon for me to overlook the obvious, so I certainly won't be surprised if that is the case here, but can someone provide me a clue as to what I'm missing, please?
Thanks for your help,
John
Re: Removing nut from AO Smith 3/4 HP Motor Shaft
Posted: Tue Oct 08, 2019 10:01 pm
by JPG
It is a left handed thread.

Re: Removing nut from AO Smith 3/4 HP Motor Shaft
Posted: Wed Oct 09, 2019 12:49 am
by everettdavis
Search Jacob Anderson’s Shopsmith YouTube Videos.
You need to control the release of that spring which will launch in your face. Jacob fabricated a board with a small housing to control the spring.
Remember you have to control and compress it again to reassemble.
Take care and you should be fine.
Everett
Re: Removing nut from AO Smith 3/4 HP Motor Shaft
Posted: Wed Oct 09, 2019 9:24 am
by rpd
This video shows how to retain the spring while removing the nut (and a lot more

) .
http://www.shopsmithacademy.com/SS_Arch ... rn_Pt2.htm
As you said, yours has the nut instead of the spring clip.
I used a ratchet strap instead of the inner tube strips.
I thought there was a diagram of the wooden piece but I don't see it now. There is a stepped hole in the middle. a smaller diameter large enough for the nut to pass through. and the larger diameter to cup the end of the spring.
This video shows a specialized tool that achieves the same end. (2:00 min mark)
[youtube]
https://www.youtube.com/watch?v=ewNLebMuHWc[/youtube]
Re: Removing nut from AO Smith 3/4 HP Motor Shaft
Posted: Wed Oct 09, 2019 10:38 am
by johnkgerken
Hi guys,
Thanks for the responses. I saw the tool in Jacob's videos, but it seems to assume a washer that is significantly larger than the clip holding it in place. On my motor, the spring is just barely larger than the nut, so it doesn't look to me like the dimensions specified will work. Is there supposed to be a washer between the nut and the spring perhaps?
Also, I see in the thread "AO Smith 1 & 1/8 HP Motor Guide - Forward / Reverse, Bearings, Wiring, etc." it lists the bearings to use as NTN 6203LLB sealed bearings. But my motor is the older 3/4 HP one. I wasn't able to find a reference to the bearings specifically for that motor. Does anyone know if the bearings are the same for the 3/4 HP, or something different? I'd like to get those ordered so I don't lose too much time between getting the old ones off and the new ones on.
Thanks again,
John
Re: Removing nut from AO Smith 3/4 HP Motor Shaft
Posted: Wed Oct 09, 2019 12:29 pm
by chapmanruss
You asked if there is supposed to be a washer behind the nut. Checking the diagrams for the early Mark 5 the answer is no. The first 3 restored owners manuals for the Mark 5 are on Everett's goggle page. Your Mark 5 made in April of 1955 would be covered by the 2nd or 3rd edition of the manual. When removing the nut be careful since it was first installed 65 and a half years ago and most likely hasn't been off since. Check the position of the Fan Sheave P/N C2897 which is the fixed Sheave closest to the motor to make sure it hasn't moved and is rubbing. This can cause the grinding sound.
Re: Removing nut from AO Smith 3/4 HP Motor Shaft
Posted: Wed Oct 09, 2019 5:00 pm
by johnkgerken
Well, I got the nut off by holding the spring down with a set of needle-nose vise grips and then rotating the nut clockwise with a brace between the fan sheave to keep the shaft from turning. Once I had that set up, the nut came off surprisingly with little effort.
But now the outside sheave is not wanting to come off the shaft. It is absolutely lined up with the key, but the key may not be completely flat from one end of the exposed shaft to the other.
Does anyone know about the NTN bearing for this particular AO Smith 3/4 HP motor? Also, has anyone had any luck buying these bearings from a local source, for instance from an automotive parts distributor, or industrial supply?
Thanks again, all.
John
Re: Removing nut from AO Smith 3/4 HP Motor Shaft
Posted: Thu Oct 10, 2019 10:49 am
by everettdavis
The key is not flat. The innermost end nearest the motor has a crook on the end that sits in a dimple to the far end of the shaft groove as i recall.
Take a drift and gently tap on the exposed end of the key to try and introduce a tiny bit of movement in the key. Dress the key with a machinist file after you place some tape along side to protect the motor shaft face.
Remove the tape and try some penetrating oil along the key.
You can measure the height of the key across the shaft itself with a pair of calipers to see if the it is elevated bent etc. I often pass the key over a whetstone when I get it out, then using a bit of oil and 2000 grit sandpaper, polish it to a very smooth finish before reuse.
Equally I will run the whetstone across the keyway at the corner edges to insure its flat, then add an ever so slight chamfer to the sides
It use 800, 1200, and the 2400 grit crocus cloth to polish the shaft of motor before reassembly.
Our late friend Bill Mayo used NTN bearings.
Be careful to measure each bearing carefully before ordering bearings. It’s critical to get the right one. Some bearings have the same part number base and different shaft size suffixes.
If you have a commercial bearing supply house take the your bearings and they can help.
Best of luck,
Everett
Re: AO Smith 3/4 HP Motor Rebuild
Posted: Thu Oct 10, 2019 4:17 pm
by johnkgerken
Thanks, Everett. There are some really good details in that post. I'm surprised about your comment regarding variations in the bearings. I would have thought that a given company would have to ensure that a part number was consistent across lots. I focused on NTN because that's what I see being sold online by everyone other than ShopSmith themselves, so NTN seemed a good brand to use. The ShopSmith bearings though seem to be significantly less expensive than the other brands, such as NTN. Is it your experience that the bearings sold by ShopSmith are similar, better, or of lesser quality than the other brands, such as NTN?
Also, a question, please, regarding the spreadsheet at the end of your ShopSmith Bearing Guide: If I have an April 1955 headstock, then do I have a "Mark 5", or a "Mark V"? Also, there are some cells with links for specific brands of bearings, but most are empty. If I find appropriate part numbers for a given vendor, do you want us to share those with you to help populate the table?
I'm slowly making progress. I was able to get the outer sheave off and with it came the key. I don't see any damage to either, but they are both filthy, so they may be hiding secrets.
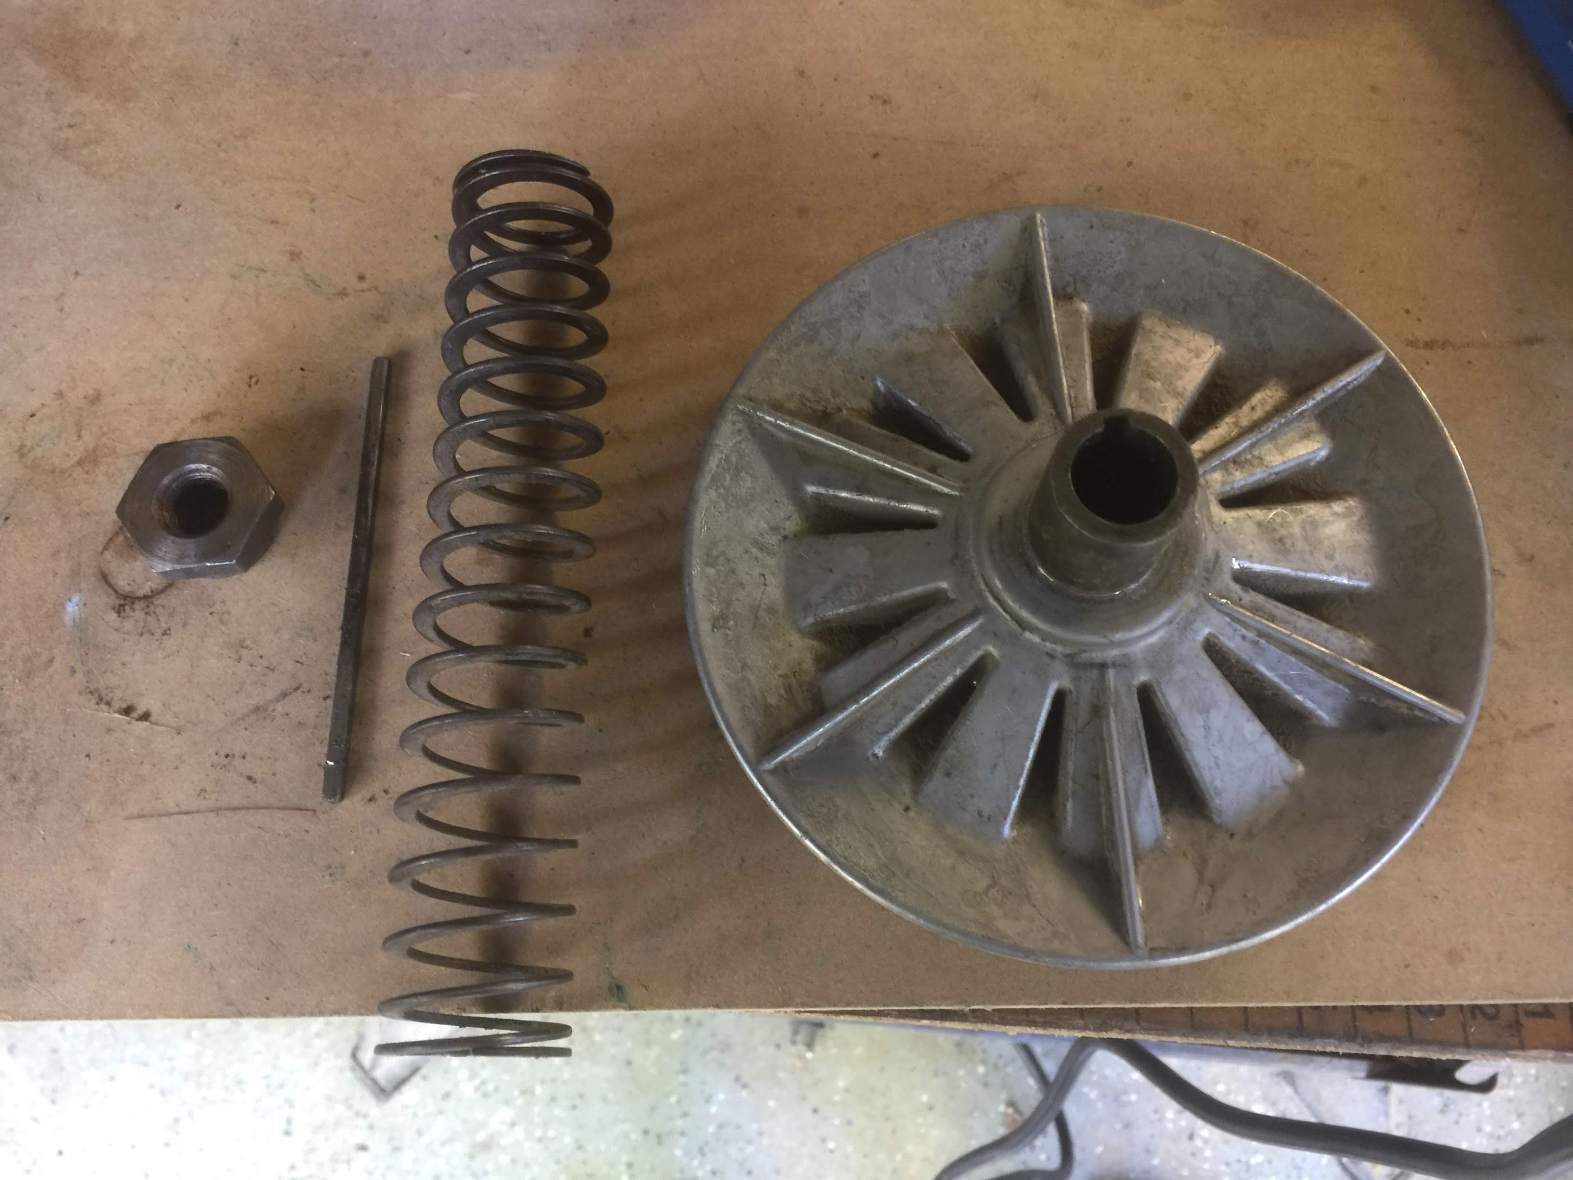
- IMG_4017.small.jpg (1.27 MiB) Viewed 14669 times
The fan sheave, like the outer, didn't want to budge, but I finally got some motion after loosening the set screw and running some 12 gauge wire underneath the fan blades, so that I was pulling up from the center instead of just the outside, and almost instantly it allowed the sheave to move upwards -- until it got to the top, where it is now stuck ... again. I guess there is some anomaly at the end of that shaft that is beyond the tolerances of the inside sheave dimensions.
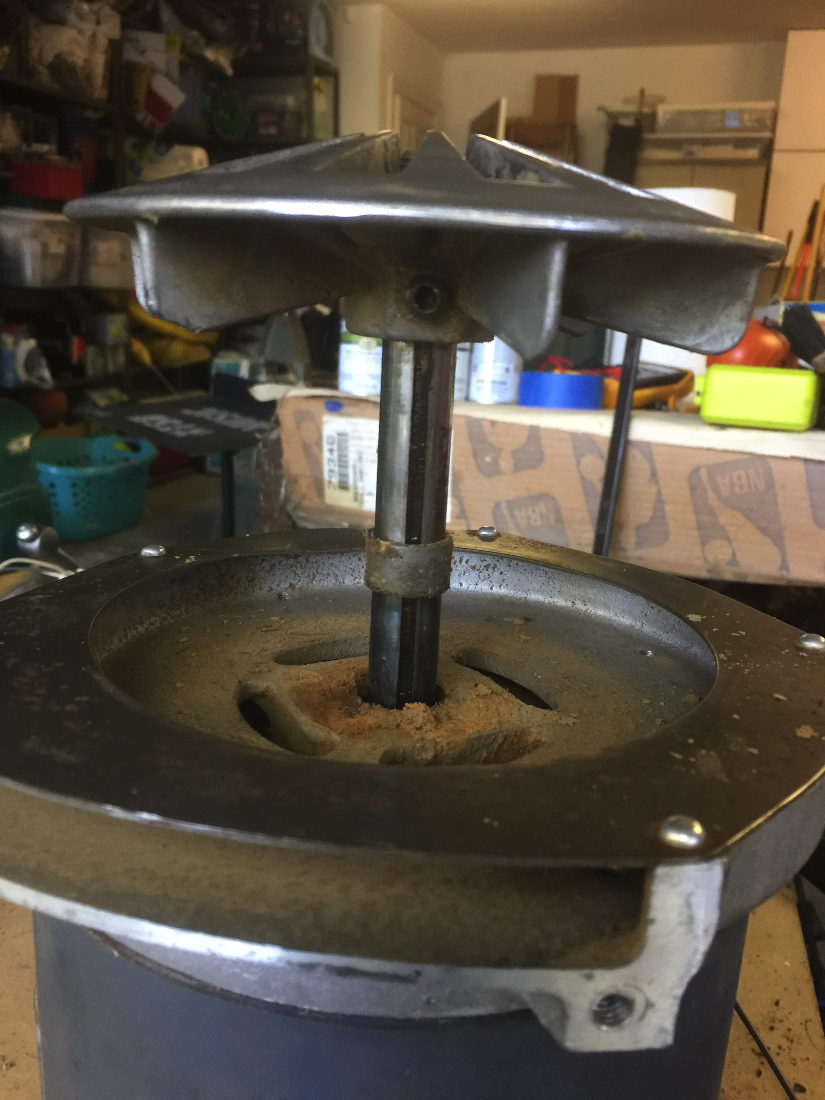
- IMG_4018.small.png (1.3 MiB) Viewed 14669 times
Any thoughts on how to proceed? Also, is the sleave between the fan sheave and the motor supposed to slide inside the motor cover? It's doing it on mine, but it doesn't look very proud of the cover, which makes me wonder about whether it is too worn to keep the fan sheave from rubbing once reinstalled.
Thanks all for your insights. This is sure becoming an interesting project.
John
Re: AO Smith 3/4 HP Motor Rebuild
Posted: Thu Oct 10, 2019 6:22 pm
by everettdavis
The spacer fits inside and touches the inner bearing race. If it wears down, the fan blades on the back of the sheave will rub the housing. Personally, I order new spacers from Shopsmith for motors I remove sheaves from, just to be safe.
A.O. Smith made the motor for Shopsmith and selected the bearings. A.O. Smith had their own repair centers for decades. Shopsmith only sold replacement motors, not components of the motor.
I put together a graphic for you to explain why one has to measure.
1955 should be a Mark 5. Check the vent plate on the auxiliary shaft which should reflect the model in the text if visible.
The Bearing Guide was one for the headstock bearings.
I started a motor guide that is out there too, but my wife's stroke put a lot of things on hold. Someday I will get back to it. Skip past the dissertation on electrical power to get to the motor specific things that I did include. It's in the Motors folder for what it's worth.
Hopefully that will answer your questions. 6203 was chosen only to illustrate variances in the same bearing that you will have to navigate when you isolate the bearing type and dimensions yours are. I chose RBI only for their illustration in the chart, not to recommend them per se.
Everett

- Measure Bearings you remove precisely.png (113.39 KiB) Viewed 14653 times