Page 4 of 88
Posted: Wed Apr 23, 2014 8:53 am
by roamer46
Thanks, BuckeyeDennis!
This boat will definitely get used. I have no intention of selling it, but you know what they say about never say never...
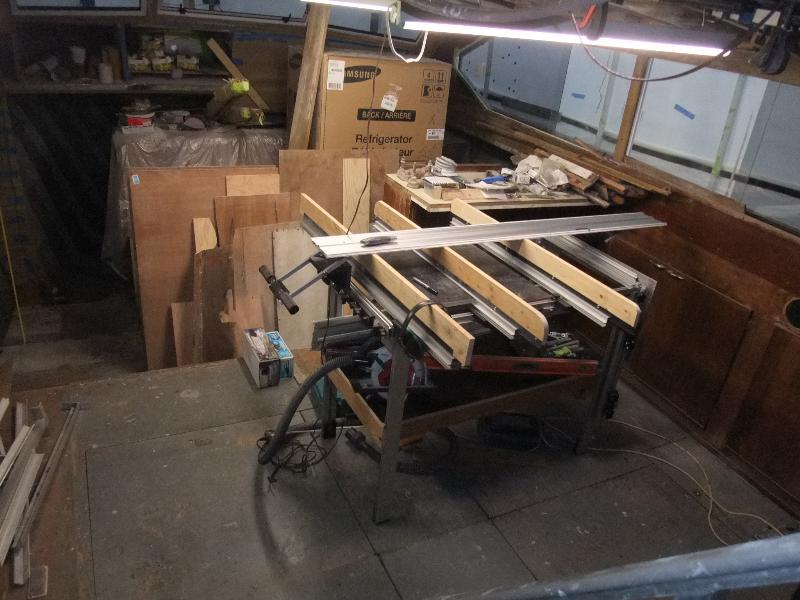
Anyway, it's been a while since I wrote a blog article on my Roamer project. Winter conspired against me, and a lot of projects got a little bit done but nothing advanced enough to inspire me to write. Gotta get back into the swing of things...
1969 Chris Craft Roamer 46 Refit: Setting Up Shop
Cheers,
Q

Posted: Wed Apr 23, 2014 9:05 am
by roamer46
Thanks, BuckeyeDennis!
This boat will definitely get used. I have no intention of selling it, but you know what they say about never say never...
Anyway, it's been a while since I wrote a blog article on my Roamer project. Winter conspired against me, and a lot of projects got a little bit done but nothing advanced enough to inspire me to write. Gotta get back into the swing of things...
1969 Chris Craft Roamer 46 Refit: Setting Up Shop
Cheers,
Q
Posted: Tue Apr 29, 2014 8:17 pm
by roamer46
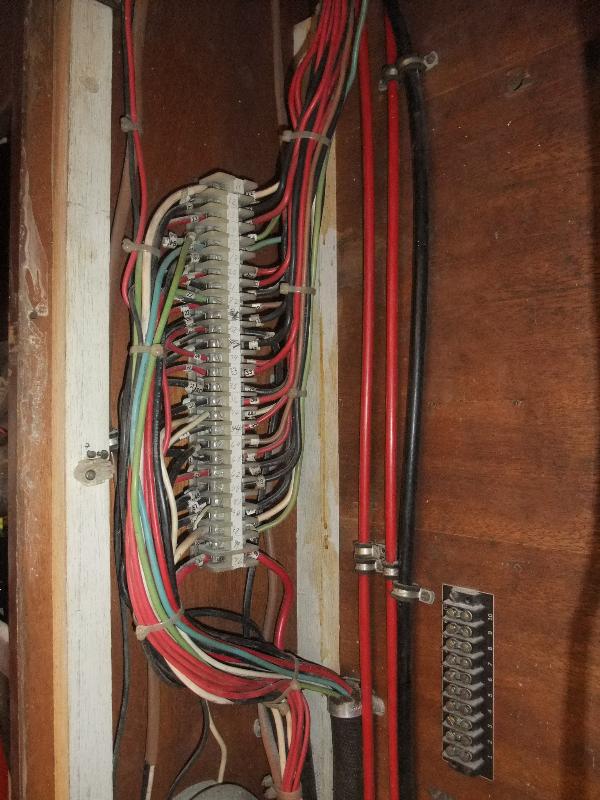
In preparation for moving the engines into position, I had to clean up the wiring and organize it a bit. It's nice not having dust falling in my eyes every time I touch a wire!
1969 Chris Craft Roamer 46 Refit: Organizing the Electrical System
Cheers,
Q
Posted: Tue Apr 29, 2014 9:00 pm
by teacherman
This is one impressive project! Hope you have a large enough body of water nearby. I had a vision of you mounting a shop smith permanently in one of the rooms on the boat, designating it the ship's "shop smith shipshape ship shop."
Thanks you for posting pictures of your progress!
Posted: Wed Apr 30, 2014 9:49 am
by roamer46
Thanks, teacherman!
I actually considered putting the Shopsmith on the aft deck just to have all of the equipment onboard. But the thought of lifting that beast over my brand new paint job makes me cringe...I don't mind shlepping lumber up the ladder. Plus, it keeps a lot of dust off the boat. That 12" disk sander really makes dirt!
Cheers,
Q
Posted: Fri May 02, 2014 8:48 am
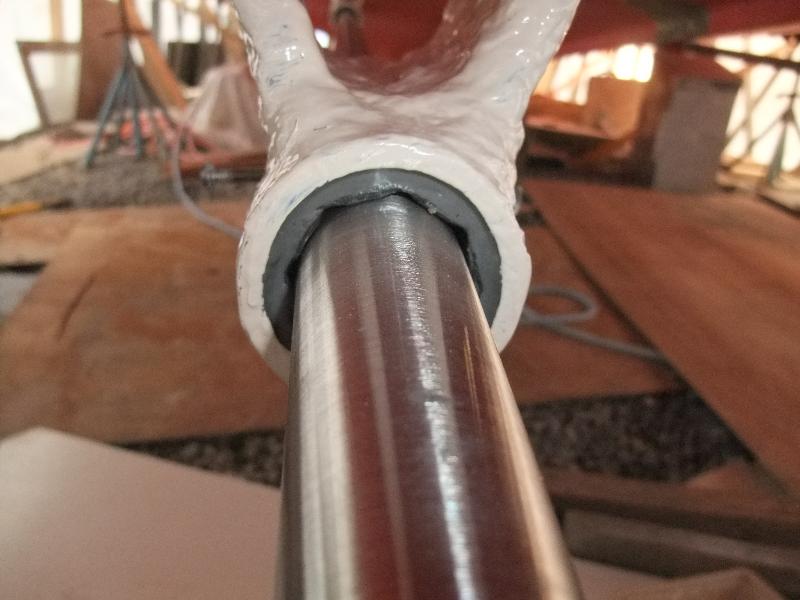
by roamer46
At long last, the prop shafts are in! Couldn't have done it without my Shopsmith 12" disc sander to resize the phenolic cutlass bearings!
1969 Chris Craft Roamer 46 Refit: Installing the propeller shafts
Cheers,
Q
Posted: Fri May 02, 2014 11:02 am
by beeg
Did ya install that shaft yourself or did ya have help? It looks to be very heavy.
Posted: Fri May 02, 2014 11:47 am
by JPG
HMMMMM! 1 3/4" SS shafting.
Wonder where that could be used on a SS?:D
Posted: Fri May 02, 2014 1:32 pm
by skou
Wonder why I didn't catch that one.
JPG, you'll pay DEARLY, when it comes time to go vertical with your drill-press, though. Like my cast iron head(stock) isn't dense enough.

steve
Posted: Fri May 09, 2014 8:30 am
by roamer46
beeg wrote:Did ya install that shaft yourself or did ya have help? It looks to be very heavy.
It was very heavy! I hired a couple of yard guys to help install them. Best money I've spent in a while!
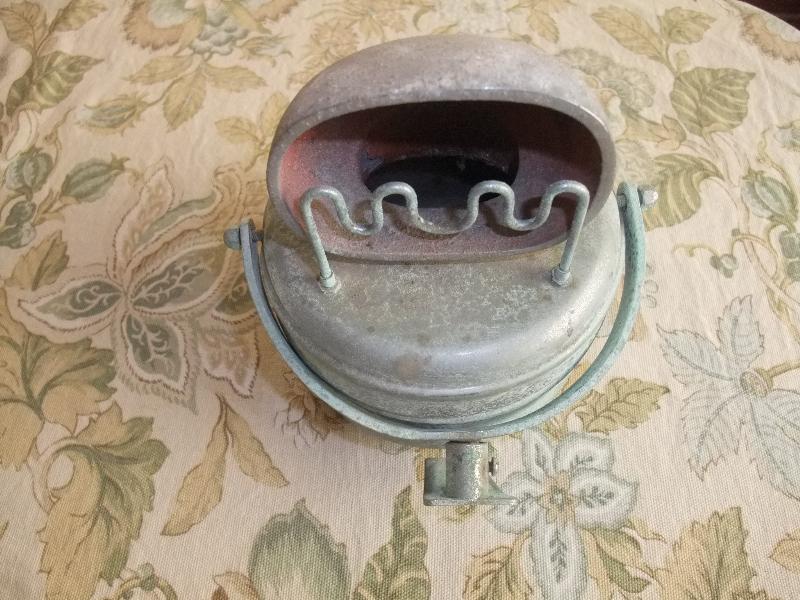
I've just about got all of my ducks in a row for the big engine install, but none of that preparation stuff is worth writing about on its own. I've had to think about installing chrome pieces, which requires a special tool to do it right (on a metal boat, anyway). Even though you might think chrome is a purely cosmetic thing you do at the end of the job, keeping out rain water will hopefully become very important later this year. Chrome and stainless parts fill many holes on the topsides of this boat.
1969 Chris Craft Roamer 46 Refit: Classic Chrome Bits & Pieces
Cheers,
Q