Refurbing a Scroll Saw
Moderator: admin
-
judaspre1982
- Platinum Member
- Posts: 1237
- Joined: Tue Jul 08, 2008 10:10 pm
==============================
Last edited by judaspre1982 on Sun May 07, 2017 3:25 pm, edited 1 time in total.

Hi,
This is great! Thanks for taking the time to share this project.
I wasn't around here when it was an active posting and I would have missed it except for having been searching for some scroll saw information and checking it out. Always a good idea to use the search function here as there are so many many quality posts lurking about.
When I first got my scroll saw, used but in what seemed to be good shape except for the table... I ask about the play in the upper arm. Can't seem to find that post here so maybe it was at the ssug site??? In any case I mentioned I had found ?/?". Those that responded said that was normal. So add a few years of use and tonight I measured about a 1/4" when pushed with my finger to the left then measuring when pushed to the right.
My question would have been how much upper arm play should be found on the shopsmith scroll saw?
But now I'd like to know after the rebuild how much play is found?
Ed
This is great! Thanks for taking the time to share this project.
I wasn't around here when it was an active posting and I would have missed it except for having been searching for some scroll saw information and checking it out. Always a good idea to use the search function here as there are so many many quality posts lurking about.
When I first got my scroll saw, used but in what seemed to be good shape except for the table... I ask about the play in the upper arm. Can't seem to find that post here so maybe it was at the ssug site??? In any case I mentioned I had found ?/?". Those that responded said that was normal. So add a few years of use and tonight I measured about a 1/4" when pushed with my finger to the left then measuring when pushed to the right.
My question would have been how much upper arm play should be found on the shopsmith scroll saw?
But now I'd like to know after the rebuild how much play is found?
Ed
{Knight of the Shopsmith} [Hero's don't wear capes, they wear dog tags]
-
JPG

- Platinum Member
- Posts: 35600
- Joined: Wed Dec 10, 2008 7:42 pm
- Location: Lexington, Ky (TAMECAT territory)
I am currently spending a week in Sevierville, TN. I will 'measure' arm sideplay when I get back to KY, but I believe it will be a very small number. I replaced both the bronze bushings and the posts they rotate on. It was close to 1/2" when I acquired it. It takes very little slop in the bushings to produce play out at the end of the arm(s).reible wrote:Hi,
This is great! Thanks for taking the time to share this project.
I wasn't around here when it was an active posting and I would have missed it except for having been searching for some scroll saw information and checking it out. Always a good idea to use the search function here as there are so many many quality posts lurking about.
When I first got my scroll saw, used but in what seemed to be good shape except for the table... I ask about the play in the upper arm. Can't seem to find that post here so maybe it was at the ssug site??? In any case I mentioned I had found ?/?". Those that responded said that was normal. So add a few years of use and tonight I measured about a 1/4" when pushed with my finger to the left then measuring when pushed to the right.
My question would have been how much upper arm play should be found on the shopsmith scroll saw?
But now I'd like to know after the rebuild how much play is found?
Ed
I feel occasional lubrication of those bushings will reduce the wear. Removal of the side cover/upper frame is required to add any lubrication.
The bushings are not identified in the manual, so I do not think they are available from ss except attached to a new arm. I got close to finding direct replacements, but the shoulder dimension was different(thicker).
Next week!
╔═══╗
╟JPG ╢
╚═══╝
Goldie(Bought New SN 377425)/4" jointer/6" beltsander/12" planer/stripsander/bandsaw/powerstation /Scroll saw/Jig saw /Craftsman 10" ras/Craftsman 6" thicknessplaner/ Dayton10"tablesaw(restoredfromneighborstrashpile)/ Mark VII restoration in 'progress'/ 10E[/size](SN E3779) restoration in progress, a 510 on the back burner and a growing pile of items to be eventually returned to useful life. - aka Red Grange
╟JPG ╢
╚═══╝
Goldie(Bought New SN 377425)/4" jointer/6" beltsander/12" planer/stripsander/bandsaw/powerstation /Scroll saw/Jig saw /Craftsman 10" ras/Craftsman 6" thicknessplaner/ Dayton10"tablesaw(restoredfromneighborstrashpile)/ Mark VII restoration in 'progress'/ 10E[/size](SN E3779) restoration in progress, a 510 on the back burner and a growing pile of items to be eventually returned to useful life. - aka Red Grange
-
camerio

- Platinum Member
- Posts: 602
- Joined: Fri Aug 11, 2006 8:01 am
- Location: Valcartier, just north of Quebec City, CANADA
Not only did the tool ended up looking very good but it is in perfect working condition.
But what I can appreciate the most is the fact that it was well documented.
Taking good pictures and making good explanations with it, is a task in itself and we recognize this contribution.
Very good thread JPG.
But what I can appreciate the most is the fact that it was well documented.
Taking good pictures and making good explanations with it, is a task in itself and we recognize this contribution.
Very good thread JPG.
Camerio
MarkV 520 & Band saw
MarkV 520 & Band saw
-
JPG
- Platinum Member
- Posts: 35600
- Joined: Wed Dec 10, 2008 7:42 pm
- Location: Lexington, Ky (TAMECAT territory)
Scroll Saw Arm 'play' after refurbishing.
The upper arm has less than 1/16" side play. The lower arm has even less, but the connecting rod etc. is probably limiting the play.
The sleeves were quite snug on the posts and press fitted to the arm.
The sleeves were quite snug on the posts and press fitted to the arm.
╔═══╗
╟JPG ╢
╚═══╝
Goldie(Bought New SN 377425)/4" jointer/6" beltsander/12" planer/stripsander/bandsaw/powerstation /Scroll saw/Jig saw /Craftsman 10" ras/Craftsman 6" thicknessplaner/ Dayton10"tablesaw(restoredfromneighborstrashpile)/ Mark VII restoration in 'progress'/ 10E[/size](SN E3779) restoration in progress, a 510 on the back burner and a growing pile of items to be eventually returned to useful life. - aka Red Grange
╟JPG ╢
╚═══╝
Goldie(Bought New SN 377425)/4" jointer/6" beltsander/12" planer/stripsander/bandsaw/powerstation /Scroll saw/Jig saw /Craftsman 10" ras/Craftsman 6" thicknessplaner/ Dayton10"tablesaw(restoredfromneighborstrashpile)/ Mark VII restoration in 'progress'/ 10E[/size](SN E3779) restoration in progress, a 510 on the back burner and a growing pile of items to be eventually returned to useful life. - aka Red Grange
Thank you.
Ed
Ed
JPG40504 wrote:The upper arm has less than 1/16" side play. The lower arm has even less, but the connecting rod etc. is probably limiting the play.
The sleeves were quite snug on the posts and press fitted to the arm.
{Knight of the Shopsmith} [Hero's don't wear capes, they wear dog tags]
Blade Change Upgrade --- added to SS gray Scroll Saw
JPG indicated he was interested in adding the Blade Change Upgrade.......................
I acquired a SS Gray Scroll Saw that was missing the Hood(3) and the bracket that holds the Hood (2)to the Upper arm cover(1) was broken. SS supplied a Bracket 11/15 -12/29. The big concern was breaking the bracket when the dowel pin was inserted. However, the dowel pin fit in the bracket before installation and didn't bind when threaded into the Upper arm cover and tapped into position.
The missing hood was part of the Blade Change Upgradekit. Creating threads with the two bolts that hold the plastic hood seemed that it would crack the plastic hood. The task was accomplished w/o splitting by going slowly and backing the bolt out frequently.
Replacing the lower blade block was straight forward. The upper, larger, blade block required a careful look at the expanded diagram before it was positioned on the stem of the upgrade blade holder with the plastic eccentric on top of the Upper Arm Shaft (25).
It was immediately obvious that the blade must be placed to use all of the head space in the upper blade holder OR THE BLADE HOLDER WILL CONTACT THE HOOD on the apex of the blade stroke. A drop of oil on the spring(6) will allow the hood to be raised easily and smoothly. More experience will show if tension will keep the upper blade holder from contacting the underside if the hood.
The Blade Change Upgrade kit offers two tension release mechanisms, a flip lever on the tensioning rod and an eccentric on the blade upper blade holder.
I acquired a SS Gray Scroll Saw that was missing the Hood(3) and the bracket that holds the Hood (2)to the Upper arm cover(1) was broken. SS supplied a Bracket 11/15 -12/29. The big concern was breaking the bracket when the dowel pin was inserted. However, the dowel pin fit in the bracket before installation and didn't bind when threaded into the Upper arm cover and tapped into position.
The missing hood was part of the Blade Change Upgradekit. Creating threads with the two bolts that hold the plastic hood seemed that it would crack the plastic hood. The task was accomplished w/o splitting by going slowly and backing the bolt out frequently.
Replacing the lower blade block was straight forward. The upper, larger, blade block required a careful look at the expanded diagram before it was positioned on the stem of the upgrade blade holder with the plastic eccentric on top of the Upper Arm Shaft (25).
It was immediately obvious that the blade must be placed to use all of the head space in the upper blade holder OR THE BLADE HOLDER WILL CONTACT THE HOOD on the apex of the blade stroke. A drop of oil on the spring(6) will allow the hood to be raised easily and smoothly. More experience will show if tension will keep the upper blade holder from contacting the underside if the hood.
The Blade Change Upgrade kit offers two tension release mechanisms, a flip lever on the tensioning rod and an eccentric on the blade upper blade holder.
MK V 520; MK V 510 w/PP DIY Upgrade; MK 5 500; Jointer; Bandsaw; Sliding Table; Conical Sanding Disk; Sharpening Guide, Lathe Duplicator, Jigsaw, Scrollsaw, Beltsander, Ring Master, Biscuit Joiner.
-
dj1960gold
- Silver Member
- Posts: 17
- Joined: Wed Mar 26, 2014 11:34 pm
- Location: Denver Colorado
Instead of starting a new thread this time, I think it would be better to add to this one if JPG doesn't mind.
I'm currently working on my scroll saw refurbishment, and my version appears to be the same vintage as JPGs.
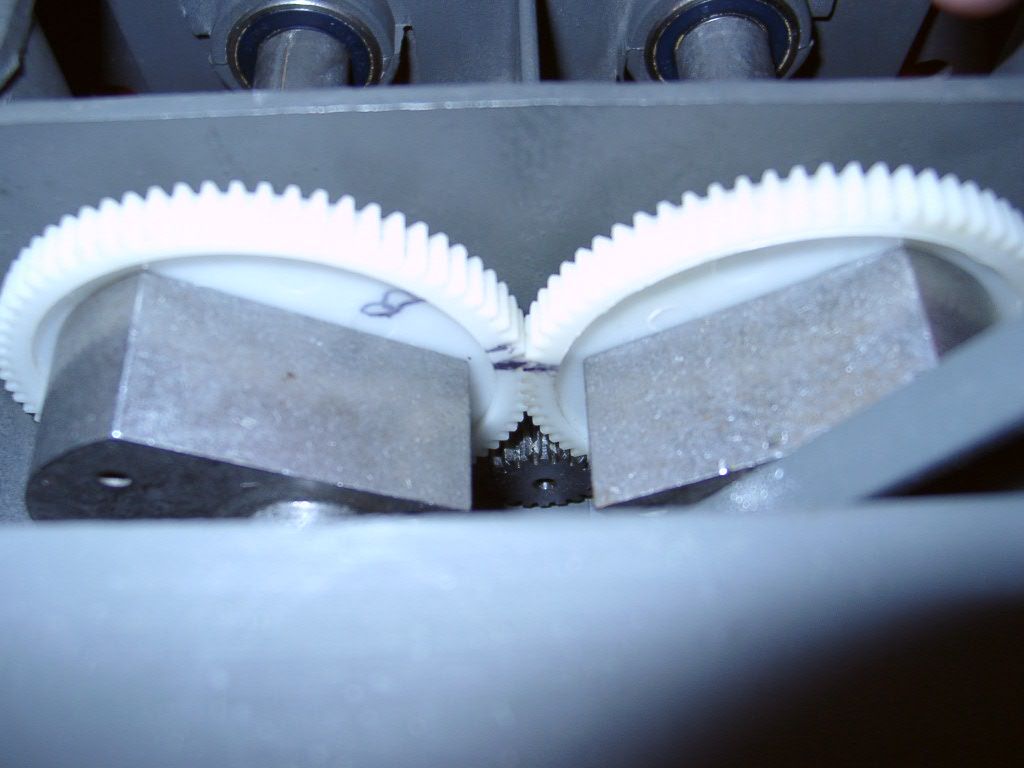
First, I wanted to say that I found the counterbalance gears to be more than one tooth off. I guess the assembly when manufactured did not have to be spot on, but just close enough:D
Photo after clean up and juggling the bearing locations so the best ones were on the drive shaft (I used teflon lube on the plastic gears):
The good news for my scroll saw is that rust is not present. Did not need evapo-rust for this job. This saw was my best craigs list buy, I paid only $120 for the saw with a power station included. Old and dusty but working.
Right now I'm considering modifying the pivot shafts to allow for easy lubrication. There was some sort of factory lube on my pivot shafts and bronze bushings that I have cleaned off in the parts washer.
When the blade is under tension and cutting normally, I think the top of the top arm pivot, the bottom of the bottom arm pivot, and the fronts of the pivot shafts are in contact. I'm considering drilling a 3/32 hole from the contact surface to the center of the pivot shafts, and locating (pointing) the new hole towards the back/middle of the saw where the forces are not acting on the bushings during cutting.
Then drilling another 3/32 hole from the center of the pivot mounting screw recess to a depth that intersects the previously drilled holes. I think this will allow me to set the saw on its side and remove the pivot shaft mounting screws (one side only) and put a few drops of 20 wt motor oil into the mounting holes where the oil can then work its way through the newly drilled 3/32 hole to lube the pivot to bronze bushing surfaces.
Did I describe my thoughts well enough? Probably need a picture, but this is just a thought experiment right now before I proceed with the reassembly.
Not being able to easily add lube to the pivots bugs me, and this is my idea to get around that limitation. I'll mostly be using the saw to cut balsa wood and other hobby items so perhaps the oil holes are a bit overkill. But I like drilling holes in things:D
I'm currently working on my scroll saw refurbishment, and my version appears to be the same vintage as JPGs.
First, I wanted to say that I found the counterbalance gears to be more than one tooth off. I guess the assembly when manufactured did not have to be spot on, but just close enough:D
Photo after clean up and juggling the bearing locations so the best ones were on the drive shaft (I used teflon lube on the plastic gears):
The good news for my scroll saw is that rust is not present. Did not need evapo-rust for this job. This saw was my best craigs list buy, I paid only $120 for the saw with a power station included. Old and dusty but working.
Right now I'm considering modifying the pivot shafts to allow for easy lubrication. There was some sort of factory lube on my pivot shafts and bronze bushings that I have cleaned off in the parts washer.
When the blade is under tension and cutting normally, I think the top of the top arm pivot, the bottom of the bottom arm pivot, and the fronts of the pivot shafts are in contact. I'm considering drilling a 3/32 hole from the contact surface to the center of the pivot shafts, and locating (pointing) the new hole towards the back/middle of the saw where the forces are not acting on the bushings during cutting.
Then drilling another 3/32 hole from the center of the pivot mounting screw recess to a depth that intersects the previously drilled holes. I think this will allow me to set the saw on its side and remove the pivot shaft mounting screws (one side only) and put a few drops of 20 wt motor oil into the mounting holes where the oil can then work its way through the newly drilled 3/32 hole to lube the pivot to bronze bushing surfaces.
Did I describe my thoughts well enough? Probably need a picture, but this is just a thought experiment right now before I proceed with the reassembly.
Not being able to easily add lube to the pivots bugs me, and this is my idea to get around that limitation. I'll mostly be using the saw to cut balsa wood and other hobby items so perhaps the oil holes are a bit overkill. But I like drilling holes in things:D
-DJ
1960 Yuba MV gold, 1957 MV green, 2-1/2 VIIs to be rebuilt, 2 power stations, 2 bandsaws, 2 belt sanders, 3 jointers, jig saw, scroll saw, strip sander, CH compressor, older sawsmith; all in various states from new to rusted
Lots of accessories, wife calls it all: 'garage junk' :-)
1960 Yuba MV gold, 1957 MV green, 2-1/2 VIIs to be rebuilt, 2 power stations, 2 bandsaws, 2 belt sanders, 3 jointers, jig saw, scroll saw, strip sander, CH compressor, older sawsmith; all in various states from new to rusted
Lots of accessories, wife calls it all: 'garage junk' :-)
-
dj1960gold
- Silver Member
- Posts: 17
- Joined: Wed Mar 26, 2014 11:34 pm
- Location: Denver Colorado
I was hoping to hear back from the forum on my crazy idea to add oiling holes in my scroll saw arm pivots:D
Well, I forged ahead with the idea anyway and here is my report with photos.
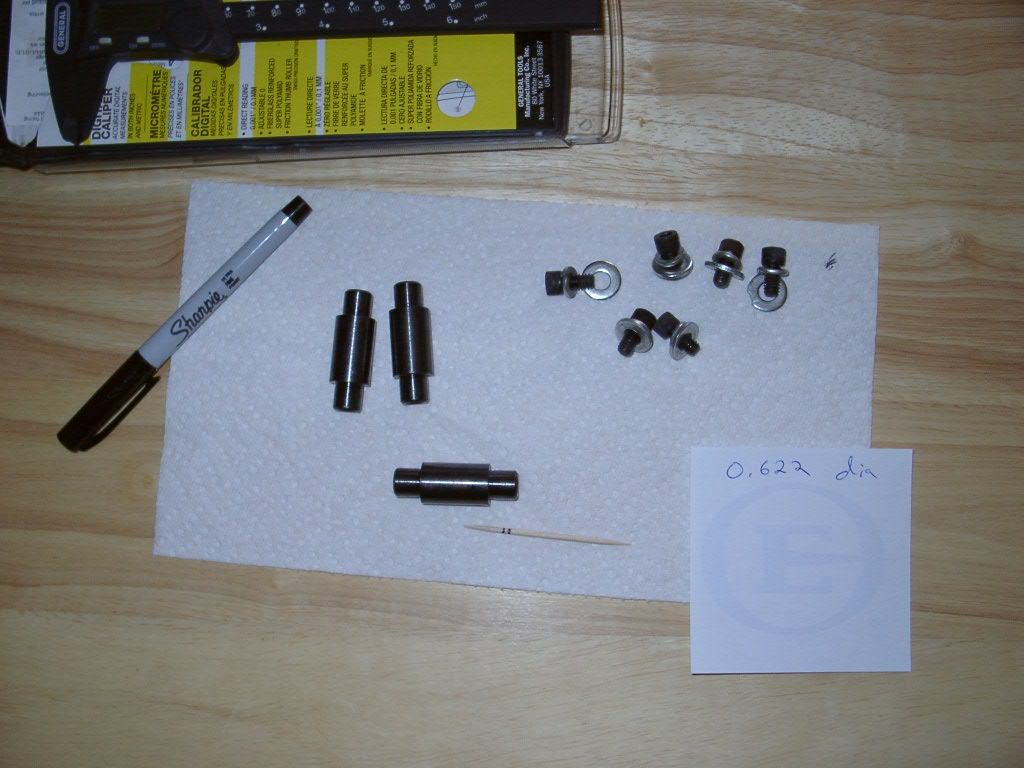
Since there are actually three pivots/mounts in the saw, I had one to experiment with that wouldn't matter if I screwed up. So measuring the mounting/threaded hole depth of the pivots, there was enough depth to them that I wouldn't have to drill them deeper to intersect the oiling/threaded hole.
Here is the three pivots. The depth of the holes is not symmetrical, one side is deeper as seen on my measuring toothpick.
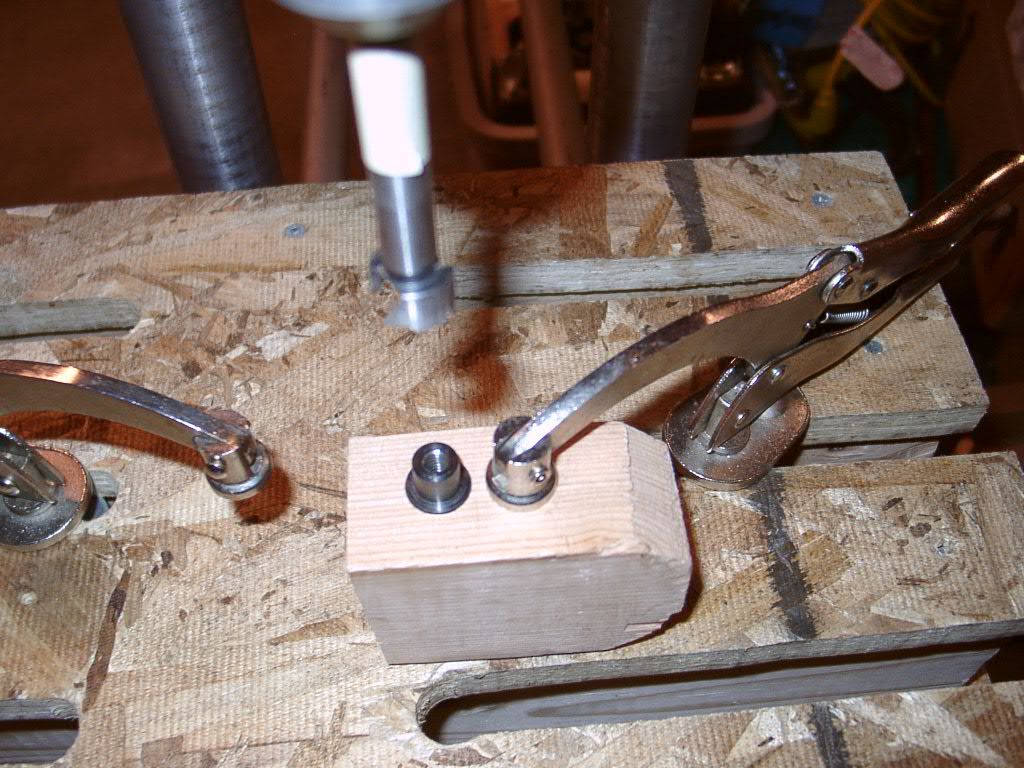
Next up was to make a jig out of scrap 2x4 and drill one pivot for testing purposes. 5/8 hole needed with a band saw cut to allow for clamping the pivot. I drilled a 3/32 hole from the surface to the middle intersecting the threaded mounting hole.
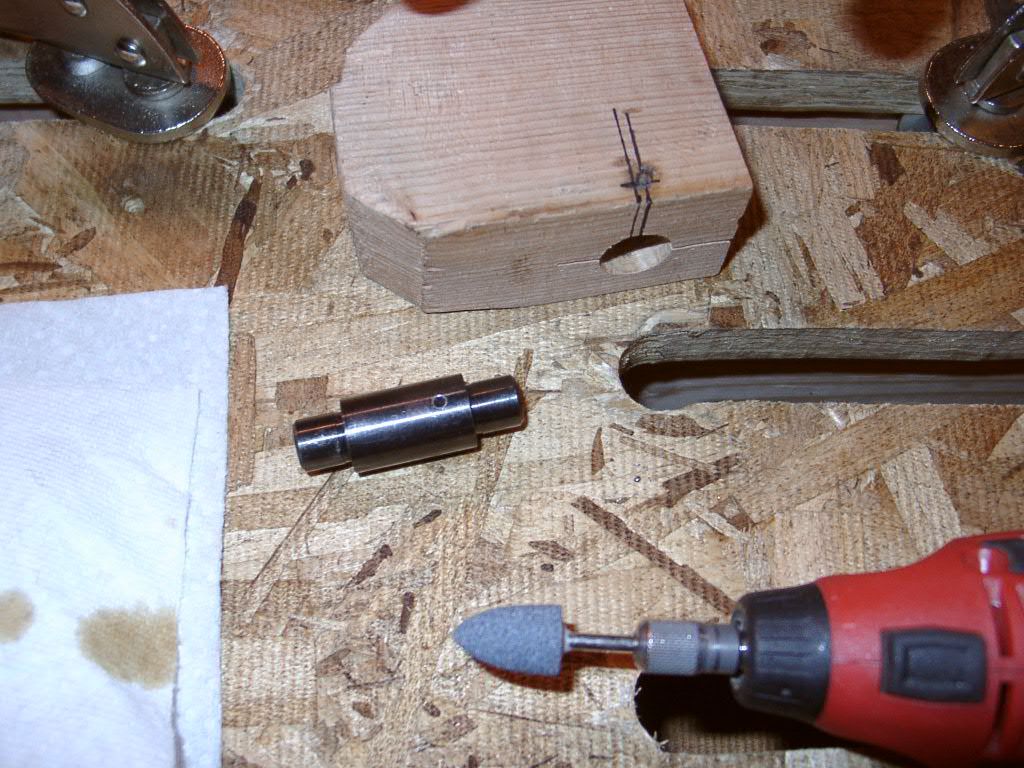
I used the rotary tool to knock down the sharpe edge that was left by the drill bit. Didn't want the hole edge to wear down the bronze bushing.
I then proceeded to test adding oil to the newly drilled pivot (upper arm) versus just dropping oil around the pivot to housing edge on the other arm.
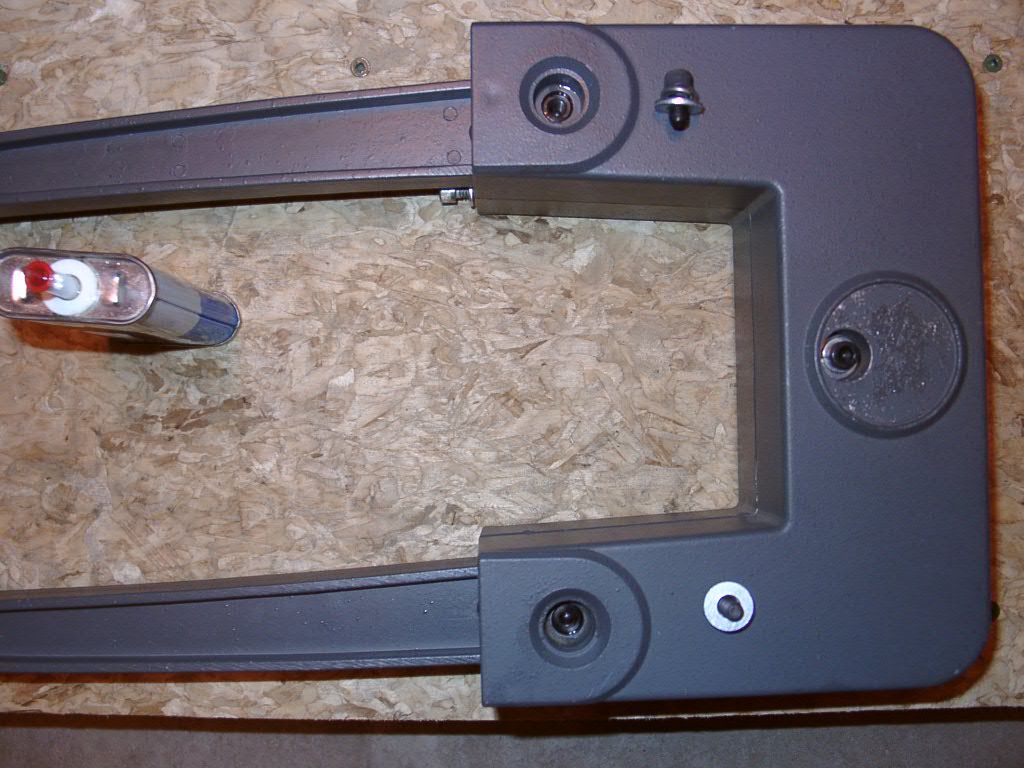
The upper arm got lubed fairly well, but I could tell that I'd have to lay the saw down on both sides after adding oil to get both sides of the arm bushing covered.
The other, non-drilled pivot didn't have any oil reaching the main surface or the other side. The pivots do fit fairly tight into the housing, and didn't let gravity do the trick on the non-drilled pivot during the hour I had the saw on its side.
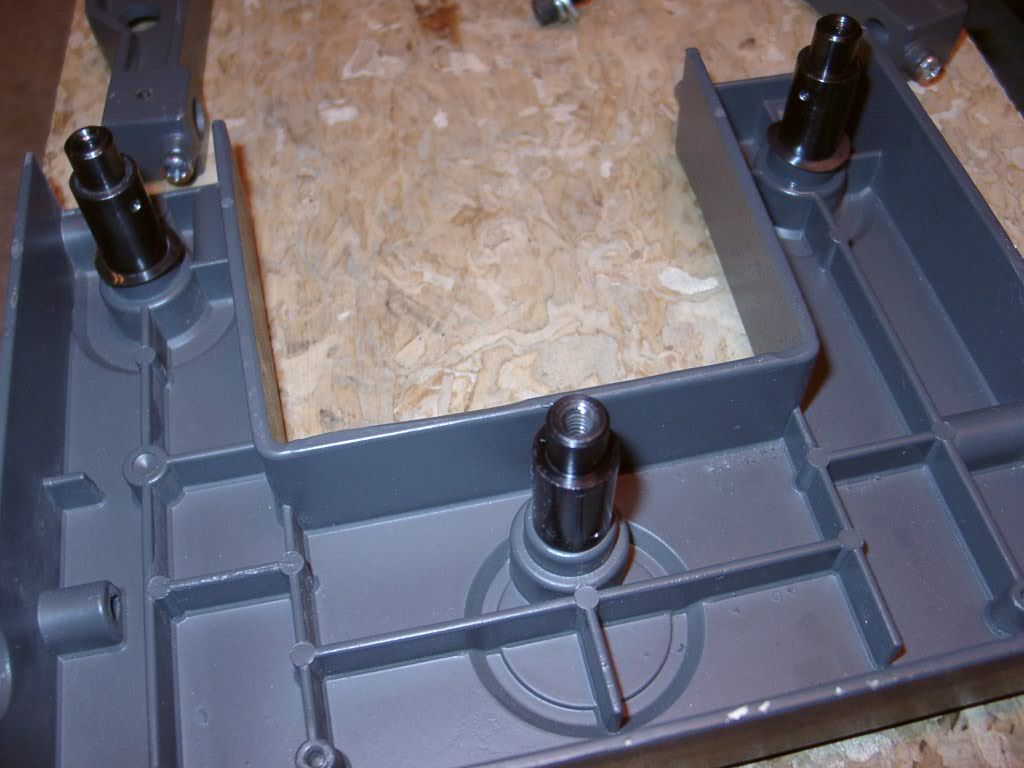
So, onward to drill out the other two arm pivots. Here is a photo for my second test showing the holes in the pivots at an angle where I believe there isn't much force on the bushings while cutting with the saw.
For the next test, I decided to see if Zoom has more capillary action than 3in1 motor oil.
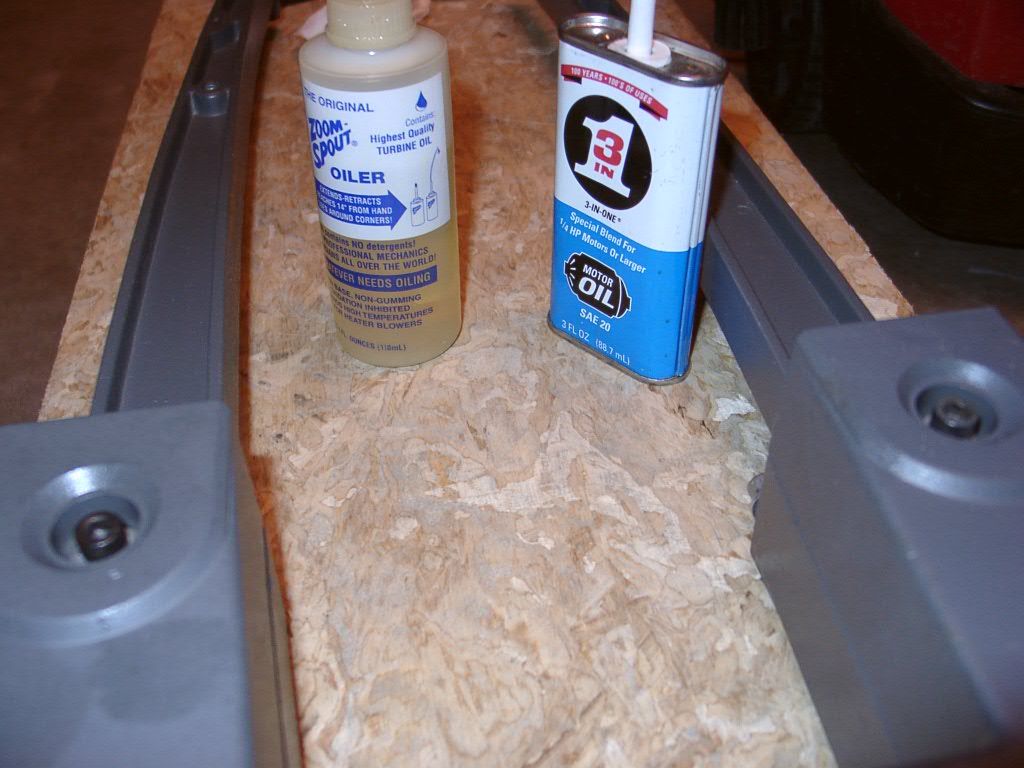
Test was inconclusive, both pivots received oil. I thought I'd need about five drops in the hole per pivot, so I added eight
I'll use the 3in1 for this job, unless someone can report on a different lube that has better capillary action to reach all the areas in contact with the bronze bushing. Its easier to drop the oil in the hole with one hand using the 3in1 can.
That's enough for now. I will finish up reassembling my saw later........hopefully soon.
Well, I forged ahead with the idea anyway and here is my report with photos.
Since there are actually three pivots/mounts in the saw, I had one to experiment with that wouldn't matter if I screwed up. So measuring the mounting/threaded hole depth of the pivots, there was enough depth to them that I wouldn't have to drill them deeper to intersect the oiling/threaded hole.
Here is the three pivots. The depth of the holes is not symmetrical, one side is deeper as seen on my measuring toothpick.
Next up was to make a jig out of scrap 2x4 and drill one pivot for testing purposes. 5/8 hole needed with a band saw cut to allow for clamping the pivot. I drilled a 3/32 hole from the surface to the middle intersecting the threaded mounting hole.
I used the rotary tool to knock down the sharpe edge that was left by the drill bit. Didn't want the hole edge to wear down the bronze bushing.
I then proceeded to test adding oil to the newly drilled pivot (upper arm) versus just dropping oil around the pivot to housing edge on the other arm.
The upper arm got lubed fairly well, but I could tell that I'd have to lay the saw down on both sides after adding oil to get both sides of the arm bushing covered.
The other, non-drilled pivot didn't have any oil reaching the main surface or the other side. The pivots do fit fairly tight into the housing, and didn't let gravity do the trick on the non-drilled pivot during the hour I had the saw on its side.
So, onward to drill out the other two arm pivots. Here is a photo for my second test showing the holes in the pivots at an angle where I believe there isn't much force on the bushings while cutting with the saw.
For the next test, I decided to see if Zoom has more capillary action than 3in1 motor oil.
Test was inconclusive, both pivots received oil. I thought I'd need about five drops in the hole per pivot, so I added eight
I'll use the 3in1 for this job, unless someone can report on a different lube that has better capillary action to reach all the areas in contact with the bronze bushing. Its easier to drop the oil in the hole with one hand using the 3in1 can.
That's enough for now. I will finish up reassembling my saw later........hopefully soon.
-DJ
1960 Yuba MV gold, 1957 MV green, 2-1/2 VIIs to be rebuilt, 2 power stations, 2 bandsaws, 2 belt sanders, 3 jointers, jig saw, scroll saw, strip sander, CH compressor, older sawsmith; all in various states from new to rusted
Lots of accessories, wife calls it all: 'garage junk' :-)
1960 Yuba MV gold, 1957 MV green, 2-1/2 VIIs to be rebuilt, 2 power stations, 2 bandsaws, 2 belt sanders, 3 jointers, jig saw, scroll saw, strip sander, CH compressor, older sawsmith; all in various states from new to rusted
Lots of accessories, wife calls it all: 'garage junk' :-)
-
JPG
- Platinum Member
- Posts: 35600
- Joined: Wed Dec 10, 2008 7:42 pm
- Location: Lexington, Ky (TAMECAT territory)
Sorry I missed your earlier post. I think this is an excellent idea. Being bronze(oilite) bearings, I am not sure that is necessary, but it cannot hurt.
BTW the middle one does not have a bronze bearing to lubricate, so the logo could be permanently reattached.
BTW the middle one does not have a bronze bearing to lubricate, so the logo could be permanently reattached.
╔═══╗
╟JPG ╢
╚═══╝
Goldie(Bought New SN 377425)/4" jointer/6" beltsander/12" planer/stripsander/bandsaw/powerstation /Scroll saw/Jig saw /Craftsman 10" ras/Craftsman 6" thicknessplaner/ Dayton10"tablesaw(restoredfromneighborstrashpile)/ Mark VII restoration in 'progress'/ 10E[/size](SN E3779) restoration in progress, a 510 on the back burner and a growing pile of items to be eventually returned to useful life. - aka Red Grange
╟JPG ╢
╚═══╝
Goldie(Bought New SN 377425)/4" jointer/6" beltsander/12" planer/stripsander/bandsaw/powerstation /Scroll saw/Jig saw /Craftsman 10" ras/Craftsman 6" thicknessplaner/ Dayton10"tablesaw(restoredfromneighborstrashpile)/ Mark VII restoration in 'progress'/ 10E[/size](SN E3779) restoration in progress, a 510 on the back burner and a growing pile of items to be eventually returned to useful life. - aka Red Grange