
Hi,
Been a while in coming but things are looking good on this project.
A while back I had a shopsmith minus headstock and carriage that I used to store some of my SPT's. That went away when I decided to make a system out of it, got a used headstock and my old swapped out 500 parts to put it together.
That system is now almost always in drill press mode. Since this is how it is working out I'm going to use the empty space along the bench tubes as storage (again) for SPT's and plan to keep the headstock vertical "all" the time. Of course there are reasons why "all" ways is not forever.
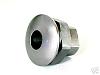
I have a shopsmith mounting base but at $45 each plus postage I don't think I'll get anymore of them just now. I also don't need a lot of the functionality provided by this item. For reference this is the item I'm referring to:
[ATTACH]18416[/ATTACH]
I used sketch-up to design the parts for the 3 versions I need. Version 1 is the simplest one and is designed to screw to a bench or shelf.
[ATTACH]18417[/ATTACH]
Version 2 has the addition of being mountable on the bench tubes, this is the version I will build several off.
[ATTACH]18418[/ATTACH]
Version 3 is more than likely a one of that mounts to the way tubes. I'll see how it works and how much in the way it might get.
[ATTACH]18419[/ATTACH]
In the case of the tube mounted ones I will have a single 5/16 - 18 bolt holding it all together. It should be easy enough take on and off as needed. And they should also be able to stand on their own of the floor if need be.
More in the following posts.
Ed
today in my shop (spt storage project)
Moderators: HopefulSSer, admin
today in my shop (spt storage project)
- Attachments
-
- DSCF3573sc.jpg (58.71 KiB) Viewed 11188 times
-
- ScreenHunter_01 Sep. 11 13.29.jpg (107.75 KiB) Viewed 11194 times
-
- ScreenHunter_02 Sep. 11 13.30.jpg (149.64 KiB) Viewed 11204 times
-
- ScreenHunter_03 Sep. 11 13.31.jpg (140.8 KiB) Viewed 11198 times
Step one was to get the shopsmith out and do a little waxing.
[ATTACH]18420[/ATTACH]
Then find some scraps of plywood. From the easy to get pile I had enough for a version 2 and 3.
[ATTACH]18421[/ATTACH]
After making sawdust out of some of it I was left with a new scrap pile.
[ATTACH]18422[/ATTACH]
The good news was that I was able to make up the prototypes before it all became scrap or sawdust.
[ATTACH]18423[/ATTACH]
After examining the bolt I've decide to order a few snap-lock knobs so it will be even easier to assemble or disassemble these.
Next post will will have some action shots.
Ed
- Attachments
-
- DSCF3554sc.jpg (145.95 KiB) Viewed 11174 times
-
- DSCF3555sc.jpg (114.2 KiB) Viewed 11167 times
-
- DSCF3563sc.jpg (91.33 KiB) Viewed 11159 times
-
- DSCF3574sc.jpg (63.07 KiB) Viewed 11162 times
Here are a few pictures of the two versions I built. First a version 2 located on the "drill press" shopsmith.
[ATTACH]18424[/ATTACH]
[ATTACH]18425[/ATTACH]
This is the version 3 with a beltsander just sitting on the floor feeling pretty stable.
[ATTACH]18426[/ATTACH]
If you've got questions or comments please post them.
Ed
[ATTACH]18424[/ATTACH]
[ATTACH]18425[/ATTACH]
This is the version 3 with a beltsander just sitting on the floor feeling pretty stable.
[ATTACH]18426[/ATTACH]
If you've got questions or comments please post them.
Ed
- Attachments
-
- DSCF3576sc.jpg (93.72 KiB) Viewed 11168 times
-
- DSCF3578sc.jpg (73.44 KiB) Viewed 11180 times
-
- DSCF3579sc.jpg (68.41 KiB) Viewed 11153 times
-
paulmcohen
- Platinum Member
- Posts: 1577
- Joined: Fri Dec 08, 2006 8:10 pm
- Location: Beaverton, Oregon
- Contact:
Why are version 2 and 3 different, what purpose does the extra width of the holder serve?
Paul Cohen
Beaverton, OR
A 1982 500 Shopsmith brand upgraded to a Mark 7 PowerPro, Jointer, Bandsaw (with Kreg fence), Strip Sander, Ring Master and lots of accessories all purchased new
12" Sliding Compound Mitre Saw, 1200 CFM DC
Beaverton, OR
A 1982 500 Shopsmith brand upgraded to a Mark 7 PowerPro, Jointer, Bandsaw (with Kreg fence), Strip Sander, Ring Master and lots of accessories all purchased new
12" Sliding Compound Mitre Saw, 1200 CFM DC
-
curiousgeorge

- Platinum Member
- Posts: 880
- Joined: Tue Feb 27, 2007 1:00 am
- Location: Fort Worth, Texas
-
easterngray
- Platinum Member
- Posts: 720
- Joined: Sun Mar 11, 2007 8:28 pm
- Location: Cape Cod MA.
-
curiousgeorge
- Platinum Member
- Posts: 880
- Joined: Tue Feb 27, 2007 1:00 am
- Location: Fort Worth, Texas
The following drawings should allow you to either make what you have seen in this post or to explore other options that might fit your needs better.
I've broken the drawings in to part drawings then a couple of assembly drawings. Some parts will work for both version 2 and 3, I will note that as I make the posting. To make it as easy as I can this is call out should make things pretty clear.
[ATTACH]18428[/ATTACH]
[ATTACH]18429[/ATTACH]
The common parts are the stackers and sides.
Three stackers make one holder, each storage unit has one holder.
(Note: Material 3/4" plywood scraps)
[ATTACH]18431[/ATTACH]
The stackers are assembled before you drill the holes. The tubes are 1-1/4" Dia. but since you will want a bit of slack to slide them in and out easily the 1-1/4" might be too tight. I went with 1-5/16" and that seems about right, you can of course experiment to determine what you like. If you decide to go smaller make sure you get the hole to hole distance right.
[ATTACH]18432[/ATTACH]
The sides maybe batch cut as they are all the same.
[ATTACH]18433[/ATTACH]
More to come
Ed
- Attachments
-
- version 2.jpg (168.84 KiB) Viewed 11131 times
-
- version 3.jpg (158.39 KiB) Viewed 11123 times
-
- ScreenHunter_13 Sep. 11 21.52.jpg (65.86 KiB) Viewed 11125 times
-
- ScreenHunter_14 Sep. 11 21.55.jpg (80.4 KiB) Viewed 11135 times
-
- ScreenHunter_09 Sep. 11 21.24.jpg (104.47 KiB) Viewed 11117 times