
Again I can't find the original posts on this subject so before the photo collection goes away I wanted to have them somewhere.
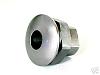
On my old OPR I modified one of the inserts to take guide bushings. This allows for many uses one of which is allowing you to do inlays. Inlays using guide bushing are really simple and I think when you view the pictures you will get the idea. The guide bushing set here is fro a 1/4" bit... some of you may have ones for 1/8" bits as do I but for a lot of things I like the 1/4" size.
[ATTACH]2702[/ATTACH]
[ATTACH]2703[/ATTACH]
As you will see this is just a scrap of plywood but works for this demo. The example is a hole or defect that needs to be fixed... it could also be decorative in nature or used in a pattern...
[ATTACH]2704[/ATTACH]
I'll finish up in the next post.
Ed
Old OPR inlay photos
Moderator: admin
Old OPR inlay photos
- Attachments
-
- opr i1.jpg (128.61 KiB) Viewed 1835 times
-
- opr i2.jpg (116.61 KiB) Viewed 1836 times
-
- opr i3.jpg (74.52 KiB) Viewed 1835 times
{Knight of the Shopsmith} [Hero's don't wear capes, they wear dog tags]
Now to the routing. First you remove the wood from where you want the insert to go. What is not shown is the pattern attached below for the guide bushing to ride in. It can be a circle or oval or what have you as long as the radius let the guide bushings go all the way into the corners.
[ATTACH]2705[/ATTACH]
Now you cut the plug for either matching or contrasting wood. Note the change to the guide bushing lets the bit cut to the outside of the center or plug area. You need to cut deep enough remove the plug and have it taller then the hole you router earlier. If you can it is best to use the smooth top surface to be in contact with the bottom of the hole you made. The "broken" surface where it comes off after making the plug will be sanded smooth afterwords.
[ATTACH]2706[/ATTACH]
When you have the plug and are ready to inset it keep in mind the fit is going to be tight. Do what ever alignment of grain needs to be done before you put it in place... if you don't get it right you might not get another chance, it will be very hard to pull back up to reposition.
[ATTACH]2707[/ATTACH]
Now sand flush and you are done.
[ATTACH]2708[/ATTACH]
Ed
- Attachments
-
- opr i4.jpg (70.91 KiB) Viewed 1836 times
-
- opr i5.jpg (76.48 KiB) Viewed 1833 times
-
- opr i6.jpg (90.42 KiB) Viewed 1834 times
-
- opr i7.jpg (76.38 KiB) Viewed 1833 times
{Knight of the Shopsmith} [Hero's don't wear capes, they wear dog tags]
-
easterngray
- Platinum Member
- Posts: 720
- Joined: Sun Mar 11, 2007 8:28 pm
- Location: Cape Cod MA.
Hi Alec,easterngray wrote:Ed I have just come across this post while searching OPR info. This is great stuff - thanks for your efforts in sharing this most useful info! Alec
I'm glad you found it. I wish it were easier to keep track of all the threads dealing with just the OPR... I know I've posted one on here or the ssug.org dealing with the making of the insert to mount guide bushings but have not been able to locate it. If you come across that one let me know.
Thanks,
Ed
{Knight of the Shopsmith} [Hero's don't wear capes, they wear dog tags]