woodhead52
I need to make 20+ slotted copper buss bars from 1/8" thick 110 copper and some threaded aluminum pieces about 1/4" thick. Has anyone done this type of milling with their Shopsmith? I've cut 1\8" steel with my bandsaw before, but I've not tried to do any milling with the drill press and end mill bits. I have a crappy 6" Harbor Freight Cross vise and I have a speed reducer. I've never used it but, this will probably be a good time to learn. :)
nuhobby
Some years ago, an independent author contributed articles to the Home Shop Machinist magazine about doing this sort of work. He substantially redesigned the Shopsmith Quill for less play in the bearings.
There was also a forum member, holsgo, who got into metal machining. I think he did a modicum of at least lathe work in this forum, but then went off to the rabbit hole of a dedicated metal shop.
SteveMaryland
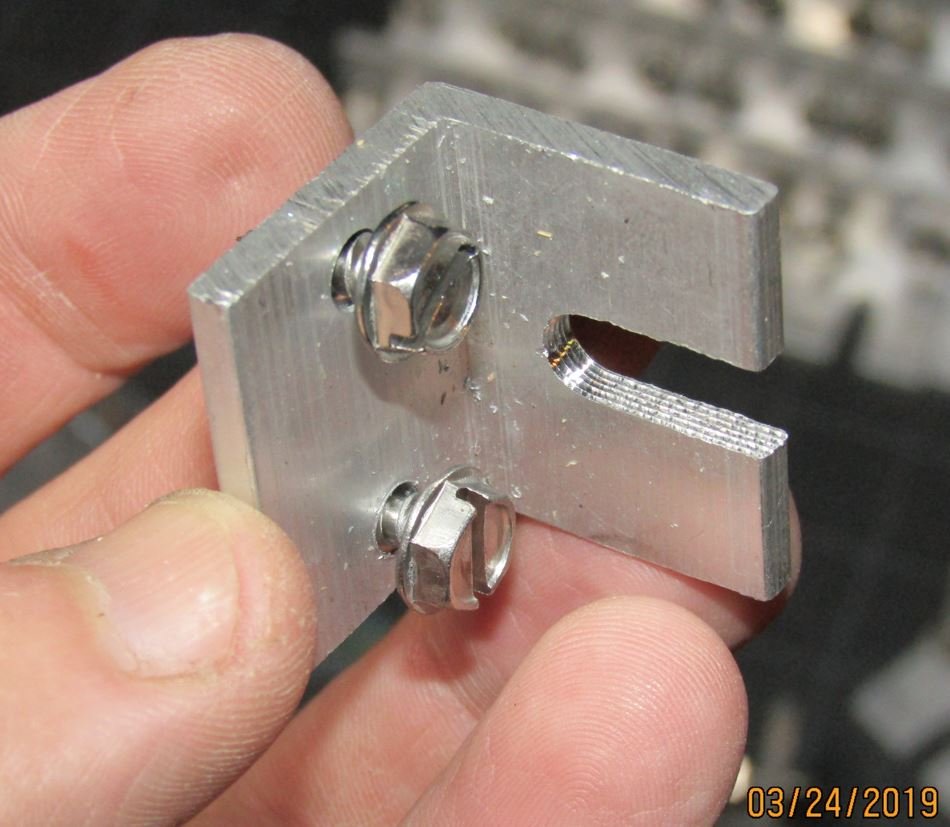
I made up a lot of these aluminum angle brackets using the Shopsmith and a 3/16" diameter milling cutter + drill press + bandsaw.
I got useable brackets but a lousy finish and positional accuracy/repeatability. Shopsmith RPM is too slow and frame/table just does not have the rigidity needed to get results comparable to a milling machine. Better fixturing and a speed increaser would have helped but I did not invest the time/money. Not the fault of Shopsmith really...
edma194
Brackets like above can be made from angle stock, but mainly through cutting with saws and drilling. I want to find a heavy cross slide and see if actual milling operations can cut cleanly but vibration is the main enemy.
Hobbyman2
Harbor freight sells a machinist vise
https://www.harborfreight.com/6-inch-cross-slide-vise-32997.html , I have used it on the SS for machining the details on walnut gunstocks and even made mortise and tenons but I haven't tried it on metals .
woodhead52
https://photos.app.goo.gl/Nexwc12gnDrxgTr49
Thanks for your responses.
The above link is an image of the pieces I want to duplicate with thicker material. I have a 6" HF cross vice. It's basically awful, but when bolted to my table I believe it's functional enough for my needs. Someone suggested using end mill bits for what I'm doing and the router chuck instead of the Jacobs drill chuck. Opinions?
To date my only metal working experience USING my Shopsmith involved cutting so trailer chassis parts from 1/8" thick steel using the bandsaw and a 1/4" blade I sourced locally that was made to cut metal. That worked out great. No over heating or problems. I took it slow and careful.
Please keep in mind that milling is new to me. Which is why I'll be asking dumb questions.😉
edma194
I'll say up front I don't have a ton of milling experience, it's all been small parts that weren't very complicated. I use aluminum a lot because it cuts easily but you can't clean up after it with a magnet, you'll have the same issue with copper.
Definitely use a router chuck. Assuming you are operating in drill press mode you can get an adjustable stop collar that will give you fine positioning control on the Y axis. I wish there was something similar for the quill for fine cutter depth adjustment. You may want to use a table support leg to further stabilize the table.
What size stock are you starting with? What kind of cuts do you need to make? If endmill is appropriate you want one made for aluminum with 2 or 3 flutes. I think a metal supplier can probably cut the bus bars to size with a shear. The profile of that little piece looks complicated, is the precise shape important?
woodhead52
Shearing would be great because there's virtually no waste, but I purchased my stock from online metal and I don't think they do special orders, but I also wasn't interested in paying the high amount often charged for cutting. Anyway I have the means to cut everything with decent accuracy. The copper is 3/4"W x 1/8"Thick. The aluminum is 3/4"W x 1/4"Thick. On the aluminum I will not be beveling like the piece I'm replacing.
The copper pieces will be 3-1/2" and 4-1/2" long. The aluminum will be cut to about 1-1/2" long.
woodhead52
Thank you all, for your time, advice and experience. I'm looking at my options and I plan to share what I end up doing on this thread.
roy_okc
I assume that you know that you can cut the aluminum and maybe copper to length with a carbide saw blade. I'd definitely recommend using a sled and having both sides of the material clamped down when doing so. It might be a bit better using a miter saw, if you have one, again, though, clamp both sides of the material. You might want to get an inexpensive 40 or more tooth blade, you could even use a 7-1/4" blade if you have a 5/8" arbor. Wear a full face shield when cutting, tiny very sharp chips will fly; if you don't have one, Harbor Freight has good enough. You might also want to wear an apron, definitely closed shoes, etc., to protect against chips finding their way into areas on your person you'd rather not have them.
With the pieces cut, I don't see any milling operation on the aluminum, just a single drilled and tapped hole, correct? Create some sort of jig that you can put the pieces in, maybe with a couple screws & washers to hold it down/steady for drilling. If you have two drill chucks, you could quickly swap from drill to tap, put a sanding disc on the left side of the headstock (remove the upper spline hub and attach the disc) to give leverage to turn manually.
For the copper bar slots, you'd probably want to use a drill to try to remove as much material as you possibly can before using a mill bit that is smaller than the slot to work one side at a time using conventional, not climb, cutting with very shallow passes. Figure out how to attach the cross slide to the table as solidly as you can, plastic speed clamps and such will not do; you might even want to consider firmly attaching to a piece of plywood the size of your table and then clamping the plywood to the table. Make sure the gibs for the both X (left-right) and Y (front-back) are as snug as you can make them while still allowing movement. Lock the Y gibs to do all the drilling operations. Set up fairly solid stops of some sort for
the vise in the X direction for your minimum and maximum hole distances, this will help with repeatability. Place the copper piece at the same place in the jaws, probably matching the edge of the vise jaws, put a slightly narrower piece of wood under the copper piece to raise it up and act as a support + sacrificial piece. As I mentioned above, drill out as much as you can, similar if you were using a drill to create a mortise. I recommend you keep one side of the material against the same jaw, let's call it the far jaw, to help keep track, maybe mark one edge of the copper with a sharpie, flipping end over end between slots. With all drilling done, loosen the Y gibs very slightly so that you can just move that axis with medium light effort and swap out to the end mill in the router bit chuck pushed in as far as possible, turn your speed down to slowest. Remount each end the same as before with the same marked edge against your reference jaw, move your Y so that the end mill just touches the highest spot on an edge, note the location on the Y's indicator ring, move the X to your starting point, move Y so that you'll engage a very small amount of material, a few thousands of an inch to start, and proceed to feed the X axis trying to keep a constant as possible feed rate. For conventional milling, I believe (I get still get confused) you want to do the edge nearer to you from right to left and the far edge left to right. After each pass, back the vise away from the end mill, return to the starting point, move the vise back toward the mill and a little extra, rinse, repeat until you have that edge done. I recommend only working one edge of the slot at a time rather than trying to go back and forth. By listening to the cuts, you should be able to figure out the optimum pass increment.
Another option for the slots in copper, which might be better in your case, is to not attempt any milling, do all mentioned above, but use a file to bring the leftover protrusions flush with the needed slot line.
woodhead52
Roy,
Very sorry for this very tardy reply. Somehow I missed the notice. Wow, that was a lot of detailed info.
So, for anyone that's interested, here's what I've done so far and how it's going. I came up with the idea of creating a crosscut sled for the Bandsaw. I checked Youtube and found a very helpful and simple video.
I made the sled and whizzed through cutting up to copper busbars. I have not cut the aluminum yet, but expect no problems. I used the sanding disc with fine grit to smooth ends which were straight and square but a bit grainy form the half inch bandsaw blade. I used the bandsaw for a couple reasons, but the main one was the narrow blade kerf.
Here's my attempt at a video:
I decided that I really didn't want to try and mill with the Shopsmith as I came to understand the difference between a vertical mill and a drill press. Definitely two very different machines. I found a local place called 757Makerspace it's a membership kind of place with all kinds of grownup toys. Woodworking equipment, CNC machines, laser cutters, milling equipment, and so on. I joined for the month of August to use the milling equipment and see what else I might like about the place. Unfortunately the equipment is proving to be poor quality and it has not been kept up. At least this is true of the milling equipment. I've glanced at the woodworking equipment and it appears old and also in varying conditions. I will say though, that it seems to ready made for some of the younger adults here as they are using it to start fledgling businesses.
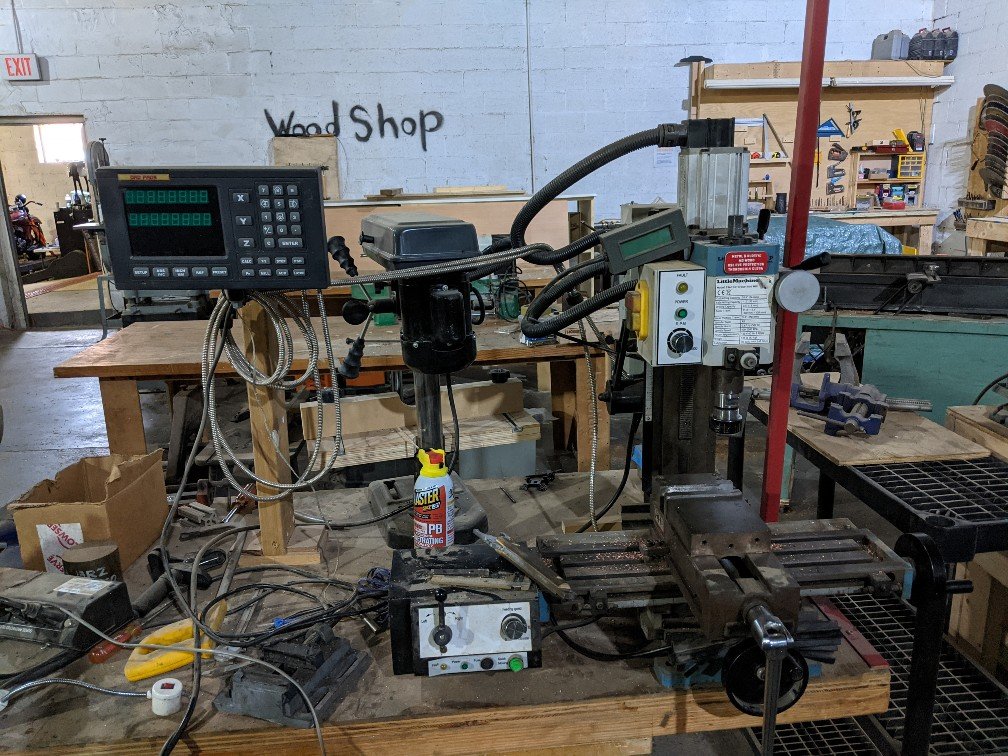
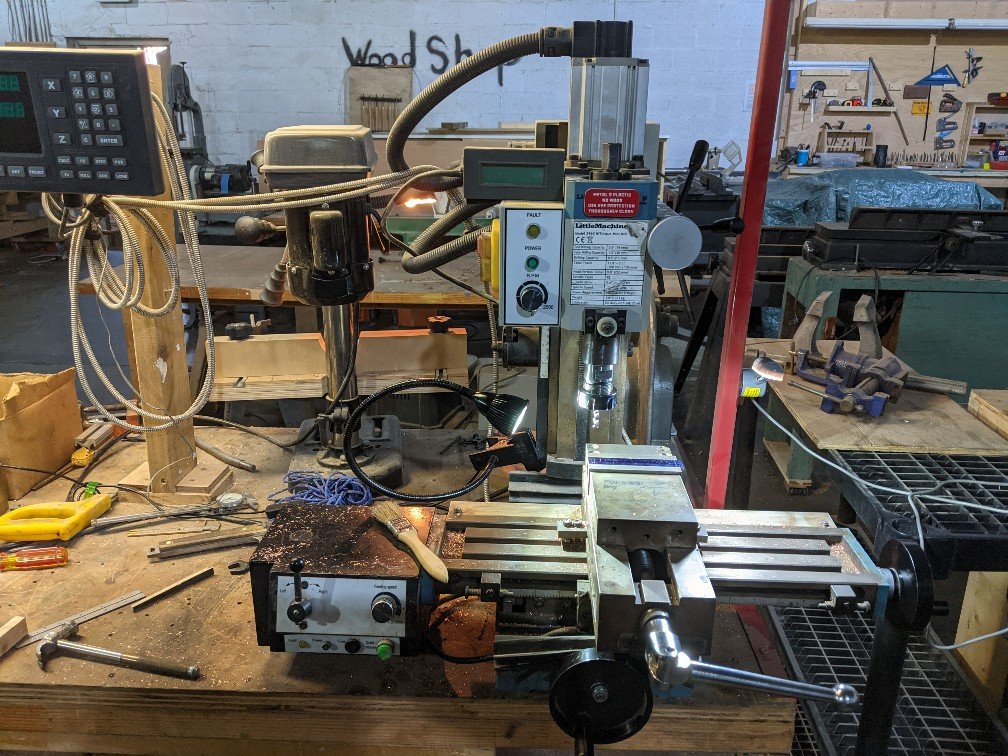
I'm cutting slots in my busbars, it's a slow process with not great results. Not being terribly experienced with milling it's hard to explain the problems, but lets just say that the machine I'm using doesn't exactly hold alignment very well. It's the Little Machine Shop 3960 HiTorque Mini Mill. None of the electronic motor controls work so I do it manually. Lots of cranking. The machine is not bolted down so there's vibration and movement. C'est la vie, I'm getting the job done. It will be acceptable for what I need it for, but obviously I'm less than thrilled. Oh, I forgot to mention it's not well light back where I am so I brought my own lights. That at least helped me see what I'm doing. Tomorrow or Thursday I'll take a fan with me, because there is no AC either and it's hot as blazes in there.
I'll post a few more pictures in a few days or so.
roy_okc
Pete,
That's a nice little sled, looks like it does the job well.
With the setup at the maker space, I'm not sure if you're ahead of trying to mill on the Shopsmith or not, LOL. I understand that some copper, depending on the alloy, can be a bit difficult to mill, but I don't know in what ways.
woodhead52
roy_okc wrote
Pete,
That's a nice little sled, looks like it does the job well.
With the setup at the maker space, I'm not sure if you're ahead of trying to mill on the Shopsmith or not, LOL. I understand that some copper, depending on the alloy, can be a bit difficult to mill, but I don't know in what ways.
Thanks Roy, I'm pretty happy with how well it works. As for the mini mill I'm using, you're probably right! As for copper I've been communicating with some guys on s milling forum. Although it's a soft metal it's what they call sticky. It kind of grabs milling bits and requires lighter cuts, etc. I'm sure over forgotten other important stuff. I'm making busbars so these don't need to be crown jewel perfection and believe me they are not! As I mentioned I'm adjusting the y axis by hand and then slowly rotating the crank at the end of the x axis to cut the slot after I slowly plunge cut through the busbar. If I get even slightly carried away it let's me know quick with very unpleasant shudders. All of that said, I also take some responsibility that I'm using a 1/4" end mill to cut a 1/4" wide slot, so there's a lot of surface contact and this grabbing. Even though I'm doing conventional cuts, is also climbing on the opposite side. Thank goodness I'm only doing it in 1/8" thick copper. So yeah, gotta admit my part in all of this. Haha.
Here's a couple shots of the mini mill. The first one is before I cleaned it up a bit and worked on aligning it with a dial indicator. The second is with an end mill bit chucked up and a busbar in the vice. And a couple decent LED lights I brought from my workshop at home. 😆