cat_couple wrote:Merry Christmas!!!!!
Well I wanted to post again ........
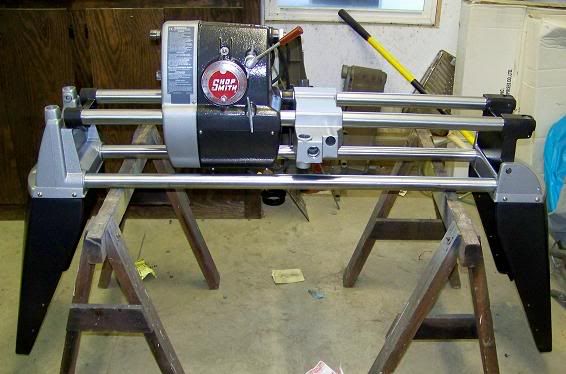
I am in process of doing the casters. I received the new wheels yesterday from Grizzly, and have primed and am currently painting the caster parts. Should reassemble Casters by Saturday. Also the mechanicals are back in the carriage, and the table is disassembled.
Merry Christmas!!!
Eric and Janie
Great progress Eric. It really looks nice!!
Since you said your doing your casters, I wanted to share this tip in the event that you aren't aware. If your a pro already, bear with my instruction. It will help others. If your not, plan on a struggle getting orientation of stuff figured out unless you have photos to go by or if you marked everything prior to disassembly. It disassembles
much easier than reassembles.
The caster reassembly can be (is) a mind game in order to get the cams, lift posts, foot lever, and rods back on in the correct orientation. I just went through it on my ER10 and I am going to post a detailed how to instruction but in case I don't have it posted by the time you do it, here's the most important trick.
DRY assemble the entire caster assembly with
slip fit machine screws
first. The machine screw must be long enough to pass completely (or darn close) though the entire cummulative hole. The screws will ensure that you have everything in the correct place, in the correct orientation, AND also serve as pilot guides as you actually tap the spring pins (or roll pins) in place. This will ensure that you don't break your aluminum castings (as jpg experienced first hand) and is THE MOST important step.
.
.
[ATTACH]7073[/ATTACH]
.
.
Here's a pic of a roll pin (aka spi
rol pin) vs. a spring pin. Both serve the same purpose.
.
.
[ATTACH]7074[/ATTACH]
.
.
Leave the machine screw in place as you start tapping your spring pin in. Keep a finger
pressing against the machine screw as the spring pin goes it. Let the spring pin push the machine screw out. This ensures exact alignment.
Good luck. Hopefully, I get my complete caster reassembly thread done by the time you start. It could save you much frustration.
p.s. You having trouble uploading and posting photos so that they show up within the post?? I noticed your last post used photos from an upload site vs. ShopSmith yet previous posts you made they showed up as links.