Page 2 of 3
Re: Today in the shop (sliding mortising jig for 520)
Posted: Sat Feb 14, 2015 8:37 pm
by reible
algale wrote:I have been following this thread with some interest and obviously will be interested in seeing the final product.
I'm curious, if one had an X-Y vice like a machinist uses and were to mount it to the table somehow, would that accomplish what you are looking to do?
The slide action is what I'm looking for in one direction. The other direction is the shopsmith main table racking in and out and it becomes locked before cutting starts. This is the general thing that an x-y vise does, at least concept a vise of this sort would work.
Ed
Re: Today in the shop (sliding mortising jig for 520)
Posted: Sat Feb 14, 2015 9:08 pm
by reible
The parts I had ordered arrived this past week and today I got to work on the project again. When I had last left the project I was waiting on a muli-track and brackets that I was planning on using as a fence.
You can see how that worked out in the following picture, from the rear first.
Re: Today in the shop (sliding mortising jig for 520)
Posted: Sat Feb 14, 2015 9:13 pm
by reible
Something odd is happening, I can add a photo but can't add anything more after that??????????????
See if closing and reopening the browser helps.
The next picture is a side/front view.
Re: Today in the shop (sliding mortising jig for 520)
Posted: Sat Feb 14, 2015 9:15 pm
by reible
Well somethings not right, me or ?? Will reboot system and see what happens after I flush cache.
Ed
Re: Today in the shop (sliding mortising jig for 520)
Posted: Sat Feb 14, 2015 10:32 pm
by reible
As you will have noted the "fence" is quite long, 36" to be exact. I'm not planning to cut it down unless I find a compelling reason to. As it is it will be simple to remove it from this jig and use it on another, why not take advantage of that?
It will surely be an add on to this project:
http://www.shopsmith.com/ss_forum/viewt ... 1&p=174897
The fence can slide left or right within the range of the mounting hardware which could also have advantages, maybe allow stock placement of larger pieces?
Right now I grabbed a rolling stop out of my collection to function as a work piece locating stop. Any hardware that works on t-tracks should work just fine. I had the stop on the left side but it could just as well been on the right, and as I mentioned the fence can be moved as well.
For what ever reason it is just putting the image at the bottom and not inline??????
So that is it for me tonight. Will see if thing resolve themselves over night.
Ed
Re: Today in the shop (sliding mortising jig for 520)
Posted: Sun Feb 15, 2015 1:23 am
by JPG
Hopefully an example of how to place pix within text.(worked before today).
First click on 'upload attachment'. Then browse to get pix, then 'add the file'. Click on 'place in line'.
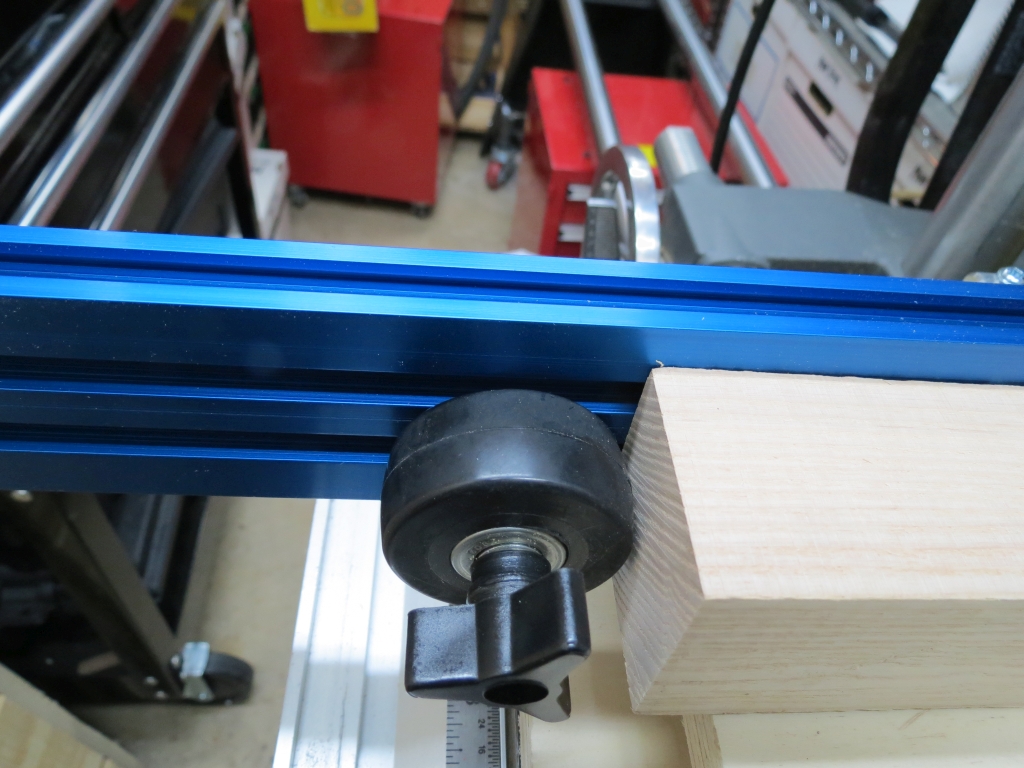
- Eds mortise jig stop.jpg (479.83 KiB) Viewed 2911 times
Which should have been here.
- Clipboard01.jpg (54.83 KiB) Viewed 2911 times
All that stuff(screen prompts etc.) keeps adding to the bottom of the screen(ya gotta scroll down to see/get to it).

So there you have two images embedded into text.
Clumsier than the 'old' way but tis possible to get there.
I had to do this over twice(human factors not very good with the flipping back and forth below the visible screen).
Re: Today in the shop (sliding mortising jig for 520)
Posted: Sun Feb 15, 2015 11:52 am
by reible
OK it is another day. JPG posted how it should work, this is also how I have been doing it. Last night when I added a second or third photo they all went to the bottom of the post and would not show up as in line. This is today's attempt to see if things are now working for me. It will also contain more information about the project.
Before using the jig you will need to draw a mortise on the wood where you want it. This needs to be done to align to. I stared by doing so by wanting to make a 3/8" wide, 2" long mortise. The width is controlled by the router bit and I used the bit to set the width along the table travel path as shown here:
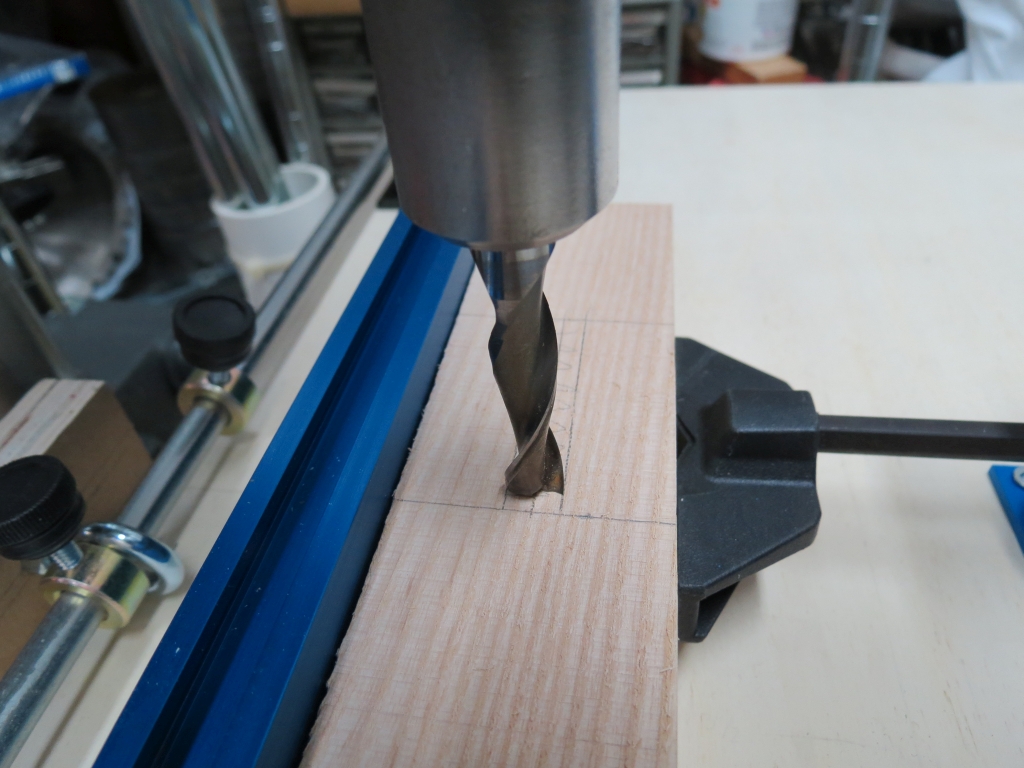
- IMG_6374sc.jpg (439.19 KiB) Viewed 2888 times
Once this is set I turn the bit to set the start point. The stop collar is locked at that point as shown here:
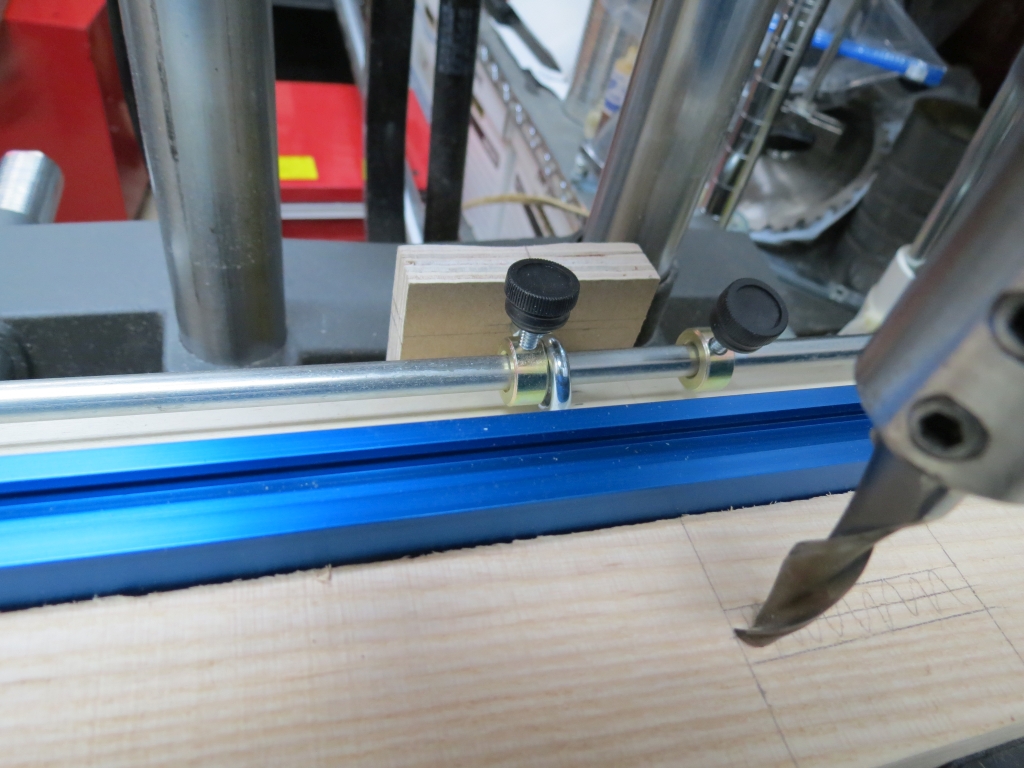
- IMG_6376sc.jpg (467.44 KiB) Viewed 2888 times
Now the table is moved to the location of the stop point. The stop collar for this point is set.
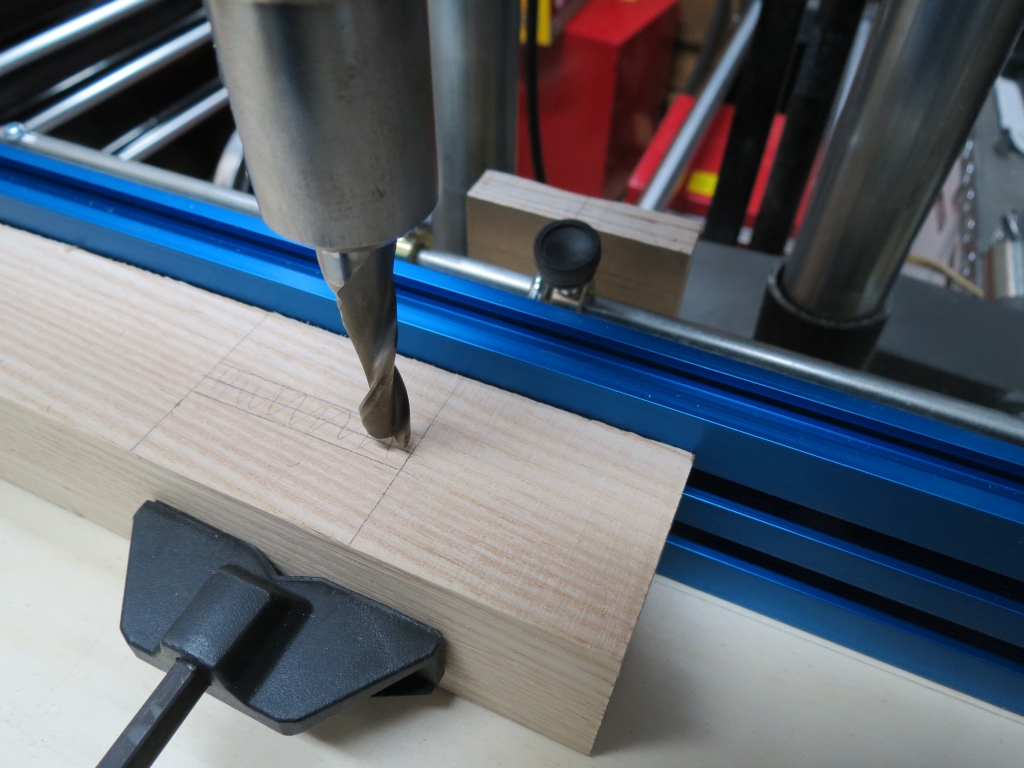
- IMG_6377sc.jpg (500.46 KiB) Viewed 2888 times
At this point the jig is ready to go. I proceeded to then make several passes to make the mortise, the results are shown.
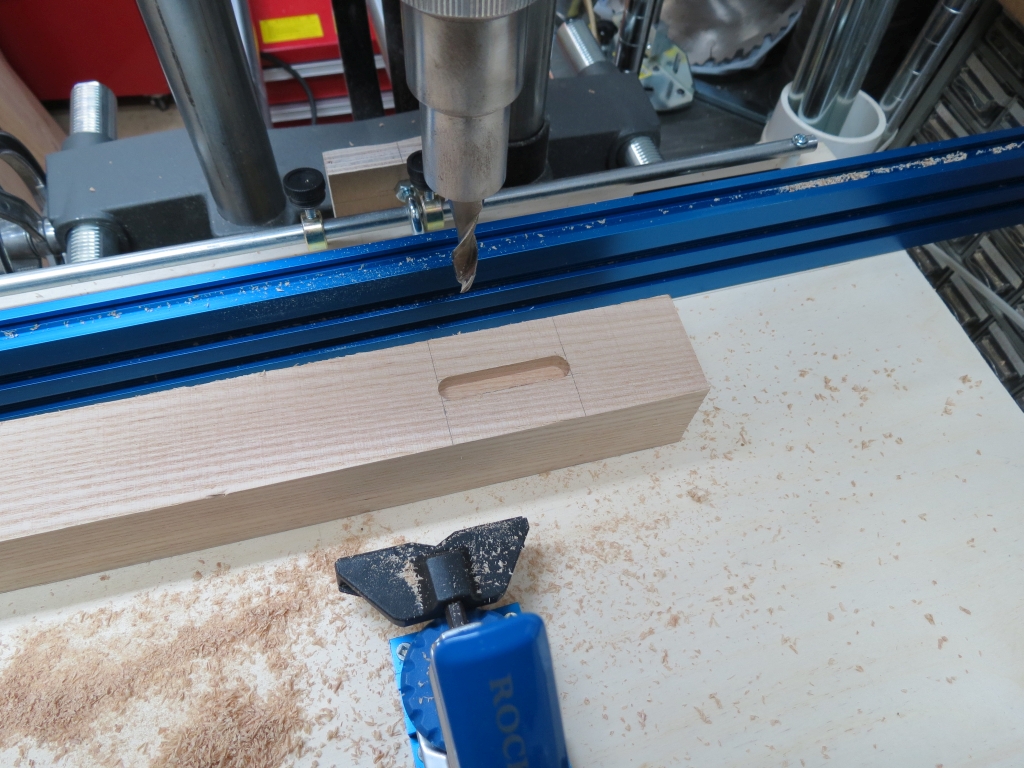
- IMG_6382sc.jpg (574.76 KiB) Viewed 2888 times
While it works as shown I do have a few tweaks I need to make. The biggest one is that with the present spacing of the brackets the fence flexes/bows when the clamp is engaged. I have it set for near maximum force(500 lbs), maybe more then it needs?? I could reduce that but I think I would rather work at re-spacing the mounting brackets. This could have a ripple effect on other parts of the design. I do have other options to explore so the end is not yet in site.
One of the other changes I made that you might have noticed is knobs on the stop collars. I had been planning on doing that but when I went to the hardware store that stocks those sorts of part I found they had gone out of business.... Looks like it is now catalog only for me now as I know of no other stores in my area that had a good collection like they did.
So time to submit this post and see what the pictures look like today.
Ed
Re: Today in the shop (sliding mortising jig for 520)
Posted: Sun Feb 15, 2015 12:12 pm
by JPG
Since each added pix creates an identical 'window' at the bottom(where the Place inline 'button' is) it is easy to place the wrong pix 'inline.
Also I neglected to state the cursor must be pre located where the pix is to go before clicking on 'Place inline'.
Obviously you got it done.
I find it frustrating.
Re: Today in the shop (sliding mortising jig for 520)
Posted: Sun Feb 15, 2015 12:51 pm
by rpd
JPG wrote:Since each added pix creates an identical 'window' at the bottom(where the Place inline 'button' is) it is easy to place the wrong pix 'inline.
Also I neglected to state the cursor must be pre located where the pix is to go before clicking on 'Place inline'.
Obviously you got it done.
I find it frustrating.
To avoid confusing myself

, I upload and then "place inline" each photo before uploading the next one.

Re: Today in the shop (sliding mortising jig for 520)
Posted: Sun Feb 15, 2015 1:10 pm
by JPG
rpd wrote:JPG wrote:Since each added pix creates an identical 'window' at the bottom(where the Place inline 'button' is) it is easy to place the wrong pix 'inline.
Also I neglected to state the cursor must be pre located where the pix is to go before clicking on 'Place inline'.
Obviously you got it done.
I find it frustrating.
To avoid confusing myself
, I upload and then "place inline" each photo before uploading the next one.
With multiple identical 'windows' with the 'place inline' button, confusion is self starting.
I guess I be spoiled with the previous way(add pix[all at once], then add comments).
It will all work out with more 'practice'.
