Page 2 of 3
Re: Today in the shop (sometime you feel like a nut)
Posted: Mon Jun 08, 2015 11:42 am
by JPG
I do not know what you are considering re attaching the legs to the 'seat', but the lines drawn lead me to think you are thinking cutting the legs at an angle to be 'flush' with the bottom of the seat.
I think leaving them 'square' and drilling sockets at the leg angle into the bottom of the seat would be preferable. The bored sockets would also have square bottoms to mate with the legs. Since I assume this is a 'portable' seat, the holes would need to be slightly oversized.
Drilling at this 'odd' angle is a trivial task with the SS tilting drill press table.(but you already know that!

)
Re: Today in the shop (sometime you feel like a nut)
Posted: Mon Jun 08, 2015 2:10 pm
by everettdavis
For a moment, when I saw the nut with three bolts entering the sides I thought he might be channeling his inner Doctor Emmett Brown, and attempting to build a flux capacitor to power his shop of the future....LOL
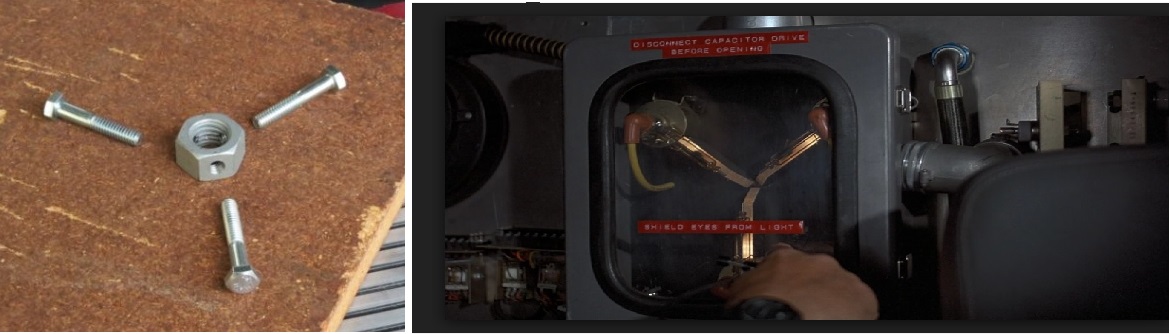
- Nut with Bolts on Three Sides.jpg (104.67 KiB) Viewed 8429 times
Re: Today in the shop (sometime you feel like a nut)
Posted: Sat Jun 20, 2015 7:01 pm
by reible
JPG wrote:I do not know what you are considering re attaching the legs to the 'seat', but the lines drawn lead me to think you are thinking cutting the legs at an angle to be 'flush' with the bottom of the seat.
I think leaving them 'square' and drilling sockets at the leg angle into the bottom of the seat would be preferable. The bored sockets would also have square bottoms to mate with the legs. Since I assume this is a 'portable' seat, the holes would need to be slightly oversized.
Drilling at this 'odd' angle is a trivial task with the SS tilting drill press table.(but you already know that!
)
Until JPG spoke up I was going to be content with a much more simple solution to the leg issue. After thinking it over I decided to go ahead and drill the base to except the legs.
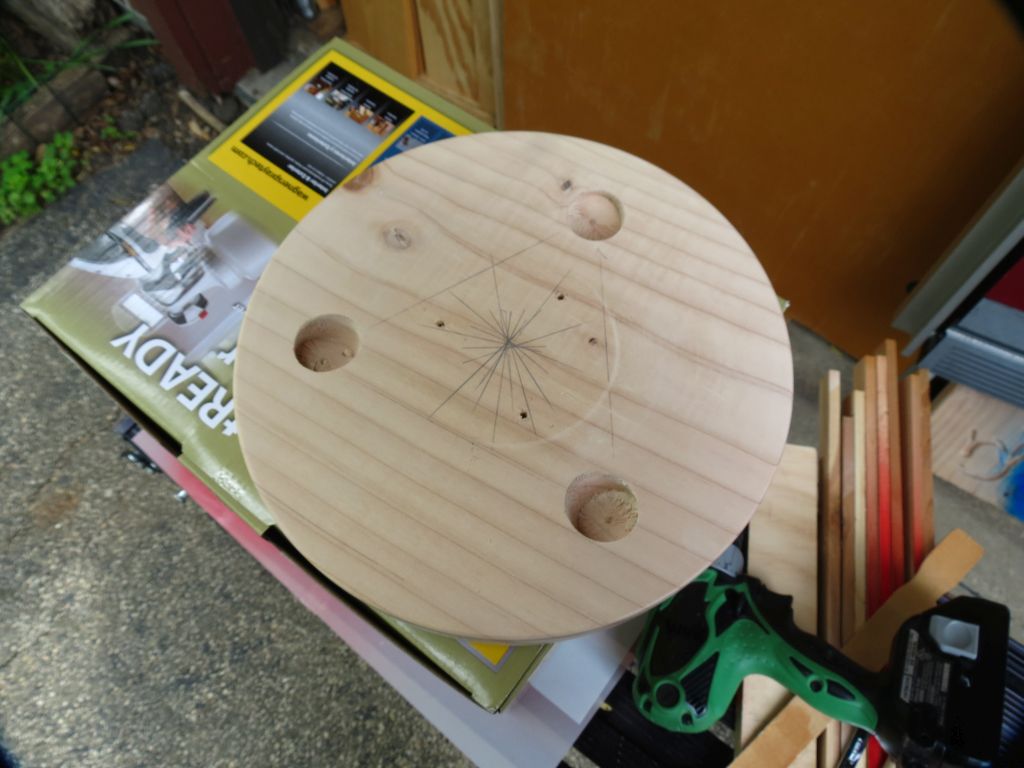
- IMG_7309sc.jpg (103.68 KiB) Viewed 8391 times
I was close enough to have it fit.
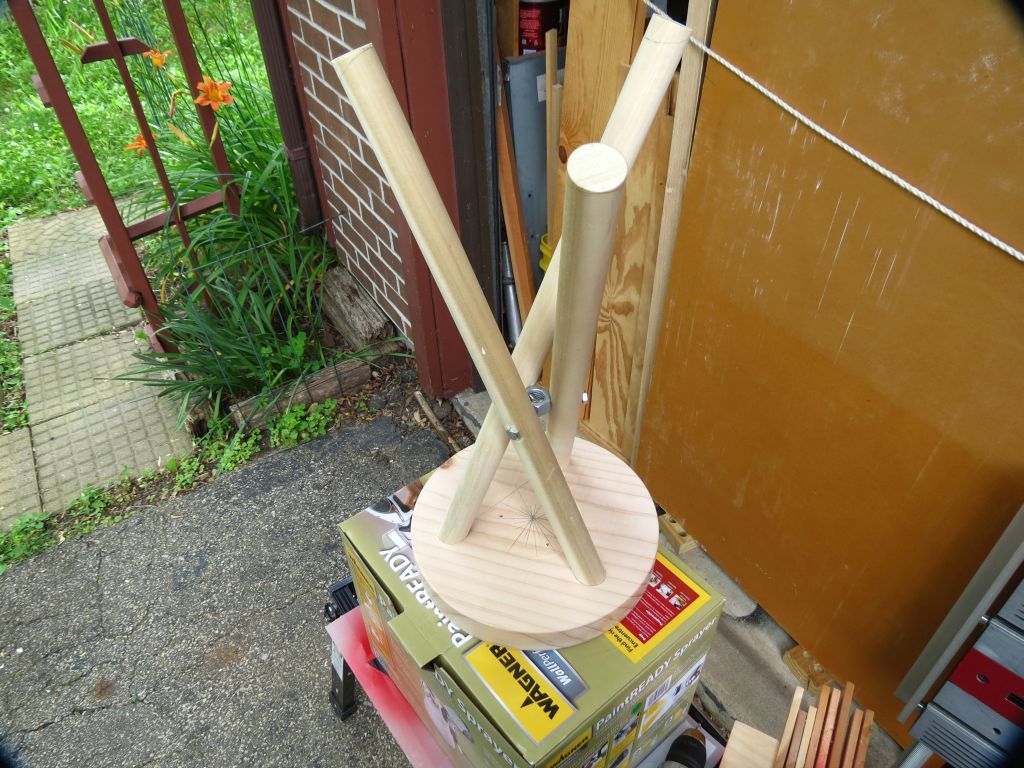
- IMG_7311sc.jpg (178.7 KiB) Viewed 8391 times
I've also tested it by sitting on it. It held so I feel safe resting a full glass of ice tea on it.
While the process was some what straight forward I wanted to share one issue that I had. I established the location of the holes by using a two pointed nail driven into the legs and through the strapping pictured earlier. Since the legs were sitting on the top I used an bevel gauge to find the angles needed.
On the shopsmith I tilted the table to match the angle using the same bevel gauge. The location of the drill was established by using he miter gauge and the rip fence.
I don't have a picture of the set up for the actual drilling so I did do a recreation that shows how the problem comes into being.
In this photo a small bit is trying to locate the hole location, after things are located I would switch to the 1-1/8" bit for the actual hole.
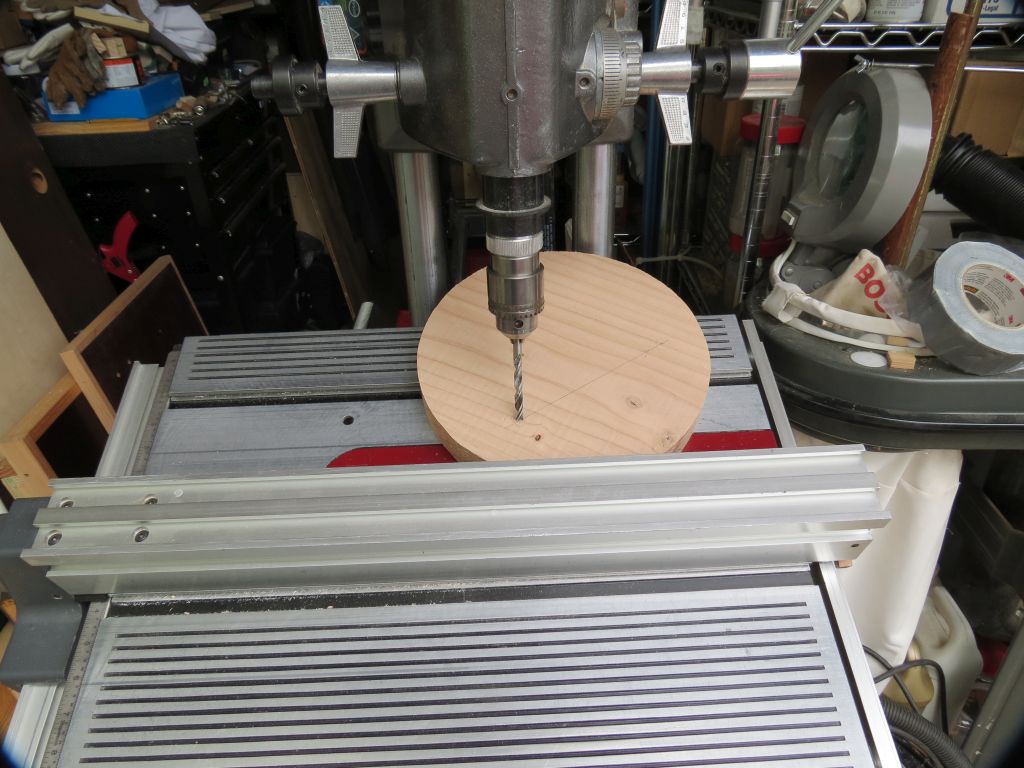
- IMG_7306sc.jpg (137.1 KiB) Viewed 8391 times
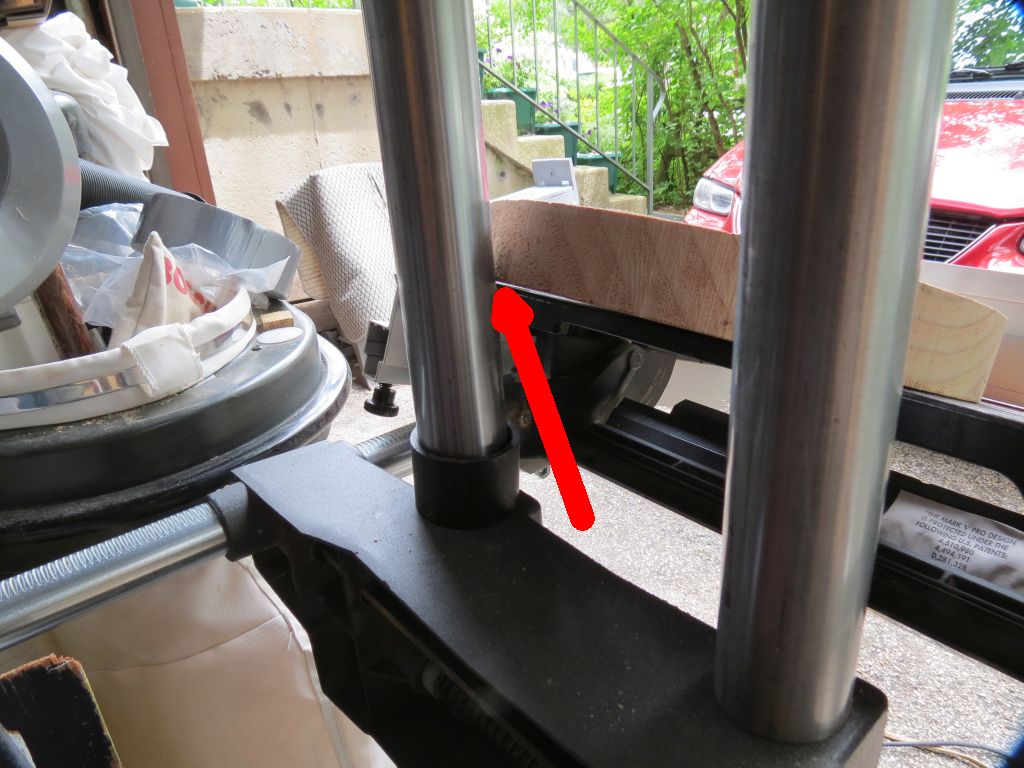
Having two columns combined with the size of circle and the hole location caused a problem..... it would not fit, as shown here:
- IMG_7305scm.jpg (136 KiB) Viewed 8390 times
I had to fudge factor it and while it was not as I would have like to have it it still worked. Had it been a drill press with a single column in this case it would have been better. I've only run in to this sort of issue a couple of times since getting my shopsmith in 1976 so I have to forgive it.
So now it to the point of final sanding and then deciding on what finish I want to use.
Thanks JPG I think this is a more elegant solution to mounting the legs.
Ed
Re: Today in the shop (sometime you feel like a nut)
Posted: Sat Jun 20, 2015 7:19 pm
by rpd
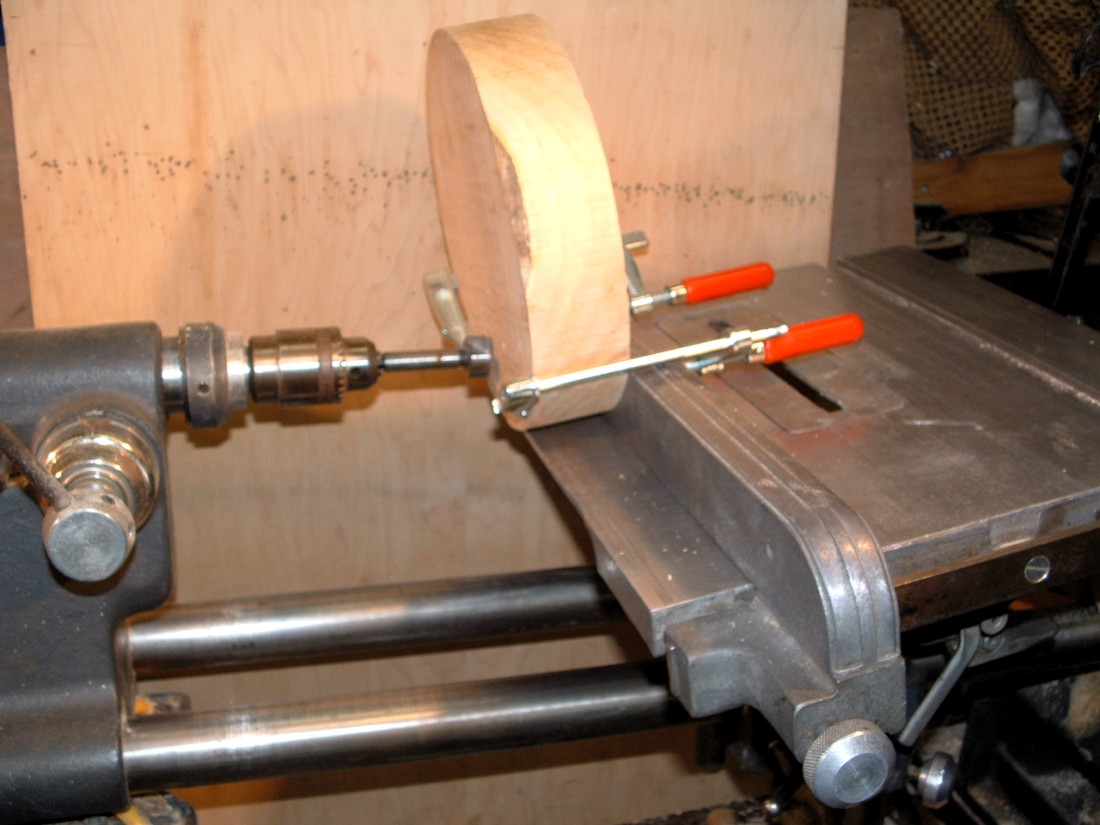
Would horizontal boring mode have worked for those holes?
Clamp the seat to the rip fence and tilt the table to get the angle.
There is more than one way to skin a squirrel.

Re: Today in the shop (sometime you feel like a nut)
Posted: Mon Jun 22, 2015 12:38 am
by charlese
Good going, Ed

I've been racking my grey head to try to come up with a simpler solution. Agreed - the sloped holes are a good solution, but when running into the double post issue it had to be fudged. We call it workmanship!!
Assuming a shorter table height is not a problem I think shortening the top of the legs by an inch or so would have allowed you to move the fence back enough so the seat would lay flat on the drill table.
Re: Today in the shop (sometime you feel like a nut)
Posted: Mon Jun 22, 2015 10:06 am
by JPG
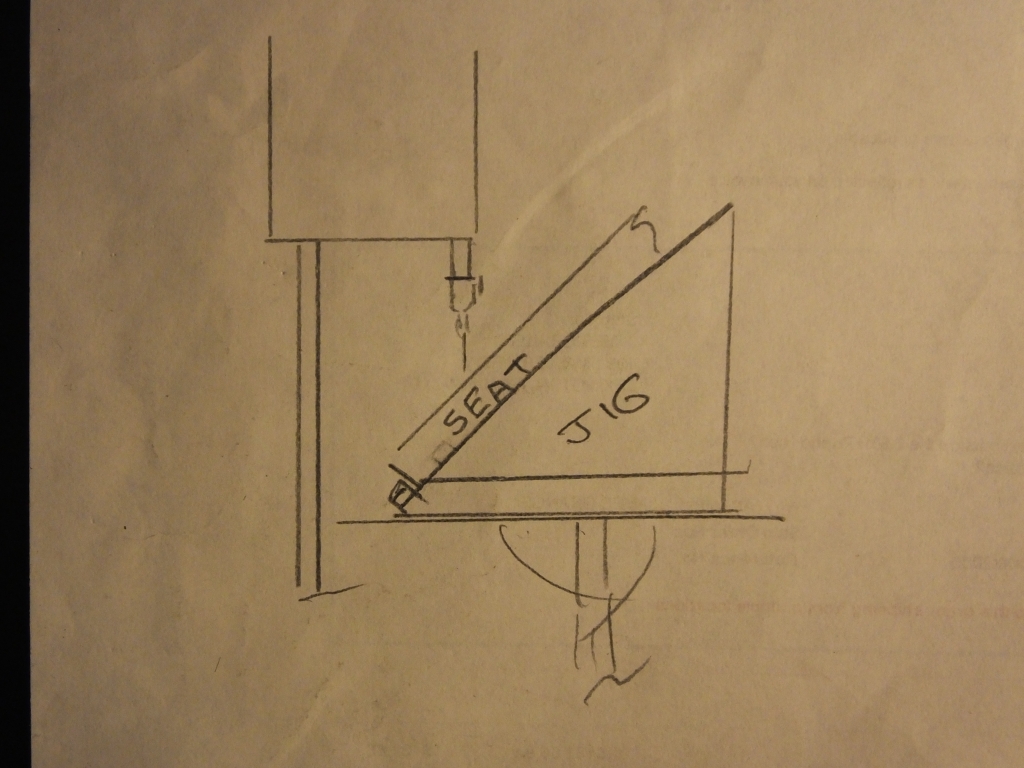
A tilting jig would have worked(allows reversal of tilt and position of seat relative bto the tubes). A 'bit' more trouble to make for just three holes however.
Re: Today in the shop (sometime you feel like a nut)
Posted: Mon Jun 22, 2015 1:28 pm
by charlese
isn't that the way it goes? After the project is done - new ideas come along. I don't recall how much the reverse tilt will go, but maybe enough to do the drilling job, especially with a lift on the outside edge.
Re: Today in the shop (sometime you feel like a nut)
Posted: Mon Jun 22, 2015 1:49 pm
by charlese
Angle drilling is sometimes a bear! Sometimes they can't be done on the Mark V.
Recalling my rocker - had to drill 4 to 5 degree angle holes in the crest and 5 to 6 degree angles in the rear of the seat in order to hold the back spindles. The fitting and gluing had to be done at the same time as installation of the crest.
Used a bevel gauge to try to approximate the angles. Was able to drill the holes in the crest with the shopsmith, but had to use a hand held drill to make the holes in the seat.
The angles in the crest were back to front and the seat were front to back to allow the S shaped spindles to fit.
Re: Today in the shop (sometime you feel like a nut)
Posted: Mon Jun 22, 2015 2:40 pm
by JPG
As a rough attempt to illustrate what I meant by a jig above . . .
- tilt jig example.jpg (423.04 KiB) Viewed 8313 times
Re: Today in the shop (sometime you feel like a nut)
Posted: Mon Jun 22, 2015 4:45 pm
by rpd
- Drill seat.JPG (155.87 KiB) Viewed 8300 times