With great appreciation for all those who paved the way for me, I am adding my contribution and notes.
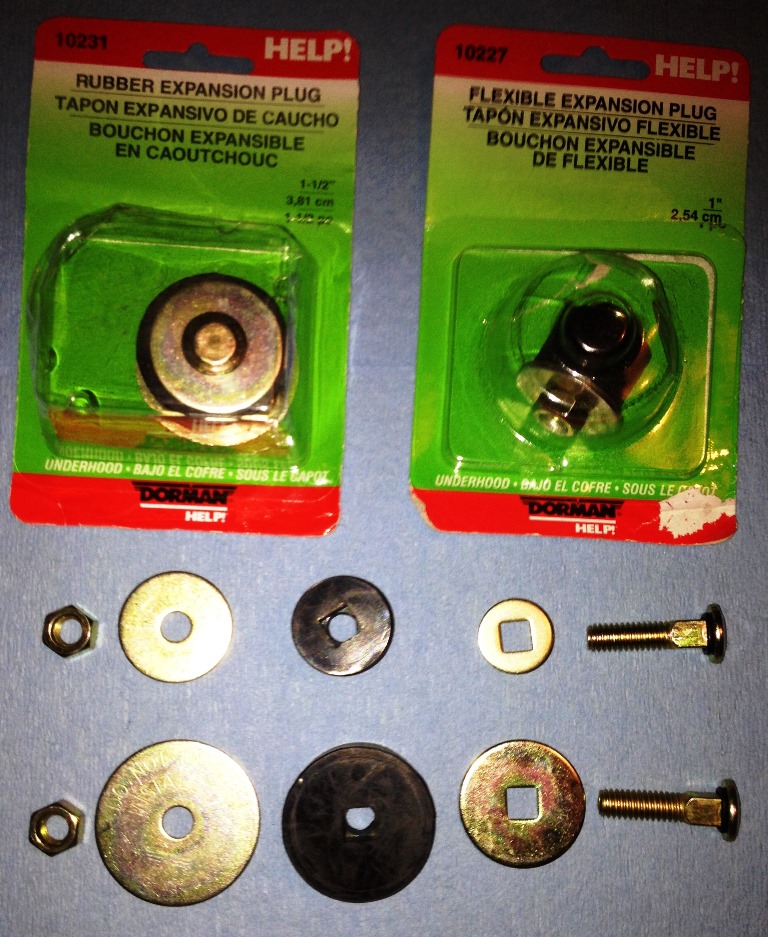
I bought Dorman Freeze Plugs from Summit Racing since none of my parts stores or building supply centers had 1½” plugs in stock. Summit had a whole range of sizes. I also got a set of the 1” for accessory tubes etc.
- IMG_0499.JPG (246 KiB) Viewed 3661 times
I swapped 5/16 Carriage Bolts for the OEM draw bolts as others here did. I did have to file the flats to get them to fit flush in the square of the washer that came with the plugs.
I used the threaded coupling and a jam nut for a surface for the drill chuck also as others here have.
- IMG_0503.JPG (206.82 KiB) Viewed 3655 times
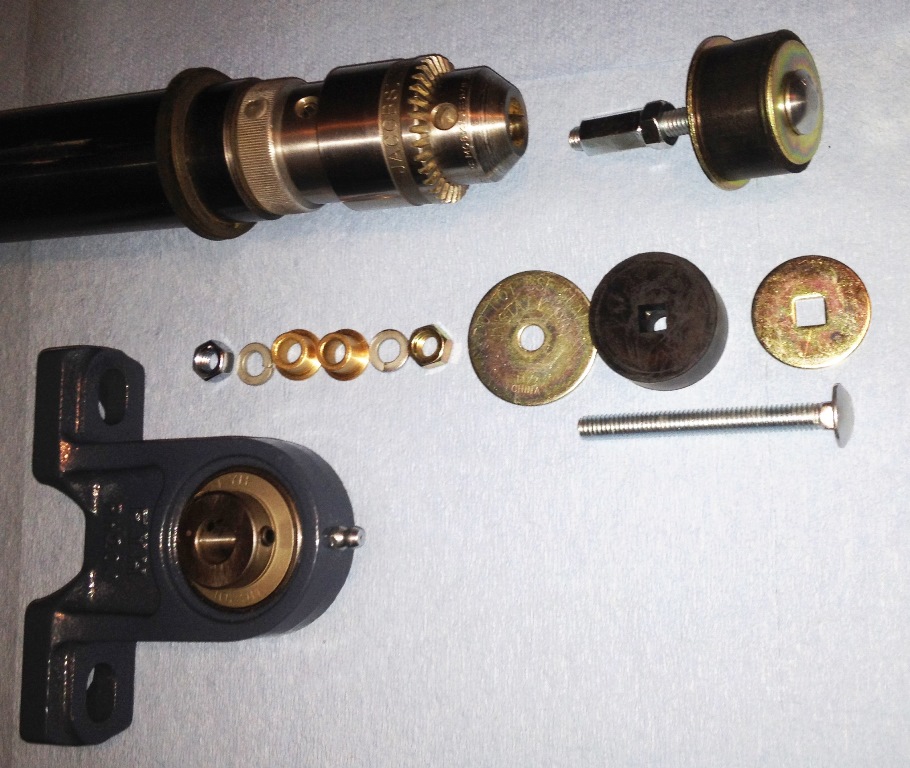
Reading about the various ways others have dealt with the tail stock / steady rests to stabilize the tubes I decided to craft a live center for mine.
What I wound up using was a Pedestal Base Pillow Block with a grease zerk and a ½” bore bearing rated at 5200 RPM, and two 5/16 x ½ x 3/8” shoulder bushings on each end to center the longer 5/16 bolt running through the plug. I put a lock washer and a nut on each side and pressure locked the shaft to the bushing, then I tightened the two set screws on the bore race to lock one end to the bushing and force it to rotate as an assembly. I would never run it anywhere near 5200 RPM for safety reasons, but point out that the bearing can take full speed of a Mark V output shaft.
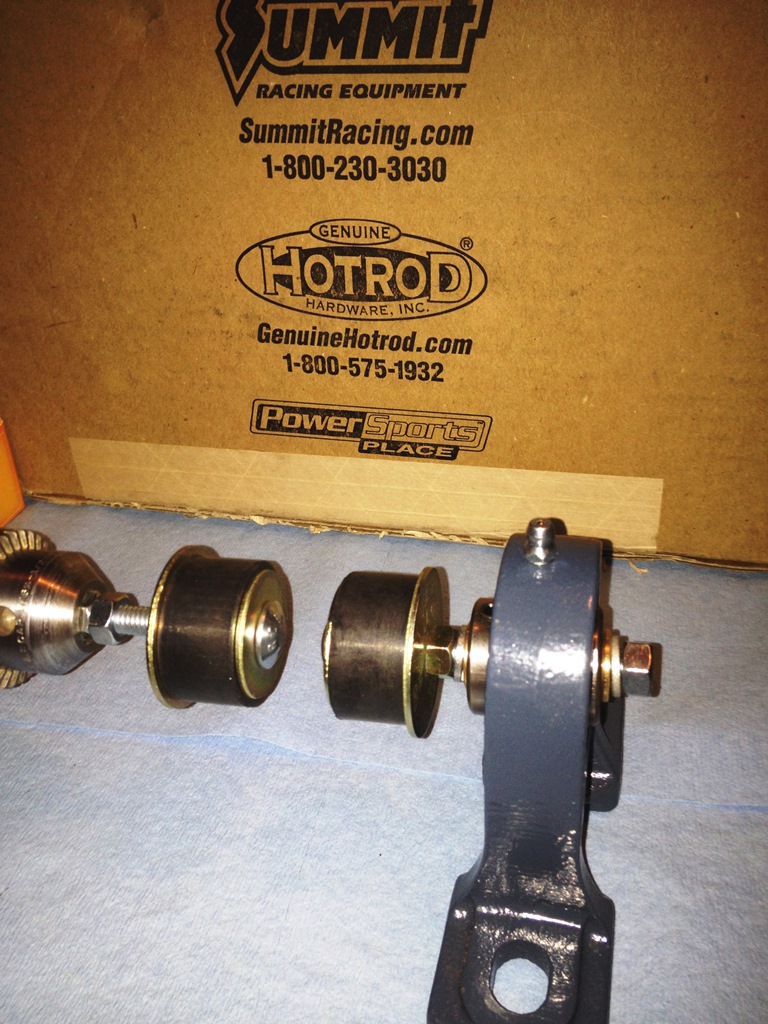
- IMG_0506.JPG (263.41 KiB) Viewed 3659 times
I can always take out the bushings and open it up for a ½” bore for some other project. I toyed with enlarging the hole in the rubber plug, and putting in a ½” carriage bolt for a beefier draw bolt, but didn’t.
One thing I noticed on the plugs was that while they may be excellent for plugging freeze plug openings in engines, they are not perfectly centered and would cause some wicked run-out and tube oscillation if not first sanded true. I just chucked them up in the drill chuck and burnished them with some 220 sandpaper to true them up. If they were too far out of round one might have to buy a larger plug to turn down to 1½”. I didn’t need much, and they work fine.
I mounted my Pedestal Base Pillow Block with T-Nuts on a piece of oak and clamped it to the worktable and extension table. I could then elevate the worktable and extension with a level on the tube I was sanding to set it up. The Pedestal Base Pillow Block reminded me a bit of a 10er tail stock once I had it mounted up.
In the future I may weld up a telescoping square tube frame for mounting the pillow block. If I do that, I might also add a 2nd Pedestal Base Pillow Block on the drive end with a large pulley and small one on the quill to form a speed reducer. I could move the whole thing forward on the tables for the offset, or just drop the tables below the quill. That’s another project entirely, and that way you could mount and drive it with another motor or drill, opposed to the Mark V, should you only have the one you are servicing. I might even turn it into a wide drum sander when not using it to restore the various tubes.
For now a few select holes and T-Nuts in this piece of oak and I can polish up just about anything I need.
To conserve space I am not posting pictures other than the parts and pieces I used to add the drive and live center bearing. Replacement bearing is a Timken Part Number UC201-8, UC - Insert Bearing, but I suspect with proper lubrication, this original bearing will be fine for decades.
I hope this helps someone else. You guys have sure helped me. I can’t thank you enough.
Everett

