Page 2 of 19
Re: Yet another "Goldie" Restoration
Posted: Wed Jul 17, 2024 10:47 am
by AllenH
Moving on to removing the bench ends and castor assemblies. I removed the castor assemblies and encountered the square nuts for the first time. Since I have 6 point sockets, I had to resort to pliers and a box end wrench.

- rsz_vlcsnap-2024-07-17-09h39m08s091.png (864.3 KiB) Viewed 6649 times
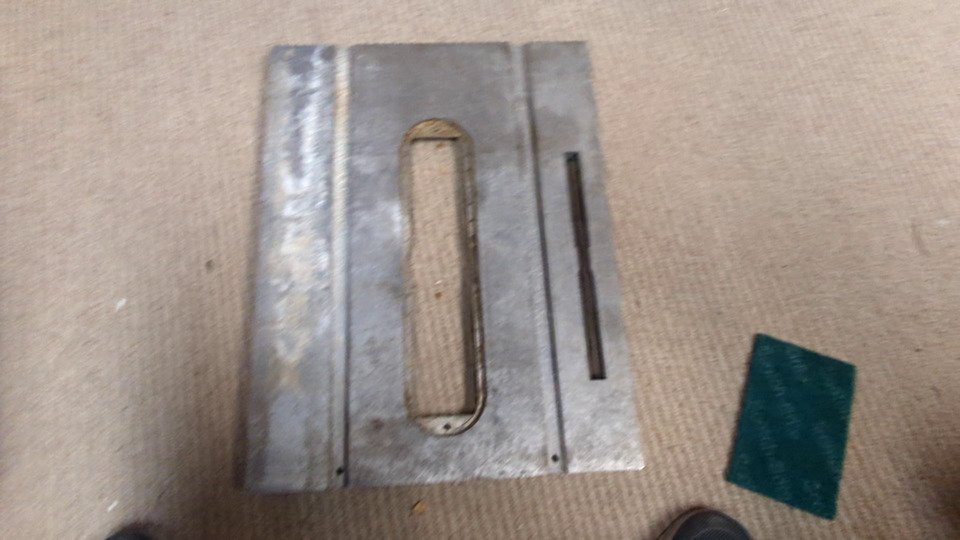
The bench ends need a little metal work and then I will put them in the media blast cabinet in prep for paint.

- rsz_vlcsnap-2024-07-17-09h40m04s240.png (949.01 KiB) Viewed 6649 times
Re: Yet another "Goldie" Restoration
Posted: Wed Jul 17, 2024 10:58 am
by AllenH
Now on to removing the way tubes from the arm. I did exercise some patience here. I soaked them in PB Blaster for a couple of nights, but they would just not move. A strap wrench did not work either. So I resorted to taking a claw hammer and tap, tap, tapping on the arm very lightly for about 20-30 minutes. on each side and I was able to get them loose without further damage.

- rsz_pxl_20240716_004730737.jpg (387.27 KiB) Viewed 6619 times
So I set those aside while I turned my attention to the table top and extension table top.
Re: Yet another "Goldie" Restoration
Posted: Wed Jul 17, 2024 11:03 am
by AllenH
Now the table top. I decided to try the Brasso an Scotch bright method. This is what it looked like before I began.
- vlcsnap-2024-07-16-16h47m01s857.jpg (80.15 KiB) Viewed 6608 times

- vlcsnap-2024-07-16-16h48m03s502.jpg (132.38 KiB) Viewed 6608 times
After about an hour of elbow grease, this is where it is at.

- vlcsnap-2024-07-16-16h50m18s432.jpg (90.75 KiB) Viewed 6608 times
It is a definite improvement, but I think I can do better. I have some Mother's Mag polish that I might try on it.
Re: Yet another "Goldie" Restoration
Posted: Wed Jul 17, 2024 11:29 am
by AllenH
So now we turn our attention to the base and way tubes. Looking over the forum, I decided to go the 2" pvc pipe with the 1" pvc pipe in the middle. Mine isn't that different then the other examples that have been shown on here, but I did 3D print plugs for the 1" pipe. If you just go out to Menards and get a couple of caps, they won't fit in the tubes.
So this is what I came up with. It is printed using PETG filament, which is the same stuff they make water bottles out of and I found out you can use regular pvc cement to glue them to pvc. They are blue, because I had some blue filament I needed to use up.
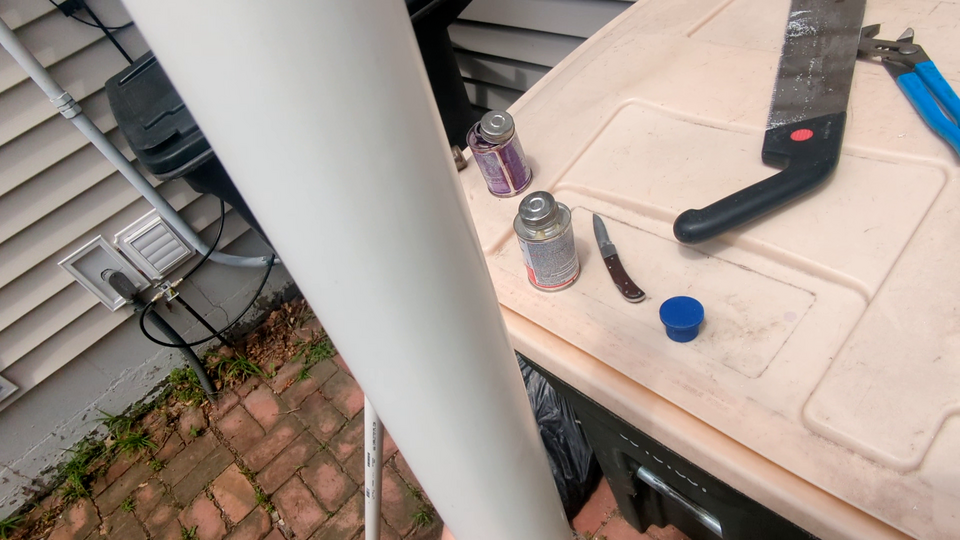
- rsz_vlcsnap-2024-07-17-10h06m31s924.png (899.39 KiB) Viewed 6525 times

- rsz_vlcsnap-2024-07-17-10h07m08s376.png (949.28 KiB) Viewed 6525 times
I cut the main pvc pipe to 54" and the 1" pipe to 53 3/4" inches to account for the width of the cap. This allowed the top cap to hold the inner pvc pipe down into the solution.
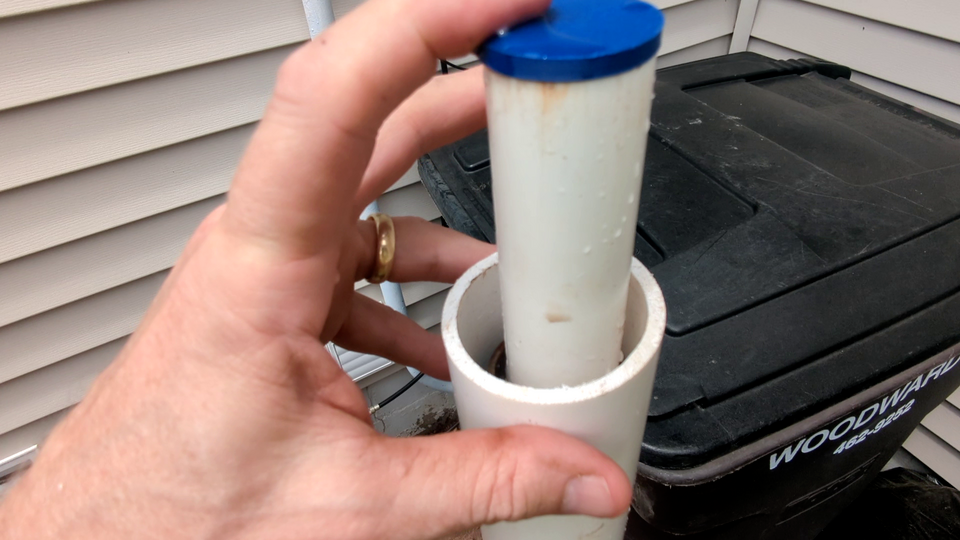
- rsz_vlcsnap-2024-07-17-10h09m53s982.png (777.17 KiB) Viewed 6525 times
Quite a bit of buoyancy on the inner pipe.
This is the top cap I used.

- rsz_vlcsnap-2024-07-17-10h10m32s719.png (705.76 KiB) Viewed 6525 times
This is one of the base tubes after about 12 hours in the Rust911. I am going to let it soak another 12 hours and see what it looks like then.

- rsz_vlcsnap-2024-07-17-10h11m32s947.png (706.17 KiB) Viewed 6525 times
So that is where I am at in the restoration. I will post more pics as I go along.
Re: Yet another "Goldie" Restoration
Posted: Wed Jul 17, 2024 11:45 am
by JPG
AllenH wrote: Wed Jul 17, 2024 10:35 am
JPG wrote: Wed Jul 17, 2024 10:25 am
As for #2, did you consider driving the roll pin IN rather than pulling it out? Of course not, you were not aware that a hole exists on the internal side of the bore to allow that.
Soooo please consult herein before the mistake count gets bigger!
Oh and welcome to the funny farm here.
Well that just makes too much sense! I will do that in the future. In my defense It took me 4 or 5 days to get registered, for some reason the board would not send me the activation email.
Now my Question is: how was cutting the hinge pin going to get the roll pin removed?
Re: Yet another "Goldie" Restoration
Posted: Wed Jul 17, 2024 11:50 am
by JPG
Try "Evaporust" next time.
Or if you have a month to spare, cut up potatoes and water.
Re: Yet another "Goldie" Restoration
Posted: Wed Jul 17, 2024 12:01 pm
by AllenH
JPG wrote: Wed Jul 17, 2024 11:45 am
AllenH wrote: Wed Jul 17, 2024 10:35 am
JPG wrote: Wed Jul 17, 2024 10:25 am
As for #2, did you consider driving the roll pin IN rather than pulling it out? Of course not, you were not aware that a hole exists on the internal side of the bore to allow that.
Soooo please consult herein before the mistake count gets bigger!
Oh and welcome to the funny farm here.
Well that just makes too much sense! I will do that in the future. In my defense It took me 4 or 5 days to get registered, for some reason the board would not send me the activation email.
Now my Question is: how was cutting the hinge pin going to get the roll pin removed?
As I said, I thought I could get it in my drill press to drill it out better. Won't be the last time I take the hard way to do something.
Re: Yet another "Goldie" Restoration
Posted: Wed Jul 17, 2024 12:03 pm
by AllenH
JPG wrote: Wed Jul 17, 2024 11:50 am
Try "Evaporust" next time.
Or if you have a month to spare, cut up potatoes and water.
Rust911 is just a concentrated version chemically of Evaporust. You just add water to it. I have used it in vehicle restorations for awhile.
Re: Yet another "Goldie" Restoration
Posted: Wed Jul 17, 2024 1:27 pm
by chapmanruss
Hi AllenH,
Due to many requests from spammers to join the Forum they are cautious about granting access. Thanks for being patient.
As JPG has already suggested and you responded, ask as many questions as you need to. JPG has owned his Mark 5 Goldie since it was new. He is an excellent resource for working on them.
Your Goldie S/N 369690 appears to be one of the last original Gilmer Drive Mark 5's before the special "C" Units. That is unless someone has upgraded it. As I said before John Dalton's S/N 369902C which also has the 3/4 HP Motor listed on the Plate closely follows yours. Mine at S/N 370596C has the 1-1/8 HP Motor. Also notice the difference in the plate's design. For those following the changes it appears the change to the 1-1/8 HP Motor occurred in 1961 between March and April with the Gilmer Drive "C" Units. That was followed by the change to the Poly V Drive in May.
The mounting tubes for the Extension Table Base Assembly are factory installed and not meant to be removed. Consider replacing the Extension Table Base Assembly. They can be found on the used market both with or without the Extension Table. You can also consider buying a new one from Shopsmith. The Mark series tools including the Mark 5/V 500, 510/505, 520, Mark 7 and Mark 4 all use the same Extension Table Base Assembly. The only difference between the models is how the Extension Table itself mounts to the base.
I like the 1" insert you made for de-rusting the Bench and Way Tubes which will require less rust remover. I don't have that 1" insert and it takes about a gallon to fill the tube. Another less expensive alternative is white vinegar for rust removal. It does take longer, about three days.
Square nuts are common on the Goldie and earlier Shopsmith tools. Save them if you want to keep your Mark 5 Goldie as close to original as possible.
If you decide to dis-assemble the Retractable Castor Assemblies for restoration you will have to, carefully, drive the roll pins out of the Brackets that hold the Tie Bar in place. Do use caution as the cast right and left end Brackets can be easily damaged getting the roll pins out. Roll Pins also hold the cams and the Foot Pedal in place on the Drive Rod. Note some Cams have been held in place with a set screw instead of the roll pin. When reassembling make sure the Foot Pedal and the Cams go back in their original positions and orientations.
Re: Yet another "Goldie" Restoration
Posted: Wed Jul 17, 2024 6:29 pm
by JPG
YES! Before disassembling the casters, observe and take pix of how the parts are orientated and assembled. ONLY the end castings are a left/right pair. ALL other parts are 'ambidextrous'. Mark the connecting rods and castings so the same ends are mated. Arbitrary(imprecise) drilling at original assembly makes them non-interchangeable. Ditto the cam shaft(maybe).