Upgrading Plane Handles
Moderator: admin

About 5 pounds of Sweat later....
Well, as you may have guessed, I got a very old, cracked wooden Jack Plane and decided to build a new version.
Here was a website that was a great inspiration:
http://www.inthewoodshop.com/ShopMadeTo ... Plane.html
My version, using a vintage iron with a chipbreaker:
[ATTACH]5829[/ATTACH]
Some high points of my experience:
The Old Blade -- what a demonstration of metallurgy! I decided to cut off the top of it for cosmetic reasons, no big deal with fairly soft steel at that end. But woe to me trying to do anything like making 2 skinny blades out of 1 big one -- that cutting-edge steel at the bottom was harder than anything! So I kept it Wide.
Laminated Maple body -- It was a good way to use up spare hard maple scraps. I oriented each so the grain would "feather" the correct way during use of the plane. My 3 middle planks were a tad too narrow to space the plane-body correctly for the "fattie" blade I got. So... I laminated some scrap hardwood veneers between them to compensate. It looks nice, too!
The Cherry Wedge -- this was my favorite part of the job. It's all hand chiseled. The several facets are copied from the original, meant to guide the shavings smoothly out of the plane. Plus, I used my #4 metal smoother plane, inverted in the bench vise, as a Small Parts Jointer: extremely helpful for forming the wedge.
The Mouth -- Had some trouble chiseling all the facets to my satisfaction. I ended up adding some epoxy filler to correct some tearout. That's why I painted it flat black. Lodgepole: I also had used flat black on the other #4 metal plane's interior.
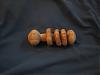
The Strike Buttons -- These are the sanctioned way to retract/adjust the blade on a wood plane like this. The old plane had one ebony button near the front. After trying my mallet a few times, I decided to use 2 buttons since my aim is poor. I used bits of Wenge (and the plug-hole cutter bit) for this.
The plane in action (it works!):
[ATTACH]5830[/ATTACH]
I really need a break from this job. I was covered in sweat every time I got near it!
Happy Woodworking,
Here was a website that was a great inspiration:
http://www.inthewoodshop.com/ShopMadeTo ... Plane.html
My version, using a vintage iron with a chipbreaker:
[ATTACH]5829[/ATTACH]
Some high points of my experience:
The Old Blade -- what a demonstration of metallurgy! I decided to cut off the top of it for cosmetic reasons, no big deal with fairly soft steel at that end. But woe to me trying to do anything like making 2 skinny blades out of 1 big one -- that cutting-edge steel at the bottom was harder than anything! So I kept it Wide.
Laminated Maple body -- It was a good way to use up spare hard maple scraps. I oriented each so the grain would "feather" the correct way during use of the plane. My 3 middle planks were a tad too narrow to space the plane-body correctly for the "fattie" blade I got. So... I laminated some scrap hardwood veneers between them to compensate. It looks nice, too!
The Cherry Wedge -- this was my favorite part of the job. It's all hand chiseled. The several facets are copied from the original, meant to guide the shavings smoothly out of the plane. Plus, I used my #4 metal smoother plane, inverted in the bench vise, as a Small Parts Jointer: extremely helpful for forming the wedge.
The Mouth -- Had some trouble chiseling all the facets to my satisfaction. I ended up adding some epoxy filler to correct some tearout. That's why I painted it flat black. Lodgepole: I also had used flat black on the other #4 metal plane's interior.
The Strike Buttons -- These are the sanctioned way to retract/adjust the blade on a wood plane like this. The old plane had one ebony button near the front. After trying my mallet a few times, I decided to use 2 buttons since my aim is poor. I used bits of Wenge (and the plug-hole cutter bit) for this.
The plane in action (it works!):
[ATTACH]5830[/ATTACH]
I really need a break from this job. I was covered in sweat every time I got near it!
Happy Woodworking,
- Attachments
-
- Jack Plane.jpg (44.46 KiB) Viewed 9302 times
-
- Plane in Action.jpg (47.88 KiB) Viewed 9306 times
Chris
-
JPG

- Platinum Member
- Posts: 35600
- Joined: Wed Dec 10, 2008 7:42 pm
- Location: Lexington, Ky (TAMECAT territory)
VERY NICE!
Could you please explain the strike button for those of us ignorant of the working details of old wooden planes?
Could you please explain the strike button for those of us ignorant of the working details of old wooden planes?

╔═══╗
╟JPG ╢
╚═══╝
Goldie(Bought New SN 377425)/4" jointer/6" beltsander/12" planer/stripsander/bandsaw/powerstation /Scroll saw/Jig saw /Craftsman 10" ras/Craftsman 6" thicknessplaner/ Dayton10"tablesaw(restoredfromneighborstrashpile)/ Mark VII restoration in 'progress'/ 10E[/size](SN E3779) restoration in progress, a 510 on the back burner and a growing pile of items to be eventually returned to useful life. - aka Red Grange
JPG40504 wrote:VERY NICE!
Could you please explain the strike button for those of us ignorant of the working details of old wooden planes?
Thanks!
The strike button(s) on the front (toe) can be hit with a mallet. This whacks the whole wooden plane with an impulse of rotational movement. However -- the cutting iron is denser than the wood and doesn't start moving as fast as the rest of the plane. So, each whack relatively retracts the blade-iron into the body a bit. If desired, a few good whacks will completely loosen the blade & wedge so you can start over. If you don't use this method, that wedge doesn't want to come out!
I found this really works like a charm. I mount the blade intentionally too deep, tighten the retaining wedge with the mallet, and then start retracting the blade with the strikes. (Striker! Striker! -- AIRPLANE, the movie.) Then the wedge is tapped tight again and it's good for planing.
Chris
-
JPG
- Platinum Member
- Posts: 35600
- Joined: Wed Dec 10, 2008 7:42 pm
- Location: Lexington, Ky (TAMECAT territory)
Ahhhhh Soooooo!nuhobby wrote:Thanks!
The strike button(s) on the front (toe) can be hit with a mallet. This whacks the whole wooden plane with an impulse of rotational movement. However -- the cutting iron is denser than the wood and doesn't start moving as fast as the rest of the plane. So, each whack relatively retracts the blade-iron into the body a bit. If desired, a few good whacks will completely loosen the blade & wedge so you can start over. If you don't use this method, that wedge doesn't want to come out!
I found this really works like a charm. I mount the blade intentionally too deep, tighten the retaining wedge with the mallet, and then start retracting the blade with the strikes. (Striker! Striker! -- AIRPLANE, the movie.) Then the wedge is tapped tight again and it's good for planing.
╔═══╗
╟JPG ╢
╚═══╝
Goldie(Bought New SN 377425)/4" jointer/6" beltsander/12" planer/stripsander/bandsaw/powerstation /Scroll saw/Jig saw /Craftsman 10" ras/Craftsman 6" thicknessplaner/ Dayton10"tablesaw(restoredfromneighborstrashpile)/ Mark VII restoration in 'progress'/ 10E[/size](SN E3779) restoration in progress, a 510 on the back burner and a growing pile of items to be eventually returned to useful life. - aka Red Grange
╟JPG ╢
╚═══╝
Goldie(Bought New SN 377425)/4" jointer/6" beltsander/12" planer/stripsander/bandsaw/powerstation /Scroll saw/Jig saw /Craftsman 10" ras/Craftsman 6" thicknessplaner/ Dayton10"tablesaw(restoredfromneighborstrashpile)/ Mark VII restoration in 'progress'/ 10E[/size](SN E3779) restoration in progress, a 510 on the back burner and a growing pile of items to be eventually returned to useful life. - aka Red Grange
Chris
Kudos to you on your latest works! After reading what is involved in making the jack plane, even if you only had half to do on your "new version", I can understand the 5 pounds of sweat. Wow, what a large amount of work and detail. Only the one who puts forth all the effort & energy in crafting something like this can really appreciate it. Great job!!
Kudos to you on your latest works! After reading what is involved in making the jack plane, even if you only had half to do on your "new version", I can understand the 5 pounds of sweat. Wow, what a large amount of work and detail. Only the one who puts forth all the effort & energy in crafting something like this can really appreciate it. Great job!!
Ron from Lewisburg, TN
-
tom_k/mo

- Platinum Member
- Posts: 856
- Joined: Mon Jul 14, 2008 3:58 pm
- Location: St. Louis, MO
- Contact:
Chris, beautiful work. Thanks for sharing the info about the strkier buttons. You learn something new all the time. 
ShopSmith MarkV-520 with Belt Sander, Jointer, Band Saw, Strip Sander, Scroll Saw and Biscuit Jointer SPTs and a DC-3300...
Woodworking Hobbyist (Check out all my Woodworking Plans (http://vbwhiz.isa-geek.net/plans)
Aspiring Sandcarver: Breaking glass one grain at a time.
Black Powder Shooter (love the smell of burning sulfur).
Woodworking Hobbyist (Check out all my Woodworking Plans (http://vbwhiz.isa-geek.net/plans)
Aspiring Sandcarver: Breaking glass one grain at a time.
Black Powder Shooter (love the smell of burning sulfur).
My Brother's project
My brother just sent this to me. He refurbished one of his old saws with a new hickory handle. He also sharpened it and says it's a joy to use now:
[ATTACH]6112[/ATTACH]
Happy Woodworking!
[ATTACH]6112[/ATTACH]
Happy Woodworking!
- Attachments
-
- Bros Handle.jpg (113.5 KiB) Viewed 9195 times
Chris
the Saga continues
I must have at least a few friends, since both planes in Post #1 have now been spoken for....
So I had to get another one for myself. As near as I can tell it was from the 1950s or 1960s, via a local antique store. I decided to use a maple/mahogany glue-up for these handles:
[ATTACH]7343[/ATTACH]
And it's my smoothest smoother plane yet!
So I had to get another one for myself. As near as I can tell it was from the 1950s or 1960s, via a local antique store. I decided to use a maple/mahogany glue-up for these handles:
[ATTACH]7343[/ATTACH]
And it's my smoothest smoother plane yet!
- Attachments
-
- HandyMan Plane with New Handles.jpg (44.69 KiB) Viewed 9124 times
Chris