Page 14 of 19
Re: Yet another "Goldie" Restoration
Posted: Wed Sep 11, 2024 5:36 pm
by DLB
I think you are reading it correctly. I've only done this once, and I ended up deviating quite a bit from his. On mine, the holes in the legs had been worn way over-sized and somewhat out of round by the original roll pin, which acted like a reamer. (Because it ain't a hinge pin, and is being used as one.) IIRC I ended up with 1/4" bolt, as opposed to his #10. Since I was drilling, which Bill's solution seeks to avoid, I decided to thread the hole in one of the legs and the nut on mine functions as a jam nut, the bolt absolutely does not turn and the quadrant swings on the bolt. I have one conventional headstock in my shop, on a mini, and it has had this modified speed control for a few years. Without the oversize bolt, it would have been a throw-away due to the excessively worn holes in the legs. According to Bill's description he modified his design twice to prevent the bolt from turning in the legs. He added star washers, then later added loc-tite to the star washers (a bit of an off-label application) to prevent the bolt turning in the legs.
Maybe the question should be, does it matter if the bolt rotates in the leg holes rather than the pork chop? It still seems superior to the original to me for two reasons. One is that the bolt head and nut tie the two legs together to reinforce one another. That should reduce/prevent the bending and splaying common to warn controls. And it seems less likely to wear the holes over-sized compared to a roll pin. If the unthreaded portion of the bolt was the perfect length, I'd say it was fine. If the threaded portion is inside the leg hole, perhaps not ideal. (But still likely better than that roll pin.)
- David
Re: Yet another "Goldie" Restoration
Posted: Wed Sep 11, 2024 5:42 pm
by JPG
IIRC no you are not reading it wrong.
If you use his star washers, that should prevent the screw from rotating in the leg holes.(or blue locktite)
I wonder if a PO reamed out those holes?
Re: Yet another "Goldie" Restoration
Posted: Thu Sep 12, 2024 11:41 am
by AllenH
Well I set the quadrant down in my Garage/Office and now I can't find it. In the meantime, when I took the Emerson motor apart to clean it, These fell out.
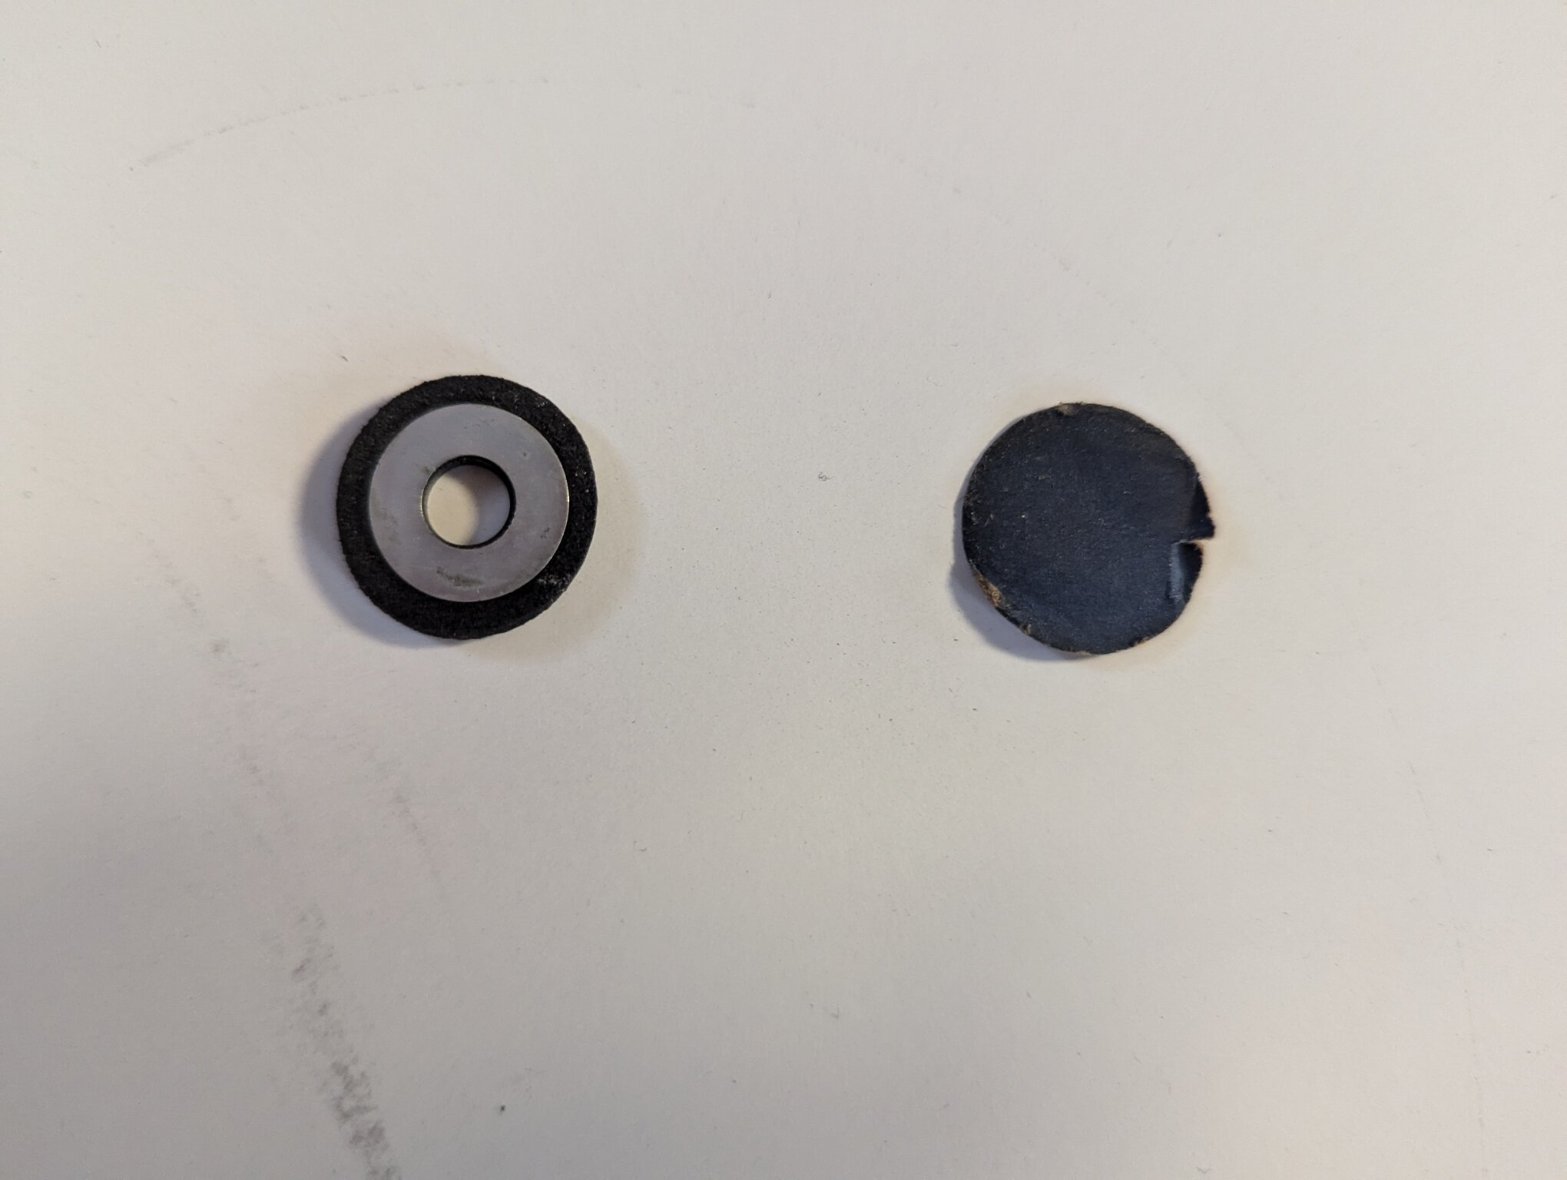
- rsz_1pxl_20240909_142456063.jpg (109.01 KiB) Viewed 1937 times
I think I figured out where the washers went as you can see in the following picture, but I am not sure about the paper circle. Is it necessary and if so where would it go?
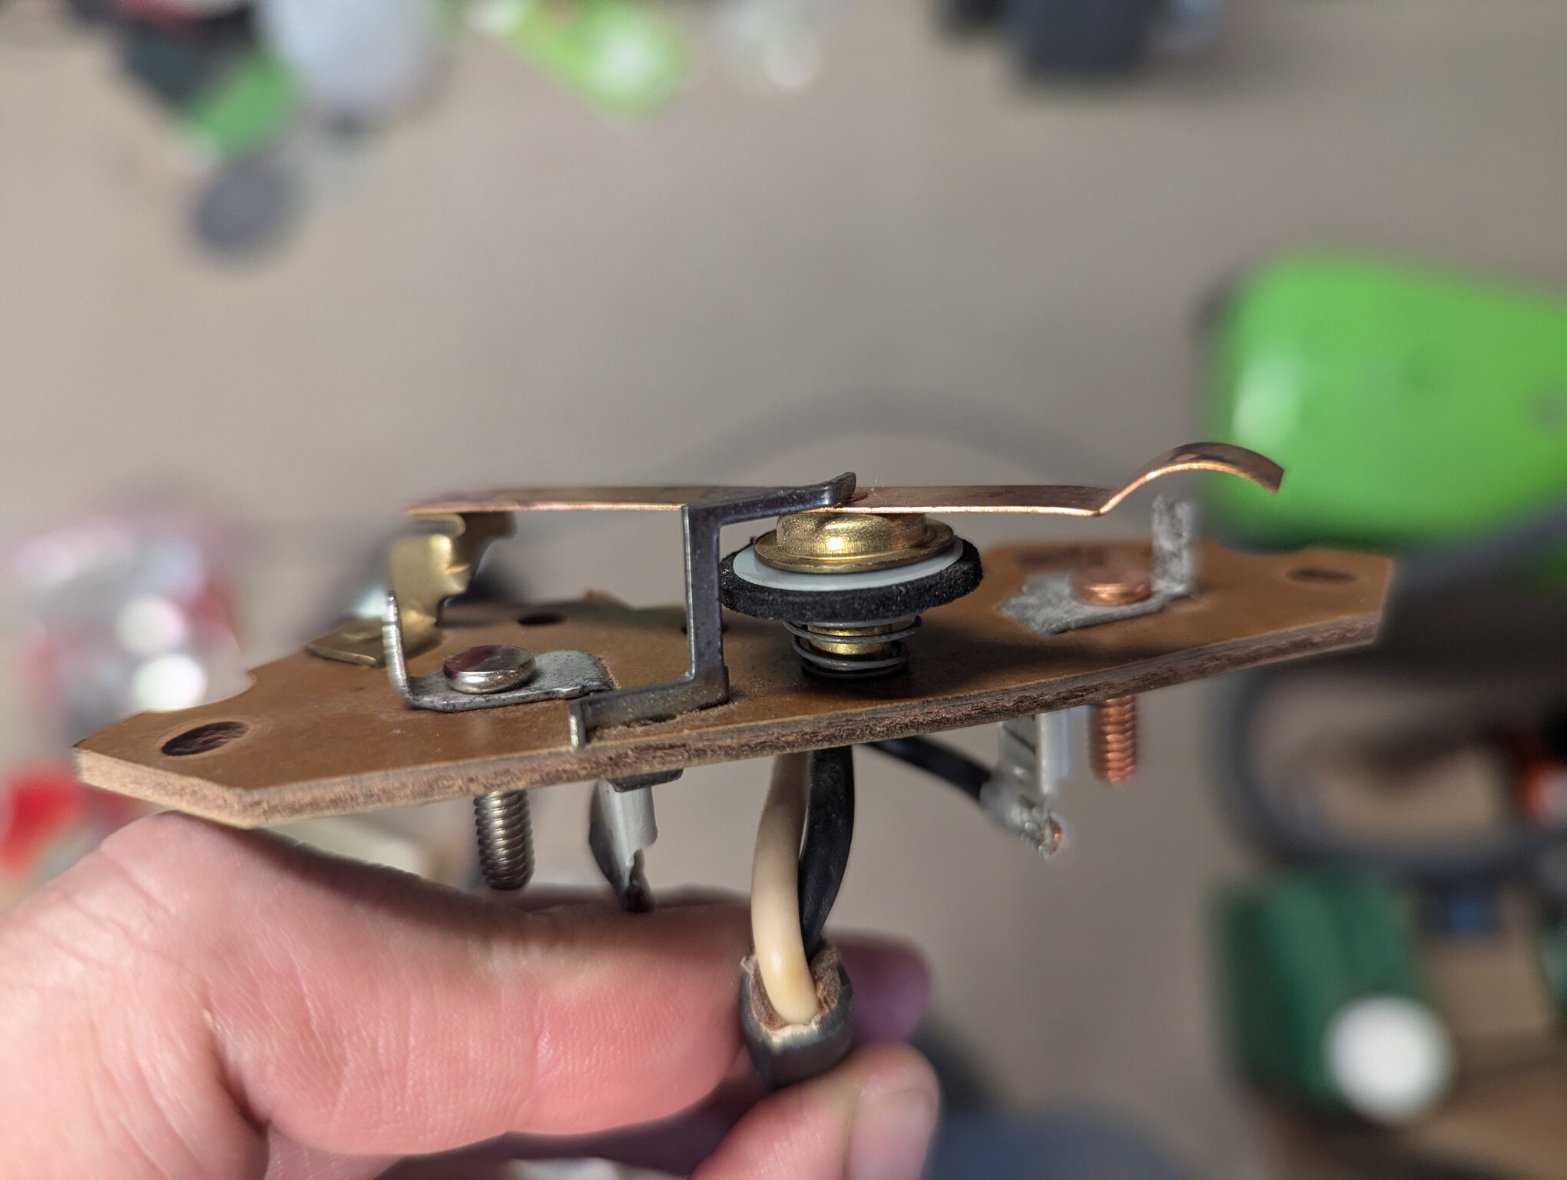
- rsz_pxl_20240912_152209663.jpg (148.81 KiB) Viewed 1937 times
Re: Yet another "Goldie" Restoration
Posted: Fri Sep 13, 2024 5:31 pm
by AllenH
Anybody know the dimensions of the Fan Sheave Spacer or where I can get one?
Re: Yet another "Goldie" Restoration
Posted: Sat Sep 14, 2024 12:14 pm
by chapmanruss
The Fan Sheave to Motor Spacer is still available from Shopsmith and is part number 504205 which sells for $5.95. If you have the original Owner's Guide for your Goldie Mark 5 you or anyone reading this topic should know that the part numbers changed in 1964. This is a case where having a later parts list and diagram is helpful. Sorry I don't know the actual dimensions.
Re: Yet another "Goldie" Restoration
Posted: Sat Sep 14, 2024 1:26 pm
by DLB
I'm not sure if the Fan Sheave Spacer is the same length for all motor brands/types used in the last 70 years. And they sometimes wear in length, though it has always been a bit of a mystery to me as to how that is possible. Sample size of one: 5/8" ID (critical) 3/4" OD (non-critical) and 0.412" long (somewhat critical but this one may be slightly worn). It has a split, implying (to me) that it fits snug to the shaft under its own spring tension.
ETA: My sample came off of an Emerson motor, probably early 2000's.
- David
Re: Yet another "Goldie" Restoration
Posted: Sat Sep 14, 2024 3:55 pm
by JPG
My observation(very limited) is that the spacer wears into the softer aluminum of the sheave. A thin steel shim washer or a retaining ring will overcome that wear.
Re: Yet another "Goldie" Restoration
Posted: Mon Sep 16, 2024 4:00 pm
by AllenH
I ended up making my own. It seemed to work well.
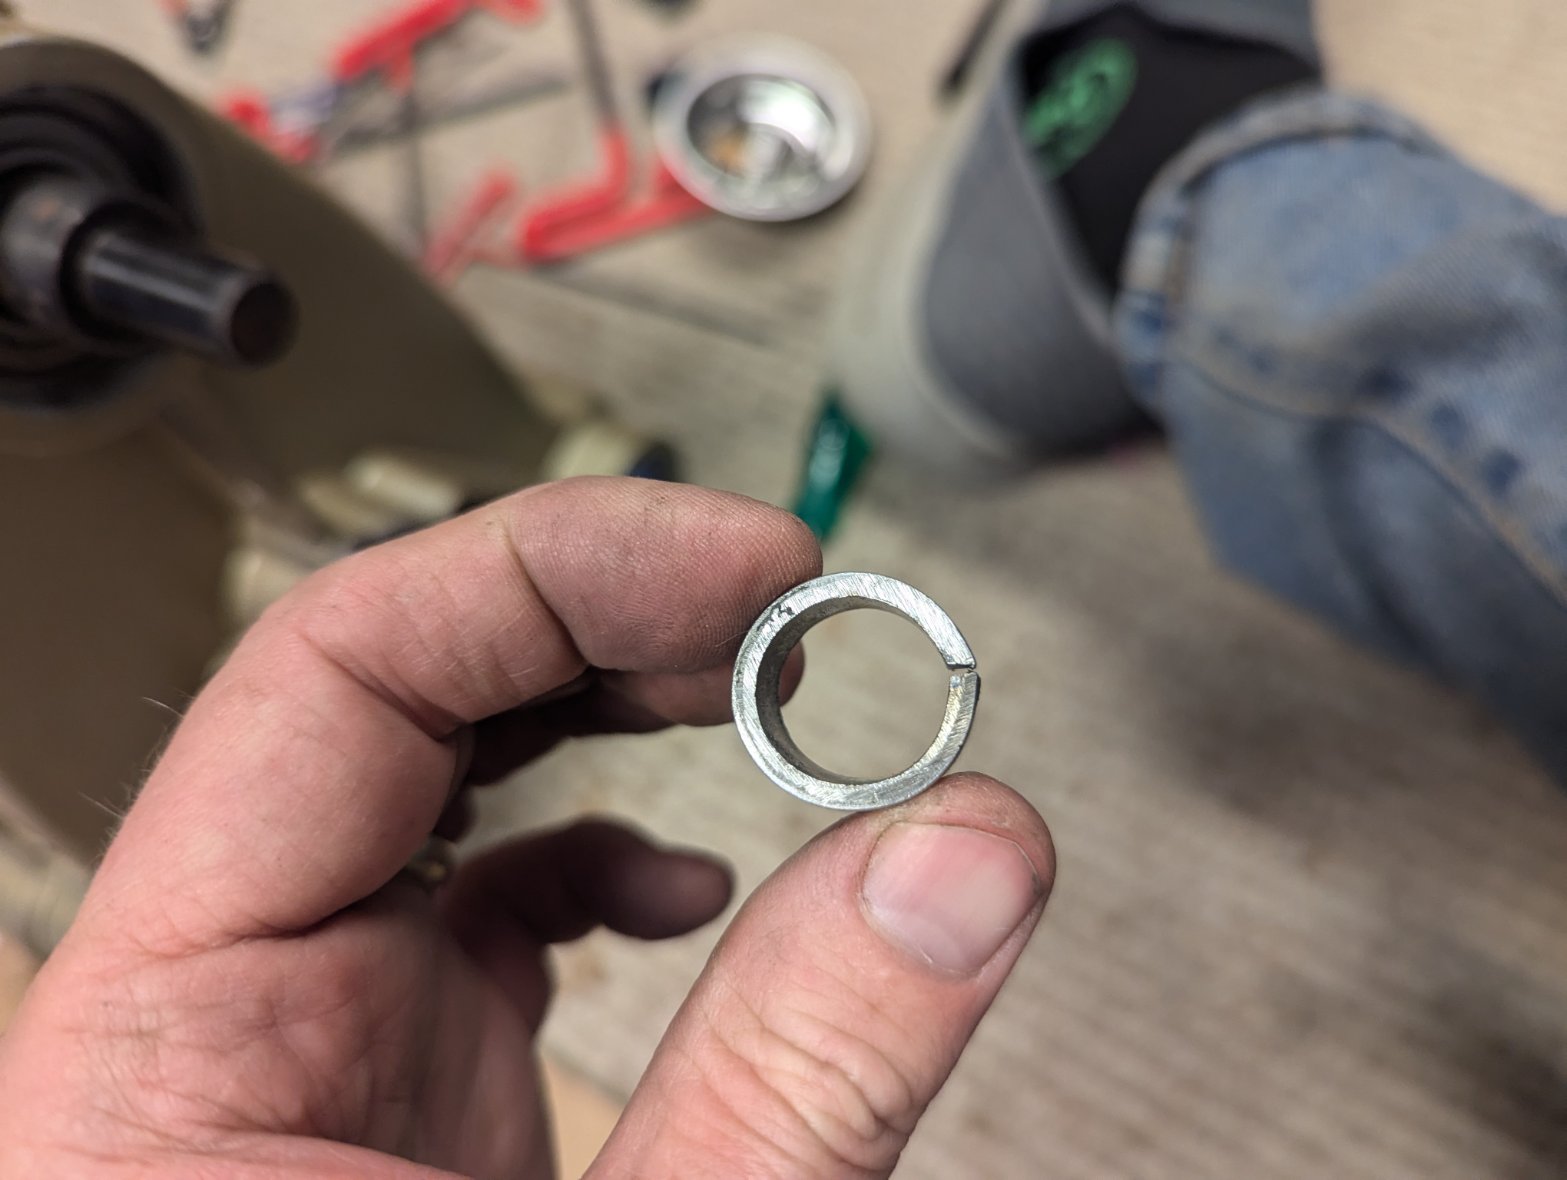
- PXL_20240914_162151323.jpg (149.06 KiB) Viewed 1604 times
Re: Yet another "Goldie" Restoration
Posted: Mon Sep 16, 2024 4:03 pm
by AllenH
I also was contacted by the person I purchased the Goldie from and she found some more pieces. While I talked to hear I found out her deceased husband's name was Matt. So I will refer to it as Matt's Shopsmith.
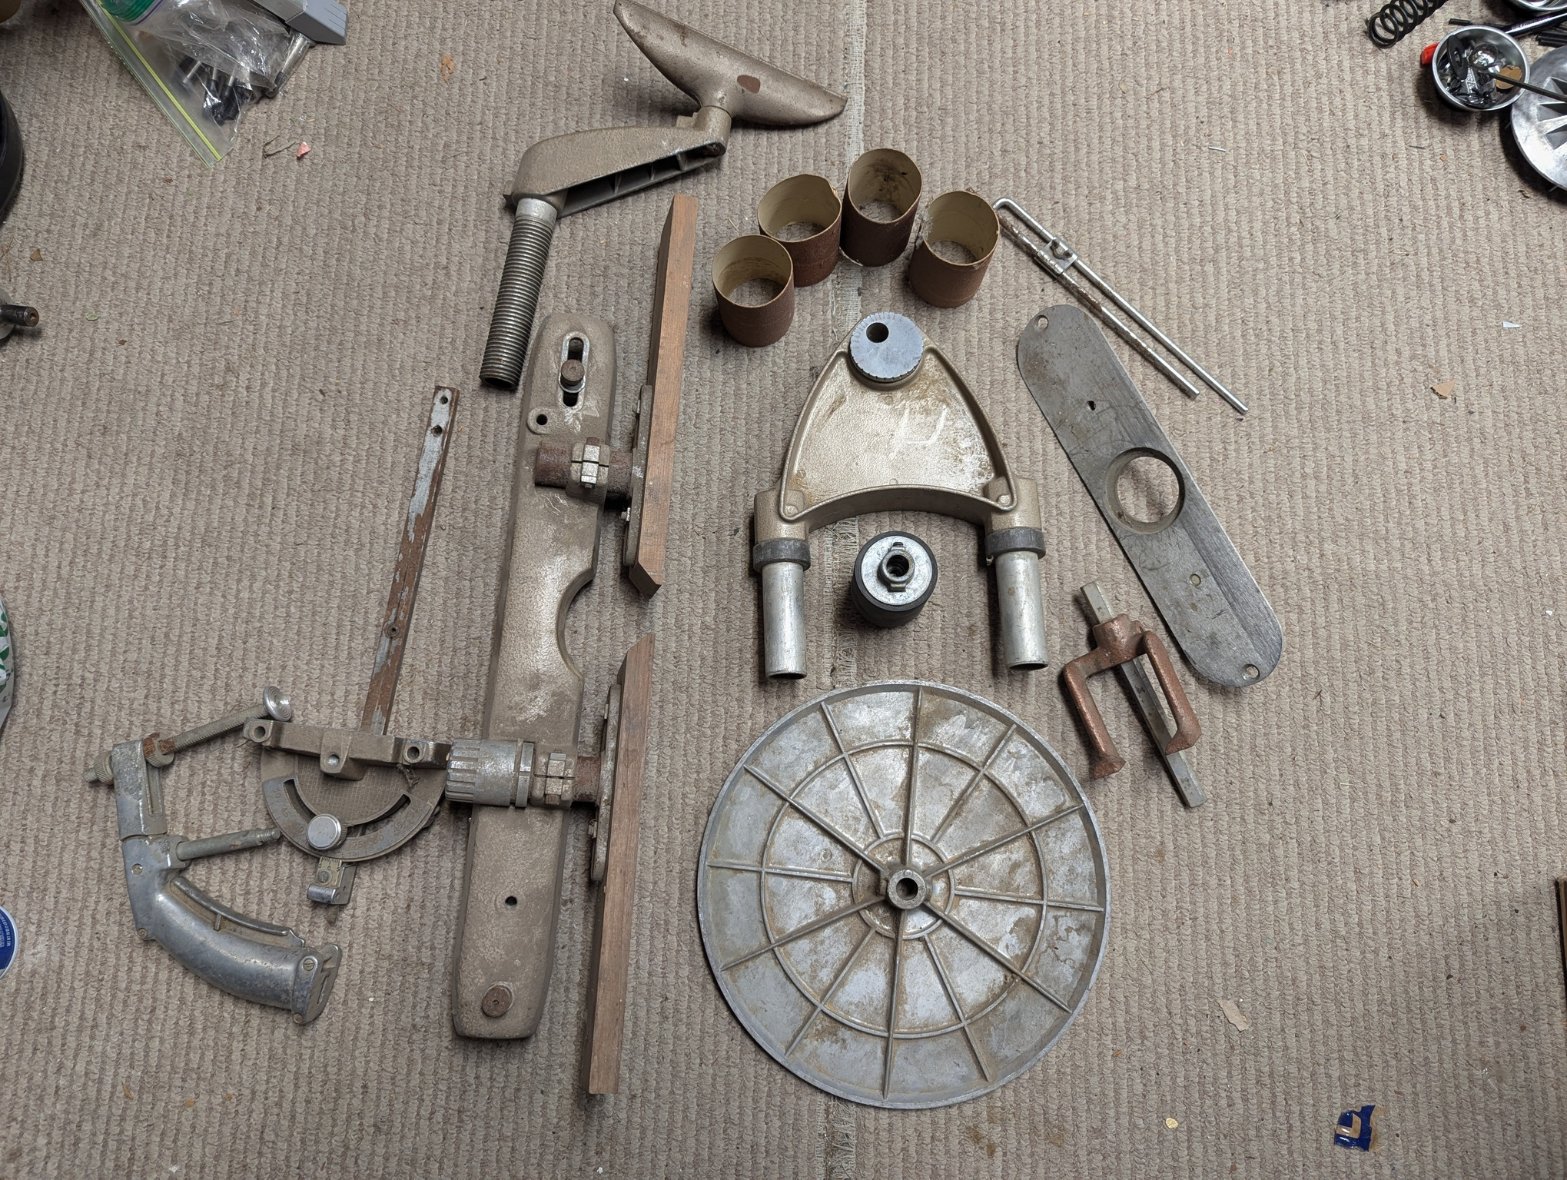
- PXL_20240913_125041785.jpg (559.52 KiB) Viewed 1604 times
Re: Yet another "Goldie" Restoration
Posted: Mon Sep 16, 2024 4:14 pm
by AllenH
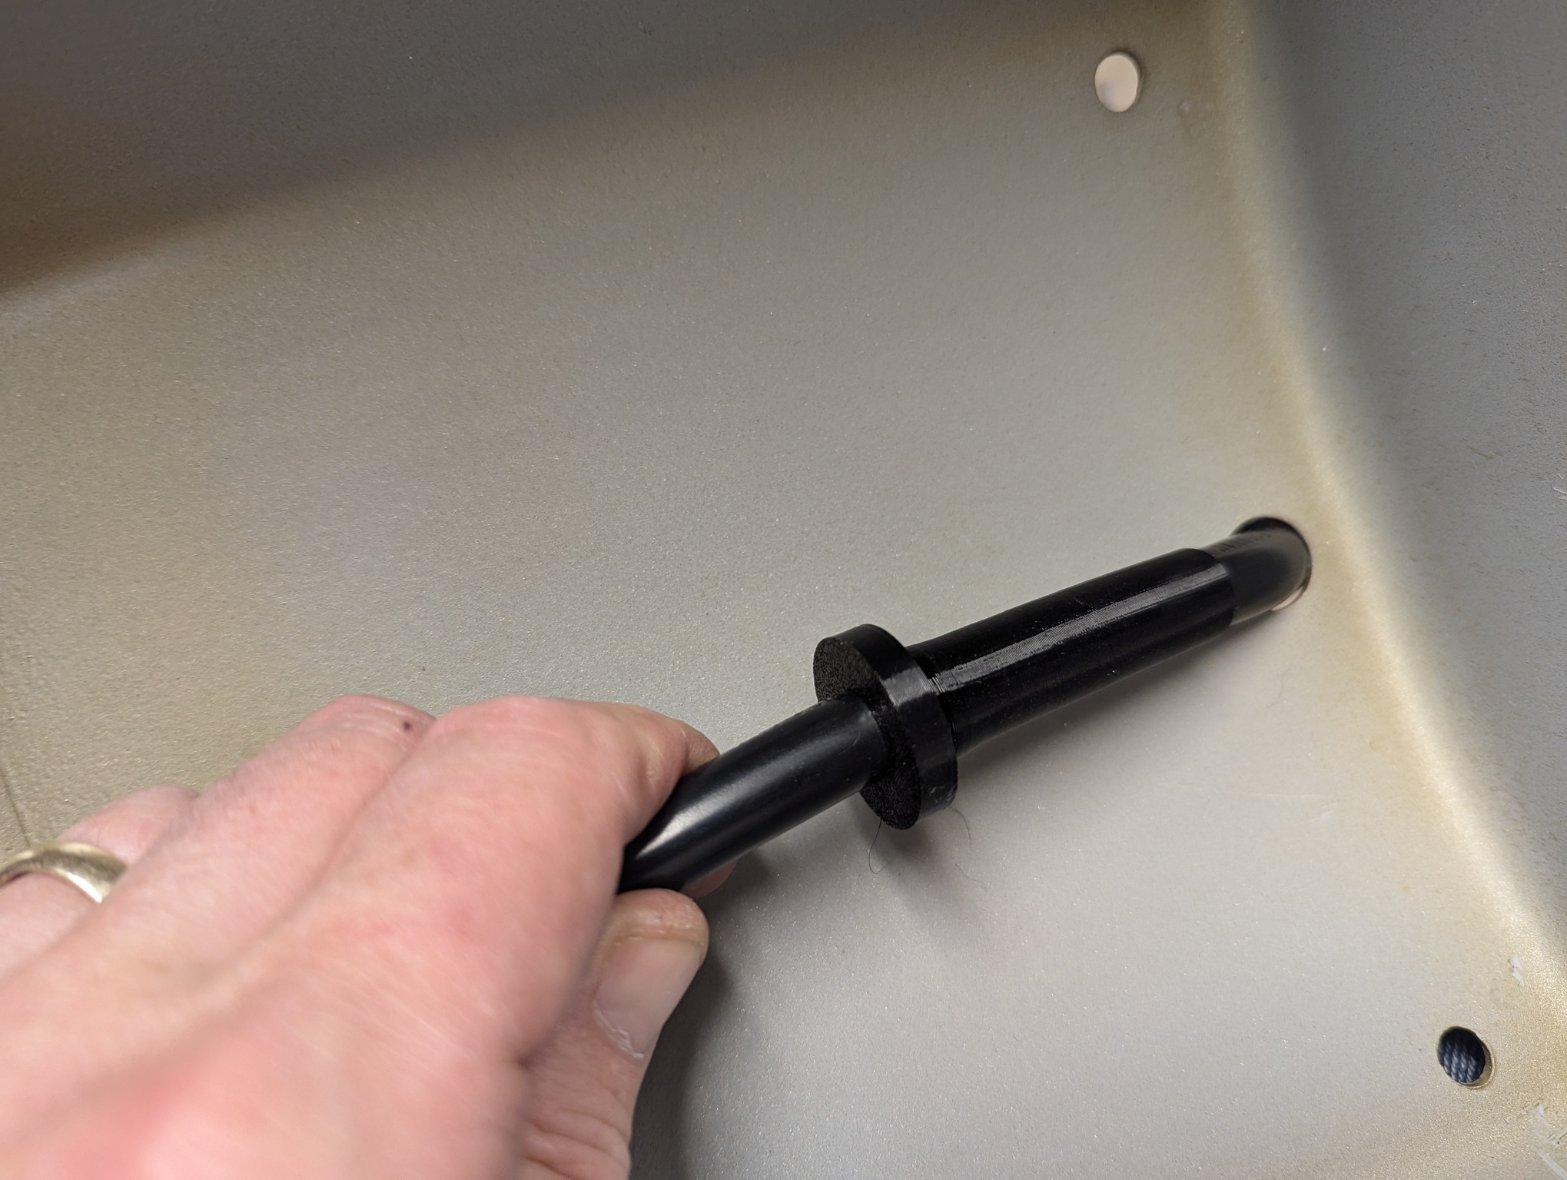
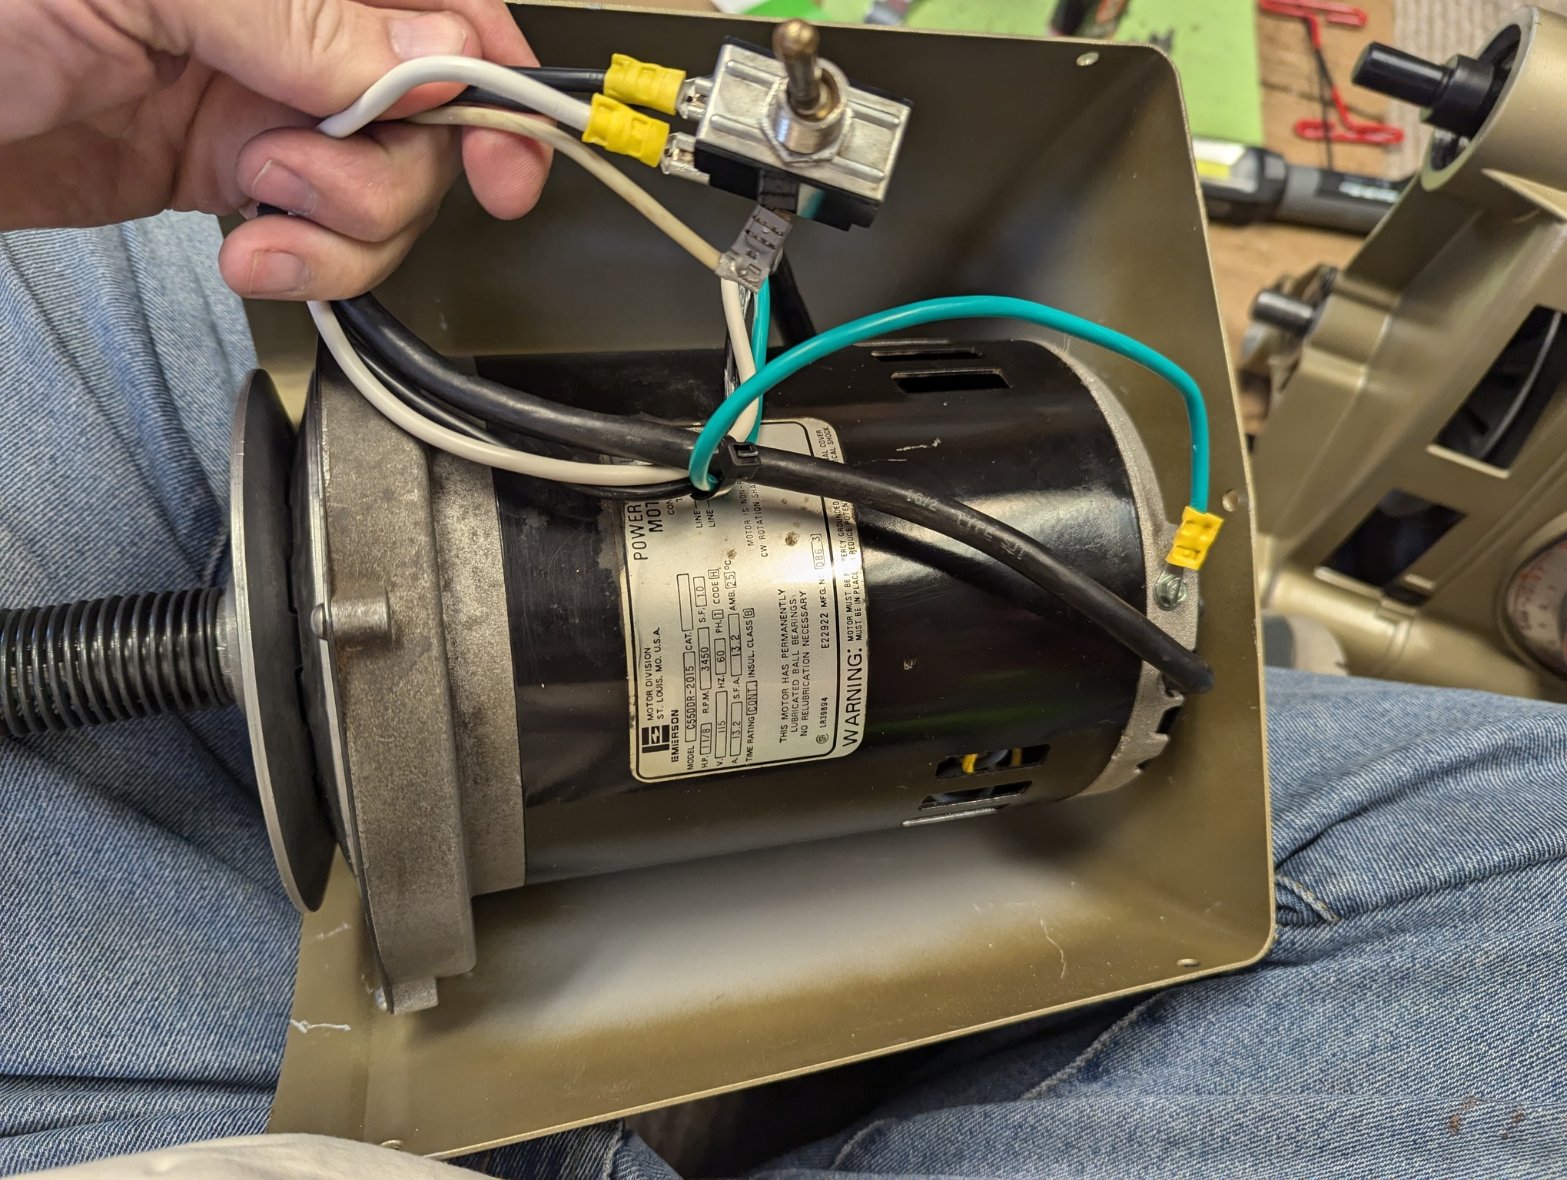
I went to a 12/2 cord, and couldn't find a strain relief that I liked so I 3D printed one.
- PXL_20240915_155429287.jpg (194.02 KiB) Viewed 1603 times
Then I attached the switch to it. Later I found out that it was bad. Wouldn't shut off after turning on, so I ordered a new one.
- PXL_20240916_154918484.jpg (363.18 KiB) Viewed 1603 times