Page 3 of 7
Re: Poly V belt replacement
Posted: Wed Mar 27, 2019 11:25 am
by roneg
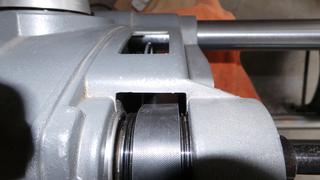
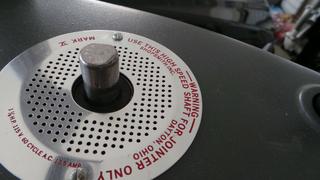
Everything went well on re-assembly. Machine runs wonderful! Here are the pix I promised. If anything looks amiss please let me know. I'm closing the chapter on this project.
Thank you JPG for hanging in there with me.
Hope my questions, and posted pix may help future shopsmithers that may have similar questions/issues.
 https://i.postimg.cc/3ryscGgQ/20190326-131254.jpg
[/img]

Re: Poly V belt replacement
Posted: Wed Mar 27, 2019 12:26 pm
by dusty
Was there a suspected "bent motor housing" somewhere associated with this Mark V or am I loosing it?
Re: Poly V belt replacement
Posted: Wed Mar 27, 2019 1:45 pm
by roneg
dusty wrote:Was there a suspected "bent motor housing" somewhere associated with this Mark V or am I loosing it?

No Dusty your not loosing it. That was My other machine..A 56 Greenie.
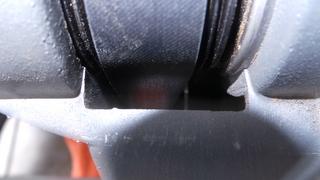
I replaced some worn items on it. It is the one with the close belt/ way tube clearance. It however still has that close clearance, but apparently not too close

as I smell no burning rubber!
Ron
Re: Poly V belt replacement
Posted: Wed Mar 27, 2019 3:23 pm
by dusty
Thanks! That makes me feel better.
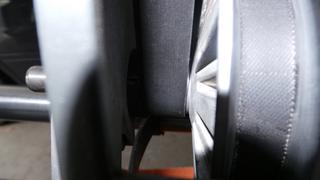
Sure do wish I could touch and feel or see good end shots that detail the proximity of the belt to the tubes along with the position of the eccentric.
The geometry of a Mark V just does not allow for what you have there.
I have rechecked all of my related sketches against the two 510s that I have and there is plenty of clearance.
Re: Poly V belt replacement
Posted: Wed Mar 27, 2019 6:06 pm
by roneg
I'll be taking the 510 down to the shop tomorrow and retrieving the 500. I can take some of those touchy, feely pix then!

Ron
Re: Poly V belt replacement
Posted: Wed Mar 27, 2019 6:24 pm
by dusty
roneg wrote:I'll be taking the 510 down to the shop tomorrow and retrieving the 500. I can take some of those touchy, feely pix then!
Ron
That would be great. Thank you.
Re: Poly V belt replacement
Posted: Wed Mar 27, 2019 6:35 pm
by JPG
I have not kept the discussion between the two machines separated either.
The bearing still looks too far sticking out of the eccentric.
The Greenie, IIRC. the eccentric adjusting slot was at/toward 3 O'Clock. That will position the idler shaft and pulley closer to the waytubes on the operator side.
Re: Poly V belt replacement
Posted: Wed Mar 27, 2019 7:25 pm
by roneg
Yea I don't know. I have not seen, nor heard a specific measurement, or recommended placement to date. Nor have O seen any real good pix of this. My control sheave pulley and idler line up. The belt seems to be pretty darn true. It is positioned as far in the head-stock as it seem to want to go. I hit it a number of time with the dead-blow hammer. As much as should have set it home!
Re: Poly V belt replacement
Posted: Wed Mar 27, 2019 11:00 pm
by JPG
roneg wrote:Yea I don't know. I have not seen, nor heard a specific measurement, or recommended placement to date. Nor have O seen any real good pix of this. My control sheave pulley and idler line up. The belt seems to be pretty darn true. It is positioned as far in the head-stock as it seem to want to go. I hit it a number of time with the dead-blow hammer. As much as should have set it home!
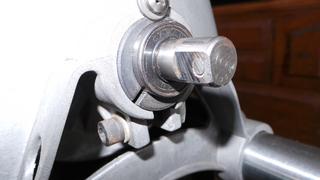
The bearing should have a groove in he middle that goes all the way around the bearing.
The eccentric should have a set screw(cone point)that aligns with the groove.
The back end of the eccentric should be flush with the headstock casting. The screw and washer should position that.
I will add a pix here that shows how it should look.
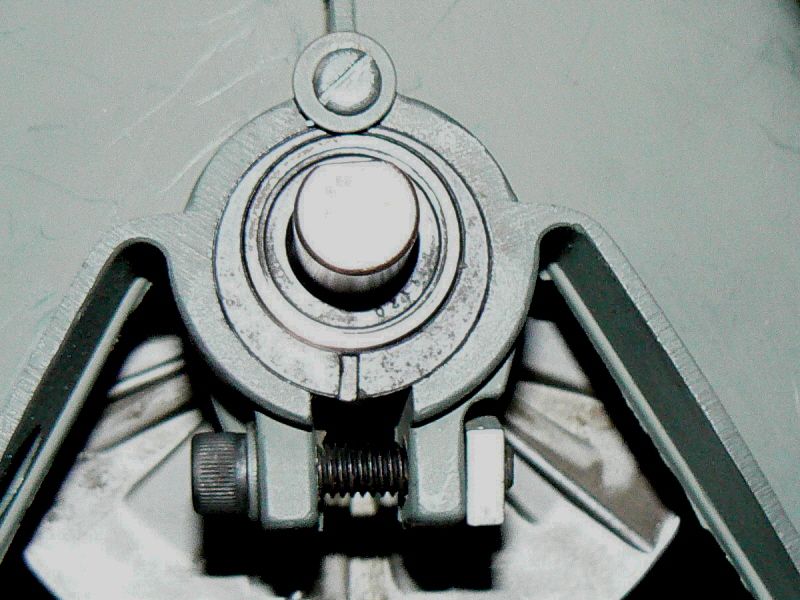
- Clipboard01.jpg (78.98 KiB) Viewed 12689 times
A hammer is not relevant to installing this.*********
Re: Poly V belt replacement
Posted: Wed Mar 27, 2019 11:15 pm
by roneg
JPG. Unless I'm mistaken your describing a style of eccentric blushing my machine does not posess. The bushing in fact is flush and screw and washer is in place. My previous post was related to the bearing position in the outer case only. The pix you provide I have seen. It does show the bushing screw, and washer well.
However the birds eye view could be deceiving as to how far the bearing protrudes out of the head-stock. One problem here is the many different ways these were manufactured in the years past.
The hammer is only relevant when you can't convince the shaft to put itself in.