Pictures of projects
Moderator: admin

-
davebodner
- Gold Member
- Posts: 476
- Joined: Sun Nov 09, 2008 4:38 pm
- Location: Arlington, VA
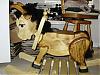
Resurrecting an old thread. Here's a jewelery box I made almost entirely with the Shopsmith. After carefully aligning the tablesaw, the long miter joints came out just about perfectly. I was real impressed with the precision. And the Shopsmith all-purpose blade left the miters smooth enough that I didn't have to sand.
Cherry and walnut "cabinet" with bocote (as I recall) drawer fronts. Top was bookmatched mahogany, split with the SS bandsaw. I turned the ebony drawer pulls. They're really too small, so I might replace them. Good thing they're only a friction fit. The SS jointer did a fine job of preparation for butt joints.
The photos stink, and my design isn't much better (just a big cube). But any imperfection isn't the machine's fault, it was my own.
- Attachments
-
- jewelery box closed.jpg (96.35 KiB) Viewed 6427 times
-
- jewelery box.jpg (106.87 KiB) Viewed 6416 times
-
- jewelery box back.jpg (117.82 KiB) Viewed 6409 times
-
a1gutterman

- Platinum Member
- Posts: 3653
- Joined: Tue Jan 09, 2007 12:45 am
- Location: "close to" Seattle
 Dave,
Dave,
-
kd6vpe
- Platinum Member
- Posts: 585
- Joined: Mon Jun 11, 2007 8:53 pm
- Location: Owasso, Oklahoma
- Contact:
Very nice work there Dave,
I can see you have learned the Shopsmith can do anything the others can do with just a little attention to detail and alignments. Thanks for sharing.
I can see you have learned the Shopsmith can do anything the others can do with just a little attention to detail and alignments. Thanks for sharing.
SS 500 upgraded to 510; SS bandsaw; SS jointer
SS Oscillating Drum Sander; Universal Lathe Rest;
lathe duplicatior, shaper fence and shapers; SS Belt
Sander
Jim
www.youtube.com/kd6vpe
SS Oscillating Drum Sander; Universal Lathe Rest;
lathe duplicatior, shaper fence and shapers; SS Belt
Sander
Jim
www.youtube.com/kd6vpe
Yep! ATTA BOY DAVE! Thanks for your photos!
Love the fact that you turned the small pulls. Some of us have difficulty turning small things. I love showing it can be done!
Also really nice mitered corners. You made them with a Shopsmith combo blade and no jointing. Once again showing this can be done with a SS combo. We've recently been having a discussion in another part of the forum about quality of saw blades vs. expense.
Love the fact that you turned the small pulls. Some of us have difficulty turning small things. I love showing it can be done!
Also really nice mitered corners. You made them with a Shopsmith combo blade and no jointing. Once again showing this can be done with a SS combo.
Octogenarian's have an earned right to be a curmudgeon.
Chuck in Lancaster, CA
Chuck in Lancaster, CA

Here are photos of my first "real" project. Our fireplace was surrounded by very poorly applied tile so I built a new surround and mantel for it. Unfortunately, I only used the Shopsmith to sand some of the trim as the disk sander is still the only attachment I have (more parts are currently being shipped to me).
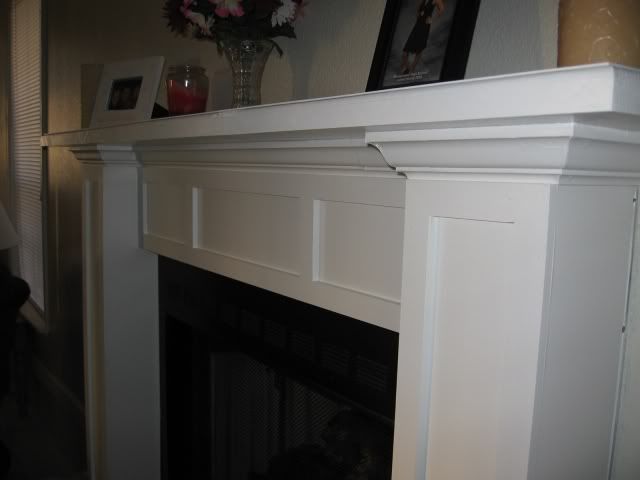
I detailed the full project including photos of the "before" and "during" at Lumberjocks.com. http://lumberjocks.com/projects/11449
I'm still very much a "newbie" at this and anybody else here could have done a better job, but I'm proud of it.
I detailed the full project including photos of the "before" and "during" at Lumberjocks.com. http://lumberjocks.com/projects/11449
I'm still very much a "newbie" at this and anybody else here could have done a better job, but I'm proud of it.
Beautiful mantle, Heath!!!:D Congratulations to both you and your Wife! That is a beautiful job of painting. Sorry about over use of the work Beautiful, but that is exactly what the unit is! Beautiful!
I loved your methods of straightforward construction! Looks like it will be there for a long while. Your trim really finishes off the mantle to give a more classic appearance. Nice job! Hope to be hearing more from you in the future.
An ATTA BOY to both of you!
I loved your methods of straightforward construction! Looks like it will be there for a long while. Your trim really finishes off the mantle to give a more classic appearance. Nice job! Hope to be hearing more from you in the future.
An ATTA BOY to both of you!
Octogenarian's have an earned right to be a curmudgeon.
Chuck in Lancaster, CA
Chuck in Lancaster, CA