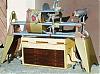
Recommendations for freeing up frozen Quill

Forum for Maintenance and Repair topics. Feel free to ask questions or contribute.

Moderator: admin

User avatar
JPG
Platinum Member
Posts: 35600
Joined: Wed Dec 10, 2008 7:42 pm
Location: Lexington, Ky (TAMECAT territory)

Spline lubrication

Post by JPG »

billmayo wrote:Since the Poly-V quill shaft splines are sliding inside a plastic coupler (drive and ring assembly), I would believe that any lubication could attract dust and crud causing wear on the plastic coupler splines. I do spray just a touch of dry lube on the quill shaft splines. The Gilmer quill shaft splines and drive sleeve splines are metal to metal coupling. I use a lot more dry lube on the Gilmer quill shaft splines and let dry for a day or two before assembling. What does any one else use or not use?
I have used powdered graphite on the spline coupling. I haven't had any problem with this, but feel the 'sample time' has been short.:)
╔═══╗
╟JPG ╢
╚═══╝

Goldie(Bought New SN 377425)/4" jointer/6" beltsander/12" planer/stripsander/bandsaw/powerstation /Scroll saw/Jig saw /Craftsman 10" ras/Craftsman 6" thicknessplaner/ Dayton10"tablesaw(restoredfromneighborstrashpile)/ Mark VII restoration in 'progress'/ 10
E[/size](SN E3779) restoration in progress, a 510 on the back burner and a growing pile of items to be eventually returned to useful life. - aka Red Grange
bobgroh
Gold Member
Posts: 400
Joined: Sun Jun 29, 2008 1:12 pm
Location: Just east of Kansas City, Missouri

Post by bobgroh »

jpg40504 wrote:WHEW!!!! I'm glad it's OVER!!!!!!!:D
Me, Too!! I have a lot of little parts to buy for this beauty and I would prefer to not spend more of my decimated budget on this the quill.

I'm actually enjoying the process of working on the 510 - learning a bunch of stuff. In fact, I'm going to go back into my other 510 (based on a 1984 500) and take care of a few things using lessons learned, e.g. wax the quill and reset the Poly-V belt.
Bob Groh
Blue Springs, Missouri (just east of Kansas City, MO)

--------------------------------------------
1984 SS Mark V updated to model 510
1994 SS Mark V updated to model 520
SS SPT's: Bandsaw
Other tools:routers, Bosch router table, Craftsman 6" jointer, Steel City 12" bench planer, Porter Cable 7" power saw, and too much other stuff (not really - just kidding!!)
User avatar
allsas
Gold Member
Posts: 159
Joined: Fri Mar 30, 2007 11:48 pm
Location: Kent, WA 98030-8732

Post by allsas »

bobgroh wrote:Got the quill pulled last night. Continued the application of PB Blaster during the day and then put the 3-1/2" lathe faceplate on the shaft. Put gentle pressure on the quill extender lever while gently bopping on the back of the faceplate with a rubber mallet. Quill started moving pretty much right off the bat and a few more taps had it out all the way. Success!!!

The problem was just a bit of rust between the quill and the boring in the headstock (which is about 3" long). .....

Had! a severely frozen Quill on an acquired Greenie. Removed the Quill Advance Assembly and dropped the domed washer in the Motor Pan. Attached a 3 " Faceplate to the quill shaft and proceeded to tap on the back of the faceplate. It finally started moving. This quill was on the tight, I was using the medium weight Ball Peen hammer on a Craftsman cast iron faceplate.


Extracted Quill [ATTACH]10125[/ATTACH].


Quill after wire wheel and Waxing...[ATTACH]10126[/ATTACH].


I had trouble getting the Way Tube Tie Bracket off..... It would move a little and then stop. It looked like it had moved the same amount on both sides by the length of the newly exposed tube. Gave up and pounded it back down. It went back down really easily. WTF. After doing that several times, I finally saw that one of the tubes would turn. The Tie bracket was binding as it moved different amounts on the Tubes, then began to bind because they were uneven. It practically fell off when the unanchored tube was kept even with the anchored tube And it was above 90 degrees when this was taking place. Damn near broke something,,,,Me. :mad:

Can only credit BobGroh for writing up faceplate method, THX.
Attachments
50621355.JPG
50621355.JPG (32.06 KiB) Viewed 2189 times
50621357.JPG
50621357.JPG (10.54 KiB) Viewed 2190 times
MK V 520; MK V 510 w/PP DIY Upgrade; MK 5 500; Jointer; Bandsaw; Sliding Table; Conical Sanding Disk; Sharpening Guide, Lathe Duplicator, Jigsaw, Scrollsaw, Beltsander, Ring Master, Biscuit Joiner.
User avatar
mickyd
Platinum Member
Posts: 2999
Joined: Mon Feb 09, 2009 1:18 pm
Location: San Diego, CA
Contact:

Post by mickyd »

The thread title was my 'issue' but the problem required a different solution. Thought it was good to post my experience here.

I was drilling a few holes and I felt the quill handle stick and release. Kept going and it happened a few more times getting worse. Only two holes to go so I just applied more pressure to the quill handle. On the next hole, it stuck and froze. NOT GOOD!!! Couldn't move the quill in or out. Bad part is I knew everything inside was immaculate, lubed, waxed, and burr free, at least the last time I looked. Removed the quill set screw and tried to pull the quill out but it wouldn't budge. Decided to take the pinion shaft out. Took off the hardware including the spring housing set screw and tried to push the shaft out. That was frozen too. Needed some kind of mechanical advantage......
Stop. Hammer time!!!

Pounded on the shaft and managed to move it. As soon as the gear teeth disengaged from the quill teeth, the quill moved freely and I was able to remove it from the headstock. Got the pinion shaft out and tried to rotate the spring housing on the shaft. It was frozen. Too weird, so I persuaded the housing off with the hammer and noticed that the inside diameter was chewed up.
.
.
[ATTACH]10358[/ATTACH]
.
.
What must have happened is a small piece of aluminum maybe from one of the pits you see came in pressure contact with the steel pinion shaft and adhered to it (aka galling). That can happen on any tight clearance fits between aluminum and steel where the aluminum bonds itself to the steel.

To fix it, I progressive sanded the aluminum ID with spiral roll sandpaper to remove a good amount of it and also cleaned up the steel shaft. Applied a smear coat of lithium to the aluminum ID wiping most of it out. That did the trick. Reinstalled everything and moves smooth as silk. Back to drilling.

(For you hammer heads, here's the full version. Love that song!! And honest honey, it has nothing to do with the girls)
Attachments
Img_8888mod.jpg
Img_8888mod.jpg (56.45 KiB) Viewed 2149 times
Mike
Sunny San Diego
Post Reply