You can delete one of them as long as it wasn't the "start of a thread".mmorris wrote:I'm about to the point of painting my greenie. I've searched "Painting" and did not come up with definitive answers to the questions below. I've stripped mine down to bare aluminum/metal and am going to use self-etching primer.
For those of you that have used Hammered paint and have a few years use on the paint job, did you sand/prep before painting and between coats? Did you use a sealer/topcoat/clearcoat?
Thanks, Monte (sorry if this got posted twice:)
Painting Goldie / Brownie
Moderator: admin
-
dusty

- Platinum Member
- Posts: 21530
- Joined: Wed Nov 22, 2006 6:52 am
- Location: Tucson (Wildcat Country), Arizona
"Making Sawdust Safely"
Dusty
Sent from my Dell XPS using Firefox.
Dusty
Sent from my Dell XPS using Firefox.

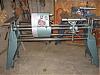
JPG, in your "group portrait" above, what is the part on the lower right?
mmoris, I did not sand between coats of the Hammered. Since you want a texture instead of a smooth surface (otherwise, why use hammered paint?) I don't think sanding is necessary. But I'm not sure what what the effect would be if you did sand between coats. I did use a clear coat on my second ER and on the legs of my Mark 5. I think it made a difference. I have nicks and dings in the paint on my first ER and on the parts where I didn't use a clear coat on the Mark 5. I don't have such nicks and dings in the paint where I used a clear coat. The Hammered paint does become pretty hard, it just takes a month or so to fully cure to that hardness.
mmoris, I did not sand between coats of the Hammered. Since you want a texture instead of a smooth surface (otherwise, why use hammered paint?) I don't think sanding is necessary. But I'm not sure what what the effect would be if you did sand between coats. I did use a clear coat on my second ER and on the legs of my Mark 5. I think it made a difference. I have nicks and dings in the paint on my first ER and on the parts where I didn't use a clear coat on the Mark 5. I don't have such nicks and dings in the paint where I used a clear coat. The Hammered paint does become pretty hard, it just takes a month or so to fully cure to that hardness.
Heath
Central Louisiana
-10ER - SN 13927, Born 1949, Acquired October 2008, Restored November, 2008
-10ER - SN 35630, Born 1950, Acquired April 2009, Restored May 2009, A34 Jigsaw
-Mark V - SN 212052, Born 1986, Acquired Sept 2009, Restored March 2010, Bandsaw
-10ER - SN 39722, Born 1950, Acquired March 2011, awaiting restoration
Central Louisiana
-10ER - SN 13927, Born 1949, Acquired October 2008, Restored November, 2008
-10ER - SN 35630, Born 1950, Acquired April 2009, Restored May 2009, A34 Jigsaw
-Mark V - SN 212052, Born 1986, Acquired Sept 2009, Restored March 2010, Bandsaw
-10ER - SN 39722, Born 1950, Acquired March 2011, awaiting restoration

-
JPG

- Platinum Member
- Posts: 35600
- Joined: Wed Dec 10, 2008 7:42 pm
- Location: Lexington, Ky (TAMECAT territory)
heathicus wrote:JPG, in your "group portrait" above, what is the part on the lower right?
. . . .
Think 6" Belt Sander.

Sorry Rob, I posted this before going to 'page two'!
╔═══╗
╟JPG ╢
╚═══╝
Goldie(Bought New SN 377425)/4" jointer/6" beltsander/12" planer/stripsander/bandsaw/powerstation /Scroll saw/Jig saw /Craftsman 10" ras/Craftsman 6" thicknessplaner/ Dayton10"tablesaw(restoredfromneighborstrashpile)/ Mark VII restoration in 'progress'/ 10E[/size](SN E3779) restoration in progress, a 510 on the back burner and a growing pile of items to be eventually returned to useful life. - aka Red Grange
╟JPG ╢
╚═══╝
Goldie(Bought New SN 377425)/4" jointer/6" beltsander/12" planer/stripsander/bandsaw/powerstation /Scroll saw/Jig saw /Craftsman 10" ras/Craftsman 6" thicknessplaner/ Dayton10"tablesaw(restoredfromneighborstrashpile)/ Mark VII restoration in 'progress'/ 10E[/size](SN E3779) restoration in progress, a 510 on the back burner and a growing pile of items to be eventually returned to useful life. - aka Red Grange
-
JPG
- Platinum Member
- Posts: 35600
- Joined: Wed Dec 10, 2008 7:42 pm
- Location: Lexington, Ky (TAMECAT territory)
I have done no sanding either before primer, or in between any coats. I have gone all the way to bare metal and then self etching primer as well as simply painting over existing paint.
It is necessary to make sure the workpiece is cleaned.(no wax/oil/dirt/rust)
The bare metal/primer will require more than one coat.
The hammer tone 'effect' will not occur in a breezy environment. The differing parts of the hammertone paint MUST separate after application to the workpiece to create the hammertone effect.
The separation works best if the freshly painted surface is horizontal for a brief period(coupla minutes) while the 'effect' is being created.
Another reason for a brief horizontal positioning is that there is a very fine line between 'heavy enough' to allow 'effect' and running.
Fortunately this paint covers over quite well, and a botched result can be either touched up, or simply painted over with an additional 'coat'.
Since it is a heavy coat, it can be 'tackey' for a while. Leaving in the sun for a couple of hours helps immensely.
If you are going to attach screws, make sure it is really really dry.
Heath's next post reminded me that I neglected to say to let it dry before 'additional' coat.
It is necessary to make sure the workpiece is cleaned.(no wax/oil/dirt/rust)
The bare metal/primer will require more than one coat.
The hammer tone 'effect' will not occur in a breezy environment. The differing parts of the hammertone paint MUST separate after application to the workpiece to create the hammertone effect.
The separation works best if the freshly painted surface is horizontal for a brief period(coupla minutes) while the 'effect' is being created.
Another reason for a brief horizontal positioning is that there is a very fine line between 'heavy enough' to allow 'effect' and running.
Fortunately this paint covers over quite well, and a botched result can be either touched up, or simply painted over with an additional 'coat'.
Since it is a heavy coat, it can be 'tackey' for a while. Leaving in the sun for a couple of hours helps immensely.
If you are going to attach screws, make sure it is really really dry.
Heath's next post reminded me that I neglected to say to let it dry before 'additional' coat.
╔═══╗
╟JPG ╢
╚═══╝
Goldie(Bought New SN 377425)/4" jointer/6" beltsander/12" planer/stripsander/bandsaw/powerstation /Scroll saw/Jig saw /Craftsman 10" ras/Craftsman 6" thicknessplaner/ Dayton10"tablesaw(restoredfromneighborstrashpile)/ Mark VII restoration in 'progress'/ 10E[/size](SN E3779) restoration in progress, a 510 on the back burner and a growing pile of items to be eventually returned to useful life. - aka Red Grange
╟JPG ╢
╚═══╝
Goldie(Bought New SN 377425)/4" jointer/6" beltsander/12" planer/stripsander/bandsaw/powerstation /Scroll saw/Jig saw /Craftsman 10" ras/Craftsman 6" thicknessplaner/ Dayton10"tablesaw(restoredfromneighborstrashpile)/ Mark VII restoration in 'progress'/ 10E[/size](SN E3779) restoration in progress, a 510 on the back burner and a growing pile of items to be eventually returned to useful life. - aka Red Grange
On my ER's I did not sand. But those were cast iron parts with an already textured surface. I cleaned them up with a wire brush on my angle grinder, then wiped with acetone before painting.mmorris wrote:Thanks, Heath.
Did you sand before you primed (if you primed)?
Did you wait for a month until the paint completely hardened, to apply the clear coat?
On the aluminum surfaces of the Mark 5, if I recollect correctly, I sanded the stamped steel parts (legs, motor pan, and belt cover) but just used a brass wire wheel on the aluminum parts when necessary (sometimes just a 3M paint stripping pad and a little acetone was all that was necessary). This was after paint removal with CitruStrip. And I always wiped with acetone before painting.
I followed the directions on the can before applying a second or clear coat. I can't recall what they are, but I *think* you're supposed to wait 48 hours before applying another coat.
Since you're going for a textured finish and not a slick automobile type finish, initial sanding and sanding between coats is not necessary. Just follow the directions on the can and you'll be fine.
Heath
Central Louisiana
-10ER - SN 13927, Born 1949, Acquired October 2008, Restored November, 2008
-10ER - SN 35630, Born 1950, Acquired April 2009, Restored May 2009, A34 Jigsaw
-Mark V - SN 212052, Born 1986, Acquired Sept 2009, Restored March 2010, Bandsaw
-10ER - SN 39722, Born 1950, Acquired March 2011, awaiting restoration
Central Louisiana
-10ER - SN 13927, Born 1949, Acquired October 2008, Restored November, 2008
-10ER - SN 35630, Born 1950, Acquired April 2009, Restored May 2009, A34 Jigsaw
-Mark V - SN 212052, Born 1986, Acquired Sept 2009, Restored March 2010, Bandsaw
-10ER - SN 39722, Born 1950, Acquired March 2011, awaiting restoration

Excellant suggestions for painting with Hammered paint. To obtain a faster drying time when using the Rustoleum Hammered paint, I put the painted headstock/parts in my converted Power Coating range oven at 200 deg. max. for 1 to 2 hours. This made a hard surface that I was able to wax/shine and then assemble the headstock immediately. This does not work for regular spray can paints (burns them), only for the Hammered version.JPG40504 wrote:I have done no sanding either before primer, or in between any coats. I have gone all the way to bare metal and then self etching primer as well as simply painting over existing paint.
It is necessary to make sure the workpiece is cleaned.(no wax/oil/dirt/rust)
The bare metal/primer will require more than one coat.
The hammer tone 'effect' will not occur in a breezy environment. The differing parts of the hammertone paint MUST separate after application to the workpiece to create the hammertone effect.
The separation works best if the freshly painted surface is horizontal for a brief period(coupla minutes) while the 'effect' is being created.
Another reason for a brief horizontal positioning is that there is a very fine line between 'heavy enough' to allow 'effect' and running.
Fortunately this paint covers over quite well, and a botched result can be either touched up, or simply painted over with an additional 'coat'.
Since it is a heavy coat, it can be 'tackey' for a while. Leaving in the sun for a couple of hours helps immensely.
If you are going to attach screws, make sure it is really really dry.
Of course, I wouold recommend trying this with some small part first to see what the results will be before trying a headstock.
Bill Mayo bill.mayo@verizon.net
Shopsmith owner since 73. Sell, repair and rebuild Shopsmith, Total Shop & Wood Master headstocks, SPTs, attachments, accessories and parts. US Navy 1955-1975 (FTCS/E-8)
Shopsmith owner since 73. Sell, repair and rebuild Shopsmith, Total Shop & Wood Master headstocks, SPTs, attachments, accessories and parts. US Navy 1955-1975 (FTCS/E-8)
-
JPG
- Platinum Member
- Posts: 35600
- Joined: Wed Dec 10, 2008 7:42 pm
- Location: Lexington, Ky (TAMECAT territory)
billmayo wrote:. . .
I put the painted headstock/parts in my converted Power Coating range oven at 200 deg. max. for 1 to 2 hours. This made a hard surface that I was able to wax/shine and then assemble the headstock immediately. This does not work for regular spray can paints (burns them), only for the Hammered version.
Been thinking of using kitchen oven, but did not know about temperature. THANK YOU!
Not recommended when SWMBO is either home or about to return soon!:eek:
╔═══╗
╟JPG ╢
╚═══╝
Goldie(Bought New SN 377425)/4" jointer/6" beltsander/12" planer/stripsander/bandsaw/powerstation /Scroll saw/Jig saw /Craftsman 10" ras/Craftsman 6" thicknessplaner/ Dayton10"tablesaw(restoredfromneighborstrashpile)/ Mark VII restoration in 'progress'/ 10E[/size](SN E3779) restoration in progress, a 510 on the back burner and a growing pile of items to be eventually returned to useful life. - aka Red Grange
╟JPG ╢
╚═══╝
Goldie(Bought New SN 377425)/4" jointer/6" beltsander/12" planer/stripsander/bandsaw/powerstation /Scroll saw/Jig saw /Craftsman 10" ras/Craftsman 6" thicknessplaner/ Dayton10"tablesaw(restoredfromneighborstrashpile)/ Mark VII restoration in 'progress'/ 10E[/size](SN E3779) restoration in progress, a 510 on the back burner and a growing pile of items to be eventually returned to useful life. - aka Red Grange