Page 5 of 19
Re: Yet another "Goldie" Restoration
Posted: Fri Jul 26, 2024 7:16 am
by GetterDone
Great job on the Shopsmith and the video.
I have some eastwood stuff like you used on the inside of the tubes.
It has been sitting for several years.
This is a good use for it thanks for the idea.
Re: Yet another "Goldie" Restoration
Posted: Fri Jul 26, 2024 3:05 pm
by AllenH
Now for some fun stuff.
I was able to get some of the base parts primed.
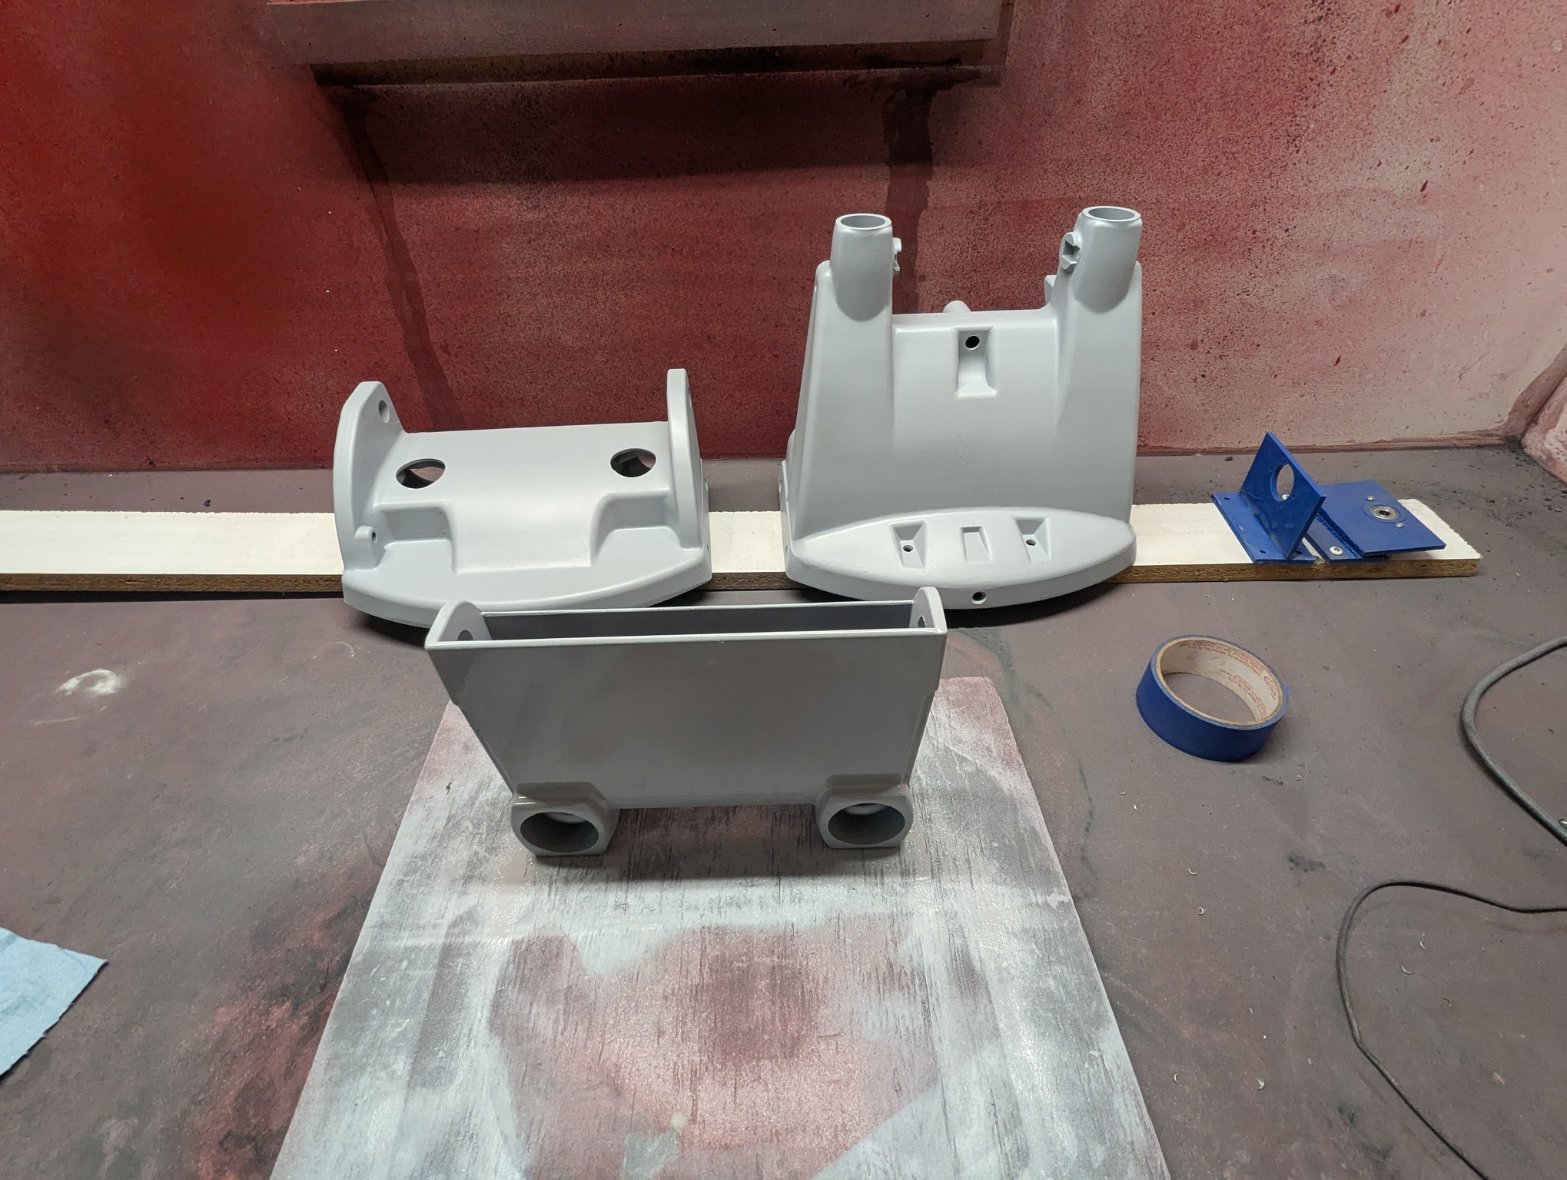
- PXL_20240726_143214156.jpg (292.9 KiB) Viewed 5190 times
And now some color.
- PXL_20240726_175837246.jpg (318.92 KiB) Viewed 5190 times
- PXL_20240726_175840261.jpg (353.85 KiB) Viewed 5190 times
So the next thing I will tackle are the castor assemblies.
- PXL_20240726_175936020.jpg (302.52 KiB) Viewed 5190 times
Re: Yet another "Goldie" Restoration
Posted: Fri Jul 26, 2024 5:32 pm
by jsburger
This has been mentioned before in other posts. IF you remove the cams from the shafts, mark them precisely so they go back on in the exact same position. The holes for the roll pins are not precision drilled. They all vary slightly. If you don't put the cams back in the same place the roll pins will (might) not be able to be installed.
Re: Yet another "Goldie" Restoration
Posted: Fri Jul 26, 2024 5:35 pm
by AllenH
jsburger wrote: Fri Jul 26, 2024 5:32 pm
This has been mentioned before in other posts. IF you remove the cams from the shafts, mark them precisely so they go back on in the exact same position. The holes for the roll pins are not precision drilled. They all vary slightly. If you don't put the cams back in the same place the roll pins will (might) not be able to be installed.
Thanks for the heads up, I did catch that in some of the other threads, but you explanation was very clear.
Re: Yet another "Goldie" Restoration
Posted: Fri Jul 26, 2024 8:18 pm
by chapmanruss
The Base and Arm look to be in good shape after the pin removal. I don't recall ever seeing a used pin for sale separately from the Base and Arm Assembly. If you can't find one you could make your own with some rod stock of the correct diameter.
Re: Yet another "Goldie" Restoration
Posted: Fri Jul 26, 2024 10:42 pm
by JPG
AllenH wrote: Fri Jul 26, 2024 5:35 pm
jsburger wrote: Fri Jul 26, 2024 5:32 pm
This has been mentioned before in other posts. IF you remove the cams from the shafts, mark them precisely so they go back on in the exact same position. The holes for the roll pins are not precision drilled. They all vary slightly. If you don't put the cams back in the same place the roll pins will (might) not be able to be installed.
Thanks for the heads up, I did catch that in some of the other threads, but you explanation was very clear.
The connecting rods to end castings are also not precision drilled, so they also need to be identified prior to disassembly. I find a simply dimpling with a center punch will suffice. There are 4 connections on each caster assembly. One dimple on the end of the connecting rod and a single dimple on the casting for the first. The second can be two dimples. The third can be three dimples. The fourth can be zero dimples.
This assures the roll pins will fit into the rod and end casting holes correctly.
If the marking is not done, one can be chasing their tail trying to get things assembled as they were originally.
It should be obvious that each caster assembly set of parts needs to be separated from the parts from the other caster assembly.
Re: Yet another "Goldie" Restoration
Posted: Fri Jul 26, 2024 11:01 pm
by AllenH
Good tip. I have a set of number punches that I was going to use. The dimples would be easier to see.
Re: Yet another "Goldie" Restoration
Posted: Mon Jul 29, 2024 9:20 am
by AllenH
I was able to get quite a bit done this weekend.
First the castor assembly.
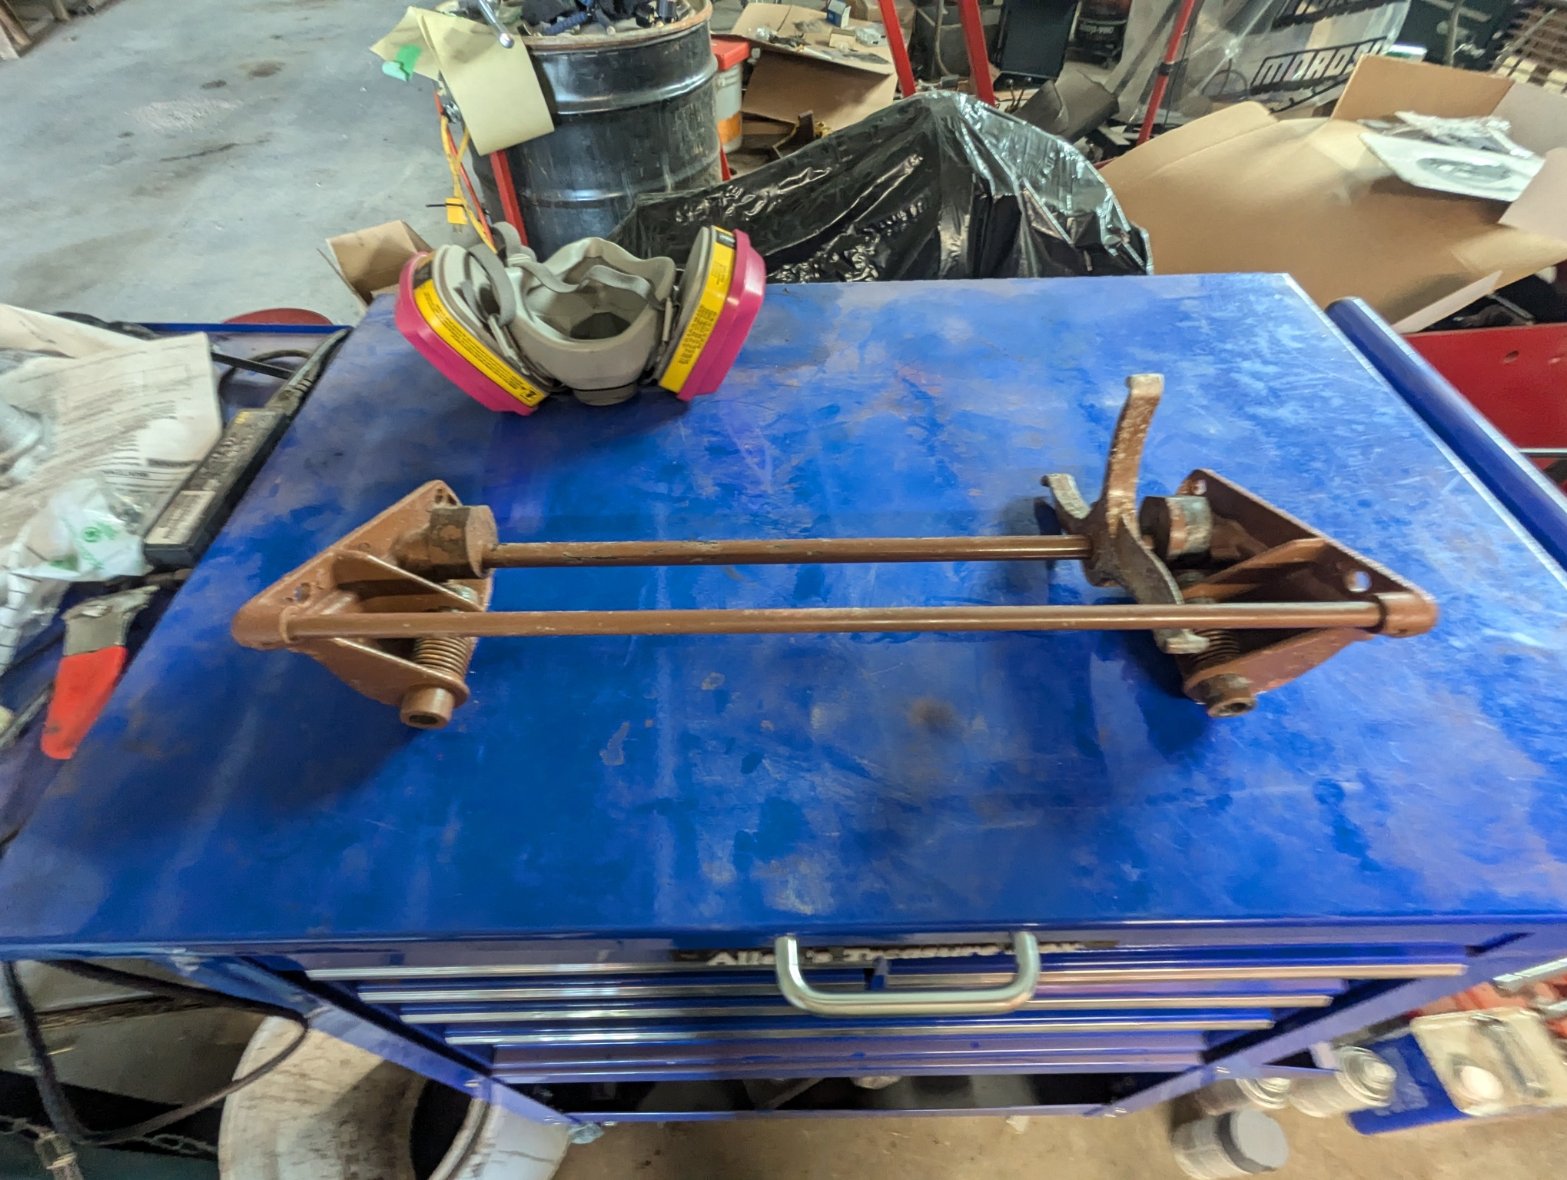
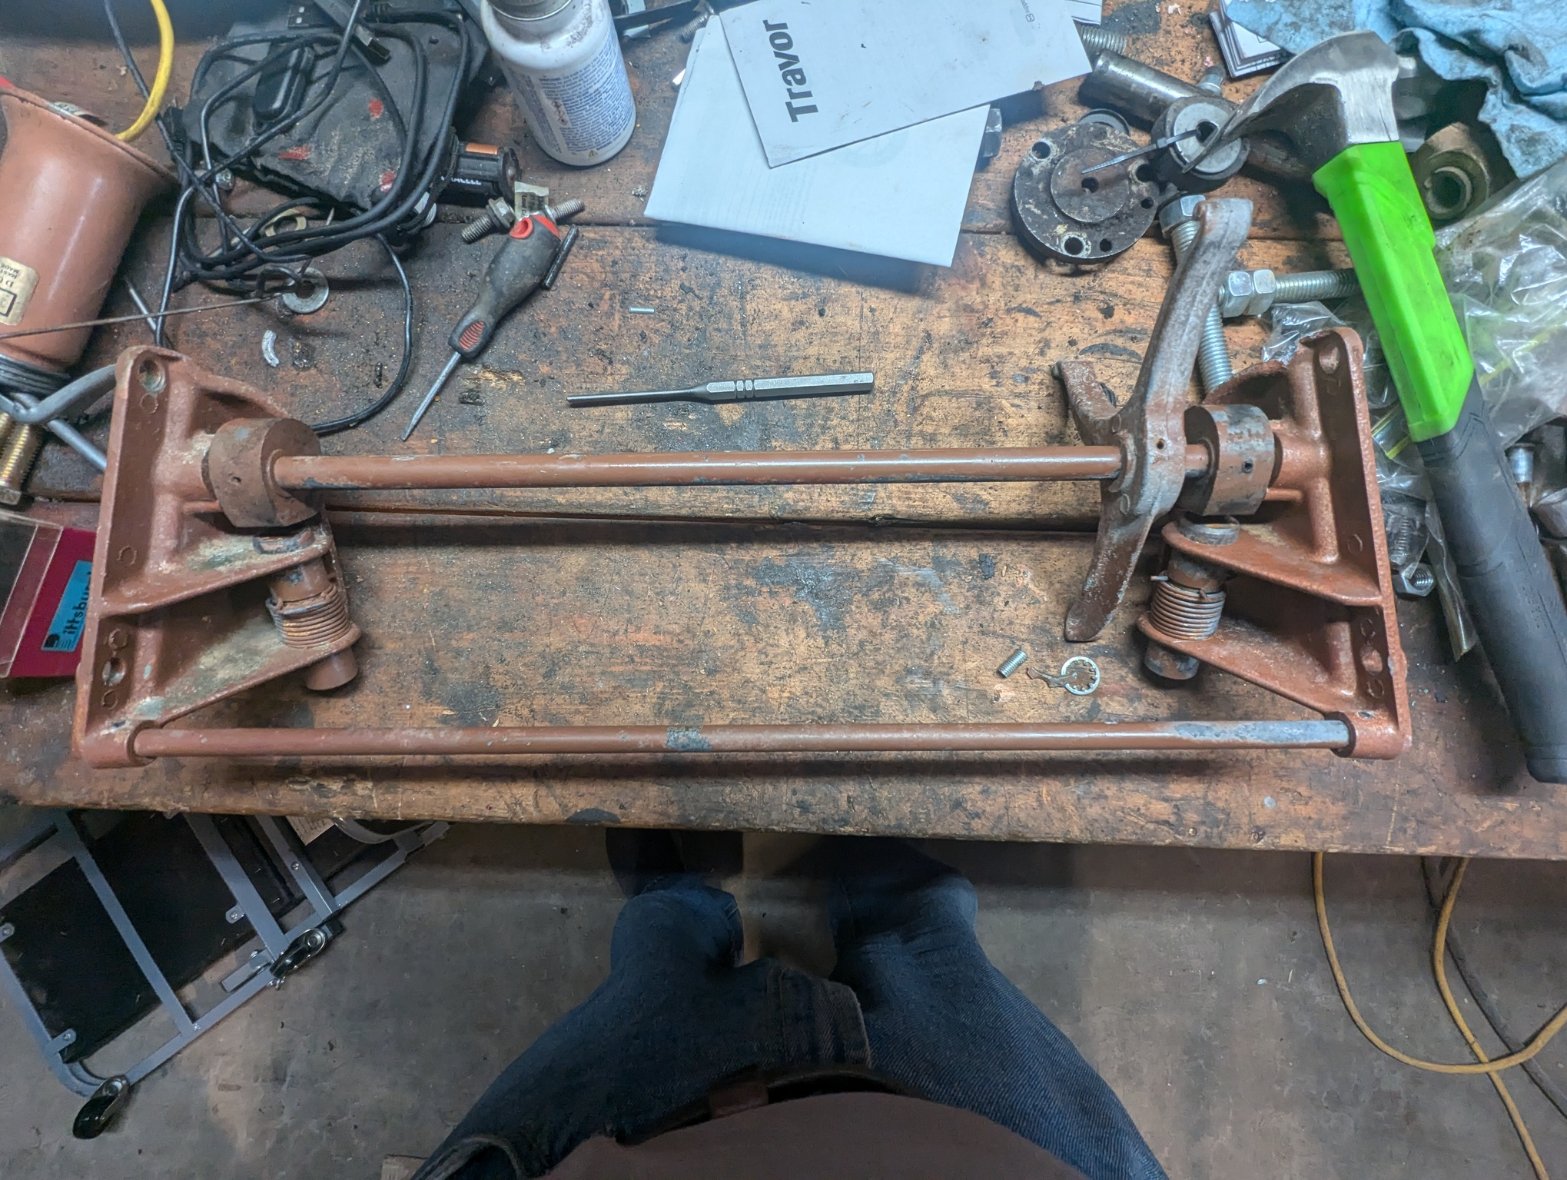
Here is a pic of the assembly just before I started to remove the roll pins. You can see the PO spray painted the assembly when he painted the legs. This side sort of functioned, but barely. The other side was pretty much frozen up.
- PXL_20240727_132238486.jpg (381.21 KiB) Viewed 4999 times
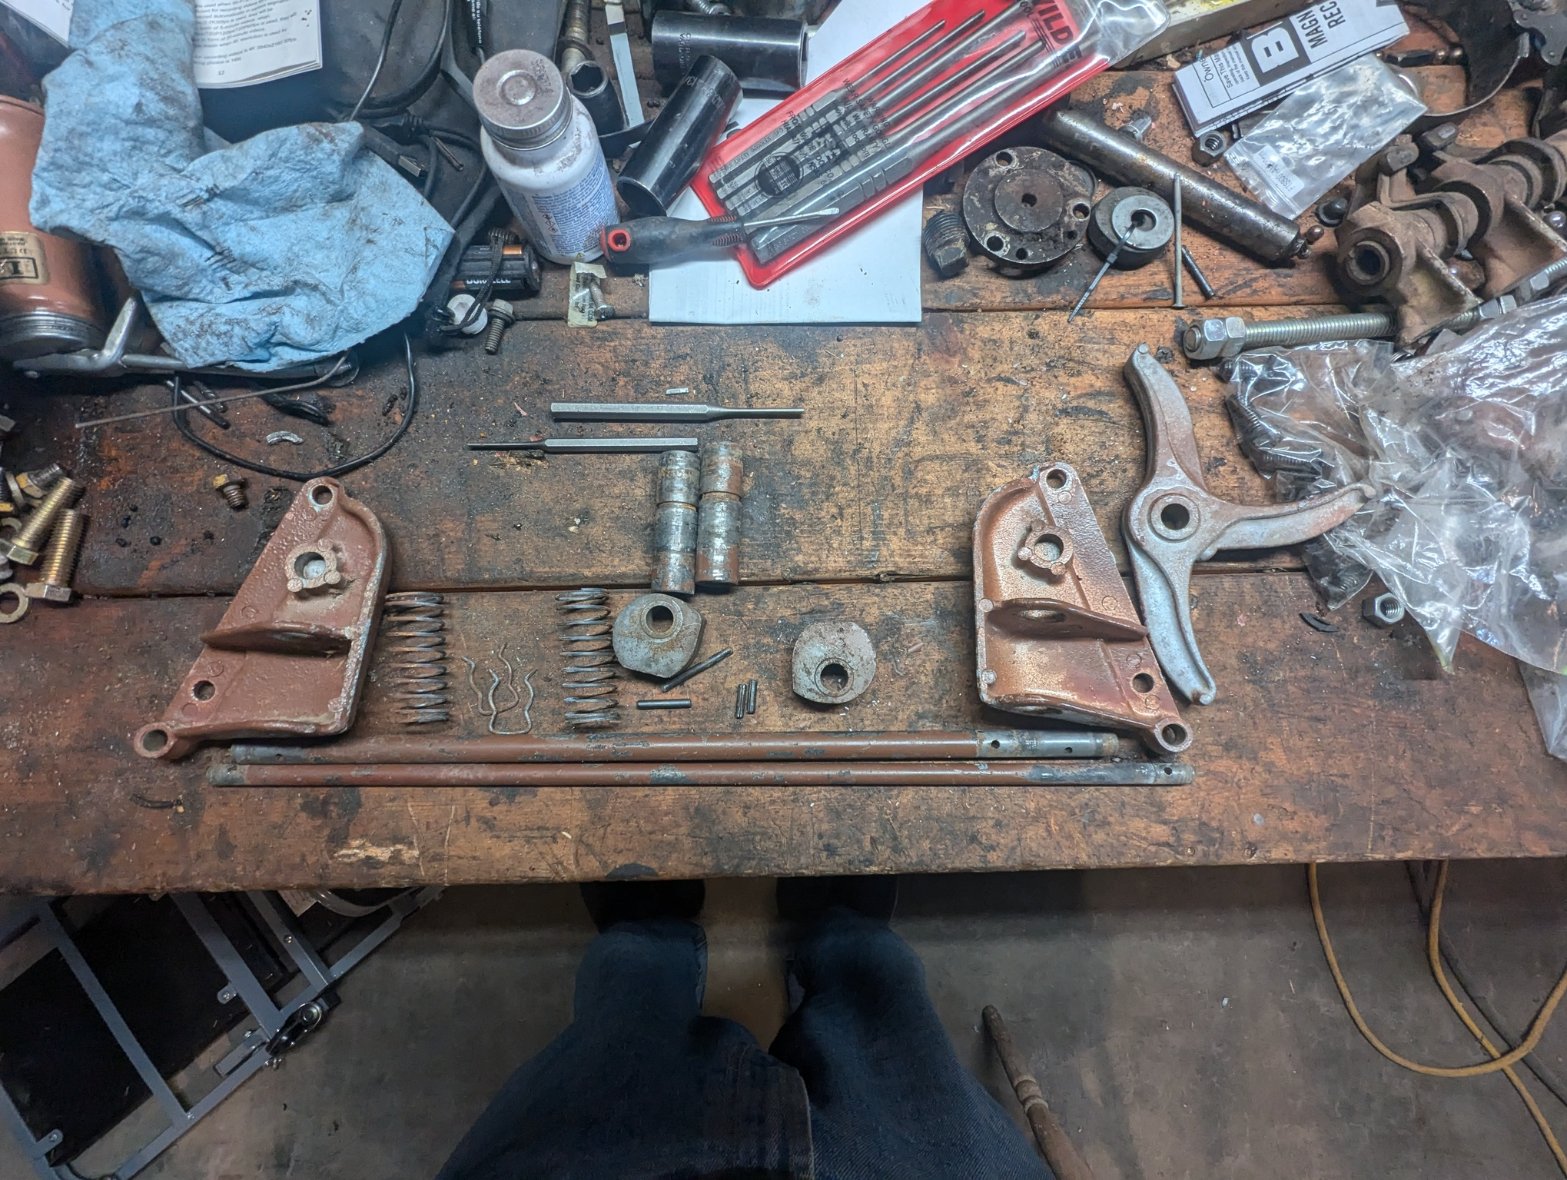
This pic shows the parts all disassembled. I had used a dimple punch as suggested to mark all of the positions of the components.
- PXL_20240727_135950132.jpg (424.42 KiB) Viewed 4999 times
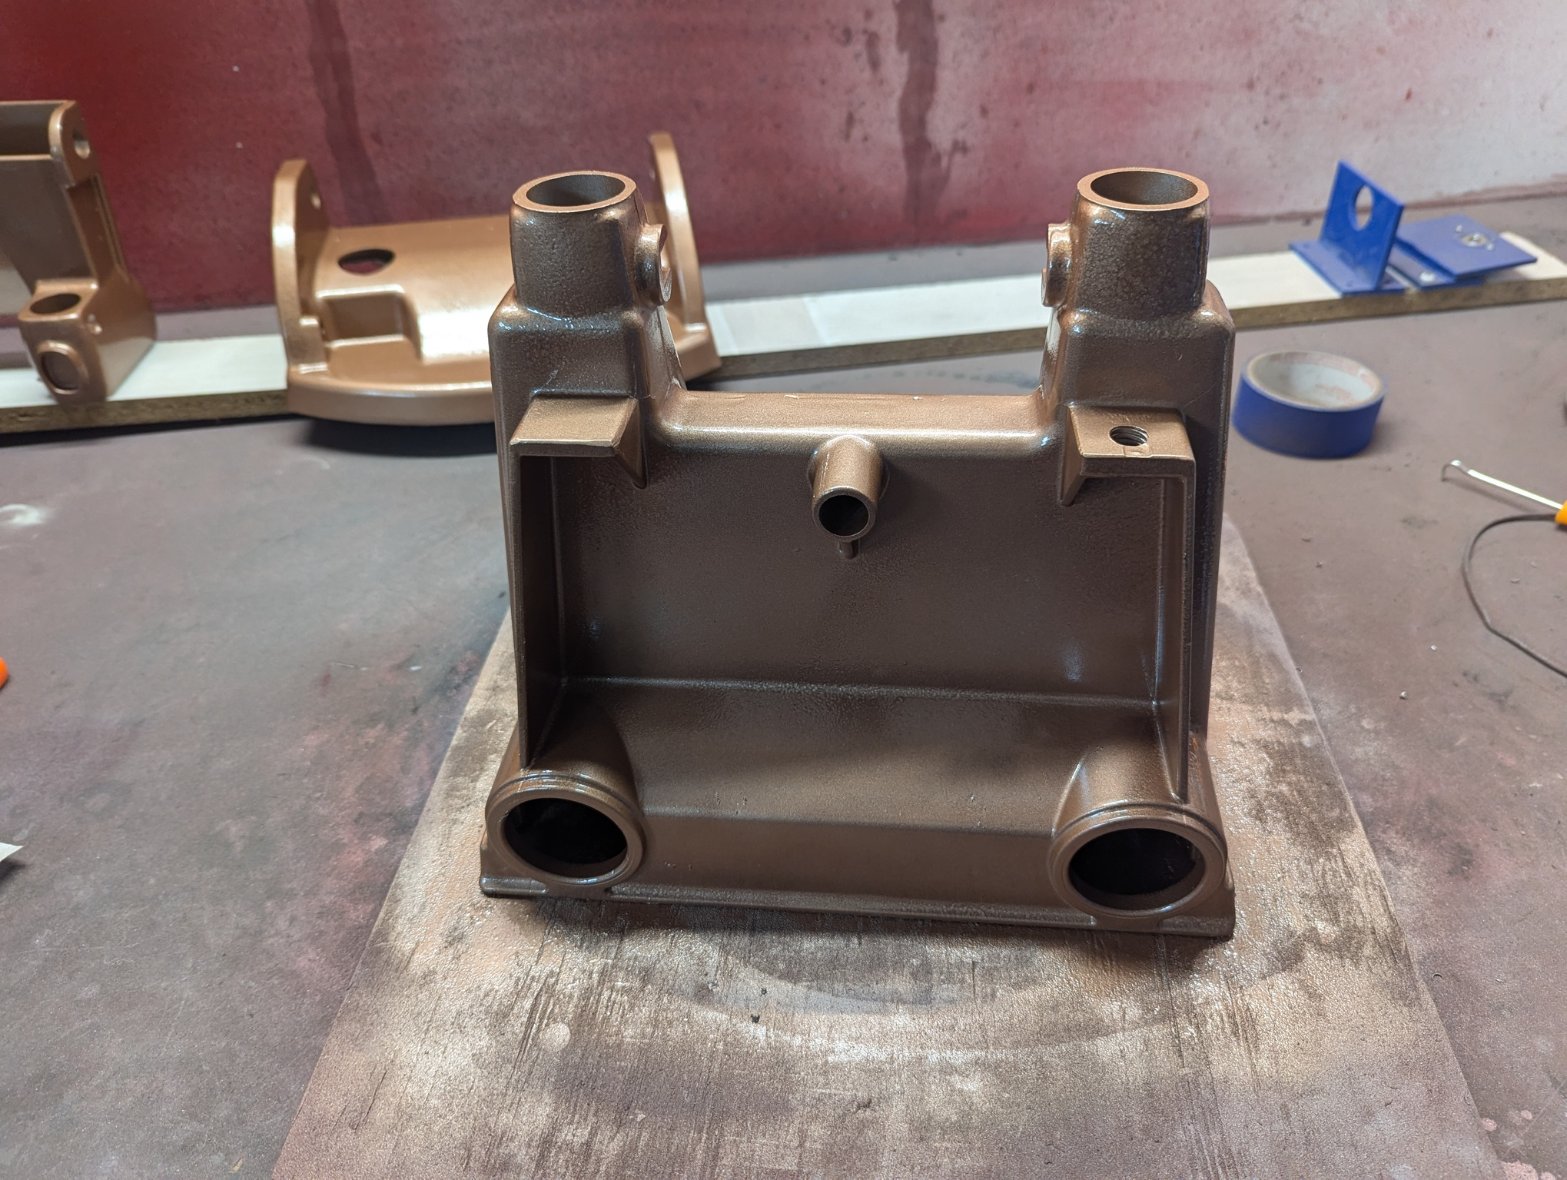
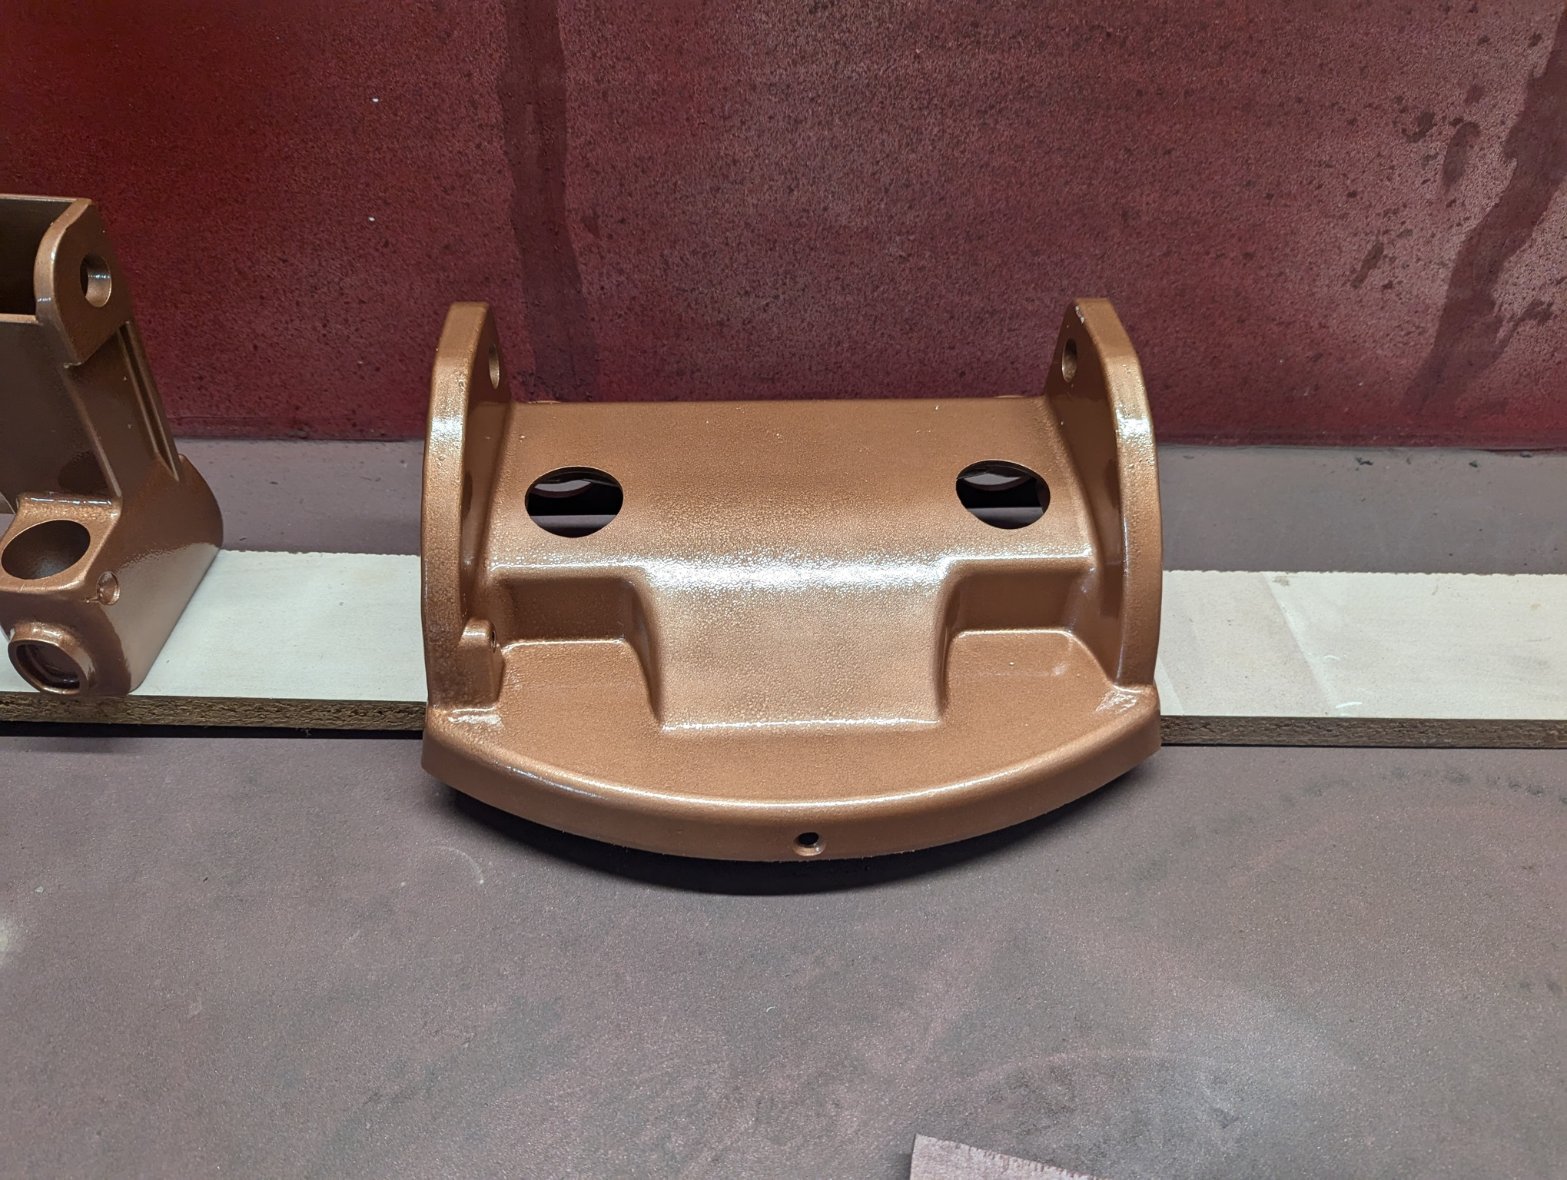
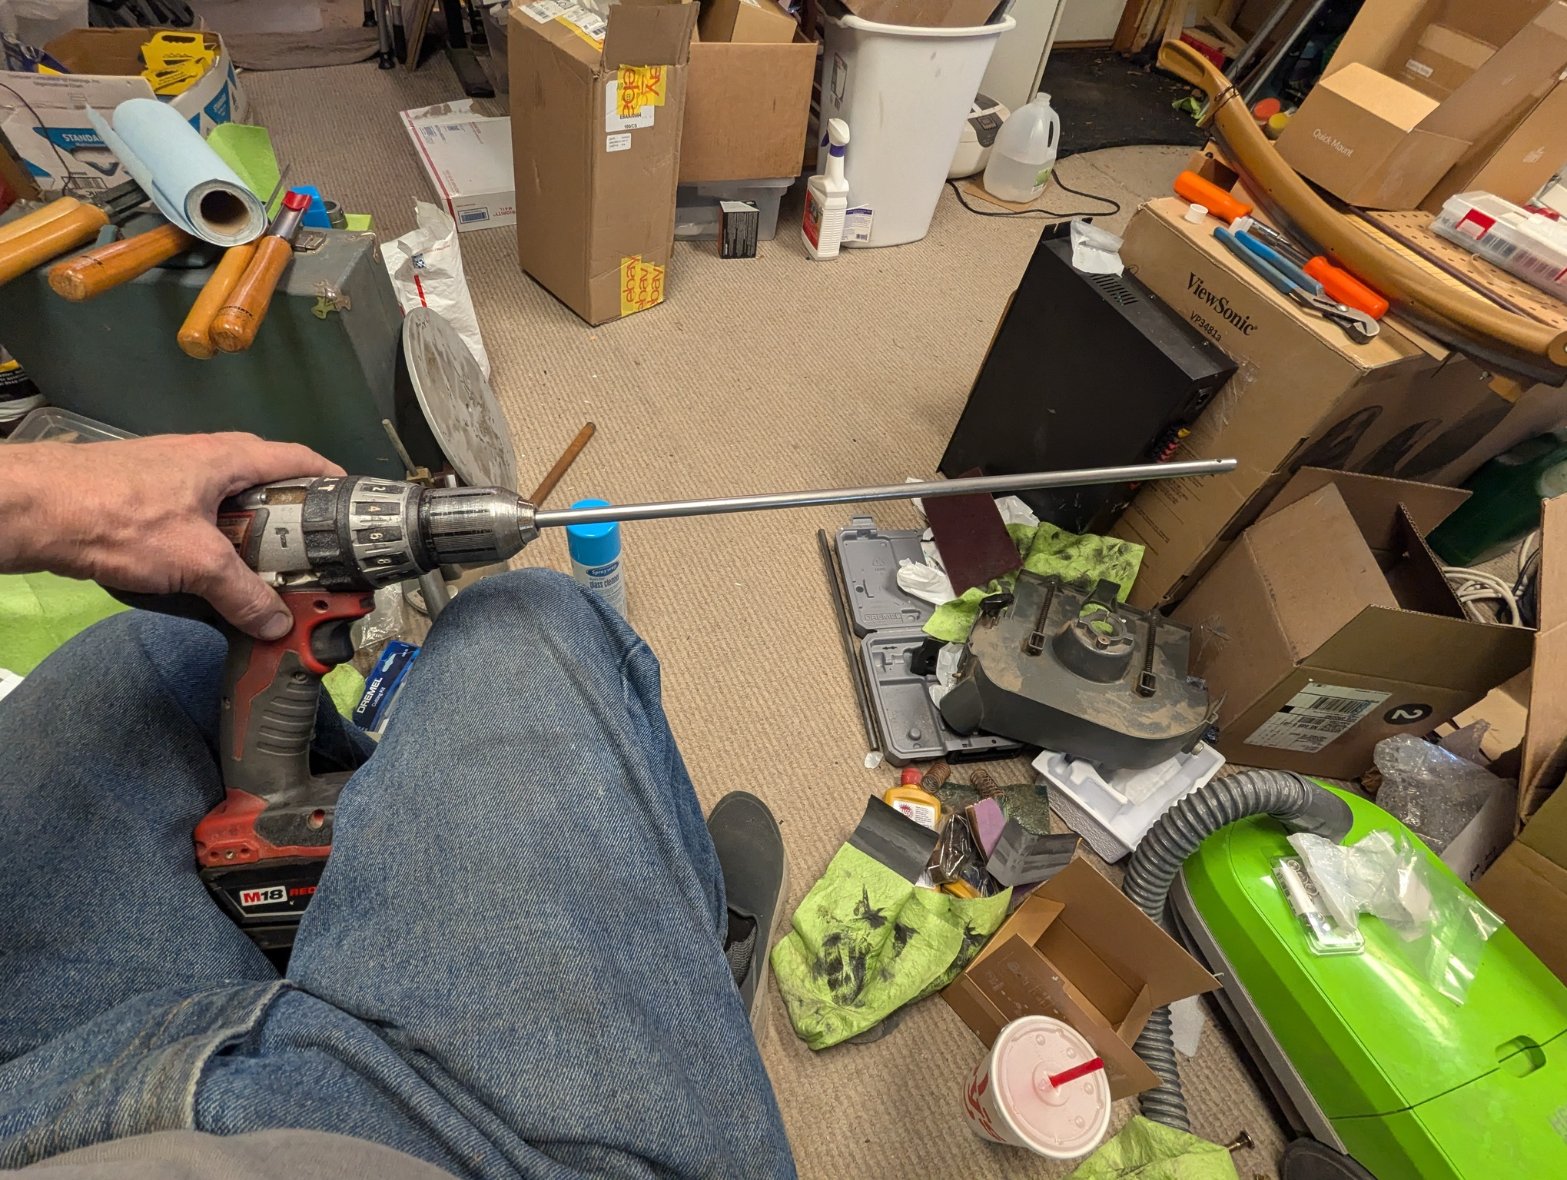
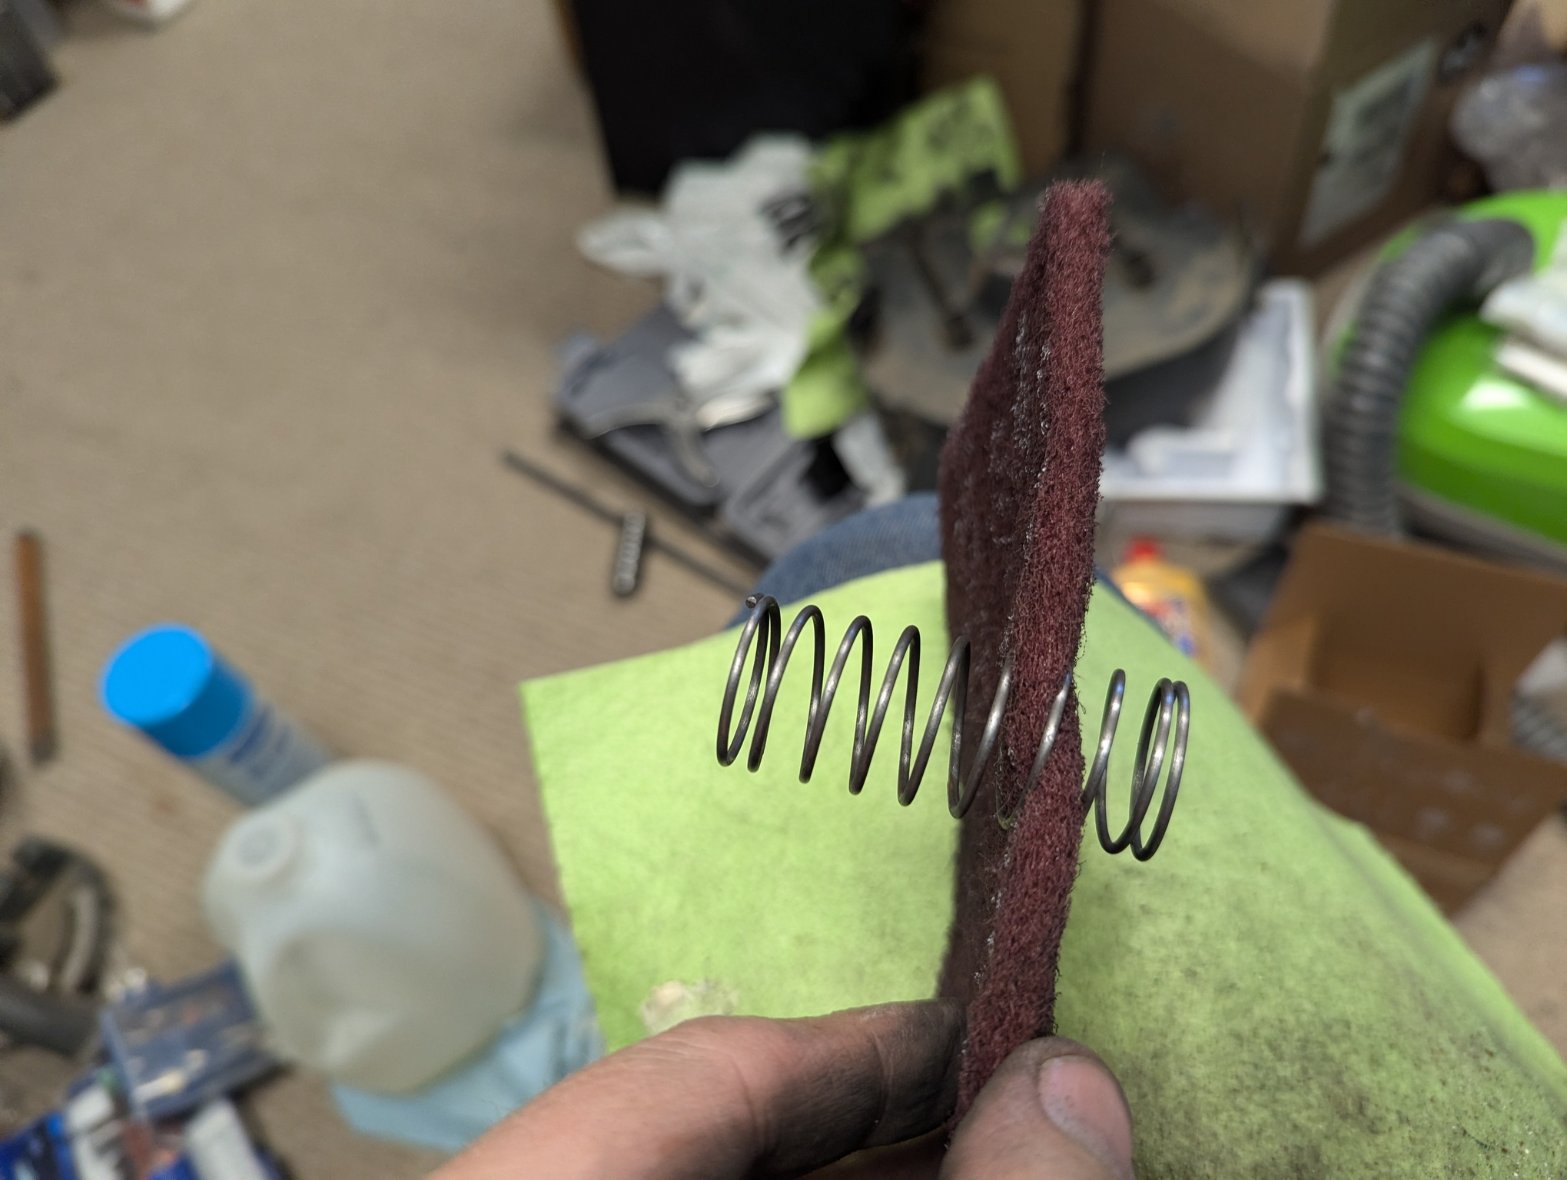
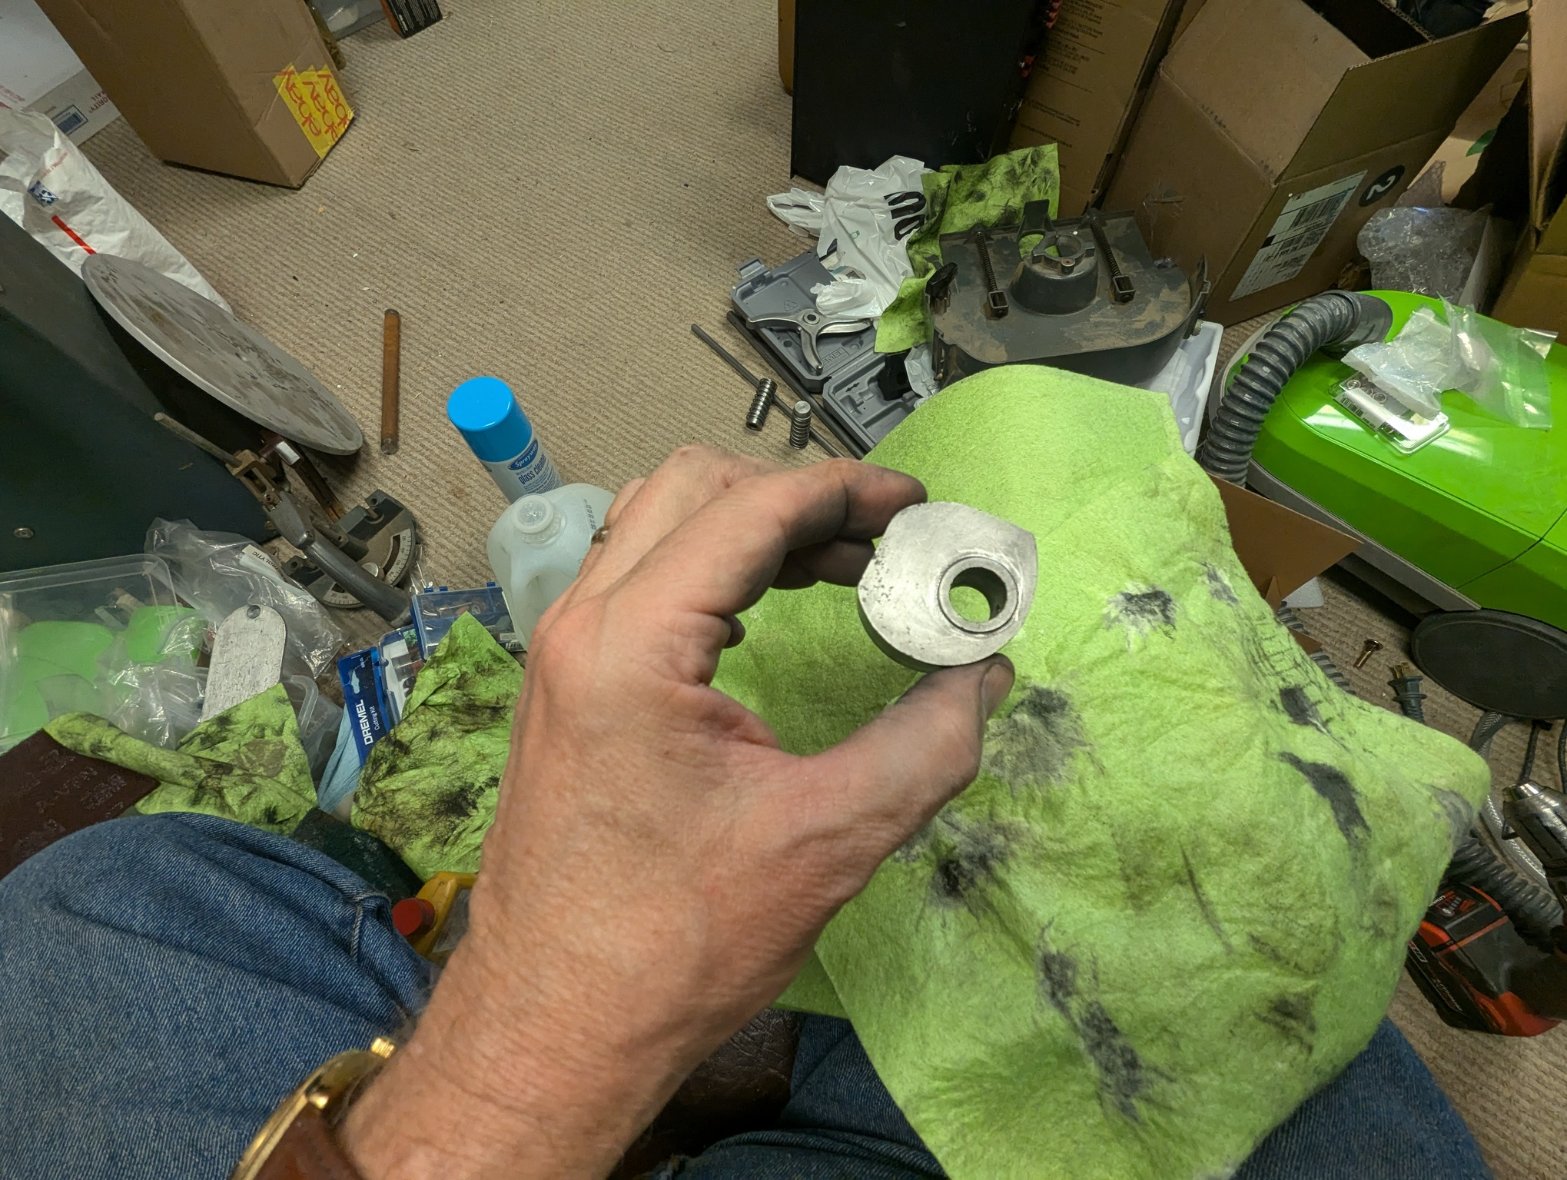
I media blasted the ends and shafts. The ends where primed and painted with Rust-Oleum Hammered Copper and the shafts were polished by putting them in a drill and using scotch brite pads and 400 grit sand paper. I finished them off with some Mag Cleaner.
- PXL_20240727_181134265.jpg (434.78 KiB) Viewed 4999 times
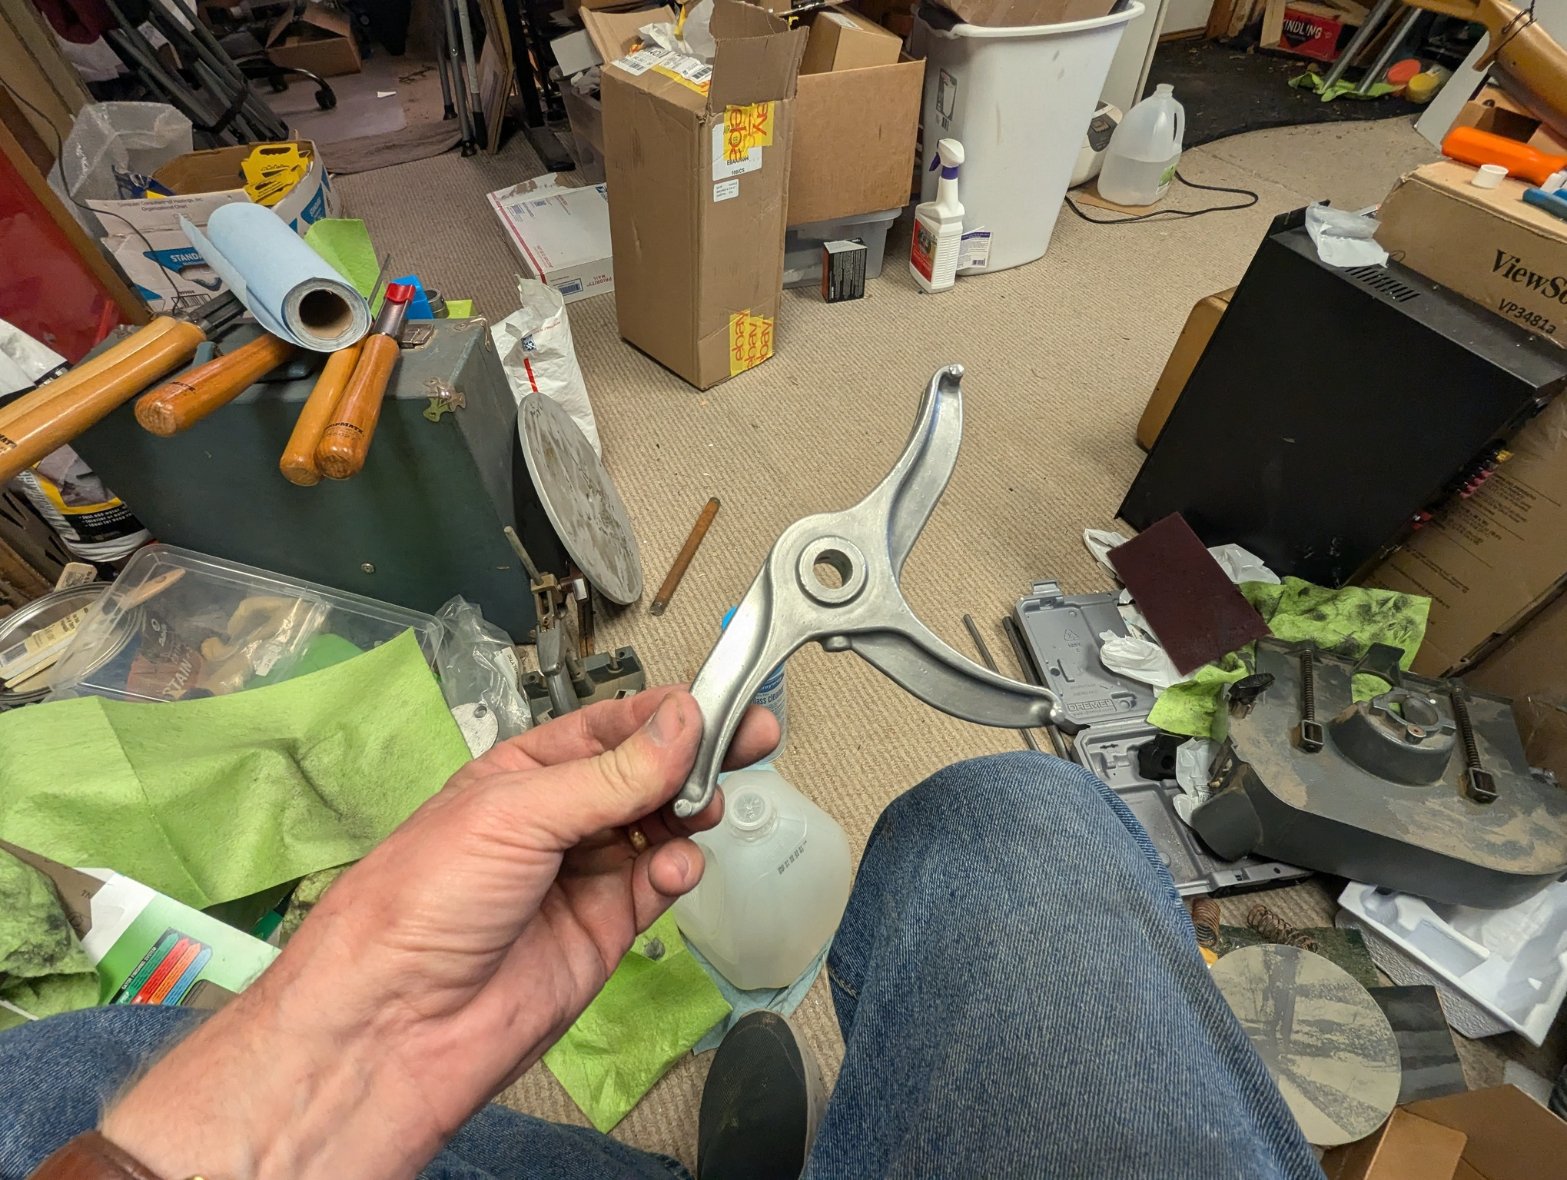
The lever mechanism was polished using the pads and Mag Cleaner also.
- PXL_20240727_181412232.jpg (393.55 KiB) Viewed 4999 times
The Cams, Pistons and springs where mainly cleaned up the same way.
- PXL_20240727_210216580.jpg (176.82 KiB) Viewed 4999 times
- PXL_20240727_212543760.jpg (368.9 KiB) Viewed 4999 times
Every thing was them waxed with paste wax for lubrication and to prevent future rust.
Now I reassembled the shaft lever, shaft and cams. I used the dimples to make sure I got them back in the correct positions.
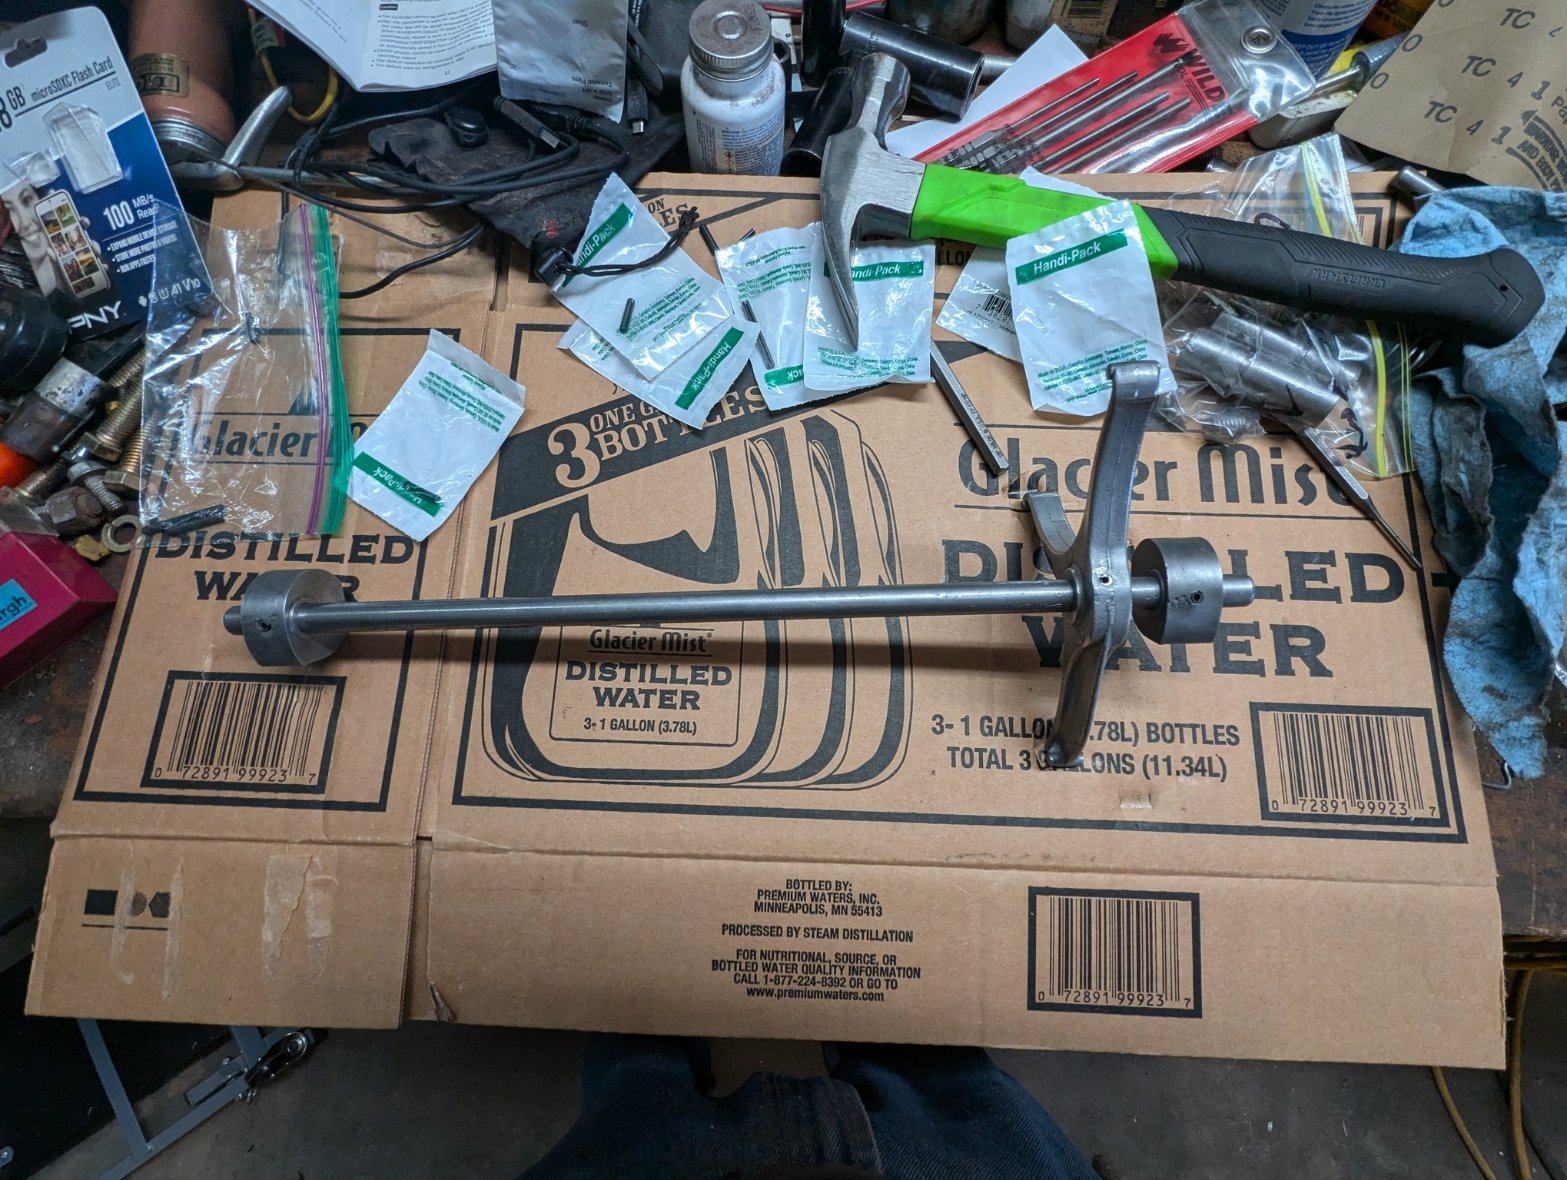
- PXL_20240728_165713380.jpg (402.25 KiB) Viewed 4999 times
Before I put the pistons back in the end pieces, I used a brake hone on the end pieces to make sure the pistons moved smoothly. Caution must be used when doing this, you can scratch up you newly painted piece easily.
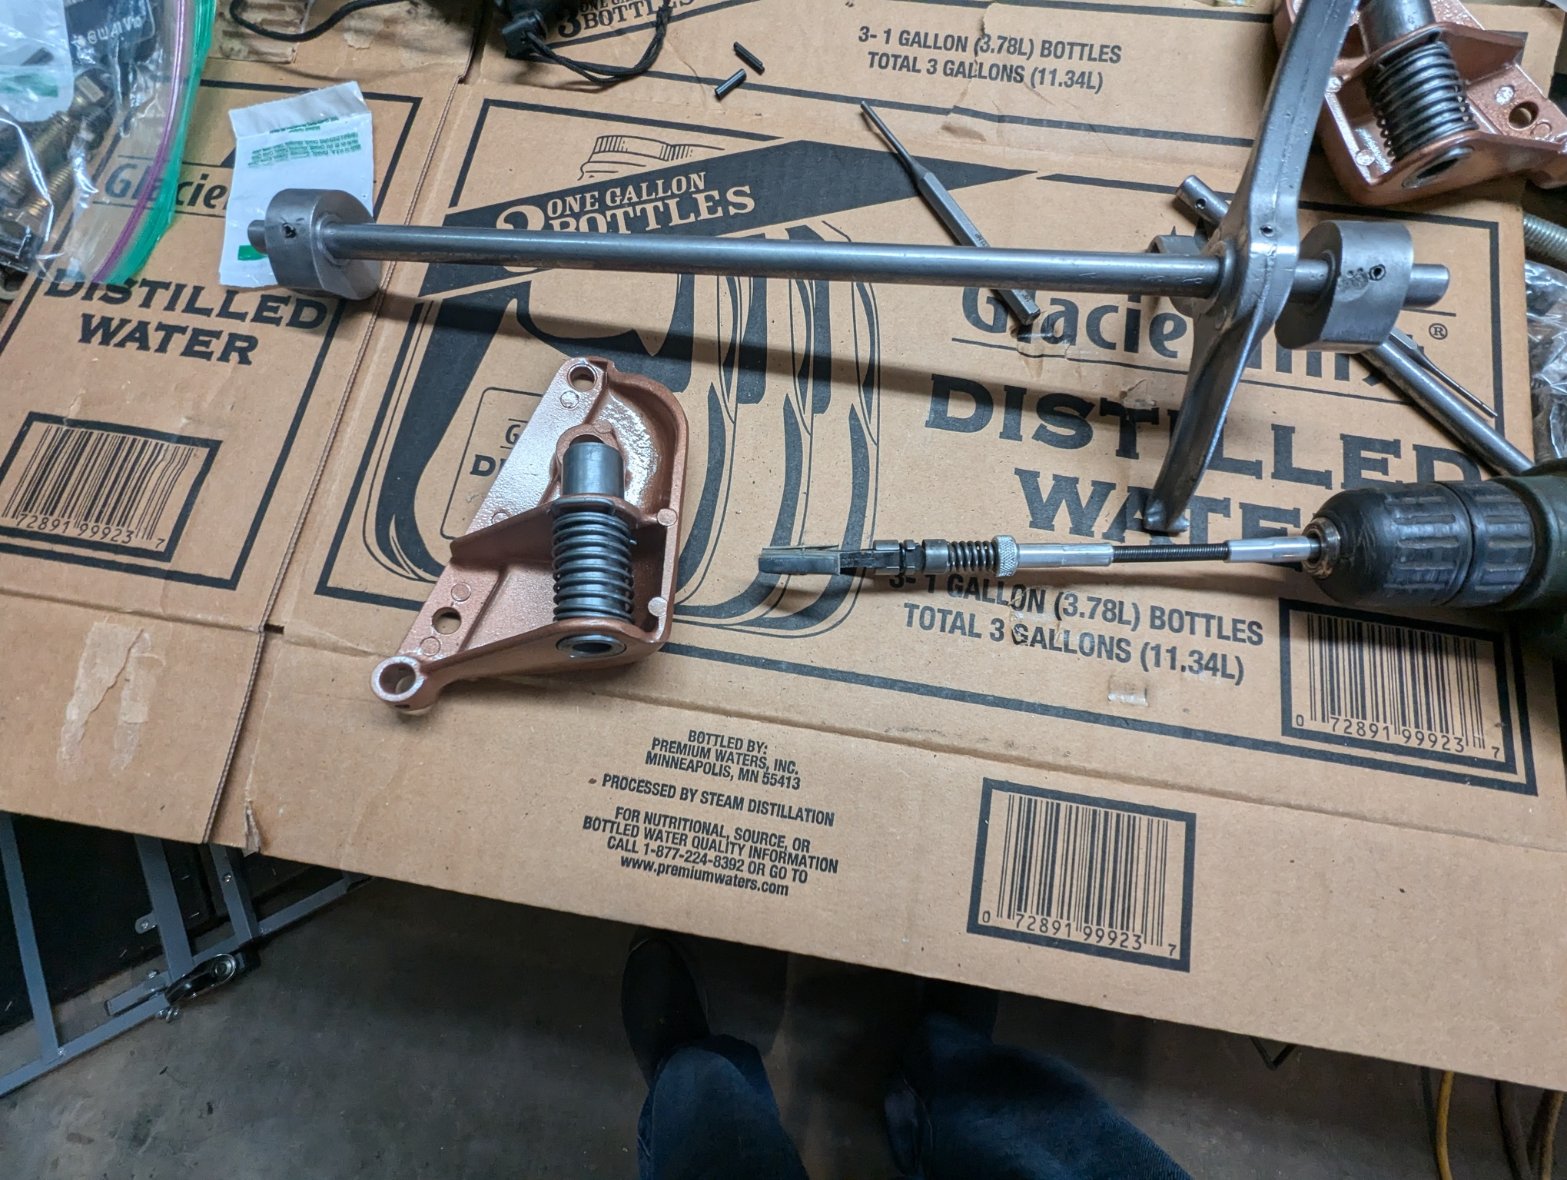
- PXL_20240728_171225970.jpg (363.61 KiB) Viewed 4999 times
This is the final product. I think it came out quite well.
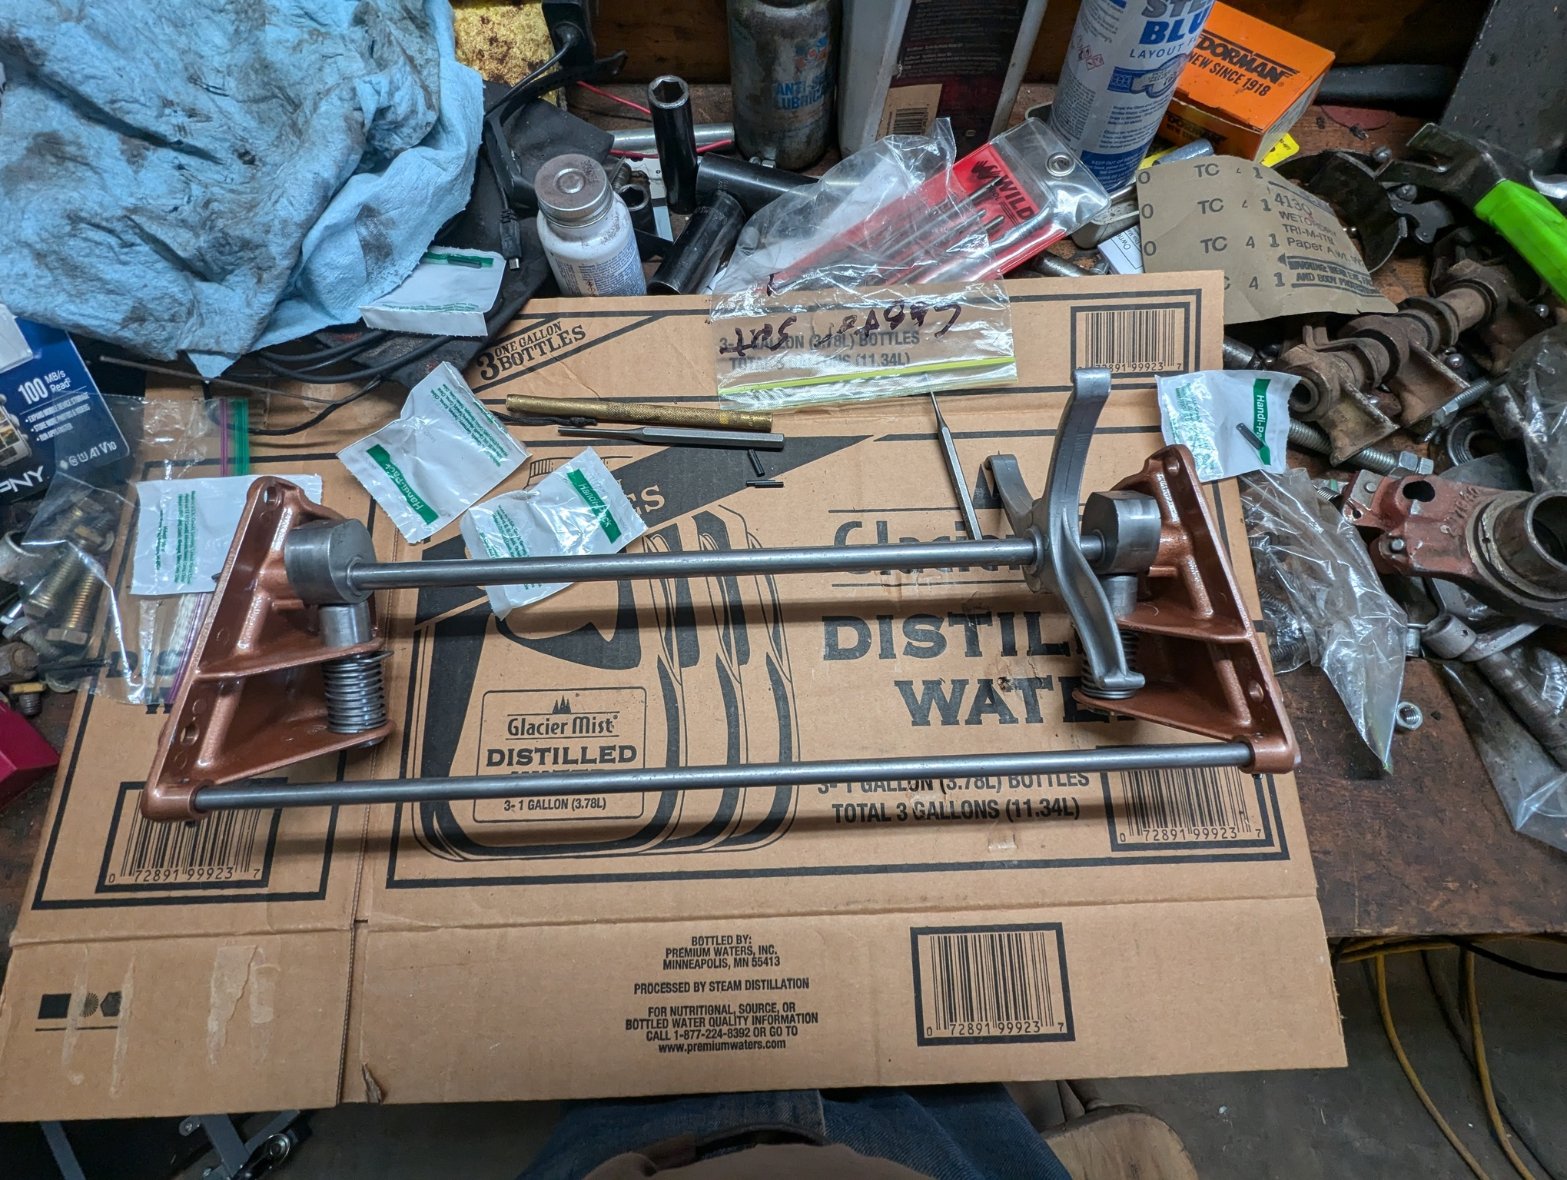
- PXL_20240728_173956701.jpg (414.9 KiB) Viewed 4999 times
For comparison, here is the completed product next to the other side before I started on it.
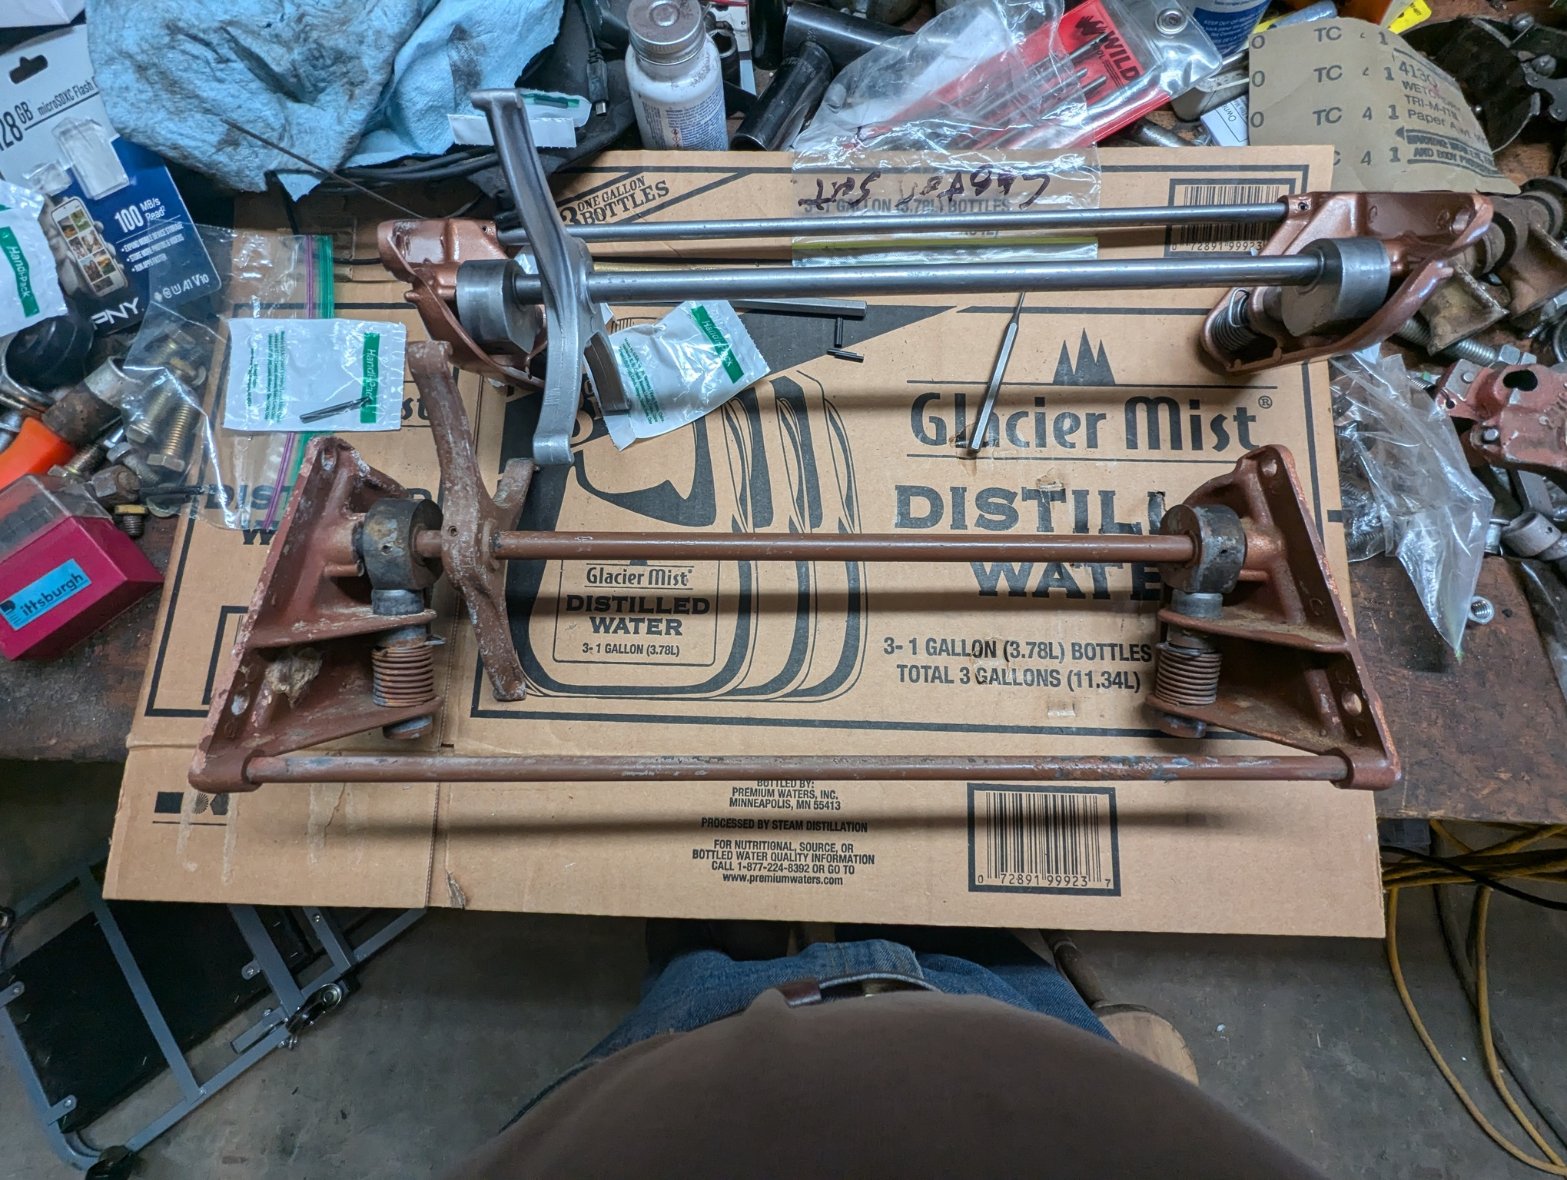
- PXL_20240728_174104661.jpg (390.44 KiB) Viewed 4999 times
Re: Yet another "Goldie" Restoration
Posted: Mon Jul 29, 2024 9:30 am
by AllenH
The base tubes did not go as well.
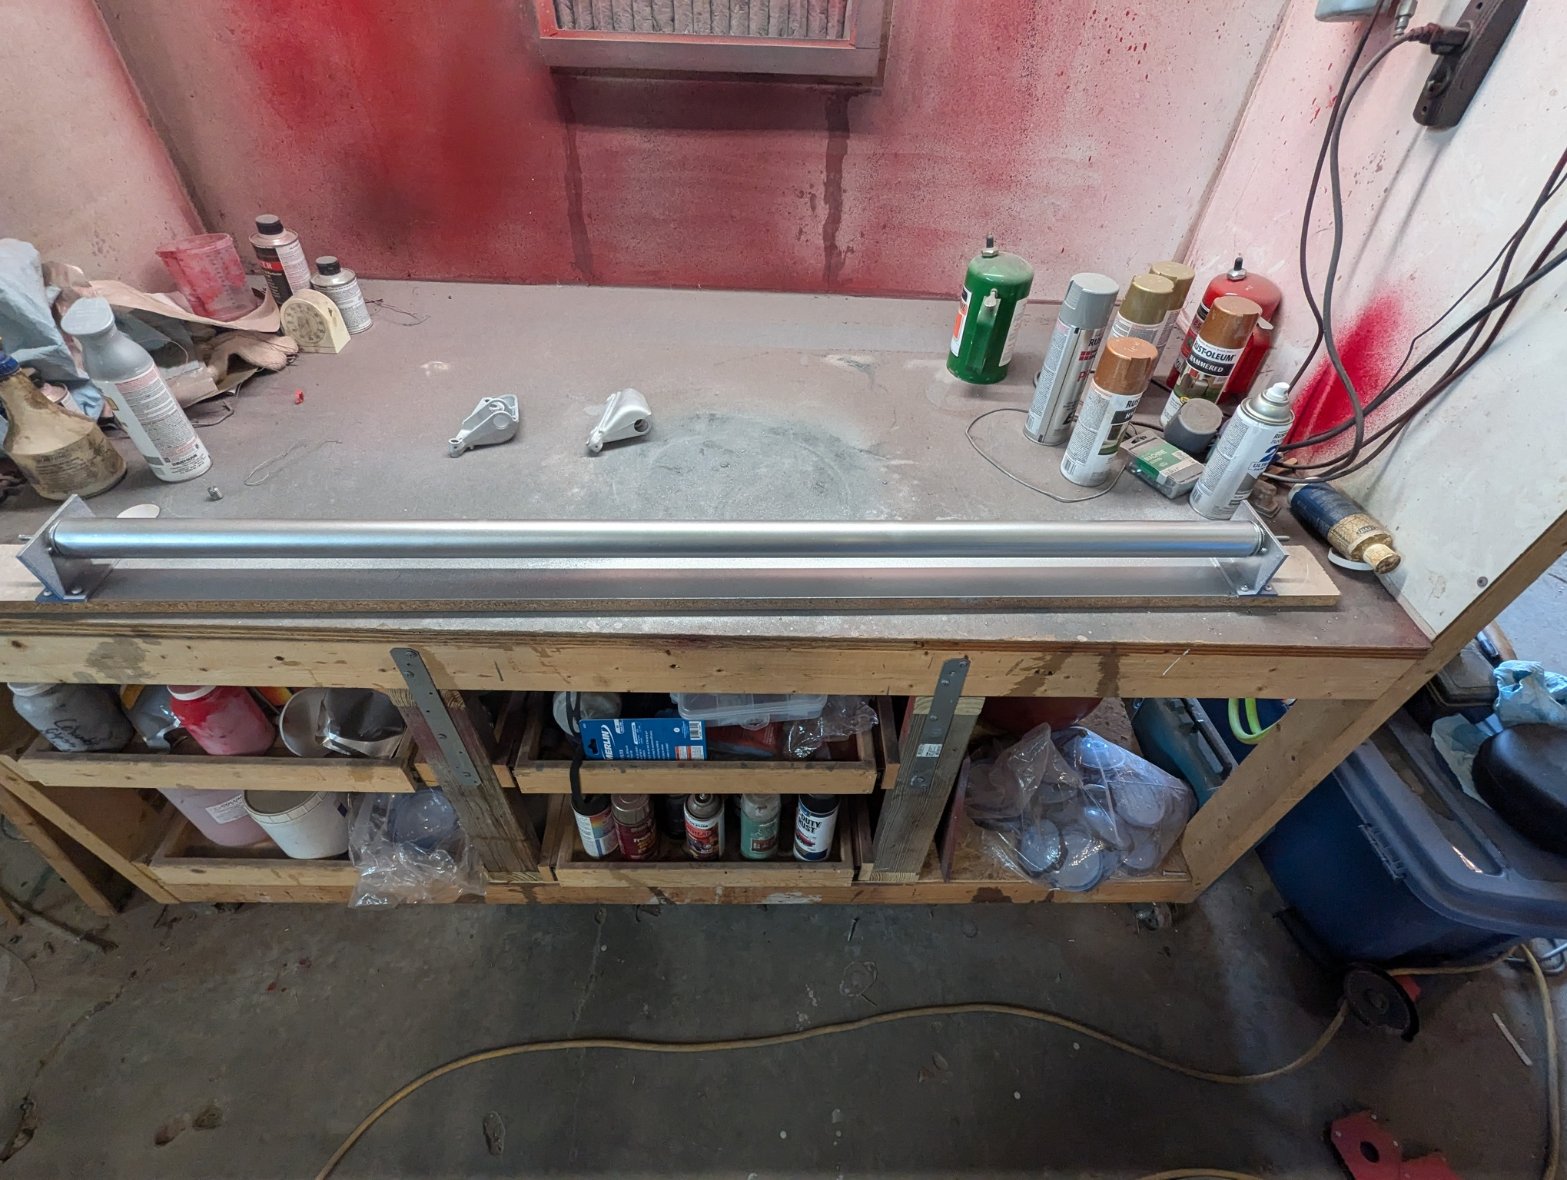
After priming the first tube, I started to paint it in the mini lathe jig. It made it easy to rotate it.
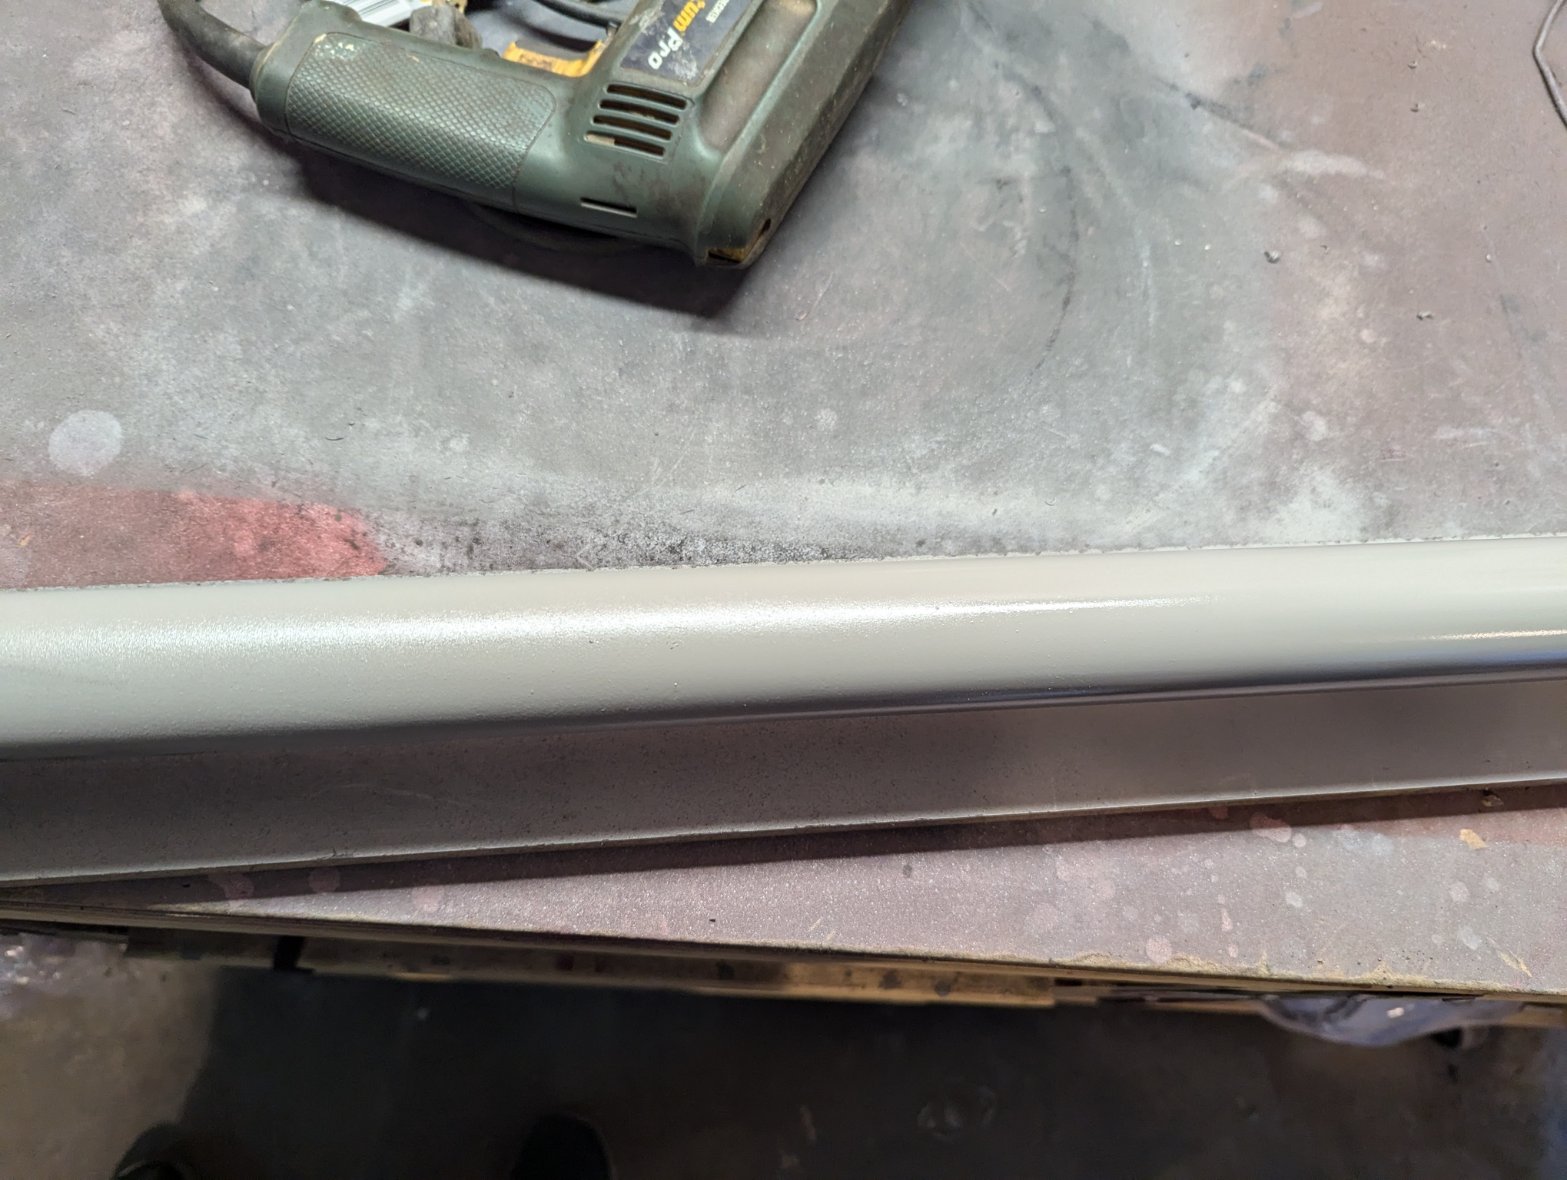
I got some grey Rust-Oleum paint. Shook it up for a couple of minutes and started painting. It spit out some black gunk at first. After some more shaking, it did start to spray out correctly, but the damage had been done. Also, I didn't like the color. I thought I needed more silver in it. So I let it try 24 hours, hooked up the drill to it again and sanded it down smooth again.
- PXL_20240728_135138019.jpg (245.48 KiB) Viewed 4997 times
This time I got some Rust-Oleum Metallic Titanium Silver. Still not completely happy with it, the color is better, but I am not exited about the finish. At this point I think I am just going to live with it. Let me know what you guys think.
- PXL_20240728_181856155.jpg (320.9 KiB) Viewed 4997 times
So next it is on to the leg panels. I will media blast them and we will see what the Rust=Oleum Hammered Gold looks like.
Re: Yet another "Goldie" Restoration
Posted: Mon Jul 29, 2024 9:33 am
by GetterDone
That is looking good.
I will use that trick on the wheel assemblies that JPG suggested also when I get to cleaning mine.
That tube looks good.IMO.