iaokie requesting help
Moderator: admin


-
robinson46176

- Platinum Member
- Posts: 4182
- Joined: Mon Mar 09, 2009 9:00 pm
- Location: Central Indiana (Shelbyville)
There is more than one way to skin a cat... Cat = Mark VII speed control. While I would prefer to keep my Mark VII as original as possible I figured out early on several ways to convert it to a different type of simple mechanism to operate the variable speed pulleys using the same bearing attaching point that operates against the plastic cam in case mine failed.
The most simple approach (on the surface) is just a making a new cam out of metal. My personal choice would be brass.
A second method would be to replace the speed control knob with a simple lever through the front of the case with its fulcrum at the back of the case. It would attach to the cam follower using the same follower pins. At the point where the lever would extended out of the front of the headstock case it would have either a set of notches to hold it in position or a simple friction device. Those types of control are common as throttle controls on antique tractors. Another design would use a similar lever but which would be all inside of the case and controlled by a heavy "T" handle control cable unit which would also have a twist lock feature. Those are common on truck PTO units and hydraulic controls. They are also fairly common as throttle controls on specialty construction equipment.
One possibility I like is making a cam (out of metal) that is basically the same cam as original but straightened out... A straight cam would be super easy to make and would fit the cam follower the same way the round cam does. It would just be a wedge shape and would be moved front to back mounted on a section of threaded rod which would be mounted in bearings at both the front and back of the case. The front end control could be a simple crank.
.
The most simple approach (on the surface) is just a making a new cam out of metal. My personal choice would be brass.
A second method would be to replace the speed control knob with a simple lever through the front of the case with its fulcrum at the back of the case. It would attach to the cam follower using the same follower pins. At the point where the lever would extended out of the front of the headstock case it would have either a set of notches to hold it in position or a simple friction device. Those types of control are common as throttle controls on antique tractors. Another design would use a similar lever but which would be all inside of the case and controlled by a heavy "T" handle control cable unit which would also have a twist lock feature. Those are common on truck PTO units and hydraulic controls. They are also fairly common as throttle controls on specialty construction equipment.
One possibility I like is making a cam (out of metal) that is basically the same cam as original but straightened out... A straight cam would be super easy to make and would fit the cam follower the same way the round cam does. It would just be a wedge shape and would be moved front to back mounted on a section of threaded rod which would be mounted in bearings at both the front and back of the case. The front end control could be a simple crank.
.
--
farmer
Francis Robinson
I did not equip with Shopsmiths in spite of the setups but because of them.
1 1988 - Mark V 510 (bought new), 4 Poly vee 1 1/8th HP Mark V's, Mark VII, 1 Mark V Mini, 1 Frankensmith, 1 10-ER, 1 Mark V Push-me-Pull-me Drillpress, SS bandsaw, belt sander, jointer, jigsaw, shaper attach, mortising attach, TS-3650 Rigid tablesaw, RAS, 6" long bed jointer, Foley/Belsaw Planer/molder/ripsaw, 1" sander, oscillating spindle/belt sander, Scroll saw, Woodmizer sawmill
farmer
Francis Robinson
I did not equip with Shopsmiths in spite of the setups but because of them.
1 1988 - Mark V 510 (bought new), 4 Poly vee 1 1/8th HP Mark V's, Mark VII, 1 Mark V Mini, 1 Frankensmith, 1 10-ER, 1 Mark V Push-me-Pull-me Drillpress, SS bandsaw, belt sander, jointer, jigsaw, shaper attach, mortising attach, TS-3650 Rigid tablesaw, RAS, 6" long bed jointer, Foley/Belsaw Planer/molder/ripsaw, 1" sander, oscillating spindle/belt sander, Scroll saw, Woodmizer sawmill
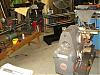
Just had to try this too
Just welded the rebar together in place of wiring each one
Only had it in for about 3 hours,will have to finish tomorrow
Think I need to make a long box lined with plastic as I've seen in other posts
Would more or larger rebar or just a big piece of steel make a difference
Just wondering
Just welded the rebar together in place of wiring each one
Only had it in for about 3 hours,will have to finish tomorrow
Think I need to make a long box lined with plastic as I've seen in other posts
Would more or larger rebar or just a big piece of steel make a difference
Just wondering
- Attachments
-
- DSC02495.JPG (142.91 KiB) Viewed 1507 times
-
- DSC02496.JPG (134.45 KiB) Viewed 1484 times
-
- DSC02489.JPG (149.85 KiB) Viewed 1490 times
-
- DSC02492.JPG (149.07 KiB) Viewed 1485 times
-
- DSC02494.JPG (147.34 KiB) Viewed 1496 times
-
JPG

- Platinum Member
- Posts: 35600
- Joined: Wed Dec 10, 2008 7:42 pm
- Location: Lexington, Ky (TAMECAT territory)
iaokie wrote:Just had to try this too
Just welded the rebar together in place of wiring each one
Only had it in for about 3 hours,will have to finish tomorrow
Think I need to make a long box lined with plastic as I've seen in other posts
Would more or larger rebar or just a big piece of steel make a difference
Just wondering
The surface area of the sacrificial iron and distance between it and the 'workpiece' affect the current, thus the speed of the rust removal. More area = faster. Closer = faster.
The major action is 'line of sight', so occasional rotating helps even things out.
BTW you are also creating both hydrogen and oxygen, so venting is a good idea!!!!
Finally, what is that 'workpiece' in your pix???? If that is the jointer fence, the 'arc' looks broken. Or do I recall it is a chinese copy cat?
╔═══╗
╟JPG ╢
╚═══╝
Goldie(Bought New SN 377425)/4" jointer/6" beltsander/12" planer/stripsander/bandsaw/powerstation /Scroll saw/Jig saw /Craftsman 10" ras/Craftsman 6" thicknessplaner/ Dayton10"tablesaw(restoredfromneighborstrashpile)/ Mark VII restoration in 'progress'/ 10E[/size](SN E3779) restoration in progress, a 510 on the back burner and a growing pile of items to be eventually returned to useful life. - aka Red Grange
╟JPG ╢
╚═══╝
Goldie(Bought New SN 377425)/4" jointer/6" beltsander/12" planer/stripsander/bandsaw/powerstation /Scroll saw/Jig saw /Craftsman 10" ras/Craftsman 6" thicknessplaner/ Dayton10"tablesaw(restoredfromneighborstrashpile)/ Mark VII restoration in 'progress'/ 10E[/size](SN E3779) restoration in progress, a 510 on the back burner and a growing pile of items to be eventually returned to useful life. - aka Red Grange
-
JPG
- Platinum Member
- Posts: 35600
- Joined: Wed Dec 10, 2008 7:42 pm
- Location: Lexington, Ky (TAMECAT territory)
It was the pix of it in the tub that I noticed. I realize now(after enlarging the pix) that the battery clip made it appear possibly broken.iaokie wrote:Yes thats the jointer fence off the Magna jointer
I think it's the angle of pic but its not broken
╔═══╗
╟JPG ╢
╚═══╝
Goldie(Bought New SN 377425)/4" jointer/6" beltsander/12" planer/stripsander/bandsaw/powerstation /Scroll saw/Jig saw /Craftsman 10" ras/Craftsman 6" thicknessplaner/ Dayton10"tablesaw(restoredfromneighborstrashpile)/ Mark VII restoration in 'progress'/ 10E[/size](SN E3779) restoration in progress, a 510 on the back burner and a growing pile of items to be eventually returned to useful life. - aka Red Grange
╟JPG ╢
╚═══╝
Goldie(Bought New SN 377425)/4" jointer/6" beltsander/12" planer/stripsander/bandsaw/powerstation /Scroll saw/Jig saw /Craftsman 10" ras/Craftsman 6" thicknessplaner/ Dayton10"tablesaw(restoredfromneighborstrashpile)/ Mark VII restoration in 'progress'/ 10E[/size](SN E3779) restoration in progress, a 510 on the back burner and a growing pile of items to be eventually returned to useful life. - aka Red Grange
-
JPG
- Platinum Member
- Posts: 35600
- Joined: Wed Dec 10, 2008 7:42 pm
- Location: Lexington, Ky (TAMECAT territory)
iaokie wrote:Its a good start on the fence
Didn't seem to affect the paint at all
Will make a bigger container next and will try the table
See where some abrading has happened?]would[/B] have removed the paint also!
╔═══╗
╟JPG ╢
╚═══╝
Goldie(Bought New SN 377425)/4" jointer/6" beltsander/12" planer/stripsander/bandsaw/powerstation /Scroll saw/Jig saw /Craftsman 10" ras/Craftsman 6" thicknessplaner/ Dayton10"tablesaw(restoredfromneighborstrashpile)/ Mark VII restoration in 'progress'/ 10E[/size](SN E3779) restoration in progress, a 510 on the back burner and a growing pile of items to be eventually returned to useful life. - aka Red Grange
╟JPG ╢
╚═══╝
Goldie(Bought New SN 377425)/4" jointer/6" beltsander/12" planer/stripsander/bandsaw/powerstation /Scroll saw/Jig saw /Craftsman 10" ras/Craftsman 6" thicknessplaner/ Dayton10"tablesaw(restoredfromneighborstrashpile)/ Mark VII restoration in 'progress'/ 10E[/size](SN E3779) restoration in progress, a 510 on the back burner and a growing pile of items to be eventually returned to useful life. - aka Red Grange