Project Help
Moderator: admin

I understand what you're saying about practicing each step. I have practiced each step so far (with only one other fairly big mistake so far leading to tear out being on the "show" side instead of on the hidden side) and I had planned to practice this one as well. But before I knew it, there I was putting the glued pieces together realizing that I didn't even have my "assembly table" (a big piece of 3/4" MDF that I put on top of my Craftsman table saw. So I had to clear off the saw, take off the fence, lower the blade, put the MDF on it, grab my clamps, find scraps for protective pieces between the clamps and the wood, etc., all while the glue was drying. I was cursing myself the entire time for not planning that step better.
Heath
Central Louisiana
-10ER - SN 13927, Born 1949, Acquired October 2008, Restored November, 2008
-10ER - SN 35630, Born 1950, Acquired April 2009, Restored May 2009, A34 Jigsaw
-Mark V - SN 212052, Born 1986, Acquired Sept 2009, Restored March 2010, Bandsaw
-10ER - SN 39722, Born 1950, Acquired March 2011, awaiting restoration
Central Louisiana
-10ER - SN 13927, Born 1949, Acquired October 2008, Restored November, 2008
-10ER - SN 35630, Born 1950, Acquired April 2009, Restored May 2009, A34 Jigsaw
-Mark V - SN 212052, Born 1986, Acquired Sept 2009, Restored March 2010, Bandsaw
-10ER - SN 39722, Born 1950, Acquired March 2011, awaiting restoration
-
mickyd

- Platinum Member
- Posts: 2999
- Joined: Mon Feb 09, 2009 1:18 pm
- Location: San Diego, CA
- Contact:
Cheer up Heath.....it will be just as bad next time, and the time after that, and the time after that, then after about 30 projects, it will all become like second nature and never again, until it happens again, will things be so chaotic.heathicus wrote:I understand what you're saying about practicing each step. I have practiced each step so far (with only one other fairly big mistake so far leading to tear out being on the "show" side instead of on the hidden side) and I had planned to practice this one as well. But before I knew it, there I was putting the glued pieces together realizing that I didn't even have my "assembly table" (a big piece of 3/4" MDF that I put on top of my Craftsman table saw. So I had to clear off the saw, take off the fence, lower the blade, put the MDF on it, grab my clamps, find scraps for protective pieces between the clamps and the wood, etc., all while the glue was drying. I was cursing myself the entire time for not planning that step better.
 Seriously, every time I have mastered something, (and I have mastered several things in my life) the process of getting there has always been one where the more I had to think about things, the more I would screw up. When I got to the point where I didn't have to think as much, my process improved significantly. Don't ask me if that's normal or not, but for me, that's how it works. It's like auto pilot kicks in and manages all the little details and the thinking that's done is higher level, not every single little detail. At this higher level of thinking, less goes wrong.
 Don't know if all this makes sense to anyone reading it but....it does to me.
Very anxious to see your completed project. I'm sure it is going to come out great. If your running tight on time, make that big pot of coffee and pretend your back in college.....pull an all nighter. Since your on staycation, you can do whatever you want. Make the best of it.
Mike
Sunny San Diego
Sunny San Diego
-
JPG

- Platinum Member
- Posts: 35598
- Joined: Wed Dec 10, 2008 7:42 pm
- Location: Lexington, Ky (TAMECAT territory)
mickyd wrote:Cheer up Heath.....it will be just as bad next time, and the time after that, and the time after that, then after about 30 projects, it will all become like second nature and never again, until it happens again, will things be so chaotic.
Don't know if all this makes sense to anyone reading it but....it does to me.
Very anxious to see your completed project. I'm sure it is going to come out great. If your running tight on time, make that big pot of coffee and pretend your back in college.....pull an all nighter. Since your on staycation, you can do whatever you want. Make the best of it.
In other words, the less you think, the better!?:D
╔═══╗
╟JPG ╢
╚═══╝
Goldie(Bought New SN 377425)/4" jointer/6" beltsander/12" planer/stripsander/bandsaw/powerstation /Scroll saw/Jig saw /Craftsman 10" ras/Craftsman 6" thicknessplaner/ Dayton10"tablesaw(restoredfromneighborstrashpile)/ Mark VII restoration in 'progress'/ 10E[/size](SN E3779) restoration in progress, a 510 on the back burner and a growing pile of items to be eventually returned to useful life. - aka Red Grange
╟JPG ╢
╚═══╝
Goldie(Bought New SN 377425)/4" jointer/6" beltsander/12" planer/stripsander/bandsaw/powerstation /Scroll saw/Jig saw /Craftsman 10" ras/Craftsman 6" thicknessplaner/ Dayton10"tablesaw(restoredfromneighborstrashpile)/ Mark VII restoration in 'progress'/ 10E[/size](SN E3779) restoration in progress, a 510 on the back burner and a growing pile of items to be eventually returned to useful life. - aka Red Grange
-
a1gutterman

- Platinum Member
- Posts: 3653
- Joined: Tue Jan 09, 2007 12:45 am
- Location: "close to" Seattle
A lot of pallets are made from oak, but that looks a lot like poplar to me.heathicus wrote:...I couldn't tell you what kind of wood it is. I might start a thread with good pictures of the wood and maybe the more experienced folks here can help. I'm guessing oak? The wood was actually from a pallet I broke down...
Tim
Buying US made products will help keep YOUR job or retirement funds safer.
Buying US made products will help keep YOUR job or retirement funds safer.
Mike, I understand exactly what you're saying and experience that myself.
Some post-Watco Danish Oil images below. I used two boards for this project and I'm pretty sure they're different types of wood. I wasn't sure initially, but made sure I used the parts from the same board were not adjacent anyway (board "a" for top and bottom, board "b" for left and right). The more I worked with it the more certain I became that they were different types of wood. Hopefully these pictures can help with identification. Yes, I'm such a noob!
I really loved the grain pattern and color variations in this board so I used it for the left and right side pieces as they would be most visible.
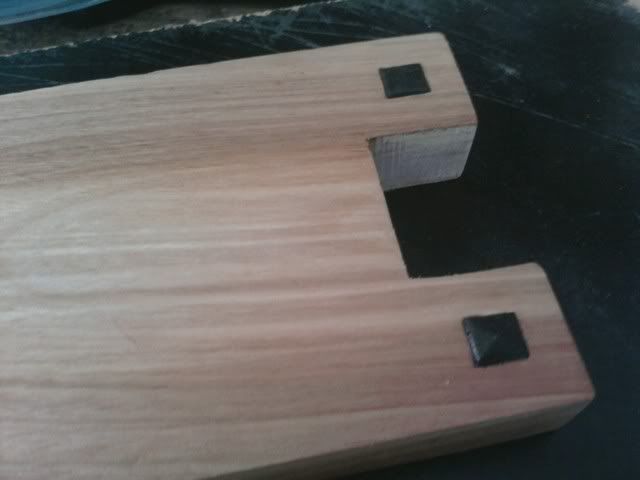
Same board showing the end grain and how the fingers were chamfered and how the pegs sit proud of the board. I am glad that I decided to go with the square "ebony" plugs after all.
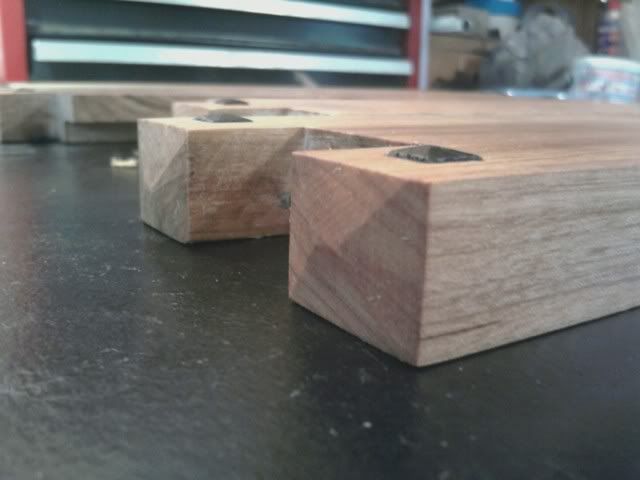
This is the wood used for the top and bottom. The pores are larger and the wood seemed more fibrous. This was especially evident when I was chiseling out the square holes.
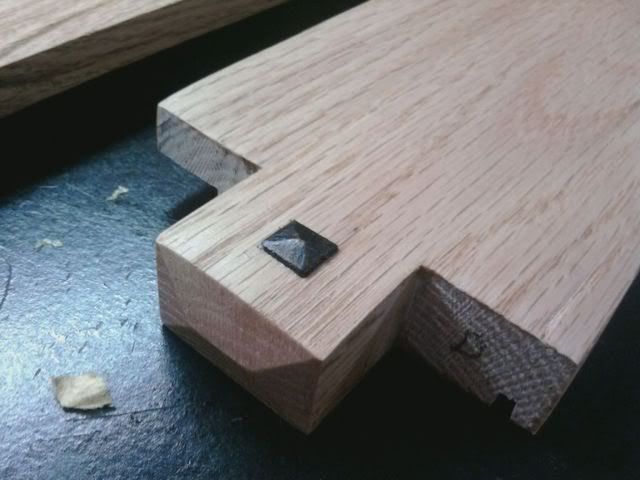
The pictures just don't do that Watco Danish Oil any justice. It was an amazing transformation when I applied that. But that could just be me being a newbie with very little prior experience with good finishes.
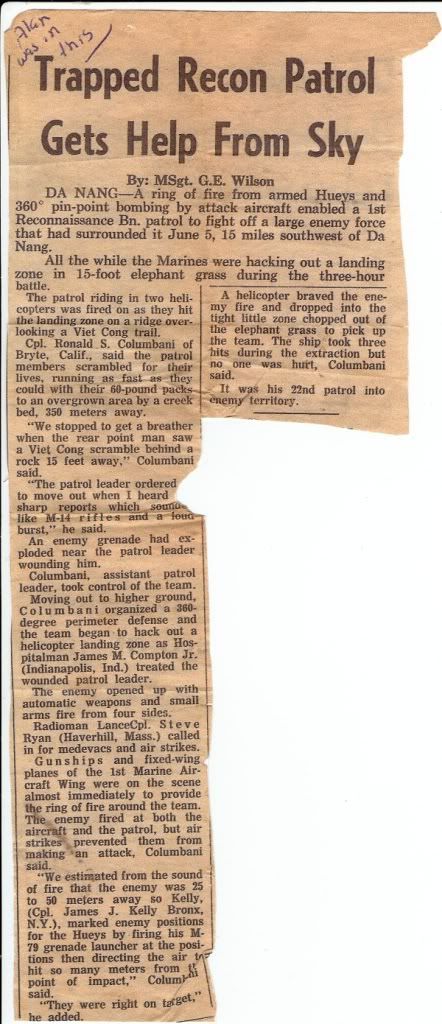
And since I haven't yet reached the image quota for this message, here's a scan of the copy of the newspaper article about a battle my dad was in in Vietnam. Dad isn't mentioned but it is an interesting read anyway.
Some post-Watco Danish Oil images below. I used two boards for this project and I'm pretty sure they're different types of wood. I wasn't sure initially, but made sure I used the parts from the same board were not adjacent anyway (board "a" for top and bottom, board "b" for left and right). The more I worked with it the more certain I became that they were different types of wood. Hopefully these pictures can help with identification. Yes, I'm such a noob!
I really loved the grain pattern and color variations in this board so I used it for the left and right side pieces as they would be most visible.
Same board showing the end grain and how the fingers were chamfered and how the pegs sit proud of the board. I am glad that I decided to go with the square "ebony" plugs after all.
This is the wood used for the top and bottom. The pores are larger and the wood seemed more fibrous. This was especially evident when I was chiseling out the square holes.
The pictures just don't do that Watco Danish Oil any justice. It was an amazing transformation when I applied that. But that could just be me being a newbie with very little prior experience with good finishes.
And since I haven't yet reached the image quota for this message, here's a scan of the copy of the newspaper article about a battle my dad was in in Vietnam. Dad isn't mentioned but it is an interesting read anyway.
Heath
Central Louisiana
-10ER - SN 13927, Born 1949, Acquired October 2008, Restored November, 2008
-10ER - SN 35630, Born 1950, Acquired April 2009, Restored May 2009, A34 Jigsaw
-Mark V - SN 212052, Born 1986, Acquired Sept 2009, Restored March 2010, Bandsaw
-10ER - SN 39722, Born 1950, Acquired March 2011, awaiting restoration
Central Louisiana
-10ER - SN 13927, Born 1949, Acquired October 2008, Restored November, 2008
-10ER - SN 35630, Born 1950, Acquired April 2009, Restored May 2009, A34 Jigsaw
-Mark V - SN 212052, Born 1986, Acquired Sept 2009, Restored March 2010, Bandsaw
-10ER - SN 39722, Born 1950, Acquired March 2011, awaiting restoration
-
mickyd
- Platinum Member
- Posts: 2999
- Joined: Mon Feb 09, 2009 1:18 pm
- Location: San Diego, CA
- Contact:
Late night ey Heath!! Projects shaping up real nice!! 'Finish' line is in sight.
Glad you posted the article. Talk about too close for comfort. I thought about that saying "Don't shoot till you see the whites of their eyes." This battle was too close. . That had to be a great sound when that fixed wing came flying over, not to mention the chopper coming in for the pickup. Your dad's emotions had to be on the ultimate edge throughout.
Glad you posted the article. Talk about too close for comfort. I thought about that saying "Don't shoot till you see the whites of their eyes." This battle was too close.
. That had to be a great sound when that fixed wing came flying over, not to mention the chopper coming in for the pickup. Your dad's emotions had to be on the ultimate edge throughout.Mike
Sunny San Diego
Sunny San Diego

That last pic looks like to me to be oak? Depending upon color It could be either white or red oak. Since ya said it was more porous, it would be red oak.
SS 500(09/1980), DC3300, jointer, bandsaw, belt sander, Strip Sander, drum sanders,molder, dado, biscuit joiner, universal lathe tool rest, Oneway talon chuck, router bits & chucks and a De Walt 735 planer,a #5,#6, block planes. ALL in a 100 square foot shop.
.
.
Bob
.
.
Bob
I like the look of the pegs and the finish! Nice job. I don't see anything in the wood that varies more than some of my oak. Just FYI, the article illustrates very well why recon types like your dad and I call the choppers angels! Contacts in recon units were very often much closer than 50 meters.
Saw dust heals many wounds. RLTW
Dave
Dave