The dance with Lady Green begins ...
Moderator: admin
-
wlhayesmfs
- Platinum Member
- Posts: 667
- Joined: Fri Jul 21, 2006 10:50 am
- Location: Broken Arrow OK
Mickyd, someone had to be the rebel and stop out of the box. Might as well be you. How else can we see what we should not do if someone doesn't show us the wrong way first. You just put yours on picture and the web and someone saw it. I didn't take pictures of me hitting a wrench with a hammer LOL but love you work and skills.
Bill 
Broken Arrow OK
MKV, 510, MKVll, 50th Anniversary 520 with Jointech saw train, Bandsaw, scroll saw, joiner, 6" Sander,Stand Alone Pin Router and Router Table, Strip Sander, Jigsaw & (4) ER's plus Jigsaw for ER. DC SS RAS
Broken Arrow OK
MKV, 510, MKVll, 50th Anniversary 520 with Jointech saw train, Bandsaw, scroll saw, joiner, 6" Sander,Stand Alone Pin Router and Router Table, Strip Sander, Jigsaw & (4) ER's plus Jigsaw for ER. DC SS RAS

Pictures?
Anyone got pictures of how they jigged up to press on (or hammer) bearings on their quill and drive?
Also, how difficult is it to replace the two bearings in the motor?
I can't find any oiling holes on the drive or motor sheave assemblies on my old '55. Is there a fix for this?
Also, how difficult is it to replace the two bearings in the motor?
I can't find any oiling holes on the drive or motor sheave assemblies on my old '55. Is there a fix for this?
'55 Greenie #292284 (Mar-55), '89 SS 510 #020989, Mark VII #408551 (sold 10/14/12), SS Band Saw, (SS 500 #36063 (May-79) now gone to son-in-law as of 11-11), Magna bandsaw, Magna jointer 16185 (May-54), Magna belt sander SS28712 (Dec-82), Magna jigsaw SS4397 (Dec-78), SS biscuit joiner, Zyliss (knockoff) vise, 20+ hand planes, 60s Craftsman tablesaw, CarbaTec mini-lathe, and the usual pile of tools. Hermit of the Hills Woodworks, a hillbilly in the foothills of the Ozarks, scraping by.
I don't have any pictures of this, but maybe I can explain. I use a set of deep well sockets and find the one that will just fit over the shaft. Make sure that it is contacting only the inner race of the bearing. I just replaced the bearings on my jointer's cutterhead, and a piece of 1/2" id pipe did the trick. A piece of 5/8' id pipe may work well for the quill.fiatben wrote:Anyone got pictures of how they jigged up to press on (or hammer) bearings on their quill and drive?
--Loren

First I will greatly recommend the puller-set which Harbor Freight sells, and which has been recommended by mickyd, bill mayo, etc. It can be configured quite a number of ways -- you may want to check out mickyd's full restoration profiles which are linked in his user-profile. This is a super way to get bearings on and off.fiatben wrote:Anyone got pictures of how they jigged up to press on (or hammer) bearings on their quill and drive?
Also, how difficult is it to replace the two bearings in the motor?
I can't find any oiling holes on the drive or motor sheave assemblies on my old '55. Is there a fix for this?
[ATTACH]8728[/ATTACH]
Note, as instructed, I have never removed the label.
There will occasionally be unwieldy situations where some simpler "pushers" like the sockets mentioned above work well. For myself I lately used a few pieces of wood:
[ATTACH]8729[/ATTACH]
The turned roller-pins were sized for the Drive Sleeve Bearings as well as smaller bearings such as quill-shaft or motor shaft. The square piece of wood happened to be just right for getting a quill-bearing into the hollow quill.
Motor bearings are similar to any other, but you've got a few pieces to keep track of as you disassemble the motor. This forum recommended scribing the motor's end-caps to "index" them to the motor-case, so you can get it all back together without struggling so much with long blind retaining screws.
Good luck!
- Attachments
-
- Puller Set.jpg (52.46 KiB) Viewed 2470 times
-
- My Custom Tools.jpg (47.41 KiB) Viewed 2470 times
Chris
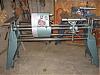
To remove the motor spring (mine has the nut and washer on it), I used a board with the appropriate sized hole in it and depressed it with two quick clamps to free up my hands.fiatben wrote:Amongst this lengthy thread I have posed a couple of questions for which I now need answers because it is what is next.
1. In Drew's video he uses a board to depress the cap over the spring on the motor's shaft to pull the sheaves. I do not have a cap. Is there a relatively easy way to do this?
2. To what extent can I rebuild my quill myself. I know I can pull the old pulley, but will it require a press to put the new one back on? And, can an old single bearing quill be retrofitted with a second bearing? Mine is a solid one piece shaft.
That's all I can think of off the top of my head. I'm sure I'll remember something else as soon as I leave here.
Thanks guys.
Monte in Missouri
Two 1954 Mark V's: #268502 and #267199
Two 1954 Mark V's: #268502 and #267199
Quadrant question
I've cleaned up the quadrant, filed the teeth, and replaced the pin with a small bolt. It works smoothly and I think it will be much improved when it goes back in, but I have a really simply question (because i forgot to take a picture while taking it apart)....
[ATTACH]8806[/ATTACH]
Is the sequence here to put the cone (spring) washer first, then the flat, or the reverse? And does the cone washer go cone in or cone out?
A second question: with both washers on, I can't get enough compression to get the snap ring down into the groove I am sure it is meant to ride in. What's the trick to this?
[ATTACH]8806[/ATTACH]
Is the sequence here to put the cone (spring) washer first, then the flat, or the reverse? And does the cone washer go cone in or cone out?
A second question: with both washers on, I can't get enough compression to get the snap ring down into the groove I am sure it is meant to ride in. What's the trick to this?
- Attachments
-
- 292284 (194).JPG (186.04 KiB) Viewed 2438 times
'55 Greenie #292284 (Mar-55), '89 SS 510 #020989, Mark VII #408551 (sold 10/14/12), SS Band Saw, (SS 500 #36063 (May-79) now gone to son-in-law as of 11-11), Magna bandsaw, Magna jointer 16185 (May-54), Magna belt sander SS28712 (Dec-82), Magna jigsaw SS4397 (Dec-78), SS biscuit joiner, Zyliss (knockoff) vise, 20+ hand planes, 60s Craftsman tablesaw, CarbaTec mini-lathe, and the usual pile of tools. Hermit of the Hills Woodworks, a hillbilly in the foothills of the Ozarks, scraping by.
Hi,
I can't remember much about the only time I took one of these apart. However, the following parts-list link can be zoomed-in pretty close; this might help:
http://www.shopsmith.com/ownersite/prod ... 0_1_14.pdf
Good luck!
I can't remember much about the only time I took one of these apart. However, the following parts-list link can be zoomed-in pretty close; this might help:
http://www.shopsmith.com/ownersite/prod ... 0_1_14.pdf
Good luck!
Chris
Well, duh!
Now, why didn't I think of that? I even have this darn section printed out and in a 3-ring binder I've been putting together in lieu of the missing manual.
Thanks!!! Now I know.
Thanks!!! Now I know.
'55 Greenie #292284 (Mar-55), '89 SS 510 #020989, Mark VII #408551 (sold 10/14/12), SS Band Saw, (SS 500 #36063 (May-79) now gone to son-in-law as of 11-11), Magna bandsaw, Magna jointer 16185 (May-54), Magna belt sander SS28712 (Dec-82), Magna jigsaw SS4397 (Dec-78), SS biscuit joiner, Zyliss (knockoff) vise, 20+ hand planes, 60s Craftsman tablesaw, CarbaTec mini-lathe, and the usual pile of tools. Hermit of the Hills Woodworks, a hillbilly in the foothills of the Ozarks, scraping by.
-
dusty

- Platinum Member
- Posts: 21530
- Joined: Wed Nov 22, 2006 6:52 am
- Location: Tucson (Wildcat Country), Arizona
Exchange the position of the two washers. The spring washer goes between the flat washer and the retaining clip.fiatben wrote:I've cleaned up the quadrant, filed the teeth, and replaced the pin with a small bolt. It works smoothly and I think it will be much improved when it goes back in, but I have a really simply question (because i forgot to take a picture while taking it apart)....
[ATTACH]8806[/ATTACH]
Is the sequence here to put the cone (spring) washer first, then the flat, or the reverse? And does the cone washer go cone in or cone out?
A second question: with both washers on, I can't get enough compression to get the snap ring down into the groove I am sure it is meant to ride in. What's the trick to this?
"Making Sawdust Safely"
Dusty
Sent from my Dell XPS using Firefox.
Dusty
Sent from my Dell XPS using Firefox.

 The exploded view shows spring washer (90) first, then flat washer (91), and finally the external retaining rings (92).