Page 8 of 14
Posted: Sun Jan 01, 2012 11:41 pm
by heathicus
I'm a bit late on the progress updates. I was lucky enough to get my dad's help 3 days in a row this week. The first day, as previously mentioned, we got the walls framed and rafters ready to be nailed down.
The second day it seemed like we didn't make as much progress. We got the rafters nailed down, the "bird boards" cut and nailed in, and the tin on the roof.
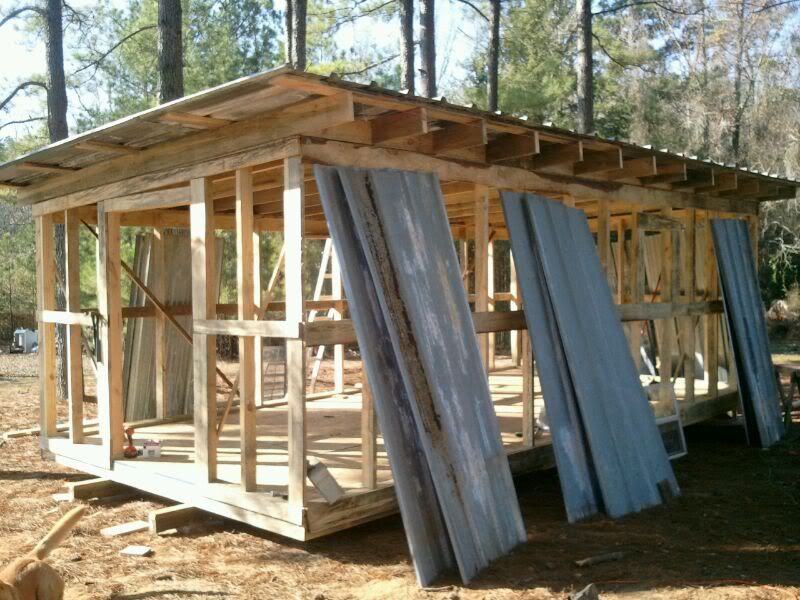
Then next day we got the rest of the tin siding on, ran electrical feed wire from the pole/meter/breaker box to the workshop (but not tied in at either end yet). Dad's help and guidance was invaluable!
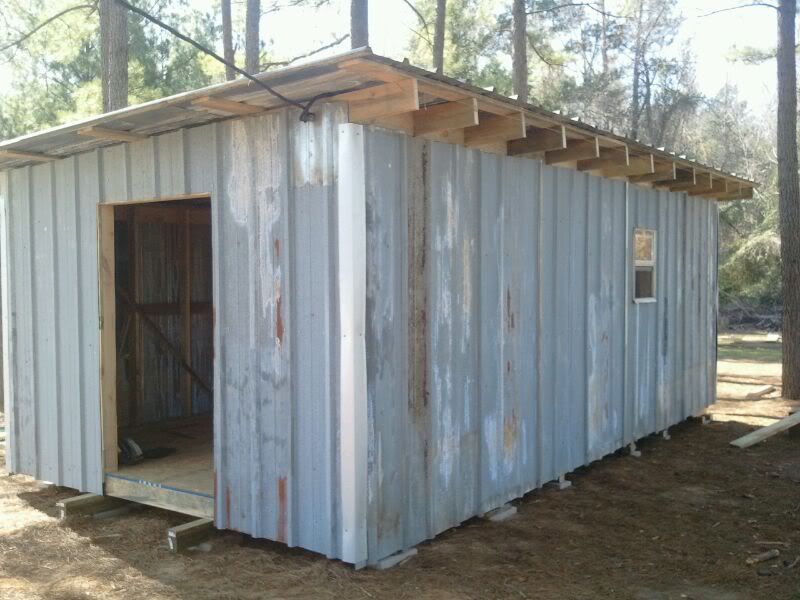

The next day (Friday) I had to go into town and by the time I got back into only had enough time to put some silicone in all the holes in the old tin on the roof.
Saturday we had to run into town again that morning and had a New Years party to go to that evening (an early family friendly one). Between that, I put silicone in the holes in the walls, put a few more screws in the tin, and used up the 4 cans of Great Stuff I had filling gaps (think I need about 10 more cans!).
Posted: Mon Jan 02, 2012 12:15 am
by heathicus
I forgot to mention that I did add 6 more blocks along each side. Treated lumber cutoffs on concrete pads. I used my motorcycle jack to lift the building a hair at each blocking point to place the blocks.
It's a good thing I don't do this for a living. It took me all day just to build a crummy door!
My father-in-law gave me three old windows. Two small ones and a big one ("big" being 36" square). I decided to put the small ones on the side walls, and the big one in the door. Why the door? I wanted the big window on that end since it faces the house. But I didn't want to take up more wall space than the door was already taking up.
I framed out the door then held it in place with wedges. I concentrated the wedges to hold up the side opposite the hinge knowing it would sag a little. With it held firmly in place, I put on three heavy duty hinges and set the window. I tested the swing and it was nice and smooth and had no tendency to swing itself open or closed when I let go.
I wedged it back in place and cut the tin and screwed it on. There wasn't much sagging at all when I removed the wedges and the door was still as smooth as could be.
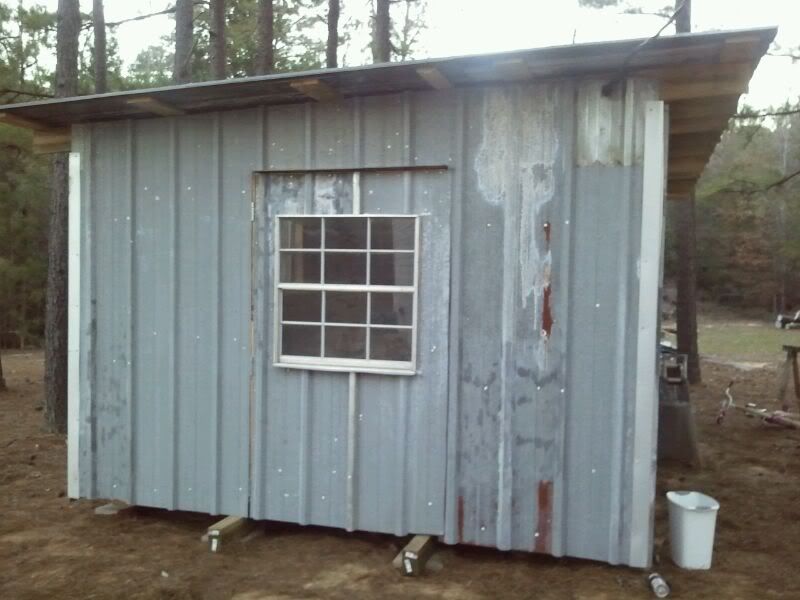


That used tin with all the holes and discoloration and rust spots makes it look like a 100 year old hillbilly shack, but for the price I can't complain!
I'm not nearly as far along as I had hoped to be at this point. I had 2 weeks off from work and had hoped to be all done and moved in by now. As it is, I still need to run electrical, install lighting, build shelves, finish sealing gaps, and a ton more. I have to go back on work tomorrow, so progress will be slow for a while. But I'm well on my way and very happy to have what I have.
Posted: Mon Jan 02, 2012 12:39 am
by heathicus
And my first actual shop building question in quite a few posts...
What kind of latch/handle options do I have for my door? I want something I can use both from inside and outside, will automatically latch when pushed closed, and can be locked.
Currently I'm using a screen door latch, but only the inside part. It was all I had laying around, but it is for use in doors up to 2" thick. My door is 4" thick. I have to push the window open and reach in to undo the latch (no screen currently). This was a temporary setup until I can either build or buy a latch that serves my needs. Any suggestions?
Posted: Mon Jan 02, 2012 10:09 am
by JPG
heathicus wrote:And my first actual shop building question in quite a few posts...
What kind of latch/handle options do I have for my door? I want something I can use both from inside and outside, will automatically latch when pushed closed, and can be locked.
Currently I'm using a screen door latch, but only the inside part. It was all I had laying around, but it is for use in doors up to 2" thick. My door is 4" thick. I have to push the window open and reach in to undo the latch (no screen currently). This was a temporary setup until I can either build or buy a latch that serves my needs. Any suggestions?
I am sure you can 'solve' the square shaft/knob missing part problem. I think 4" is enough depth for it to fit in!
http://www.acehardware.com/product/index.jsp?productId=1444742&cp=2568451.2626208.2626334.2627419
Posted: Mon Jan 02, 2012 10:35 am
by heathicus
Although this would be far down the road, I've done some quick research this morning regarding painting galvanized metal. It seems the general recommendation is to power wash it to clean off the dirt and crud, wash it down with vinegar or trisodium phosphate to etch the metal, then prime and paint. Can I expect any adverse reaction with the silicone "plugs" in all the holes?
And I'm already tentatively planning my first big upgrade. Hopefully I'll have enough income tax return to insulate and panel the inside and get a window unit for ac/heat.
Posted: Mon Jan 02, 2012 10:47 am
by JPG
heathicus wrote:Although this would be far down the road, I've done some quick research this morning regarding painting galvanized metal. It seems the general recommendation is to power wash it to clean off the dirt and crud, wash it down with vinegar or trisodium phosphate to etch the metal, then prime and paint. Can I expect any adverse reaction with the silicone "plugs" in all the holes?
And I'm already tentatively planning my first big upgrade. Hopefully I'll have enough income tax return to insulate and panel the inside and get a window unit for ac/heat.
Gonna mount it on the door!:D
Paint it camouflage style and the silicone will not matter.
Ya trying to gild it now!:D
Posted: Mon Jan 02, 2012 11:24 am
by heathicus
JPG40504 wrote:Gonna mount it on the door!:D
Yeah, that door needs some more weight! LOL! I actually have no idea right now where I'll place it. I'll figure that out when it's time.
JPG40504 wrote:Paint it camouflage style and the silicone will not matter.
Ya trying to gild it now!:D
I mainly just wanted to make sure the vinegar or trisodium phosphate wouldn't break down the silicone or anything like that. I don't see how it would, but wanted to make sure.
Posted: Sat Jan 07, 2012 6:36 pm
by mbcabinetmaker
About time for an update??:)
Posted: Sun Jan 08, 2012 4:27 pm
by heathicus
Nothing to update yet unfortunately. It is after dark when I get home from work so can't get much done during the week. I had hoped to run the electrical his weekend (or at least lights) so I could see to work after dark. But my wife's grandfather passed away a few days ago and his funeral was Saturday. Today (Sunday) my wife is throwing her sister a wedding shower so I'm watching our kids and their cousins. I tried my best to keep them outside but they whined and moaned and complained and I gave in and brought them inside. So all I've managed to get done on the shop is clean up a little and sweep the floor.
Posted: Sun Jan 08, 2012 4:38 pm
by robinson46176
heathicus wrote:Nothing to update yet unfortunately. It is after dark when I get home from work so can't get much done during the week. I had hoped to run the electrical his weekend (or at least lights) so I could see to work after dark. But my wife's grandfather passed away a few days ago and his funeral was Saturday. Today (Sunday) my wife is throwing her sister a wedding shower so I'm watching our kids and their cousins. I tried my best to keep them outside but they whined and moaned and complained and I gave in and brought them inside. So all I've managed to get done on the shop is clean up a little and sweep the floor.
Yeah, but you probably "adjusted" the floor plan mentally 6 times while you were sweeping...

.