Page 9 of 9
Re: Jointer Cleanup and Repair
Posted: Wed Nov 10, 2021 11:30 am
by chapmanruss
From JPG's comments, he would use the guard in the "behind the fence" hole if using the fence moved to do rabbiting or a second guard if the fence is near the middle. That can work as protection and was the intention of the second hex hole behind the fence. The feather guard and even the replacement mounting hardware use nuts to "lock" the guard to the Jointer. This makes more work than simply lifting the guard off to do rabbit cuts. For the feather guard the stop stud must be removed too. If I was to do rabbits on my jointer it would be a case where I would use my Model 4E Jointer on my Shopsmith Model 10ER which is still original as opposed to my 1979 Jointer which is upgraded. I do not know if newer Jointers have the second hex hole behind the fence but hopefully someone having a newer Jointer can answer that. Jointers having the rear cutter guard wouldn't need the second hex hole any longer.
theinrichs,
Your Jointer looks great and I know you will enjoy having it as part of your tool collection available to do projects.
Re: Jointer Cleanup and Repair
Posted: Fri Nov 12, 2021 5:38 pm
by theinrichs
- 1A2C6B4B-72E3-48F3-BE03-D74B02930751.jpeg (327.54 KiB) Viewed 1404 times
- 3396292D-287F-45E5-88C8-78EDFDFC8B0F.jpeg (467.86 KiB) Viewed 1404 times
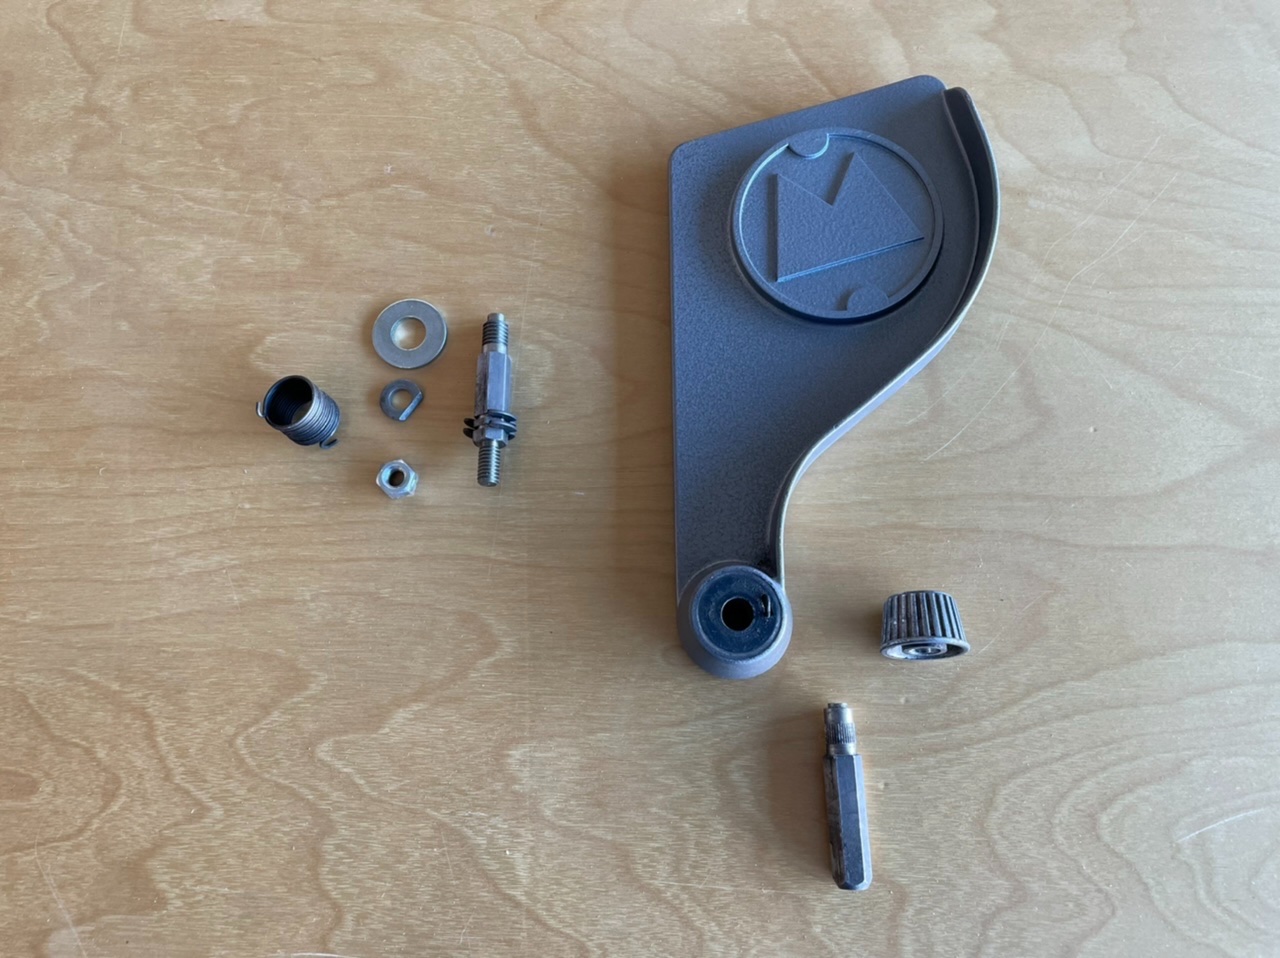
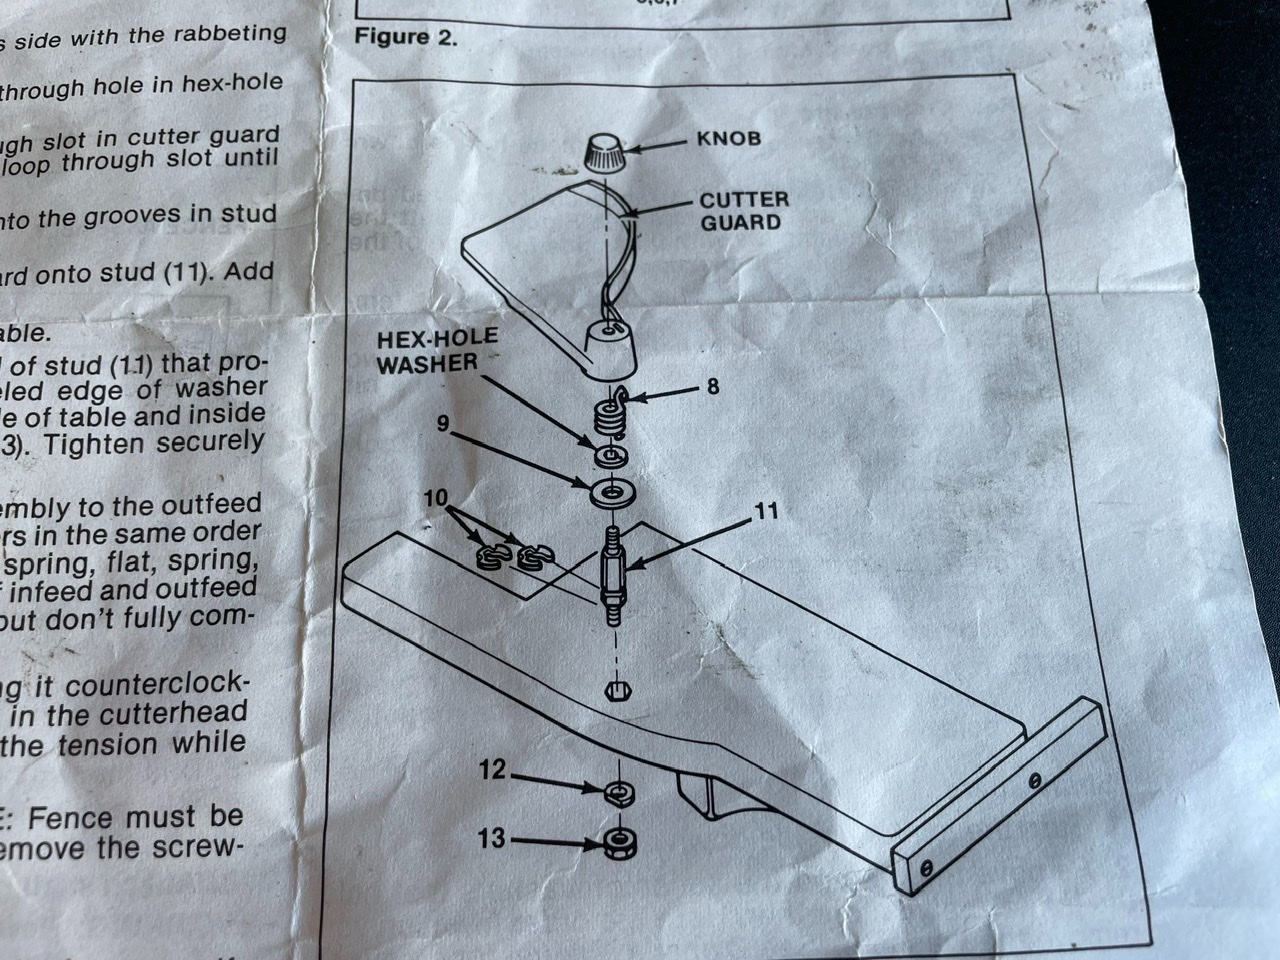
I’m now down to the last short strokes to getting my jointer restoration over the finish line. I have one remaining issue to resolve though and that pertains to the cutter head guard. I’ve attached a couple of photos to help illustrate the problem. The parts photo shows the hardware on the left side that came with the new jointer retro kit I purchased from an EBay seller. The assembly on the right side of the photo is the existing guard, mounting post and knob. The other photo shows the exploded parts diagram for the new cutter head hardware.
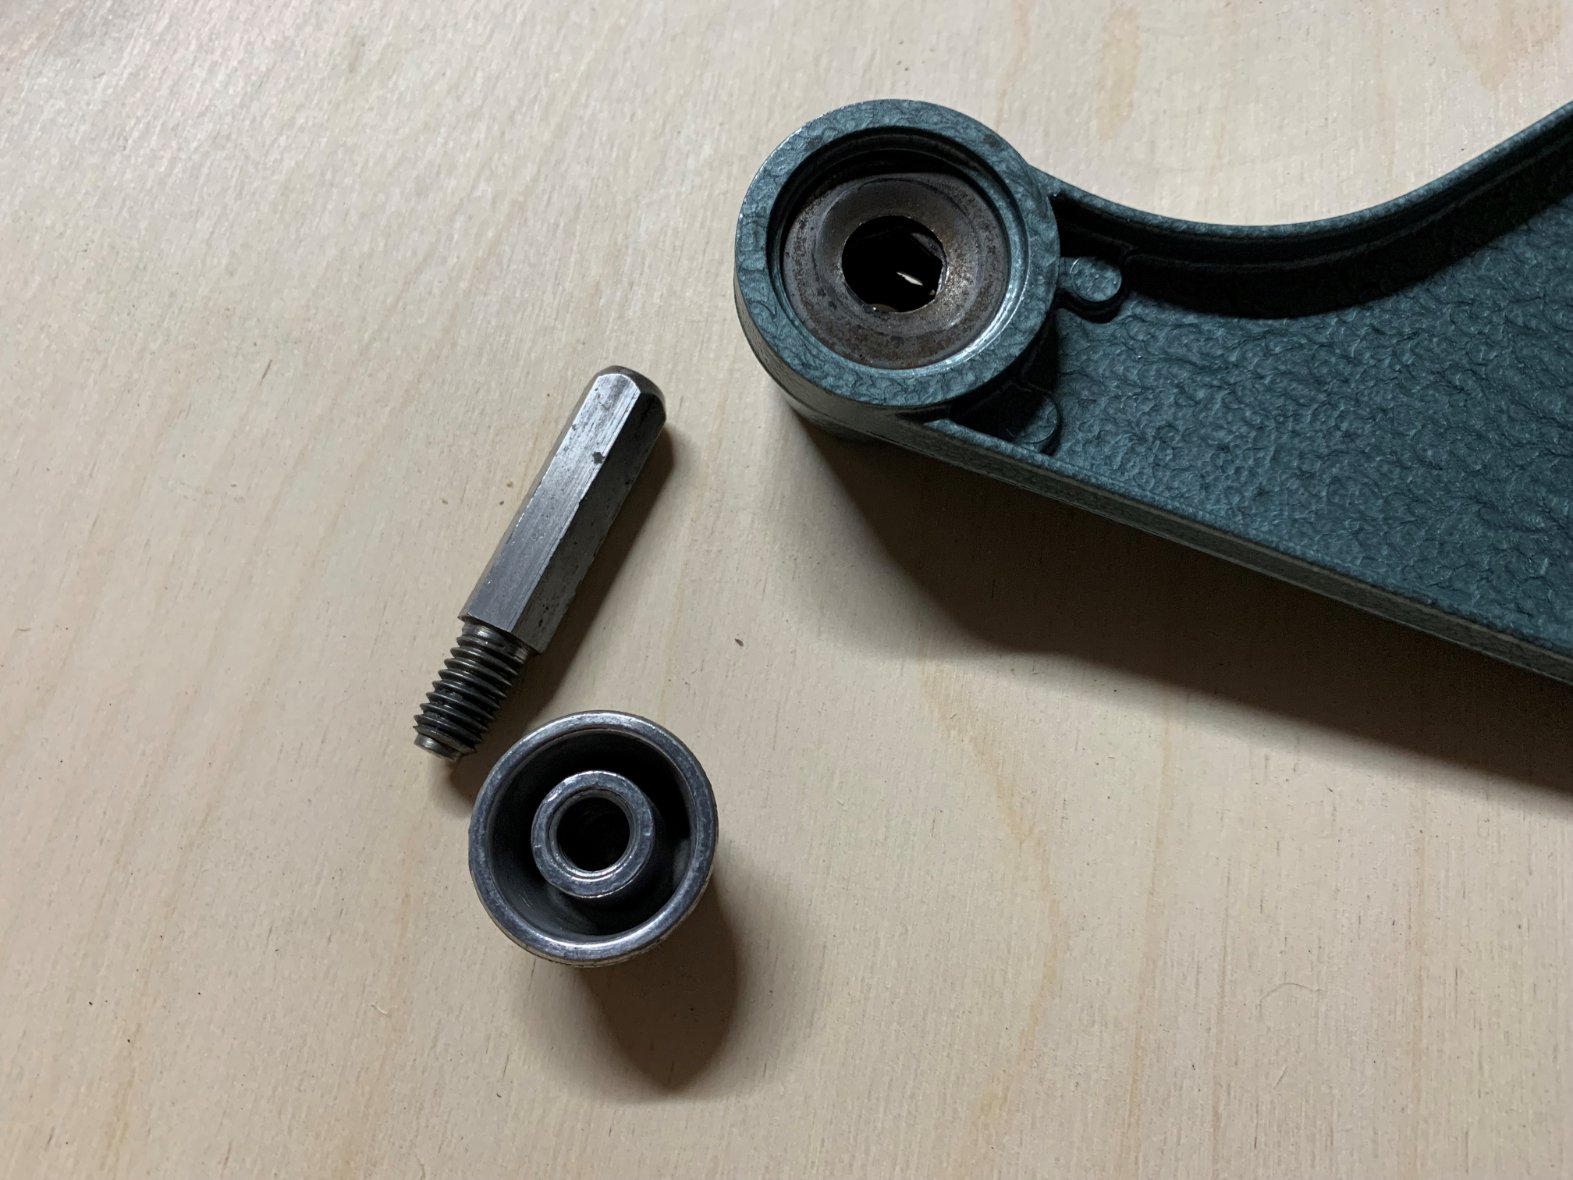
The issue is that the existing knob won’t attach to the threads on the new mounting bolt shown on the left. The existing mounting bolt or post has vertical, knurled threads. The threads inside the knob show lots of wear. The existing cutter head assembly works fine but since the new hardware came with the retro kit I would like to use it if possible. It seems to me I could stick with the old adage, “if it ain’t broke don’t fix it”, or get a new knob that is compatible with the new hardware if that is even possible, or upgrade using the Shopsmith feather guard retro kit. Has anyone else faced this issue before? Any suggestions? Thanks.
Tony
Re: Jointer Cleanup and Repair
Posted: Fri Nov 12, 2021 7:19 pm
by Majones1
Hi Tony,
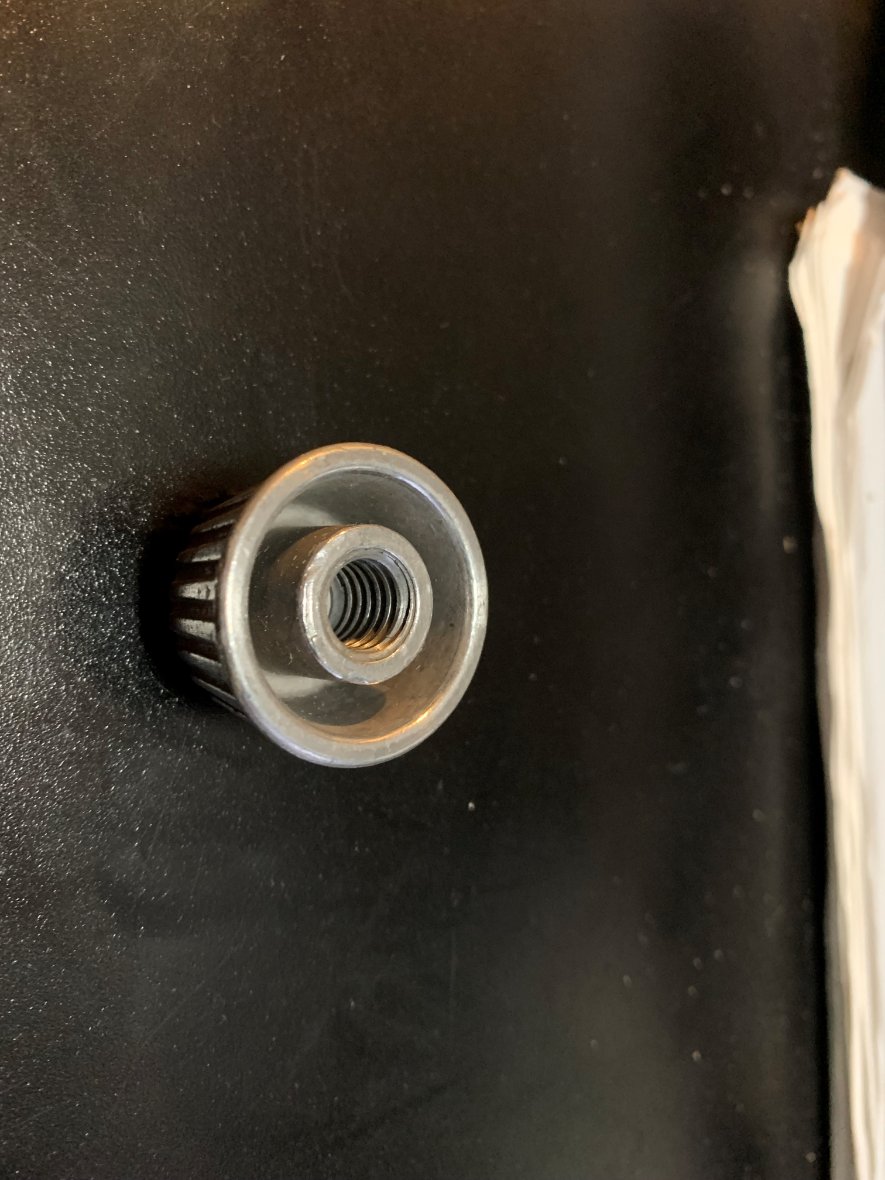
The way your Knob attaches looks different than mine. Are you sure there is not a knurled sleeve screwed or pressed over the steel shaft of the stud? I believe yours and my jointers are from around the same year. I'm thinking that maybe your knob was stripped out and the PO repaired it by drilling out the knob and adding a knurled sleeve. Just guessing. But I guess it could be another design change. I've included photos of my hardware below.
.
- Jointer Feather Guard Hardware.jpg (245.99 KiB) Viewed 1398 times
- Jointer Feather Guard Cap.jpg (142.23 KiB) Viewed 1398 times
Re: Jointer Cleanup and Repair
Posted: Fri Nov 12, 2021 8:53 pm
by chapmanruss
I now understand what you meant about your knob and hex shaft. The ones I have had and taken apart look like Marc's with threads. To use the new hardware with the locking nut may require finding a used guard for a threaded knob.
Re: Jointer Cleanup and Repair
Posted: Mon Nov 15, 2021 6:34 pm
by theinrichs
It appears that the knurled threads were machined into the top of the hex shaft. I'm inclined to leave it alone since the guard is working satisfactorily as is. I may upgrade to the feather guard assembly at a later time. Thanks for your comments.
Tony