Post Pictures of Your Shop
Posted: Tue Apr 09, 2013 5:09 pm
In the Bird House tread several people asked to see pictures of my shop. I like to look at other people's shops too, so I decided to start a new thread. I invite all to post pics of their shops. I know this request made me do some Spring cleaning, not a bad thing!:D
[ATTACH]20909[/ATTACH]
[ATTACH]20910[/ATTACH]
[ATTACH]20911[/ATTACH]
[ATTACH]20912[/ATTACH]
Page 1 [Top Left to Right]
Left side of wall tool box with Stanley combination planes - #45, 46, 55 and hinge routing plane. Bottom shelf contains an assortment of Stanley rabbet, shoulder, miter, tongue and groove planes.
Side view of wall tool box with transition, smoothing, miter, and scraper planes showing.
Transition planes with bit brace, scraper, smooth, and Stanley 113 circle plane showing.
Sets of chisels to include, carving, Japanese dovetail, and mortise chisels.
Delta lathe geared with compound slide rest for light metal/plastic work.
Oval: View of shop through window.
Page 2 [Top Left to Right]
Shopsmith 500 ‘82’ and hardware corner of shop. Machinist chests on left contain machinists tool for use on the lathe. Chest on the right contains chairmaking planes and spoke shaves.
Windsor sidearm chair on workbench
Assortment of block, side rabbet, rabbet, planes and beading tools. Drawers contain sets of blades for plow planes.
Delta 11” Bandsaw
Grizzly woodshaper
Delta radial arm drill press
Oval: Marking gages, wood rasps above machinest chest filled with measuring gages.
Page 3 [Top Left to Right]
Drill press with 18th – 20th C. hand planes on wall. Bottom shelf contains all from #2 to #8 metal planes, including scrub planes. Middles shelf contains wood compass, panel raising, dado, and plow planes. Top shelf moulding planes.
Delta miter saw
Ryobi Contractors saw
Work bench with Windsor chair in progress
Sharpening bench with assorted water cooled grinding wheels.
Oval: Craftsman, 1962 “Best” Radial Arm Saw fitted with laser line and Forrest blade.
Page 4 [Top Left to Right]
Shopsmith 500 ‘78’ with Ryobi radial arm saw configured to over arm router.
[ATTACH]20909[/ATTACH]
[ATTACH]20910[/ATTACH]
[ATTACH]20911[/ATTACH]
[ATTACH]20912[/ATTACH]
Page 1 [Top Left to Right]
Left side of wall tool box with Stanley combination planes - #45, 46, 55 and hinge routing plane. Bottom shelf contains an assortment of Stanley rabbet, shoulder, miter, tongue and groove planes.
Side view of wall tool box with transition, smoothing, miter, and scraper planes showing.
Transition planes with bit brace, scraper, smooth, and Stanley 113 circle plane showing.
Sets of chisels to include, carving, Japanese dovetail, and mortise chisels.
Delta lathe geared with compound slide rest for light metal/plastic work.
Oval: View of shop through window.
Page 2 [Top Left to Right]
Shopsmith 500 ‘82’ and hardware corner of shop. Machinist chests on left contain machinists tool for use on the lathe. Chest on the right contains chairmaking planes and spoke shaves.
Windsor sidearm chair on workbench
Assortment of block, side rabbet, rabbet, planes and beading tools. Drawers contain sets of blades for plow planes.
Delta 11” Bandsaw
Grizzly woodshaper
Delta radial arm drill press
Oval: Marking gages, wood rasps above machinest chest filled with measuring gages.
Page 3 [Top Left to Right]
Drill press with 18th – 20th C. hand planes on wall. Bottom shelf contains all from #2 to #8 metal planes, including scrub planes. Middles shelf contains wood compass, panel raising, dado, and plow planes. Top shelf moulding planes.
Delta miter saw
Ryobi Contractors saw
Work bench with Windsor chair in progress
Sharpening bench with assorted water cooled grinding wheels.
Oval: Craftsman, 1962 “Best” Radial Arm Saw fitted with laser line and Forrest blade.
Page 4 [Top Left to Right]
Shopsmith 500 ‘78’ with Ryobi radial arm saw configured to over arm router.
 Wish my workshop was organized, but sharing a garage with the cars and outdoor stuff has made it tight. Getting the itch to clean and organize and hopefully to be able to use everything I own.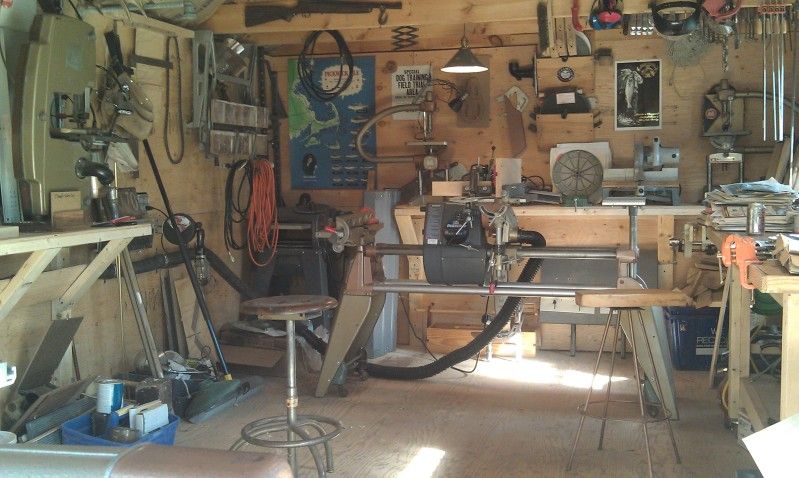
 But none of them are for sale. Except maybe for my for 13 year old boy, if you catch me at just the right time.

