Page 1 of 2

My First Table

Posted: Fri Jan 02, 2015 4:21 pm
by rjent
OK guys, here is my first table (now that I know what aprons are :D ). I have made, very successfully if I may say, a few other items (a winter window cover, an over the stove microwave panel and frame, a storage box for a teeth grinding prevention device, etc), but this is my first "furniture". There are a lot of mistakes, but it is bull for stout, it is unique, my wife loves it :D, and it fulfills a need we have had in our "everything" room for years now. I designed it to fit in with the old world beams that make up the walls and ceiling.

Anyway, any and all feed back is welcome. I have a lot to learn, but I am having the time of my life so far!

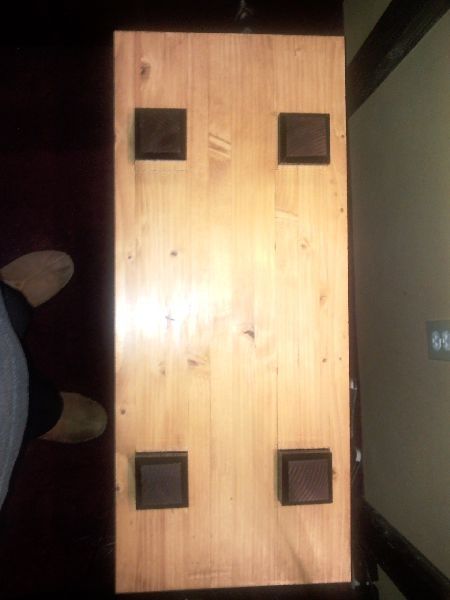
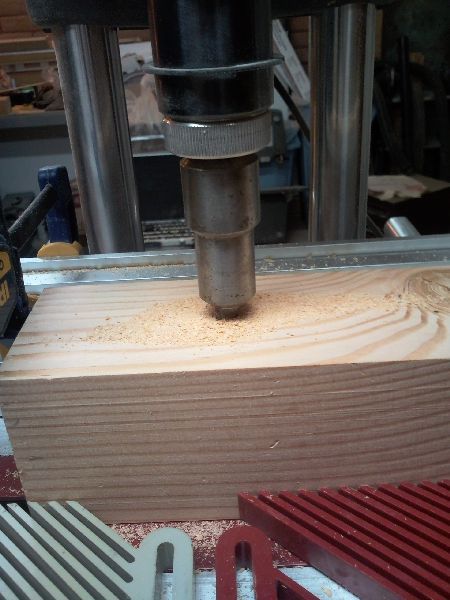
The wood is Pine (legs) and Fir (top and shelf). I am not ready to use expensive woods yet :D. The Pine is stained with Jacobian Minwax, and the top and shelf is stained with a 10 parts of Natural and 1 part of English Chestnut, both Minwax. The Mark 7 and the 10ER were both used for the machining of the parts the 500 is set up as a sanding station. I cut the mortices in overhead router mode with a straight router bit, and the tenons were made with the ShopSmith tenon master.

It took me forever .... LOL

Image

Image

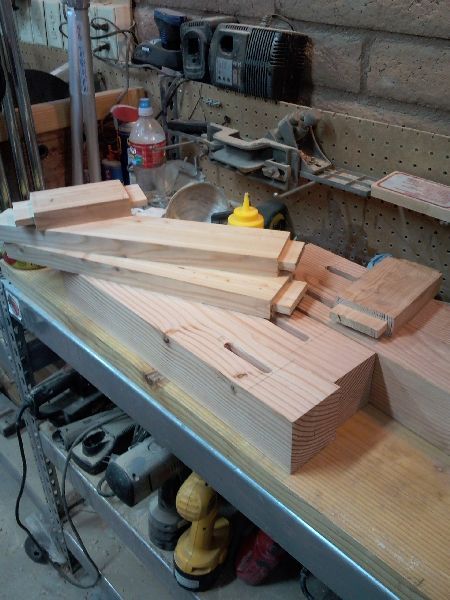
Making the upper aprons
Image

Mortising the legs
Image

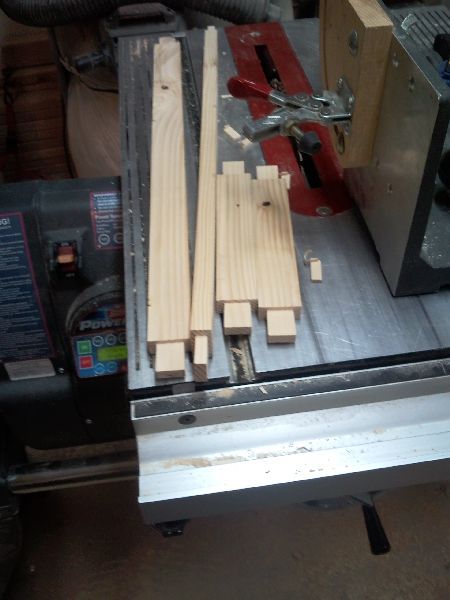
Making the lower aprons tenons
Image

Image


Upper aprons in place

Image

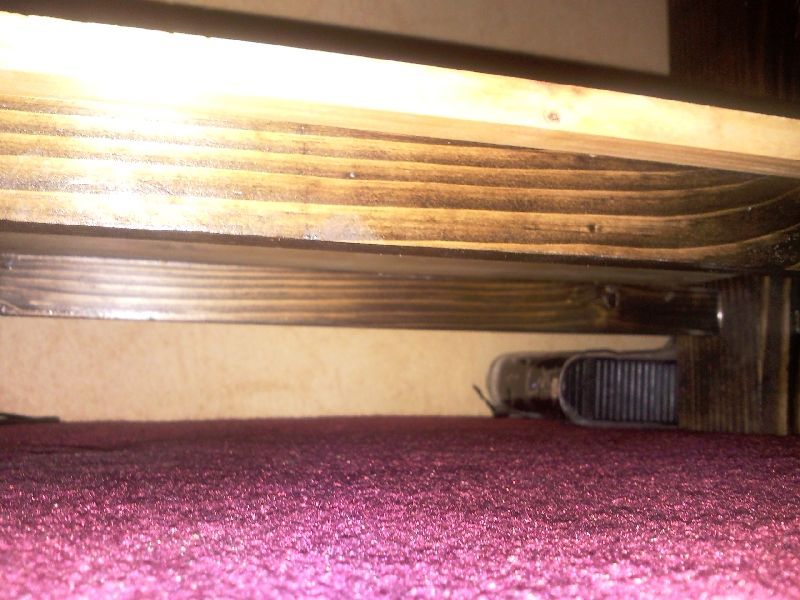
Lower aprons in place

Image

Oh yeah, I forgot. I allowed room for the top to expand and contract around the "protrusions" and i anchored the top with 3 lag screws that go all the way through the aprons with the "outside" lags with over large holes to allow the wood to move. Hope it works :)

Re: My First Table

Posted: Fri Jan 02, 2015 4:32 pm
by JPG
Damn good experience and result!

If Mama is happy, that is what counts(your satisfaction is irrelevant!) '>}}


No doubt you learned much!

Re: My First Table

Posted: Fri Jan 02, 2015 4:40 pm
by algale
Project looks great! Your Tenon Master has the protractor located in front of the work piece. Should be in back to support piece. See photo:
Image

Re: My First Table

Posted: Fri Jan 02, 2015 6:42 pm
by charlese
GOOD JOB rjent!! :D You did very good work, especially on the thru tenons. They often cause concerns for most woodworkers. Lag screws might be a bit overkill, but they'll work! After all a few mistakes don't show to most folks, and those who do won't say so.

Ain't wives great? Your job is done!

Re: My First Table

Posted: Fri Jan 02, 2015 8:34 pm
by JPG
algale wrote:Project looks great! Your Tenon Master has the protractor located in front of the work piece. Should be in back to support piece. See photo:
Image
How in tarnation did I miss that?

I'se slipping! :rolleyes:

Re: My First Table

Posted: Fri Jan 02, 2015 9:37 pm
by charlese
algale wrote:Project looks great! Your Tenon Master has the protractor located in front of the work piece. Should be in back to support piece. See photo:
---

The wood protractor appears to me to be oriented correctly - in the back of the workpiece. The photo shows the start of a forward movement into the saw.

The issue I see is the operator is in front of the blade, reaching across the blade.

Re: My First Table

Posted: Fri Jan 02, 2015 9:45 pm
by algale
Charlese -- go back and look at the pics posted of the table construction. The protractor is backwards. The big photo is from the Shopsmith site.

Re: My First Table

Posted: Sat Jan 03, 2015 1:08 am
by rjent
This is what I love about this site! Useful information!

OK, thanks on the protractor tip, I will start doing it reversed (with the protractor toward me).

Now, no crossing of the arm over the blade. How do you control the two pieces of stock coming off of the cut without doing that? I am VERY right handed so I tend to stand to the left of the blade. That make me reach across the blade when pushing the stock through the cut with my left hand controlling the two pieces coming off. Until the stock is completely clear of the blade, I am still having to push the stock through ... right?

As far as wives go, yeah they are pretty special. I had been building it in the shop with the shop verboten to her until I finished this table. I snuck it in while she was in the bedroom and when she came out, I heard her suck wind like she had been hit in the stomach, then she said she loved it and called me a hero :D Trust me, that doesn't happen every day LOL

Thanks for the compliments. I feel good about it, the mistakes are all cosmetic and lack of precision. My M and T's on the bottom shelf, which I made second, were almost perfect while the first one not so much. I don't like the top all that much, but I will live with it for a while. Make another in a few months.

Anyway, thanks again, and anymore tips/critique will be received with dignity and grace ..... :D

Re: My First Table

Posted: Sat Jan 03, 2015 1:49 am
by shopsmithpaul
Great job! You should be proud of your work.

Re: My First Table

Posted: Sat Jan 03, 2015 12:09 pm
by JPG
I consider that there is too much todo about 'crossing' the blade.

With the workpiece securely clamped in the jig, and the jig securely held by that right hand, I do not see a great risk. As always, do 'expect the unexpected', although unexpected is usually due to inadequate forethought.

Placing one's torso in the direct path of the blade when ripping is another matter entirely.

FWIW, methinks that jig had been set up for a left handed person. ;)


Also with the jig pushing the workpiece, that second clamp is not likely needed.