Page 1 of 1
Framing Vise
Posted: Sun Mar 08, 2015 5:02 pm
by algale
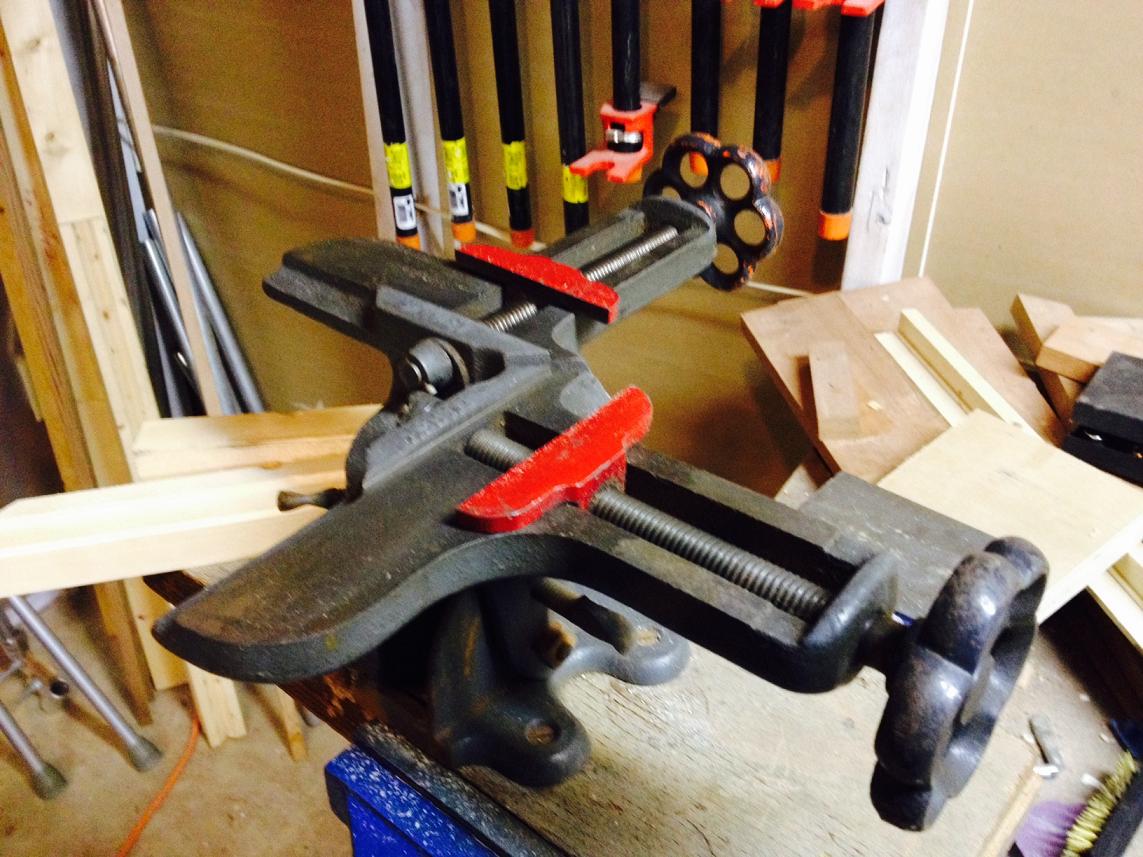
This is a Stanley Marsh # 400 picture frame vise that I just acquired. When I worked in the framing department of an art museum back in the early 80s we used one of these exclusively.
It accommodates frame stock up to 4 inches wide.
- FullSizeRender(2).jpg (143.02 KiB) Viewed 8379 times
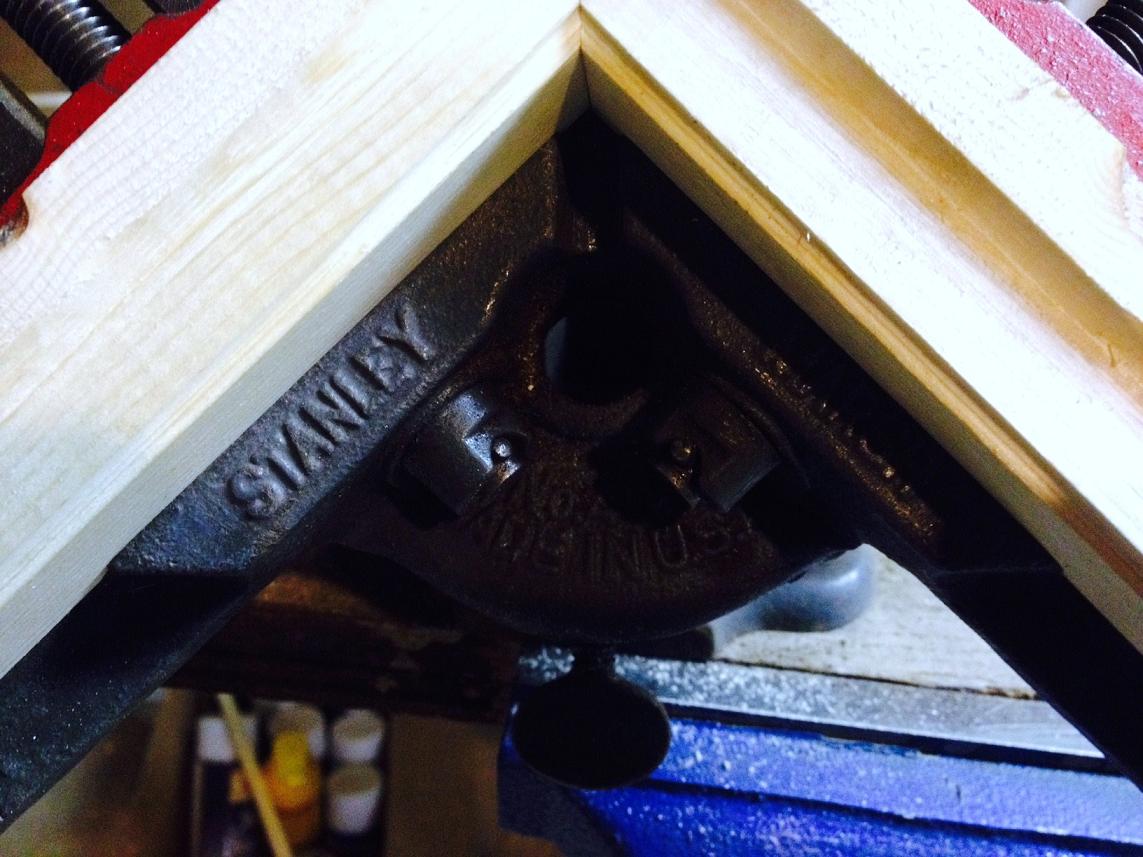
You can only do one corner at a time but assuming you have cut your miters correctly, you will get perfect miter joints. The vise is not meant to bring a bad miter joint together. Instead, if your miter is off when you clamp it, you saw through the joint with a back saw (there's a little valley under where the miter sits so you don't dull the teeth on your saw). Then you bring the miter together again. You can see the valley here.
- FullSizeRender(3).jpg (130.2 KiB) Viewed 8379 times
The really nice feature of these vises are that they rotate both in the horizontal and vertical planes and the clamping jaws have a low profile and are set back from the miter. This lets you quickly reinforce the joint with brads and then move on to the next joint.
- FullSizeRender(1).jpg (146.6 KiB) Viewed 8379 times
- FullSizeRender.jpg (139.62 KiB) Viewed 8379 times
I'm looking forward to getting reaquainted with this tool.
Re: Framing Vise
Posted: Sun Mar 08, 2015 9:15 pm
by paulsgreenbarn
I've had my eye on one of those for years.I thought they might be a good pick up.Thanks for the review.I'll be snatching one up in the future for sure now..
Re: Framing Vise
Posted: Sat Mar 28, 2015 12:17 pm
by WmZiggy
That's really a nice addition to your shop. I am going to keep my eye out for one of those at the tool auctions. Thanks for posting.
Re: Framing Vise
Posted: Sat Mar 28, 2015 12:25 pm
by joedw00
If you saw it off will it change the size any?
Re: Framing Vise
Posted: Sat Mar 28, 2015 6:46 pm
by algale
Apologize for this long response. You are sawing through the bad joint. Yes, cutting through the joint has to have some small impact on dimensions because you are removing wood. But you are removing very little wood, usually less than a full kerf width of your hand saw (because there is gap in an open joint and you are only removing what's interfering with the joint coming together along the miter).
In picture framing this slight change in dimensions doesn't matter much for the reasons discussed in the last two paragraphs below (hint: it is because professional framers usually design their frames to be slightly larger than the mat that is going into it).
But remember: if any of the four joints don't come together perfectly when you put the pieces in this vise, you already have a problem. Either one or more of your angles is slightly off or one or more of your dimensions is off or both. So, if you do nothing, your frame is either going to have an ugly open joint or it won't be perfectly square/rectangular or both.
That leaves only three options I know of: (1) cut a new piece with the correct angle/length (easier said than done or you wouldn't have made the mistake the first time), (2) break out the wood putty, or (3) fine "tune" the miter by cutting through it. (Ok, there is a fourth option: if the joint is only open on the outside of the joint and the gap is small enough, you can "burnish" the joint using the round shaft of a large screw driver to round over the "point" at the corner of the joint. You do this by griping both ends of the screw driver, putting the center point of the shaft over the point of the joint at a tangent and move the shaft front to back across the joint while applying downward pressure. At the art museum, we used to burnish our joints even when we had perfect miter joints because perfect miter joints are surprisingly pointy and sharp and uncomfortable to handle.)
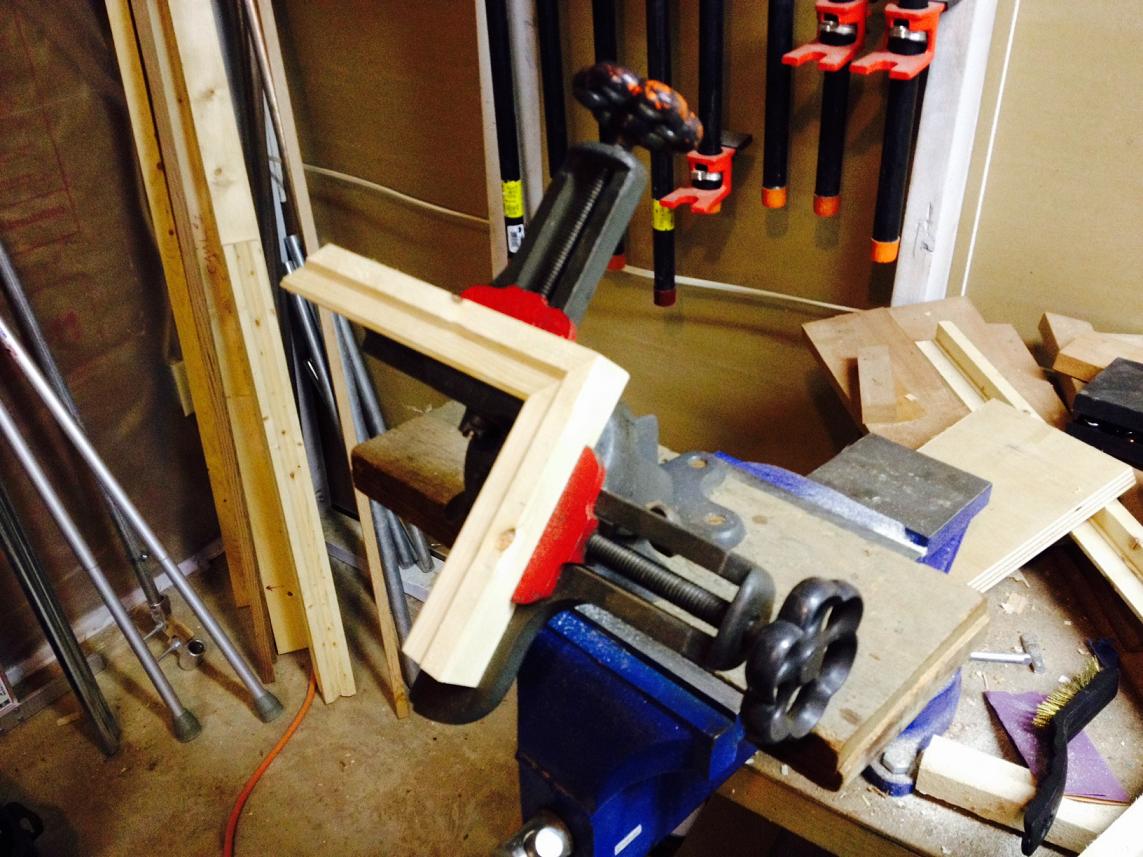
With this vise you complete the frame in halves, one opposite corner at a time, tuning each miter as you go as necessary (in the above photo the first miter needed no tuning whatsoever straight off the Mark V using an Incra v120 miter gauge.
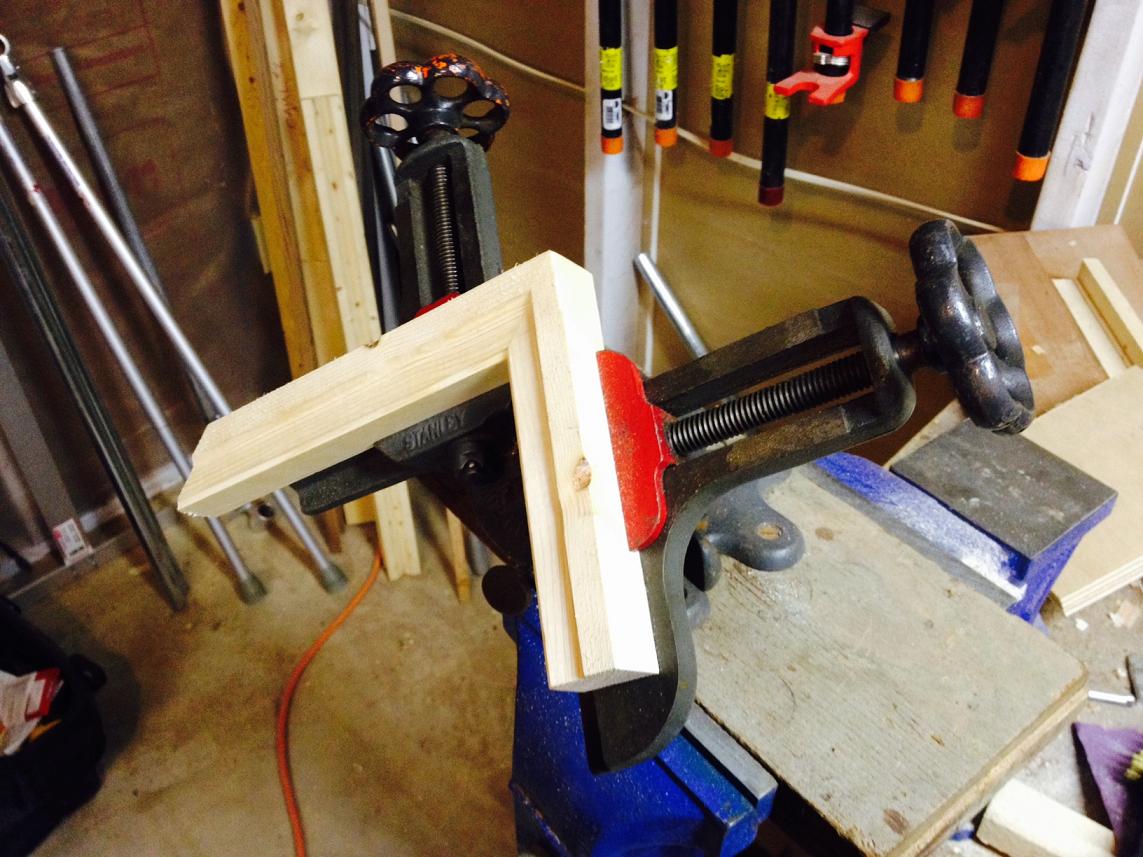
After you have two halves, you join up the halves, one opposite corner at a time. Any accumulated dimensional changes from correcting one or more of the earlier joints can be sorted when you complete the last corner -- unless you have really butchered the frame and taken off a ridiculous amount of wood. If done right, this results in a frame that has good looking, tight fitting miter joints and is square/rectangular.
The frame may be slightly smaller than it was designed to be, but in picture framing business, particularly where a matted piece of art is involved, this dimensional reduction usually isn't a big deal. I was taught to always make each of the frame's 4 legs 1/8th longer than needed to accommodate the sides of the mat that fits in it. This lets the mat float in the frame's rabbet with a 1/16th clearance on all sides. So there is already a built in fudge factor in the frame's size. By the way always make the mat first and take your measurements on the inside of the rabbet. Or so I was taught.
If, after tuning the miters, the frame ends up so much smaller that the mat has no clearance at all despite the original fudge factor, the mat can always be trimmed down slightly to fit the frame, which is a lot easier than making a new, larger frame to fit the mat.
Re: Framing Vise
Posted: Sat Mar 28, 2015 7:52 pm
by charlese
In my shop - having no advice as given by algale, I used another method to arrive at the perfect length. This works only if the angles are correct, but length is a little off.
Identify the longest piece(s) and rip off a SMALL strip of the longer piece(s) from the INSIDE edge. This makes the piece shorter (but also narrower). Now the four corners will fit together beautifully. Glue it up and after set, trim the other pieces as needed to make the frame look uniform.
Yes, this is cheating, but it works!
Re: Framing Vise
Posted: Sat Mar 28, 2015 8:18 pm
by algale
charlese wrote:In my shop - having no advice as given by algale, I used another method to arrive at the perfect length. This works only if the angles are correct, but length is a little off.
Identify the longest piece(s) and rip off a SMALL strip of the longer piece(s) from the INSIDE edge. This makes the piece shorter (but also narrower). Now the four corners will fit together beautifully. Glue it up and after set, trim the other pieces as needed to make the frame look uniform.
Yes, this is cheating, but it works!
Neat! I suspect the reason I didn't learn this trick in the framing shop is that we used pre-made frame stock (with the rabbet for the mat already cut). If you do this with pre-made frame stock you will lose part of the rabbet, no?
Re: Framing Vise
Posted: Sun Mar 29, 2015 2:09 pm
by beeg
charlese wrote:Yes, this is cheating, but it works!
Sorry Chuck, but your wrong. It's called FITTING the piece. 