Page 1 of 2
Shopsmith Project pictures
Posted: Sat Feb 04, 2017 1:07 am
by Hobbyman2
Re: Shopsmith Project pictures
Posted: Sat Feb 04, 2017 1:17 am
by Hobbyman2
I tried to resize some other pictures to fit ...however I have a photobucket site that I have used for some time and it was easier to just post a link.
It is a free site.
I will add other projects to the pictures over time.
This is only a couple projects , the kitchen cabinets were non finished from the big box store ,,,the cabinet ends were made using air dried ash for the frames with floating tenons in the corners.
Took the wood 2 years in the attic to dry down to 6% moisture ,
The frames were made with the SS.
The big counter top legs are oak and walnut.
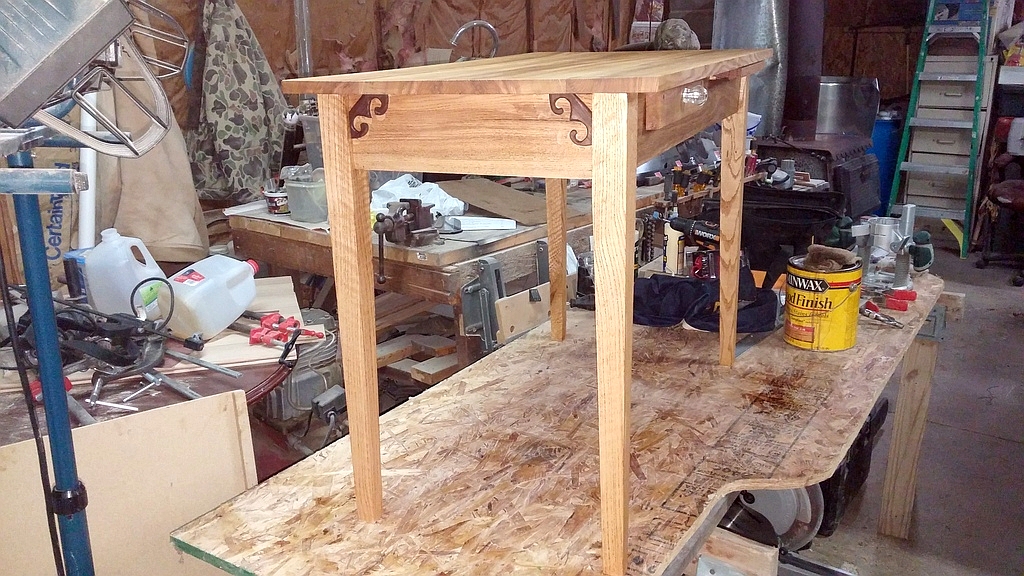
The table is air dried ash ,,,with some reclaimed oak for the drawer and leaf.
Its just a hobby.
Hobbyman2
Re: Shopsmith Project pictures
Posted: Sat Feb 04, 2017 6:06 am
by newportcycle
Nice looking projects, great work. I really like the small end table. I've been planning one myself can you tell me how you did the corner accents?
Re: Shopsmith Project pictures
Posted: Sat Feb 04, 2017 6:15 am
by recurve1usa
Hello;
Nice work there. I like the turkey call. My Uncle's friend made me one years ago. It is not as decorated as yours but it has a nice sweet sound to it.
Nice work. thanks for posting
John
Re: Shopsmith Project pictures
Posted: Sat Feb 04, 2017 7:37 am
by garys
Nice work. I did a similar thing with my kitchen about 8 years ago. I found beautiful rustic hickory cabinets at Lowes. Both my Wife and I fell in love with them so we got them. Then we installed them ourselves and made over the rest of the kitchen in rustic hickory including the door frames and woodwork. We even had to make a hickory bifold door for the kitchen pantry so it would match. We enjoyed doing the job and enjoy the kitchen every day since.
After all your hard work, now you get to sit in there and look at the beauty of the wood every day. That's your reward for doing the work.
Re: Shopsmith Project pictures
Posted: Sat Feb 04, 2017 10:09 am
by JPG
But it was small enough to begin with?

- Clipboard01.jpg (510.15 KiB) Viewed 11319 times
Re: Shopsmith Project pictures
Posted: Sat Feb 04, 2017 11:02 am
by nuhobby
Most handsome projects, congratulations!
Chris
Re: Shopsmith Project pictures
Posted: Sat Feb 04, 2017 12:37 pm
by berry
Like that table. Especially the embellishment on end apron, is it an inlay or is it sitting on the apron?
Re: Shopsmith Project pictures
Posted: Sat Feb 04, 2017 1:13 pm
by Hobbyman2
Thanks for the compliments
Turkey calls ,, I wanted to improve on my carving a little .. they were fun
The table,, the embellishment on the ends are walnut, cut them out on the SS scroll saw and glued on.
The taper on the legs were done on the band saw and then rough sanded with the disk sander.
It was a very fun project , I actually did this with one arm in a sling , had rotator cuff surgery and this was as good as any therapy I could get.
All of the lumber is air dried not kiln dried .
The kitchen,,,, it has been a enjoyable ,a lot of work ,,and a challenge ,,,the SS has been a blessing ,
Pictures,, I am impressed once again,,I got the ,,,too large,,,, message ,,, I'm a old fart and not that computer savvy and my 10 year old moved out 15 years ago ,,lol,,, any ,,,,slow,,,,,,guidance on resizing them is welcome.
Thanks again for the compliments
Re: Shopsmith Project pictures
Posted: Sat Feb 04, 2017 3:41 pm
by JPG
My favorite 'tool' for manipulating pictures is a free program called IRFANVIEW. Resizing is quite simple.
http://www.irfanview.com/main_download_engl.htm