Page 2 of 2
Re: Today in the Shop "sawdust videos and I mean that"
Posted: Sun Aug 20, 2017 4:11 pm
by Skizzity
That's slick. I like the sheet metal hole covers.
Sent from my 2PZC5 using Tapatalk
Re: Today in the Shop "sawdust videos and I mean that"
Posted: Sun Aug 27, 2017 1:13 am
by reible
I was out making some more sawdust today and took a video of the sheet metal cover in action. Well maybe action is not the right word, but it is working as expected blocking saw dust.
I posted a video of it here:
https://youtu.be/1T37qbUMfQk
As you can see there is a lot more to do but this was an easy start.
I really think that shopsmith is dropping the ball by not offering a better dust collection system. I'd be willing to pay for new improved hardware to solve this. Short of them actually doing so we are left to our own devices.
By the way feel free to do a few improvements of your own and post some videos of the results. If you don't have or want a youtube account I understand but we might be able to work something else out.......
Ed
Re: Today in the Shop "sawdust videos and I mean that"
Posted: Fri Sep 01, 2017 10:04 pm
by Ed in Tampa
I wonder if this product would help you in your quest to corral sawdust?
http://www.fastcap.com/estore/pc/viewPr ... ategory=28
Re: Today in the Shop "sawdust videos and I mean that"
Posted: Wed Sep 27, 2017 6:10 am
by dusty
Capping those two ports does help in this endeavor. I can attest to that. You did much nicer work but I have had these ports capped since way back when mbcabinetmaker and I here working on a dust collection system.
You might want to check those out.
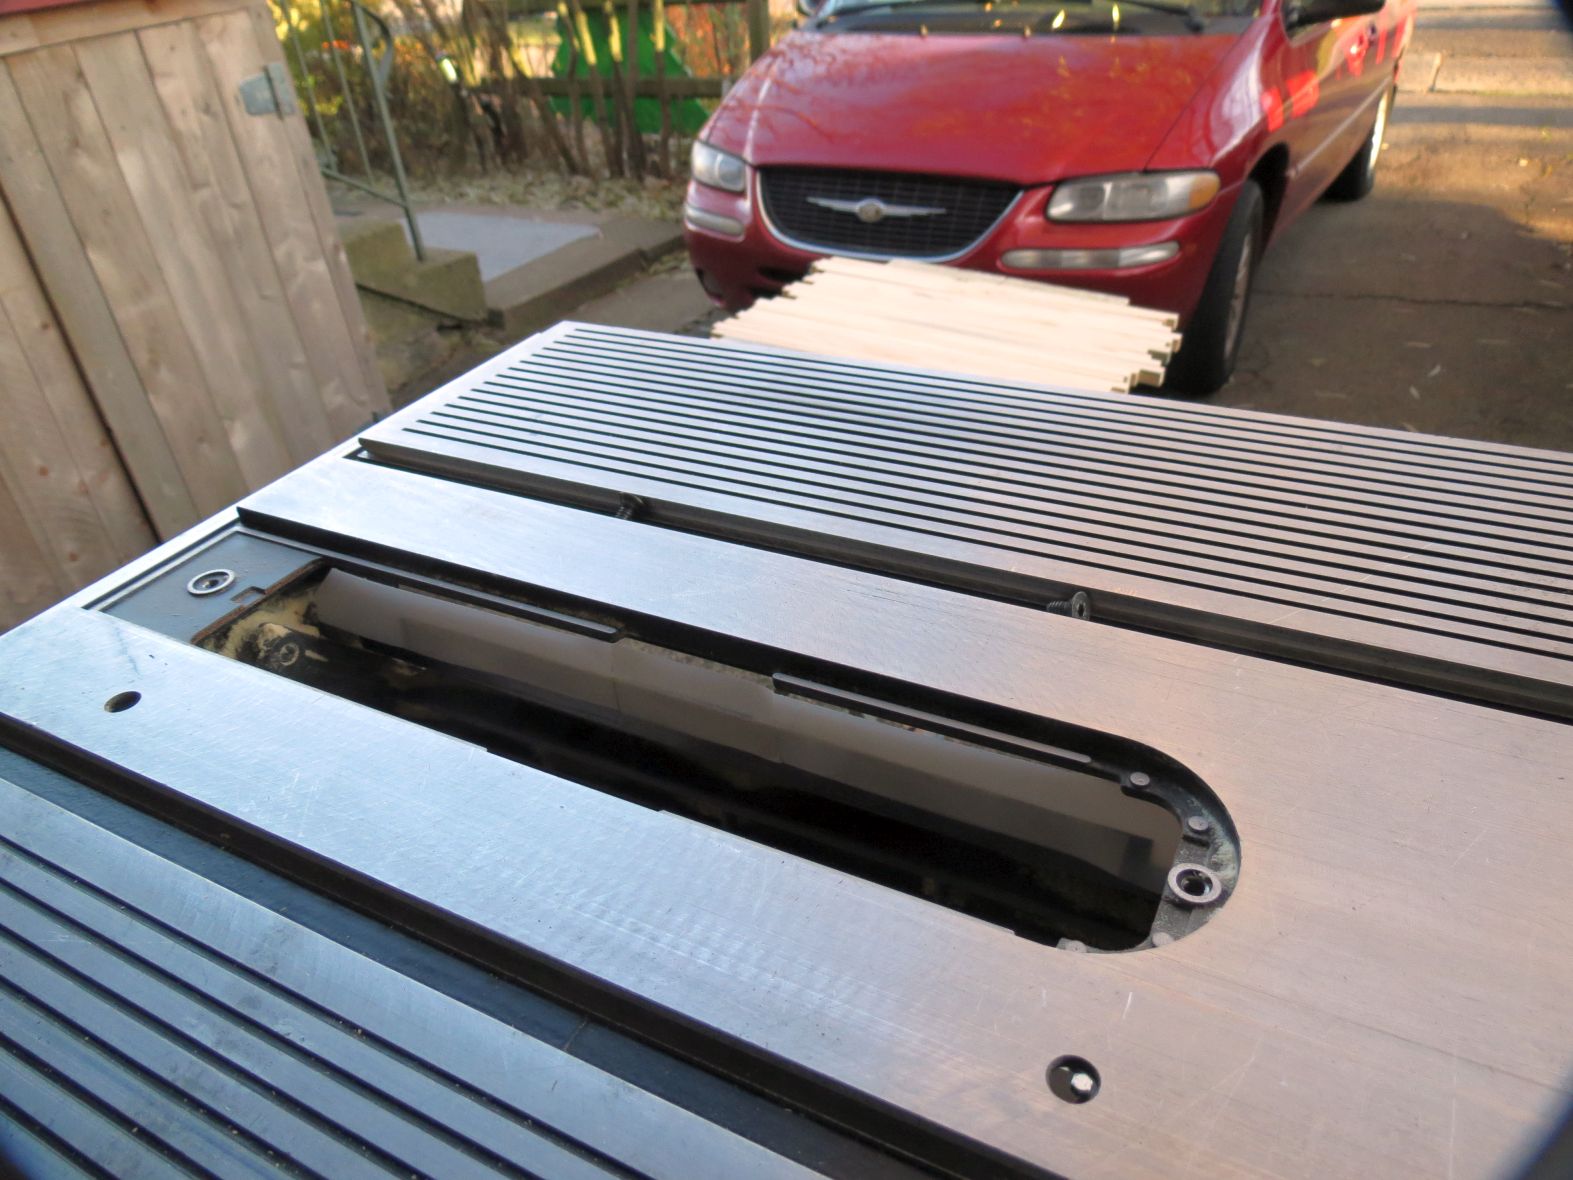
Ed (in Tampa), nice find. Thanks for posting that. My first thought is under the table along the table insert.
Re: Today in the Shop "sawdust videos and I mean that"
Posted: Mon Nov 27, 2017 11:22 pm
by reible
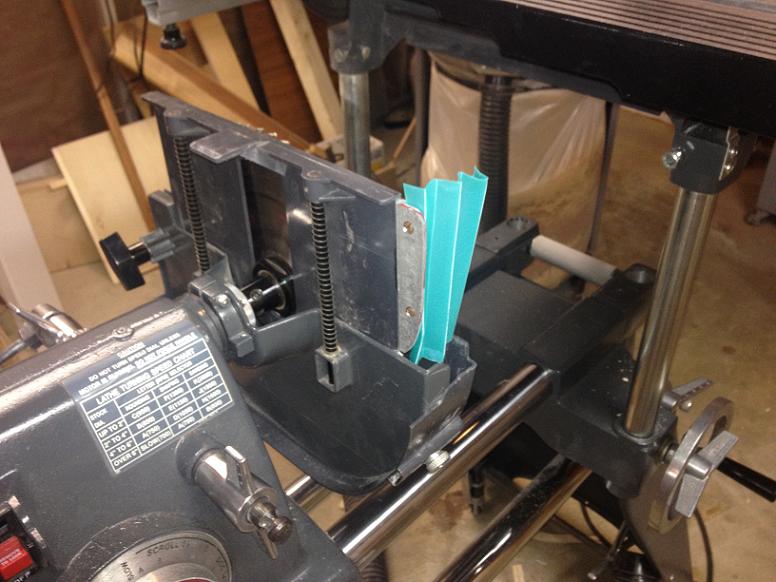
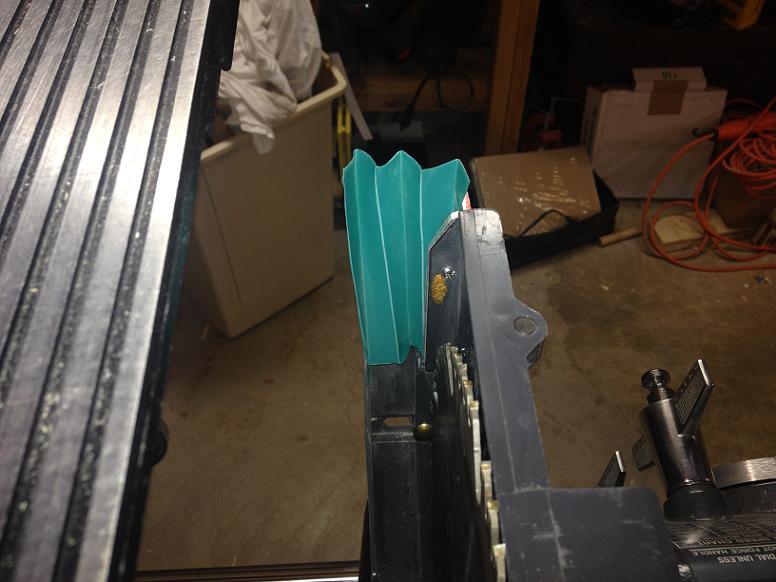
Got back to this again just before ripping up a bunch of wood. I had two things I wanted to do. First was to block the front area where I saw a bunch of sawdust coming from.
I wanted to get some thin plastic for this but never got around to it so I went with some plastic from a milk carton. A little light and no so flat but it did work quite well.
I wanted something that would attach but could be removed when needed. When needed is if you were to mount a sanding disk. I have two 520's hence the fact I do have two lower guards but still.....
So lets look at this with a couple of pictures.

- IMG_5211sca.jpg (223.58 KiB) Viewed 11063 times

- IMG_5210sca.jpg (232.36 KiB) Viewed 11063 times
So what we have is a small section of aluminum angle shaped to match the part of the lower guard that slides up and down. The aluminum part is threaded so it and the plastic deflector can be removed or the deflector replaced. As I mentioned, if a sanding disk is installed this has to be removed.
The deflector may look short but keep in mind the blade has to be above the table to cut and thus create sawdust, by then the deflector is lower and does it job.
The width of the deflector is self adjusting. What you see is what I think to be the optimal location of the lower shield, but it can be closed or open from that location. The plastic has a normal set or predetermined curvature .
Testing shows this pretty much stops the dust from that area but it doesn't do enough by itself. I'll get to the second part of this experiment later.
Ed
Re: Today in the Shop "sawdust videos and I mean that"
Posted: Mon Nov 27, 2017 11:42 pm
by reible
The second area of concern is the area between the tie bar guard and the main table. This seam leaks a lot of sawdust. What I did was to attempt to use a shield attached to the tie bar guard to seal this up. A simple way to do this was some double sided tape and more of the plastic milk carton.
The pictures show how this looks. First view is looking into the area with out the table insert in place.
- IMG_5212sca.jpg (254.48 KiB) Viewed 11059 times
It is easier to see with the table rotated 90 degrees.

- IMG_5213sca.jpg (358.87 KiB) Viewed 11059 times
This pretty much takes care of this area and leaking sawdust.
I took some videos but I'm having some problems posting them right now. If I get that resolved you will see the improvements. If not then you can make your own testing situation and find out for yourself.
Ed
Re: Today in the Shop "sawdust videos and I mean that"
Posted: Tue Nov 28, 2017 12:00 am
by reible
This video adds on to the others with the addition of the last two shields installed. It was a very windy day so keep in mind that the sawdust that is blowing is coming mostly from the top of the saw and not at the joints that have the shields in place.
I've lost my program that I used to process videos and the new version has added imprints because I didn't buy it so that is useless now, old version is no longer available. This is straight out of the camera and takes a long while to upload........... I think this will be the only video I post from this session due to that.
https://youtu.be/NIJ8YXW5SbY
Ed
Re: Today in the Shop "sawdust videos and I mean that"
Posted: Tue Nov 28, 2017 12:37 am
by algale
Looks good! I built a front deflector on a similar line a while back.
It worked great but the one of the nuts worked loose and a screw got taken out by the blade. Haven't had it back on since.