Page 1 of 2
New owner, nearly finished rebuild
Posted: Mon Jan 21, 2019 8:01 pm
by DaHeffer
First off, I want to thank everyone who has posted information on how to go about rebuilding. Very helpful. I don't have anything to add save for one thing that someone may find useful. Graffiti Remover did a fantastic job of removing the old paint.I thought I was buying de-greaser to prep for sand blasting, saw Goof-Off and it was a big can, brought it home. Wasn't until I spayed it did I realize it was graffiti remover, happy accident, didn't have to sand blast. Oh they are serious about well ventilated (oh the pretty colors.......)
What I have is a 1954 Model 500. Needed bearing and belts, I took it touch further and repainted as well. Got it together, fired it up and noticed a couple things that I could use some help with.
First is that the idler shaft gets hot, may be due to the shaft/bearing assembly sticking out a bit far which is causing the gilmer belt to rub on the inside of the case. Given the nature of the retaining brackets, I am not sure how it can be any other way.
Second, How does go about leveling the thing?
Have not posted here before, going to try to attach a couple photos.
Re: New owner, nearly finished rebuild
Posted: Mon Jan 21, 2019 8:04 pm
by DaHeffer
Opps, posted the same photo twice, here is one showing the gilmer belt against the inside of the case.
Re: New owner, nearly finished rebuild
Posted: Mon Jan 21, 2019 8:10 pm
by algale
First of all, that's a really great paint job!
Second, I know nothing about the Gilmer drive so I will leave that to others.
Third, not sure what you are asking when you ask how to level it.
Re: New owner, nearly finished rebuild
Posted: Mon Jan 21, 2019 8:17 pm
by DaHeffer
Thanks, The painting came out better than I hoped.
Before I took it apart, it sat solidly on the floor. Now there is a wobble, like it is slightly twisted. I loosened the brackets on the lower tubes thinking I could settle it on the floor and re-tighten. That had the effect tilting the ends inwards and then the upper tubes didn't lay flat on the end that disengages to lift it up for drill press setup.
Re: New owner, nearly finished rebuild
Posted: Tue Jan 22, 2019 6:16 am
by DaHeffer
Unsurprisingly, looks like operator error. I was looking at the original idler shaft this morning with my coffee, wondering if there was perhaps something different with the replacement.
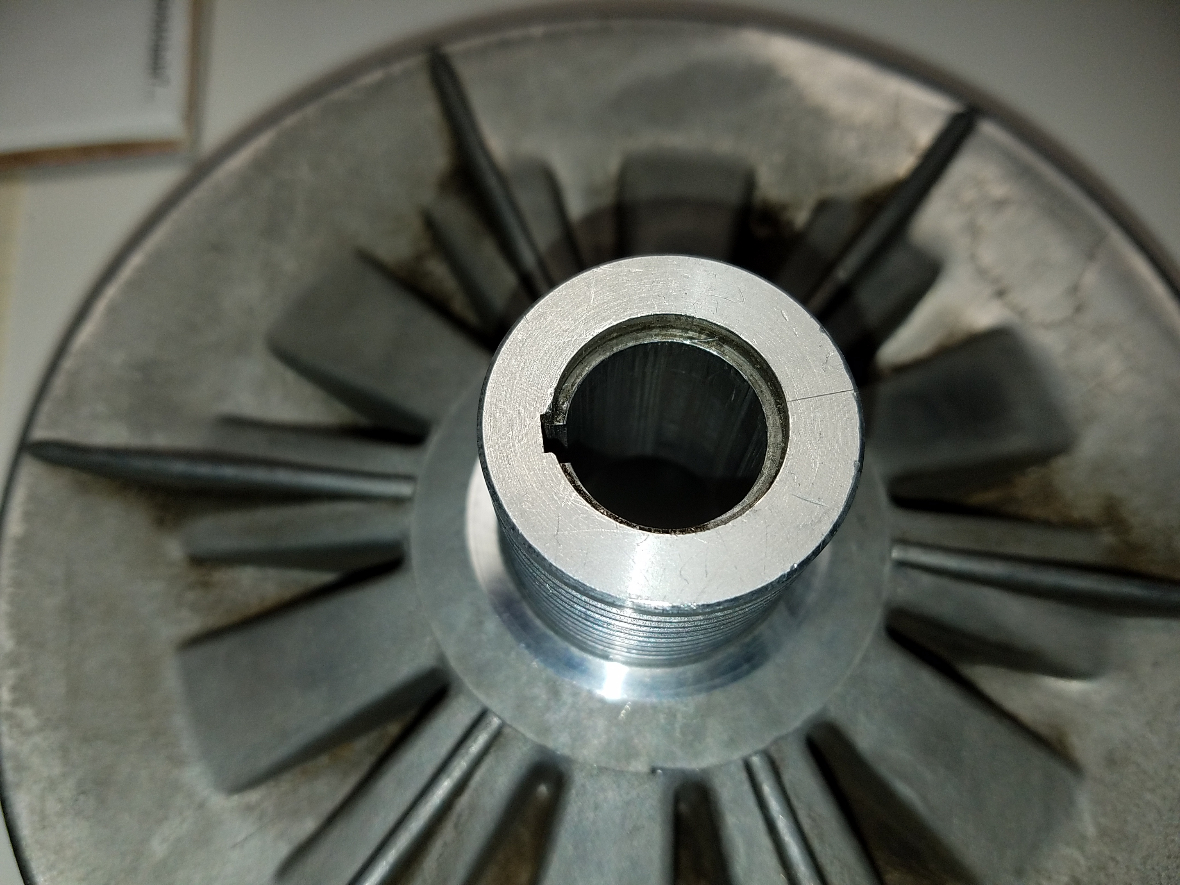
Noticed a retaining ring on the original, Huh, if it is there then what is on the new one? I took the new idler shaft out this morning and the answer turned out to be a empty slot where that ring should go. Attaching a photo of both the new and old. That should keep the sheave off of the case.
Wont be until tomorrow night before I get it all back together, but I am hopeful that this is the issue.
Re: New owner, nearly finished rebuild
Posted: Tue Jan 22, 2019 6:42 am
by algale
DaHeffer wrote:Thanks, The painting came out better than I hoped.
Before I took it apart, it sat solidly on the floor. Now there is a wobble, like it is slightly twisted. I loosened the brackets on the lower tubes thinking I could settle it on the floor and re-tighten. That had the effect tilting the ends inwards and then the upper tubes didn't lay flat on the end that disengages to lift it up for drill press setup.
I'd put the Mark 5 upside down on a pair of saw horses. Then I'd remove the legs from the end castings (to take the weight off of the casting) and then re-tighten the clamps on the lower tubes. Also this would be a good time to check to see the tubes are inserted correctly. Then re-attach the legs, put right side up and check again.
Re: New owner, nearly finished rebuild
Posted: Tue Jan 22, 2019 7:44 am
by garys
It looks very pretty, but in a way, I feel sorry for you guys who spend half of your lives rebuilding and refurbishing your Shopsmiths. My 1983 Shopsmith has never been rebuilt and it works perfectly every day. Mine isn't that pretty. It is usually covered with so much sawdust that I can barely see it and it still works perfectly.
I'm thinking that Shopsmith built these machines to cut wood, not to rebuild.
Re: New owner, nearly finished rebuild
Posted: Tue Jan 22, 2019 7:57 am
by dusty
garys wrote:It looks very pretty, but in a way, I feel sorry for you guys who spend half of your lives rebuilding and refurbishing your Shopsmiths. My 1983 Shopsmith has never been rebuilt and it works perfectly every day. Mine isn't that pretty. It is usually covered with so much sawdust that I can barely see it and it still works perfectly.
I'm thinking that Shopsmith built these machines to cut wood, not to rebuild.
We each have our own passions and our own "needs". May you never need to rebuild(repair) your Shopsmith. It is really very frustrating to not be able to make sawdust when you have the tools but they do not work as they should.
Re: New owner, nearly finished rebuild
Posted: Tue Jan 22, 2019 8:13 am
by JPG
garys wrote:It looks very pretty, but in a way, I feel sorry for you guys who spend half of your lives rebuilding and refurbishing your Shopsmiths. My 1983 Shopsmith has never been rebuilt and it works perfectly every day. Mine isn't that pretty. It is usually covered with so much sawdust that I can barely see it and it still works perfectly.
I'm thinking that Shopsmith built these machines to cut wood, not to rebuild.
Although it may appear differently, the purpose of 'rebuilding' is to restore to original functioning. Yes making them pretty can be over done, but that is not the primary purpose.
I will have to think about that ring - too far back in the cobwebs.
Re: New owner, nearly finished rebuild
Posted: Tue Jan 22, 2019 9:32 am
by dusty
DaHeffer wrote:Unsurprisingly, looks like operator error. I was looking at the original idler shaft this morning with my coffee, wondering if there was perhaps something different with the replacement.
Noticed a retaining ring on the original, Huh, if it is there then what is on the new one? I took the new idler shaft out this morning and the answer turned out to be a empty slot where that ring should go. Attaching a photo of both the new and old. That should keep the sheave off of the case.
Wont be until tomorrow night before I get it all back together, but I am hopeful that this is the issue.
There should be a ring in the slot nearest the bearing. The ring is intended to prevent the sheave from going too far onto the shaft. The sheave is milled so as to cover the ring when assembled and to provide a hard stop.
- 20190122_070730.jpg (870.11 KiB) Viewed 10626 times