Page 1 of 4
Today in the shop (new project is in the planning stage)
Posted: Thu Oct 24, 2019 9:09 pm
by reible
I'm ready to change up some things in my shop. I have always kept tools in containers, either the ones they come in or finding something off the shelf to fit them. In most cases the cases are rather less then uniform. The except is the festool stuff that come with a nice stacking systainer system. (Those festool tools will still stay in containers I think.)
I have done this storage method because I use to transport my tools often, and they were safer that way. Now I just don't do that much at all. The local kids have there own tools and I don't go out of my way to help people like I use to. Got enough of my own projects and hardly the energy to do them much less finding the time to get to things.
So I will be making up a test case to see how I like the idea of a bunch of pigeon holes to store tools in without the cases/boxes. There would be some tools that would still be in containers when it seems a better idea like having a collection of add-ons pertaining to the tool or in cases where they are more of a backup tool. The tools stored in the pigeon holes would be common use items like drills etc.
I have several of these shelves. They are in ruff measurements 18" deep and 48" wide and when on casters about 76" tall to the top shelf.

- metal shelf.jpg (67.79 KiB) Viewed 19088 times
They are designed to hold 500 pound when on casters.
The general idea would be to have a shelf that has this pigeon hole arrangement setting on it. Something like this:

- pigeon hole.jpg (111.06 KiB) Viewed 19088 times
This is what a fixed arrangement might look like. The other option might be to make the spacing a flexible arrangement. I haven't worked that out yet as I don't see making a whole bunch of those dado's so maybe I'll look at some variation using spacers of different widths.
Just wondering if anyone has done this sort of thing and have any insights.
Not sure if the weather is going to allow me to make up one of these, perhaps the one with the fixed space to see how I like it yet this fall.
Ed
Re: Today in the shop (new project is in the planning stage)
Posted: Thu Oct 24, 2019 10:30 pm
by reible
This might be an example of a way to make it easy to vary the widths of the openings:

- var exmp.jpg (56.72 KiB) Viewed 19070 times
More likely maybe a mix of say 4, 5, and 6 inch spacers and then some odd ball dimensions in 32nds of an inch but you should get the idea.
Ed
Re: Today in the shop (new project is in the planning stage)
Posted: Fri Oct 25, 2019 7:20 am
by BuckeyeDennis
Why not a bunch of dados, Ed? IIRC, you made an adapter so that you can guide a router with your Festool saw track. You could route a bunch of dados full length on full-sized sheets of plywood, and then crosscut them into the shelf-unit tops and bottoms with your track saw. That seems easier than making and mounting all those spacers.
What would really be slick is if you could find something like a box-joint blade that fits your track saw. That would make real short work of the dados, but I’ve never seen such a blade. I suppose that you could also make the dados a standard track-saw kerf width, and then rabbet the dividers to fit.
Re: Today in the shop (new project is in the planning stage)
Posted: Fri Oct 25, 2019 7:42 am
by algale
Ed, when you say "easy to "vary" width, do you mean varying fixed widths or are you aiming for something that is variable and easily reconfigurable? Because I'm not seeing how the spacers idea would be reconfigurable.
Re: Today in the shop (new project is in the planning stage)
Posted: Fri Oct 25, 2019 8:49 am
by br549
For flexibility in spacing the dividers, maybe shelf standards could be used horizontally in lieu of vertically. You would probably want to recess at least the bottom ones so that pigeon hole contents could slide in and out easily. Dividers could be spaced in increments of 1/2" (starting at about 2"). Space between clips installed face to face is about 5/16". Unlike the newer version of shelf pins that use dowel holes, this type of clip relies on slight spring pressure to stay engaged and shouldn't fall out of the standard even when "upside down" at the top of the pigeon hole divider.
Re: Today in the shop (new project is in the planning stage)
Posted: Fri Oct 25, 2019 9:36 am
by algale
br549 wrote:For flexibility in spacing the dividers, maybe shelf standards could be used horizontally in lieu of vertically. You would probably want to recess at least the bottom ones so that pigeon hole contents could slide in and out easily. Dividers could be spaced in increments of 1/2" (starting at about 2"). Space between clips installed face to face is about 5/16". Unlike the newer version of shelf pins that use dowel holes, this type of clip relies on slight spring pressure to stay engaged and shouldn't fall out of the standard even when "upside down" at the top of the pigeon hole divider.
Good idea!
Re: Today in the shop (new project is in the planning stage)
Posted: Fri Oct 25, 2019 9:54 am
by JPG
+1
Re: Today in the shop (new project is in the planning stage)
Posted: Fri Oct 25, 2019 12:06 pm
by masonsailor2
There is an easy solution Ed that works great for adjustable partitions. Make two dados each longitudinally down the top and bottom. Use a 3/4 router bit and make the dado about 3/8” deep. Then cut some strips to fit in those slots very much like making runners for a sled. Cut them about 3” long. Drill and countersink one hole on each end of the 3” pieces to accept a small 5/8” flathead screw. Drill a hole in the center of each one from the opposite side to accept an 1 1/4” flathead screw. At some point along each dado and in the same spot drill a hole in the center of the dado big enough to allow the 1 1/4” screw to pass through. From there it’s just a matter of putting four of the 3” runners in the dados, insert the partition at the point you drilled the holes in the dados for the 1 1/4” screws and put a screw through the runner into the partition. Slide it out of the way and repeat the process. Position all the partitions where you want them and use the 5/8” screws through the runners to hold them in position. A good idea is to fill the vacant dado areas on the bottom with some blank runners. Also put adjustable shelving holes in the two ends and the partitions.
Re: Today in the shop (new project is in the planning stage)
Posted: Mon Oct 28, 2019 2:39 pm
by reible
There were some really interesting ideas given, thanks!
To clear up a couple of things, I think I may have miss lead you on the idea I showed with the cut spacers. The flexibility is not for reconfiguration but in the original build. You would put a tool in place and then see what the space needs were then cut the two spacers and tack in place. It is also possible to make them say 4, 5 and 6 inch lengths and use the closes size.
Anyway I think for this first test case I will cut dados on fixed spacing and get a feel for how this might work. I can see this being used in several applications and perhaps most of my hand power tools being stored this way. For those applications a lot more adjustable spacing will be needed and I will revisit this thread to work out some details of the ideas presented.
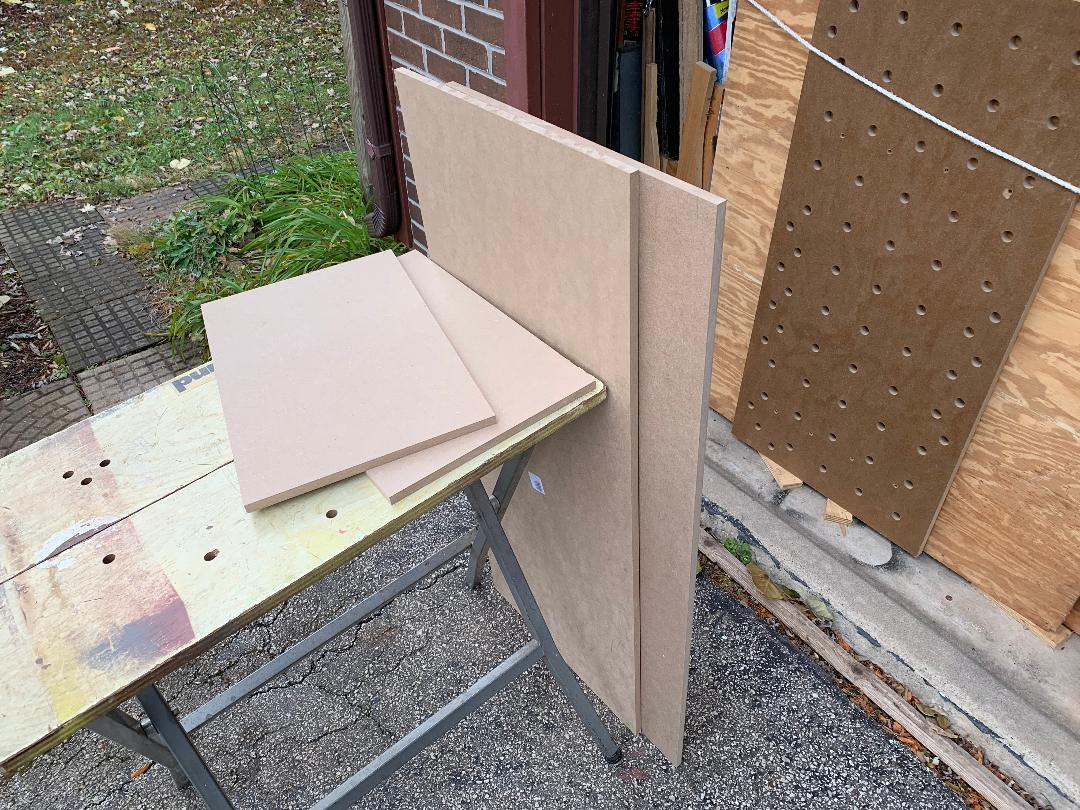
I picked up some 1/2" MDF and some 1/8" hardboard(dark). I normally don't love to use either of those material as the dust is really bad but with the festool saw and vac system there is so little that escapes that I no longer mind working with it.
I have a joint that I wanted to try for a while so this will be a good opportunity to do that. Nothing special but it will save some effort and make things a bit stronger I hope. Here is a picture which pretty much tells the whole story:

- joint test.jpg (25.05 KiB) Viewed 18899 times
And here is a drawing of the whole project:

- storage shelf.jpg (87.98 KiB) Viewed 18899 times
The bad news is that the weather is closing in on me. Rest of this week looks to be as washout or too cold for me to work outdoors where I would have to work to do this. If we get a nice day I see no reason I can't get it all cut and put together so there is still hope.
Ed
Re: Today in the shop (new project is in the planning stage)
Posted: Fri Nov 01, 2019 9:18 pm
by reible
The snow has now pretty much all melted and with the help of some sun the day warmed up enough to work later in the afternoon. So this project has gone from planning to cutting stage.
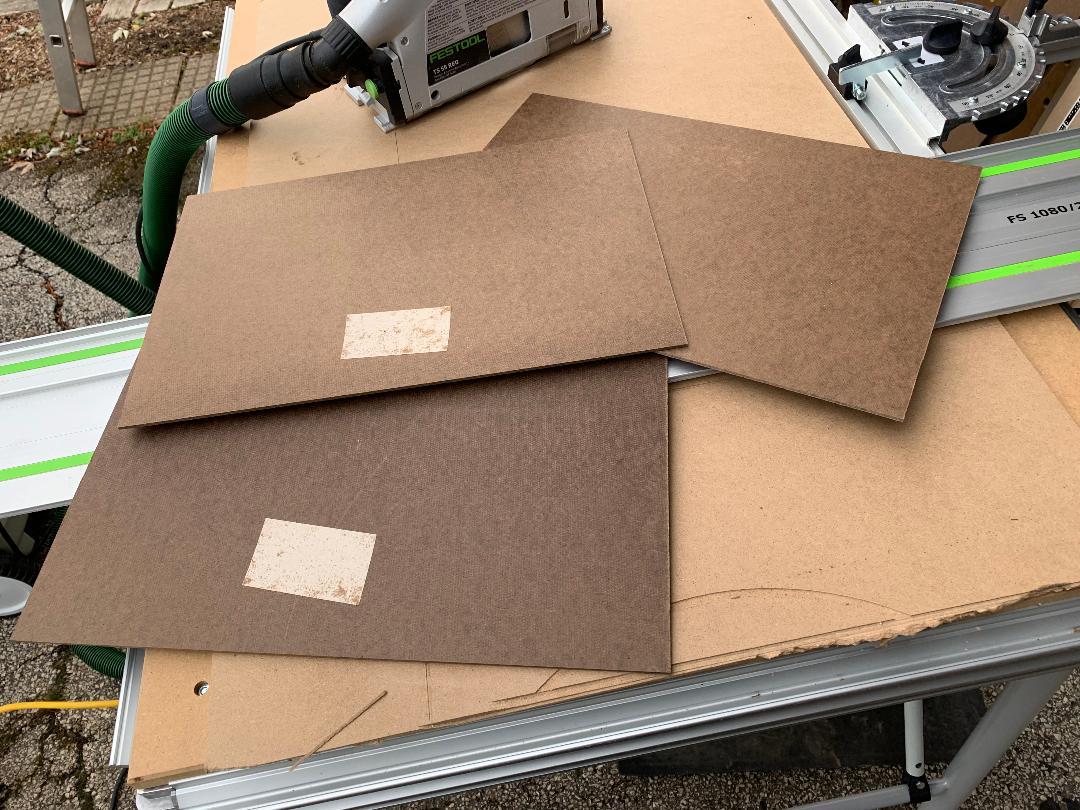
I cut the top, bottom and uprights to width with my guided saw system. I followed this up with cutting the dividers to width. The top, back and end pieces were cut to length. Here you can see the top, bottom and ends:
- TDN5.jpg (224.58 KiB) Viewed 18735 times
Cutting the dividers I did a bit differently. The MFT works really well for this sort of cutting.

- TDN1.jpg (246.26 KiB) Viewed 18735 times
Some times when cutting things you end up wanting to work backwards from normal work flow because of the position of the track. A simple work around that I use is to double side tape a small sacrificial strip that I then cut though to establish the cut width. This way I can use that on the line of the work piece and end up cutting the waste side that is between the mark and the guide rail. It is a little hard to see but I hope you get the idea.

- TDN2.jpg (141.49 KiB) Viewed 18735 times
I then took the three sheets of material that I'm going to use for the dividers and double sided taped them together. Since I had a reference on one edge I still was not well controlled getting them aligned in the other direction but that is not a problem as a starting trim cut fixes that. After cutting you separate them and take the tape off as shown here:
- TDN3.jpg (169.5 KiB) Viewed 18735 times
I cut up a dozen dividers so we will have to see how that works out.

- TDN4.jpg (176.48 KiB) Viewed 18735 times
That was all I had time for today. Hope to have another afternoon to finish the cutting process by doing the dado's.
Ed