Page 1 of 1
Picture Frame
Posted: Fri Apr 17, 2020 12:35 pm
by bainin
Having some COVID time on my hands, the wife assigned me to come up with a frame for an old oil painting I had tried to hide in the back of a closet

Not having the SS available, I used hand miter box, router table and some scrap shelf wood for the job. Overall I was happy with the result.
Heres the profile I came up with using the the router table for the profile definition:
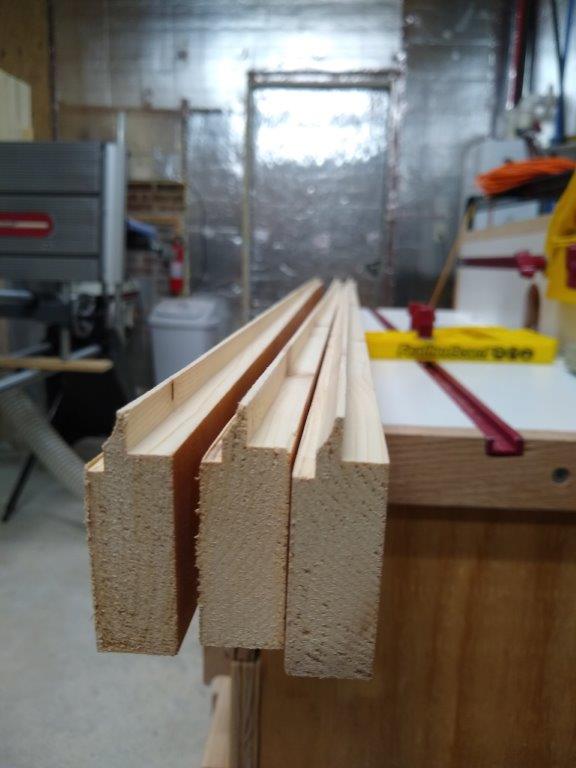
- frame-profile.jpg (47.81 KiB) Viewed 12476 times
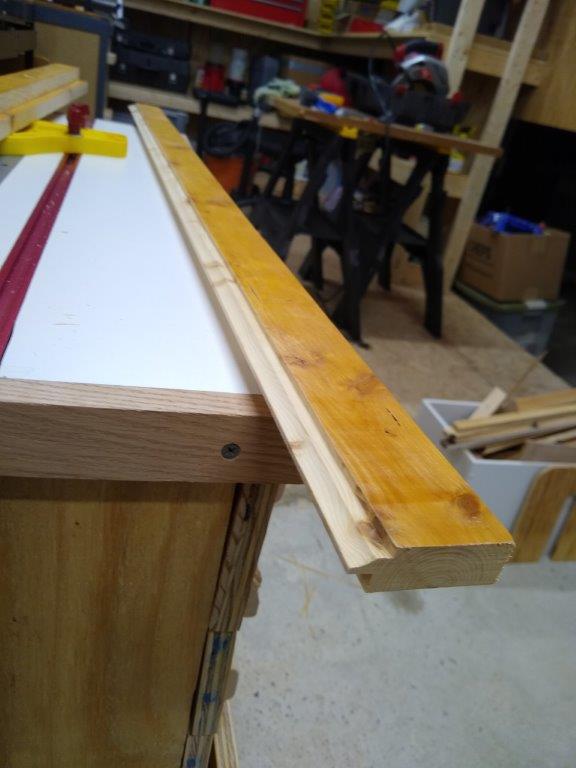
- frame-board.jpg (47.27 KiB) Viewed 12476 times
Close up of the corner after clear finish
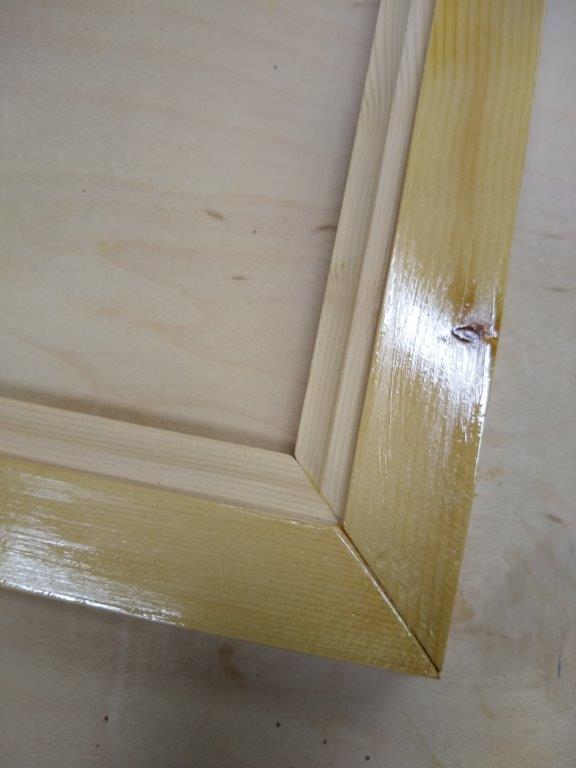
- frame-corner-finish.jpg (38 KiB) Viewed 12476 times
I made some tab slots on the back of the frame to hold the artwork-wasnt pretty but it worked.
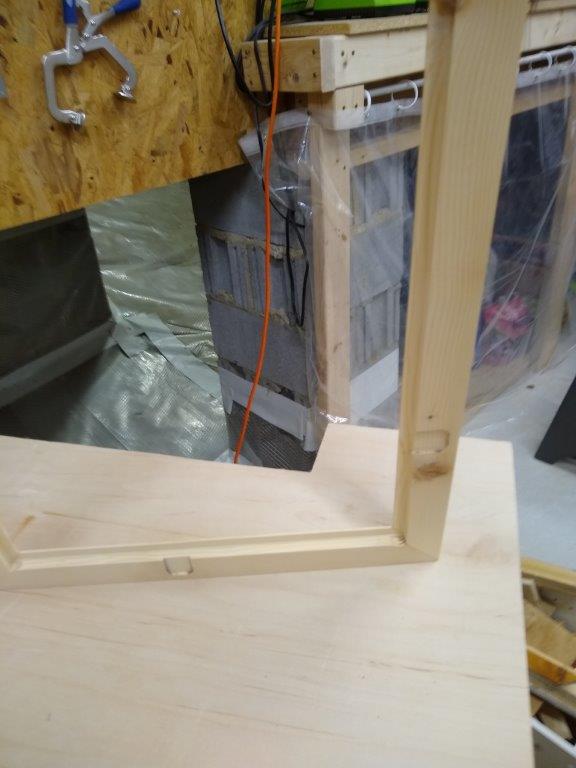
- frameback-slots.jpg (46.73 KiB) Viewed 12476 times
Shown with artwork and tabs mounted-while i was pre-drilling holes for the screws on the tabs, I punched thru the front in a few spots and had to go back and fix that mess...it was actually on my mind during the process but still somehow managed to screw it up.
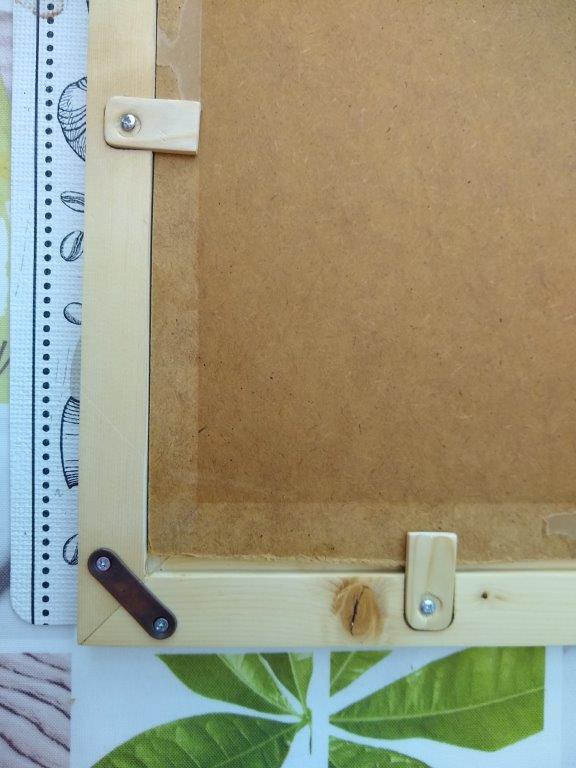
- frame-back-mount.jpg (59.46 KiB) Viewed 12476 times
and finally-the finished frame with artwork,
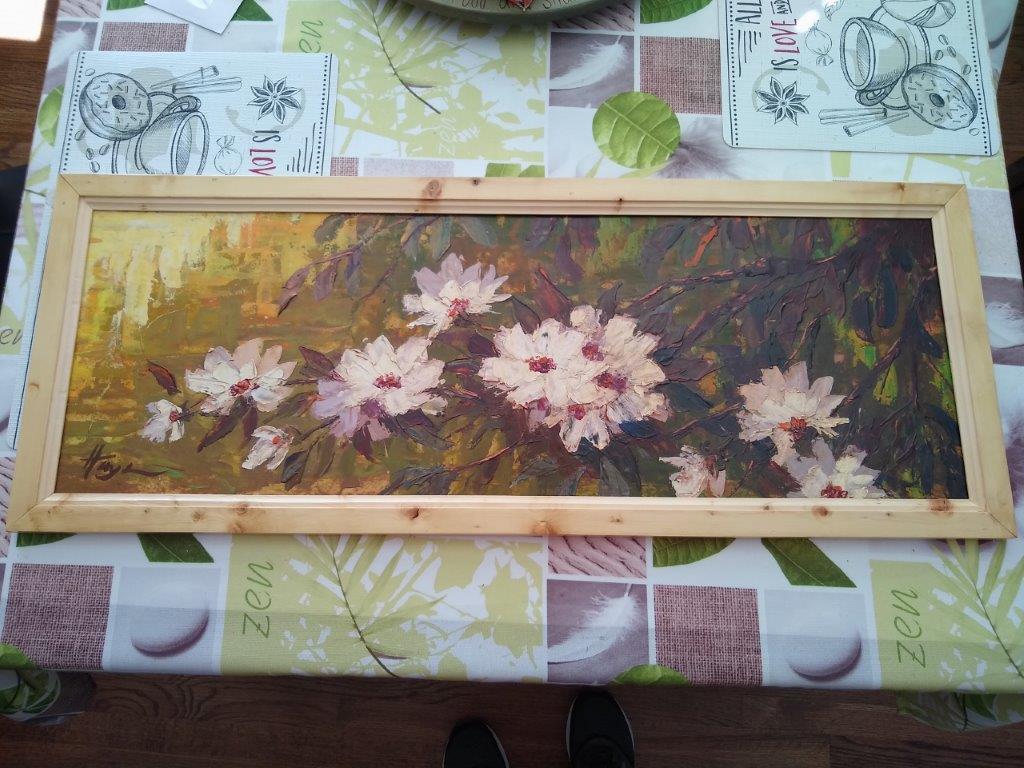
- fullframe.jpg (137.75 KiB) Viewed 12476 times
Now after a few days of work on my part , the picture i tried to hide in the closet is out on the living room wall
Moral of the story-take the time up front to hide things well to avoid work in the future !
Hope you are all safe,
b
Re: Picture Frame
Posted: Fri Apr 17, 2020 1:21 pm
by JPG
Re: Picture Frame
Posted: Fri Apr 17, 2020 5:01 pm
by john
Good Job.
I know the feeling. My wife has a couple of pictures she wants framed but so far I have manged to avoid it. I'm not the best with mitered corners and I like the solution you have for adding support on the back. Your handmade clips are also a good idea.
John
Re: Picture Frame
Posted: Fri Apr 17, 2020 8:22 pm
by bainin
i agree- mitered corners make me crazy-i just don't have good luck with them .
These came out reasonable after a good bit of sanding.
I actually think that hand sanding the sawn ends of mitered corners is one of my problems, as I don't sand the face as flat as the saw made it, it tends to curve at the edges and corners.
b
Re: Picture Frame
Posted: Fri Apr 17, 2020 8:51 pm
by garys
That's a nice frame. I've made all my own frames for many years. I find that the miters work out well if I do careful setup of the miter gauge on my Shopsmith.
I set it to 45 degrees and cut two identical pieces of scrap wood. Then take the two cut pieces from the left or the right side of the cut wood and put them together. Measure them with a square for exactly 90 degrees. Adjust the miter if necessary until the two pieces make an exactly 90 degree square.
Do not take a piece from each side of the two pieces you cut. Take both of them from the same side of the cut. If you do that and get 90 degrees, the miters should fit perfectly when you assemble the frame.
Re: Picture Frame
Posted: Sat Apr 18, 2020 7:03 am
by Hobbyman2
Nice !!
Re: Picture Frame
Posted: Sun Apr 19, 2020 3:29 pm
by bainin
garys -
Thank you for giving me a hint about how to get the miter perfect.
I'm curious though -- for a 45 deg miter, wouldn't a single cut be enough to determine if you have the proper angle?
Imagine I just made the 45 cross-cut and now have a left and right piece on either side of the saw blade.
If i take the right piece and re-orient it (rotate and flip) and then match up to the left hand miter, I could then check for 90 degree?
Is using 2 boards a more accurate way to do this?
thank you,
b
Re: Picture Frame
Posted: Sun Apr 19, 2020 8:37 pm
by garys
If you make only a single cut from a single board, one side could be a bit more than 45, and that leaves the opposite one less than 45. When put together, they will make a 90 with a messed up angle. If you use two boards and two cuts, the pieces from the same side will magnify any error if it is there, or show you that you are perfect.
Either method might work, but I get better results using two pieces. The second part of getting a square frame with good fitting miters is making sure that the two sides are exactly the same length and the top and bottom are exactly the same length.
The easiest way I've found to achieve that is to first cut the miter on one end of each of the 4 sides. Then stack the top and bottom pieces, carefully align the miter ends, and cut them as a pair with a single cut. Repeat for the sides to get two sides the exact same length. When I cut them separately, I always get a bit of error.
Re: Picture Frame
Posted: Sun Apr 19, 2020 9:58 pm
by bainin
Here is the math I did to come to the conclusion that 1 board might work.
Its a trick of the flip/rotate that ends up matching the same 2 cut angles to each other at the corner. Follow the Theta thru the progression on both boards.
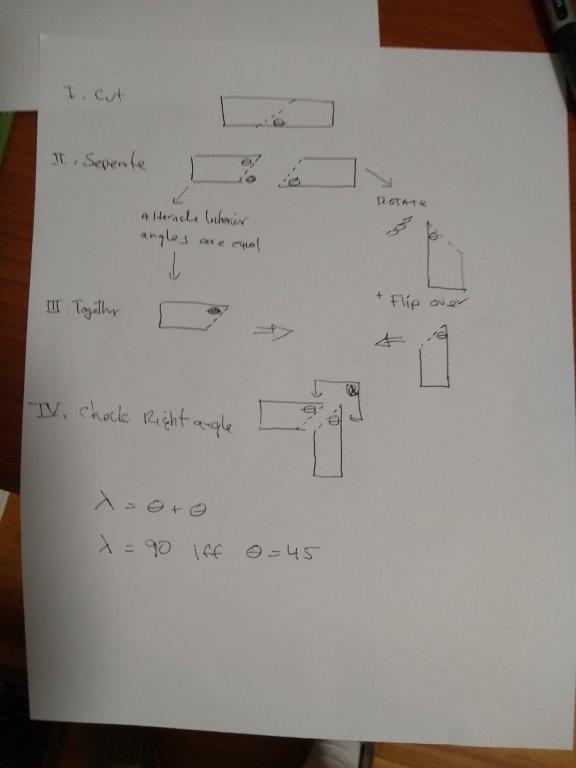
- math.jpg (25.93 KiB) Viewed 10003 times
It assumes your board is flat and the 2 long sides are parallel.
When i get a saw back sometime or break down and buy an old hand miter - i want to check this out in "the lab" =)
Thank you for answering.
b
