Page 1 of 1
Collet holder
Posted: Sat Apr 24, 2021 10:52 pm
by reible
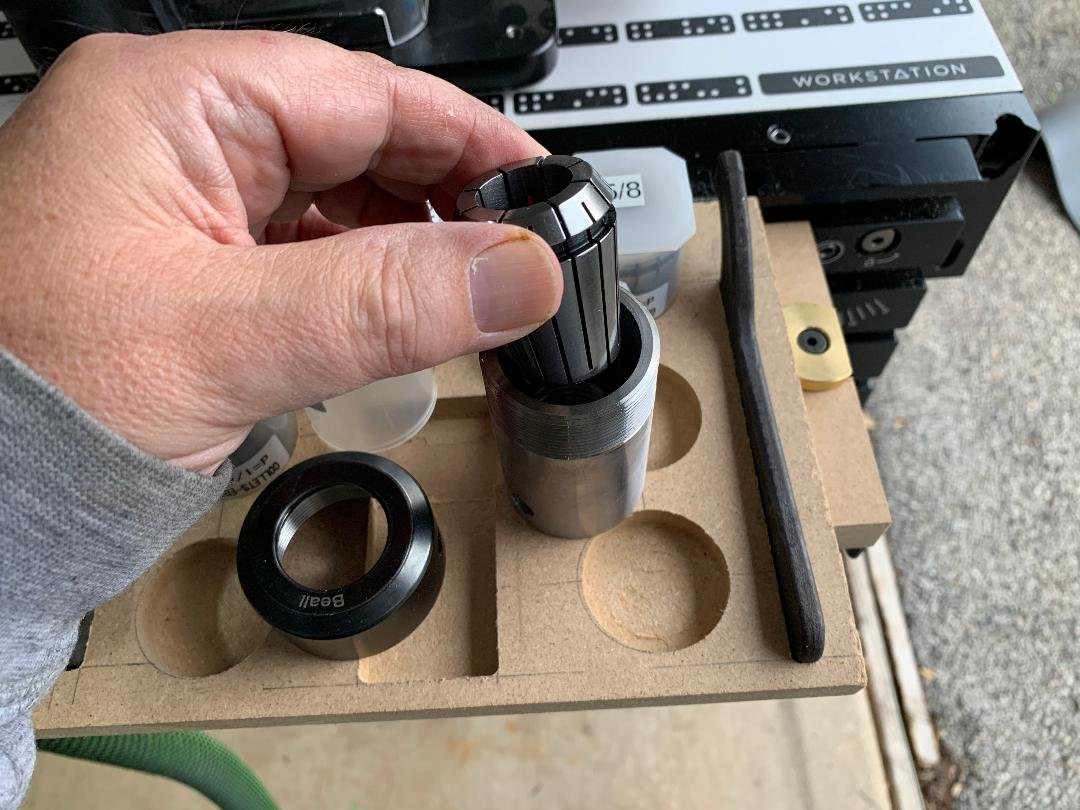
It has been a while since I got my set of collets and they have lived in a cardboard box for long enough. I also have on my to be purchased list 2 additional collets so I added two more places to be filled in later. I did the design in sketch up and then used my SO to make the cut outs.

- ch1.jpg (226.53 KiB) Viewed 1793 times
For the most part this could well be done by drilling and some chisel work but it always fun with the SO.

- ch2.jpg (194.57 KiB) Viewed 1793 times
For those not so familiar with a collet system there is a holder and then the actual collets. It is a lot like what routers use to hold the bits. You can hold metal, plastic and of course wood. They are sized with range of about 1/32" from the listed sized.
- ch3.jpg (155.41 KiB) Viewed 1793 times

- ch4.jpg (106.32 KiB) Viewed 1793 times
I think I may have showed the clamping system that I used today but this might be a refresher or new to some. The t-track is rockler and clamps are from lee valley.

- ch5.jpg (176.1 KiB) Viewed 1793 times
I still need to give it a light sanding and some sort of finish but for the night I wanted to put it in the drawer..... maybe to finish tomorrow or maybe not.

- ch6.jpg (165.77 KiB) Viewed 1793 times
I have a lot of scrap mdf so it will do for this project. It looks bad next to the cherry block with the internal expanding collets but I can live with that.
Ed
Re: Collet holder
Posted: Sun Apr 25, 2021 12:56 pm
by sehast
I am familiar with collets as I use an ER-20 holder on my CNC spindle but how are you using them on the Shopsmith?
Re: Collet holder
Posted: Sun Apr 25, 2021 1:57 pm
by edma194
I like what you're doing there, very good use of the tool. How much set up and cutting time did that take you?
And, learning something new every day, had no idea there was such a thing as internal expanding collets.
Re: Collet holder
Posted: Sun Apr 25, 2021 4:21 pm
by RFGuy
sehast wrote: ↑Sun Apr 25, 2021 12:56 pm
I am familiar with collets as I use an ER-20 holder on my CNC spindle but
how are you using them on the Shopsmith?
Steve,
Ed can confirm how he uses these, but I believe he is using these for lathe operation on his Mark V. Collet chucks like these are used for smaller woodturnings or turnings where you can mount them from a round tenon inserted into the collet.
https://bealltool.com/products/turning/colletchuck.php
Ed,
How do you like this Beall collet chuck? Does it mount directly to the Mark V spindle or did you have to get a special adapter to mount it?
Re: Collet holder
Posted: Sun Apr 25, 2021 5:13 pm
by reible
Collet adapters are useful for turning things like finials and bottle stoppers or for that matter any small dowel like objects. Drawer pulls and the like also come to mind.
They don't seem to come in shopsmith standard 5/8" mountings so we are limited to picking something that has an adapter to another lathe standard. I have picked the 1" x 8 tpi and if and when I need an adapter to that I have gone to the expense of the what I have found to be the only decent adapter made for this. You can find the adapter here:
https://bestwoodtools.stores.yahoo.net/ ... dwith.html
It is short and well made and has the angled set screw that I prefer. I have tried others but they are not even close to the quality of this one and for collet work being just close is not a very good option.

- ct1.jpg (158.55 KiB) Viewed 1727 times

- ct2.jpg (154.37 KiB) Viewed 1727 times
While router collets are normally captive these are designed to be easy to install and remove. You set the collet in the front part of the chuck and it sets off center. You move it towards the center location and it pops in. Reverse to remove.

- ct3.jpg (122.59 KiB) Viewed 1727 times

- ct4.jpg (128.16 KiB) Viewed 1727 times
Then you screw on and put the workpiece in. Shown is a 3/8" dowel in the 3/8" collet. The collet system has holes for wrenches but so far I have only hand tightened them and had no problems what so ever doing it that way. Perhaps if I were to check some sort of other thing like a router cutter I would want it wrenched but not so on wood and plastic.

- ct5.jpg (122.91 KiB) Viewed 1727 times
I'm sure you can find youtube videos of these in use if you want more information but it should be pretty clear how to use them once you get started.
Ed
Re: Collet holder
Posted: Sun Apr 25, 2021 5:43 pm
by reible
As to the process of making the holder. I did a very compact design first but without the two wrenches and without the two addition collet locations. I was about ready to make it but thought to check the height of the drawer I was planning on storing it in and found that the vertical collet tool was going to be a problem.
So take two. By laying the tool down I was already trending towards a larger size and since it also made since to add two more collet positions for new purchases and hey why not keep the tended to be not used wrenches with it so as to not loose them this design took shape.
I use sketch up for this sort of thing and this one is done in metric units. After getting what I hoped was the final design I wanted to verify the spacing to make sure I did not crowd the parts and have easy finger access. So with the workpiece cut to size I used my drawing to do a layout of the holes with the help of my Incra metric rule. If you look closely you can see the pencil lines on the part. This pre-cutting part took longer then the actual cutting, since I had to measure parts and get a right fit for things.
Once you get to the cutting you do a scan and place a grid to give a 0,0 point to work from. The design is then loaded and placed. I did one of the collet locations first to a depth of 5mm to check the size and once happy with that did the others and the tool and wrench slots. This was a two part operation where I did the removal of the bulk material first followed by an inside cut to all the parts. Then I went back to cutting to full depth on the collets and other parts that were at that depth. Same thing as before you bulk out the center waste and then do an inside cut. The tools and the deeper part of the tool then had to be done, yes the same steps.
I didn't time myself on the cutting but it goes pretty fast. I did have to go back and loosen the wrench slots, I did that by using an offset but have since gone back and fixed the sketch up model in case I want to make a hardwood version some day.... unlikely but hey.
People use the SO for many purposes and this just happens to be something that I needed and doing it with the SO was fun but like I mentioned it could have been done with other tools with just as nice results. I'm still glad I have the tool and look forward to do a few more of my projects that are backlog from over winter.
Ed
Re: Collet holder
Posted: Sun Apr 25, 2021 5:56 pm
by JPG
I am curious which two 'x/16' collets you anticipate purchasing.
Re: Collet holder
Posted: Sun Apr 25, 2021 6:22 pm
by reible
This is subject to change but for now it is the 9/16 and the 11/16.
At $19 each they almost make me wonder how good the other online collets might be for what I use them for. You can get a whole set of 26 pieces for about $80 and while that would have a over lap of 5 sizes it still comes out pretty cheap, so I will be thinking this over until it comes time to have to make up my mind. Not sure how useful all of those sizes would be either.......... The Beall collets are really nicely made and the fear of the unknown tools from the other countries is always with me.
I do have plans to buy the Beall countersink as early as next month so to save postage costs I might want to add the collets to that. Slippery slope on nice tools.
Ed
Re: Collet holder
Posted: Sun Apr 25, 2021 10:51 pm
by reible
Well trying to get the holder out of the drawer was not all that easy. True that most of the time I will not be taking the holder out but for when I do want to it was time to make an addition.
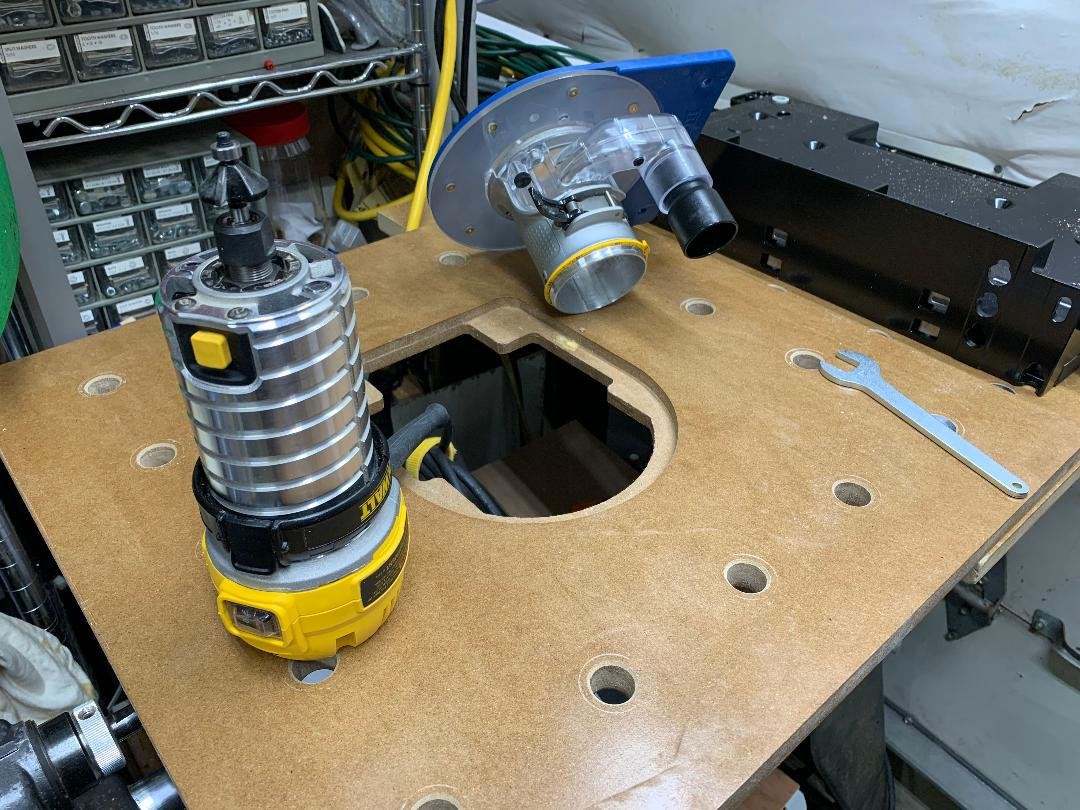
I've also not shown the new router table addition set up and ready to use on my MFT shopsmith extension table. So we will do that and show what addition I've made.
As shown before the table takes either the sander or the compact router and will mount to any side of the MFT like extension table on the shopsmith. For a change of pace I mounted it to the inside, towards the headstock. These are the TSO dogs that allow me to clamp the table and still have a flush surface on the table top.
I can take the rockler insert out of the table to work on putting the bit in and since it is pretty easy to unlock the router from the base it makes sense to do that as well.
- riu1.jpg (214.08 KiB) Viewed 1677 times
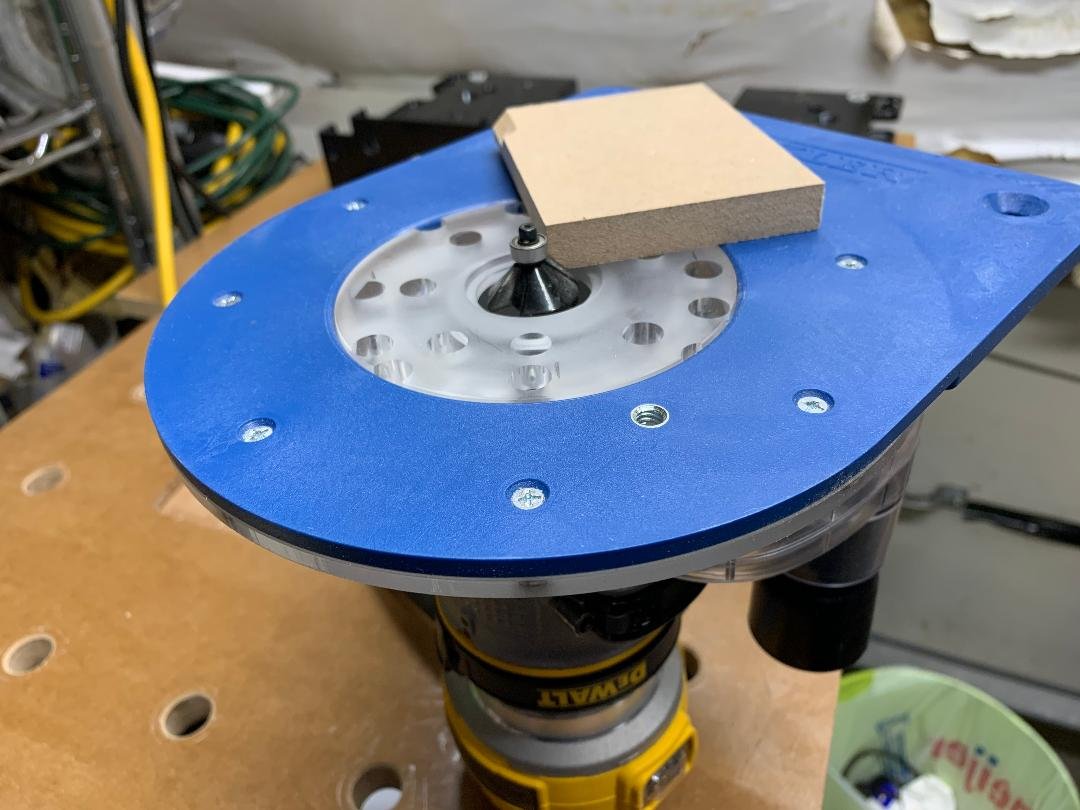
Then having the router mounted once again it easy to have a good visual of the height adjustment. In this case I have a block I use that gives me the cut I want and use that as part of the setup.
- riu2.jpg (117.59 KiB) Viewed 1677 times
I added the safety pin or starter pin because that is the safe way to start the cut. Once started you don't need it for the rest of the cuts.

- riu3.jpg (225.5 KiB) Viewed 1677 times
I do have the vacuum hose attached but it doesn't do much for the dust that stays on the table. I have a part coming that should help that. Anyway here you can see the parts cut and the dust that has collected on the table.

- riu5.jpg (262.6 KiB) Viewed 1677 times
The idea will be to sandwich the two parts together to give a "V" for a finger grip. I will tape them together to test how well that works and then either glue and or pin nail the parts together if I like it or come back and cut a bit deeper "V". But that is for tomorrow.

- riu6.jpg (180.28 KiB) Viewed 1677 times
Ed