Page 2 of 2
Re: Early A-34 Jigsaw Rust Removal and Clean-up
Posted: Mon Jul 05, 2021 7:46 pm
by Majones1
chapmanruss wrote: ↑Mon Jul 05, 2021 2:13 pm
If needed don't be afraid of taking the spring cylinder assembly apart for cleaning. It is not a difficult task for this Jig Saw and the spring is hardly compressed while in the resting position. Disassembling it will give you a look at the leather seal which if in good condition makes the air blow dust away from the cut.
Thanks for the suggestions. I’ll watch for the dust. Maybe I can use some filler foam, or something to block the hole into the crank box to keep the sawdust out.
Re: Early A-34 Jigsaw Rust Removal and Clean-up
Posted: Tue Jul 06, 2021 1:25 pm
by chapmanruss
Adding something to the base frame to keep dust out of the gear box area should not be a problem.
I haven't mentioned this before but there is a vent hole on the bottom of the gear box. It is in the small cover disk at the bottom of the lower extended part where the lower shaft goes into. This needs to be kept clear to avoid creating pressure or a vacuum as the lower shaft goes up and down.
As for the broken off table insert screw I would try to remove it first before considering replacing the table.
Re: Early A-34 Jigsaw Rust Removal and Clean-up
Posted: Wed Jul 21, 2021 11:09 am
by Majones1
chapmanruss wrote: ↑Tue Jul 06, 2021 1:25 pm
Adding something to the base frame to keep dust out of the gear box area should not be a problem.
On a recent trip to Lowe’s I found they had two different types of foam fillers that plumbers use to fill the gaps created when routing pipes through walls; one type is for gaps smaller than 1” and the other for larger gaps. Since the hole between the A-34 Jigsaw crank box and the lower arm of the base frame is around two inches I used the latter type of filler.

- “Great Stuff” is Lowe’s store-brand big gap filler
- CD26BA07-B072-44D8-8DFF-BFA6D52E8826.jpeg (82.38 KiB) Viewed 441 times
It did a great job filling the hole, but since I did not follow their directions that said to practice first, I ended up slightly overfilling the hole and had to remove a few of the components in the crank box to clean a little bit of foam from the lower chuck rod and crank link assembly. I also trimmed a small bit of foam that was rubbing against the crank when it rotated. This simple fix should keep sawdust from collecting in the crank box and prevent problems that might be caused by that over time. Before closing up the crank box I took the opportunity to add a little oil to the moving components. It’s ready for another 70 years.
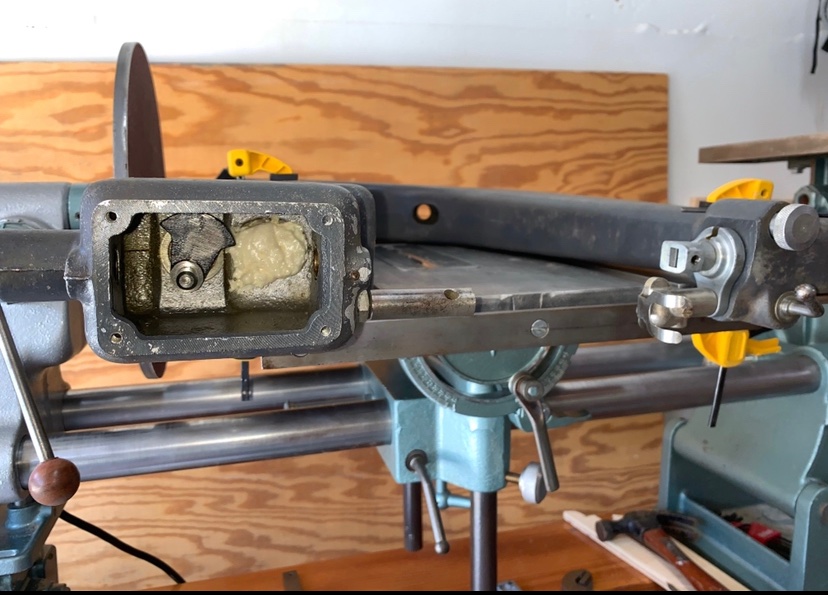
- A-34 Jigsaw clamped onto the SS table to keep it from sliding while working in the crank box.
- 8B193E85-E577-4D7D-A63B-131DD93D8EAB.jpeg (150.37 KiB) Viewed 441 times
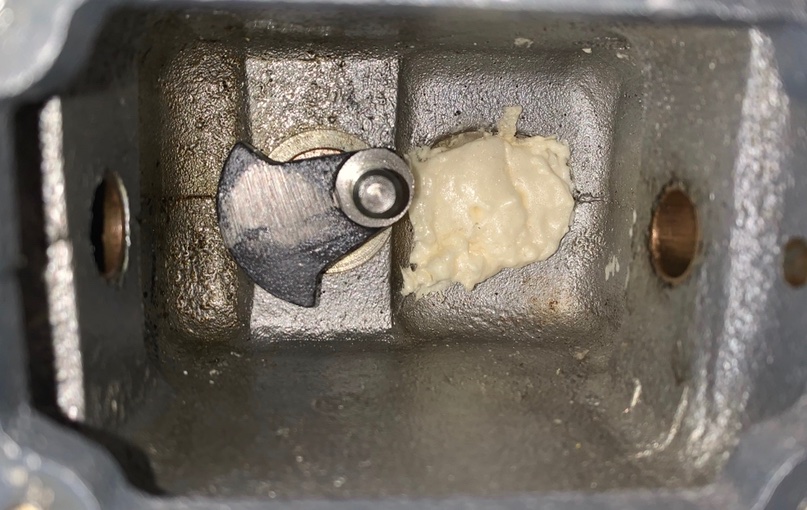
- Close-up of foam filler in hole between lower base arm and the crank box.
- FCCBAB54-AD1E-4733-A882-C8B51F6E5E70.jpeg (149.57 KiB) Viewed 441 times

- Close-up showing how filler was trimmed to avoid the rotating crank.
- D79FA641-E8EA-4562-814D-A3F72C915986.jpeg (151.11 KiB) Viewed 441 times
Re: Early A-34 Jigsaw Rust Removal and Clean-up
Posted: Wed Jul 21, 2021 11:55 am
by chapmanruss
The Gap Filler looks like an easy and simple way of closing up the gear box to keep dust and stuff out. I don't know if I will do it on the one I am restoring since I have a later A-34 Jig Saw which I rarely use. I have the Model 610/505644 Jig Saw I normally use.