Page 2 of 2
Re: A Fixture Board Strategy for Machining Small Parts
Posted: Thu Jul 22, 2021 1:19 pm
by sehast
I used a separate switch so I would not have to power the saw through the vac. I have read that power from the vac constrains the Kapex motor and can lead to problems.
Re: A Fixture Board Strategy for Machining Small Parts
Posted: Thu Jul 22, 2021 3:06 pm
by reible
Is that a recent finding? I know some years back I had seen that but thought the newer designs had fixed it???
Anyway I should get an order in this month for a second remote. I really love the fact that you can control the vacuum that way, a major upgrade in my opinion.
Ed
Re: A Fixture Board Strategy for Machining Small Parts
Posted: Fri Jul 23, 2021 11:59 am
by sehast
It is time to take a look at some actual clamping techniques using the clamps and stops discussed in the last installment. First is the most basic task of cutting a small work piece to length. For this I establish an accurate known point which I call the primary stop with one of my larger brass stops. I typically set it 6 inches from the blade as a good universal distance and leave it set up for a full session of cutting. Initially I set it up using a rule and the kerf in the base but then make some cuts to really dial it in using a digital caliper to measure the actual length of scrape pieces cut. The calibration for this primary stop should remain accurate until I take down and re-install the fixture board but even then it still should be within .02”.

- SetStop.JPG (160.5 KiB) Viewed 1574 times
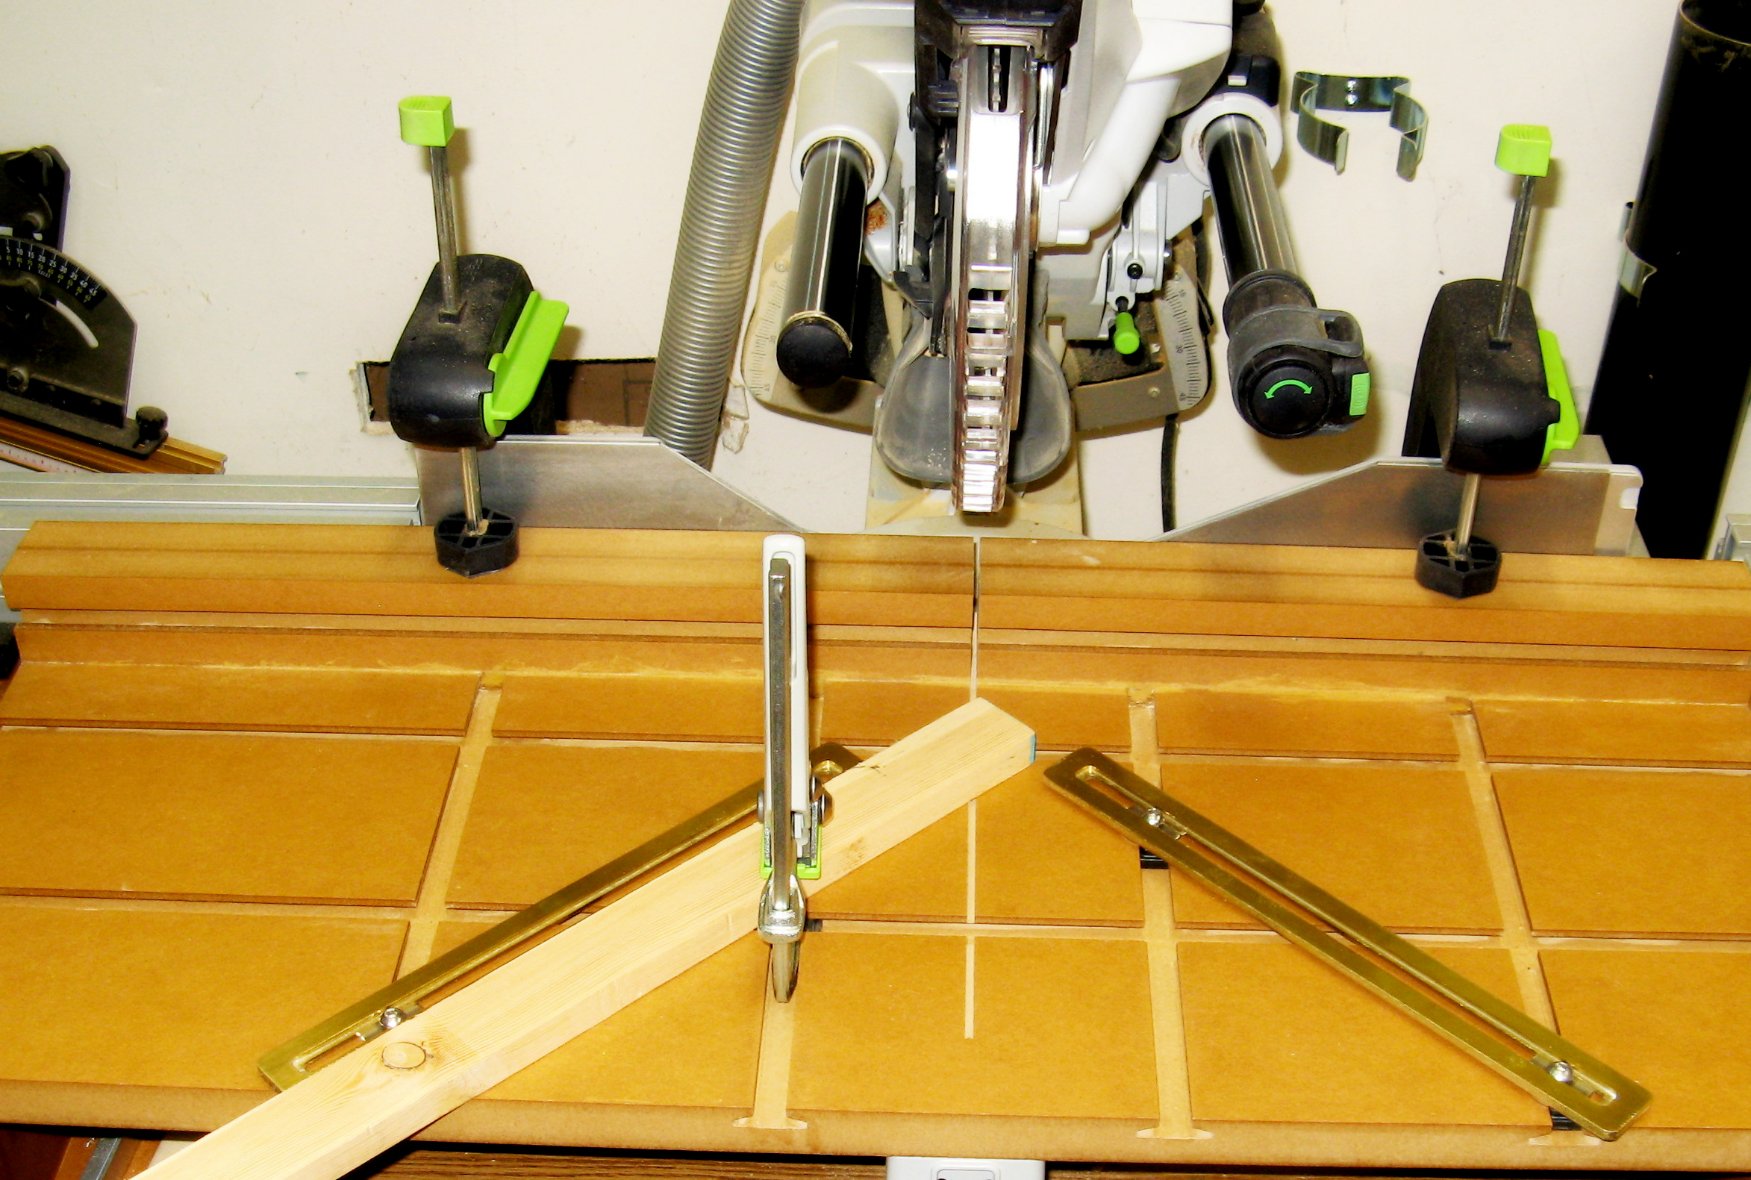
Once the primary stop is set I use 1-2-3 blocks and the Lee Valley fractional inch setup block set to establish a secondary stop for a small work piece. With two 1-2-3 blocks I can get to any 1 inch increment from the primary stop and with the Lee Vally setup blocks it can be dialed in to within a 1/32”. I find this process to be the fastest and easiest way to get very accurate and repeatable cuts on small parts. The other option is just to set a stop at the desired cut off distance from the blade using the rule and be done with it. If you are young and have good eyesight this might be the preferred method but at my age I have more confidence in the setup block technique. The picture shows a small work piece being held with two Gator Tooth clamps to make a 1.5” cut. Two clamps are used to ensure the cutoff does not go flying off to parts unknown in the workshop. A precaution I take if the cutoff is to be used but I also have had pretty good luck with just using proper miter saw techniques. I usually start by putting the blade down well in front of the work piece and then steadily push the spinning blade into the work piece until the miter saw stop is contacted. Then I stop the saw but do not lift it up from the cutting position until the blade completely stops. If you do not have a sliding miter saw the same technique can be used for a vertical chop motion. The key is to not let the blade up until it stops spinning. This prevents the small cutoff from flying off over 90% of the time for me. When I measured the length of the resulting work piece with a digital caliper it was within .002” of the desired 1.5”. I can typically count on accuracies of +/- .003” using this setup block technique.

- SmPartHold.JPG (148.47 KiB) Viewed 1574 times
There are a couple of ways to do angle cuts depending on the size of the work pieces. For 45 degree cuts it often is good to establish a secondary fence set with a speed square against the primary fence or in my case I use my TSO triangle. I use my long brass slotted stops as secondary fences to position work pieces and make 45 degree cuts with confidence. If other angles are required I again use a setup block technique. This set of machinists angle blocks works very well and allows angles to be set in 1 degree increments.
https://www.amazon.com/gp/product/B00HZ ... UTF8&psc=1
If you have less need for an endless range of angles you might give these blocks a look. They have the most commonly used angles.
https://www.amazon.com/QWORK-Triangle-P ... 35&sr=8-19
Another option would be to just cut your own setup blocks at the angles you need out of ¼” hardboard which still gives pretty accurate results, can be easier to use and is much more cost effective.
I have found that establishing two opposing secondary fences have advantages for some tasks such as creating perfectly fitting miter joints or making trapezoidal cuts for a segmented disk.

- AngleSet.JPG (194.99 KiB) Viewed 1574 times
- AngleCut.JPG (314.38 KiB) Viewed 1574 times
The floating dogs can also be used to establish a secondary fence as shown below.

- FltDogsCut.JPG (256.88 KiB) Viewed 1574 times
Sometimes work pieces are so small that the secondary fence technique is too cumbersome. That is when I use the setup blocks directly with the work piece and the primary fence as shown below. I feel I have not done justice to the Gator Tooth clamps used here by just showing one of the many ways they can clamp a work piece. They are probably the most versatile clamps I own. Please check out the video.
https://www.youtube.com/watch?v=4QjYt_R-bjE

- SmPartAngleCut.JPG (149.81 KiB) Viewed 1574 times
That is pretty much it for the miter saw fixture board techniques at this time but there are endless ways of using this fixture board for cutting small parts and I hope that when you find them you will let us know.
Just to finish this up I want to talk about a fixture board for the drill press and in particular the Shopsmith drill press. One of the first things I built using the ToolQuest array of products was a fixture board for my drill press. I used the technique mentioned earlier of laminating common ¾” MDF with ¼” tempered hardboard. However, since I had limited experience working with WoodAnchor slots, I choose to put the hardboard on top and cut the slots through it. I have been using the fixture board for over a year now and have not noticed any stability issues but still to get the most benefit of the hard board it should be on the bottom uncut. I used my table router and fence to make the slot cuts in a single pass. The fixture board can be used with the same clamps and stops discussed earlier. The picture below shows an example of using the long slotted brass stop to establish a fence with two Tiger Claw clamps and another brass stop. A little bit of work holding overkill but it gives you an idea of how all these can be used for small pieces.
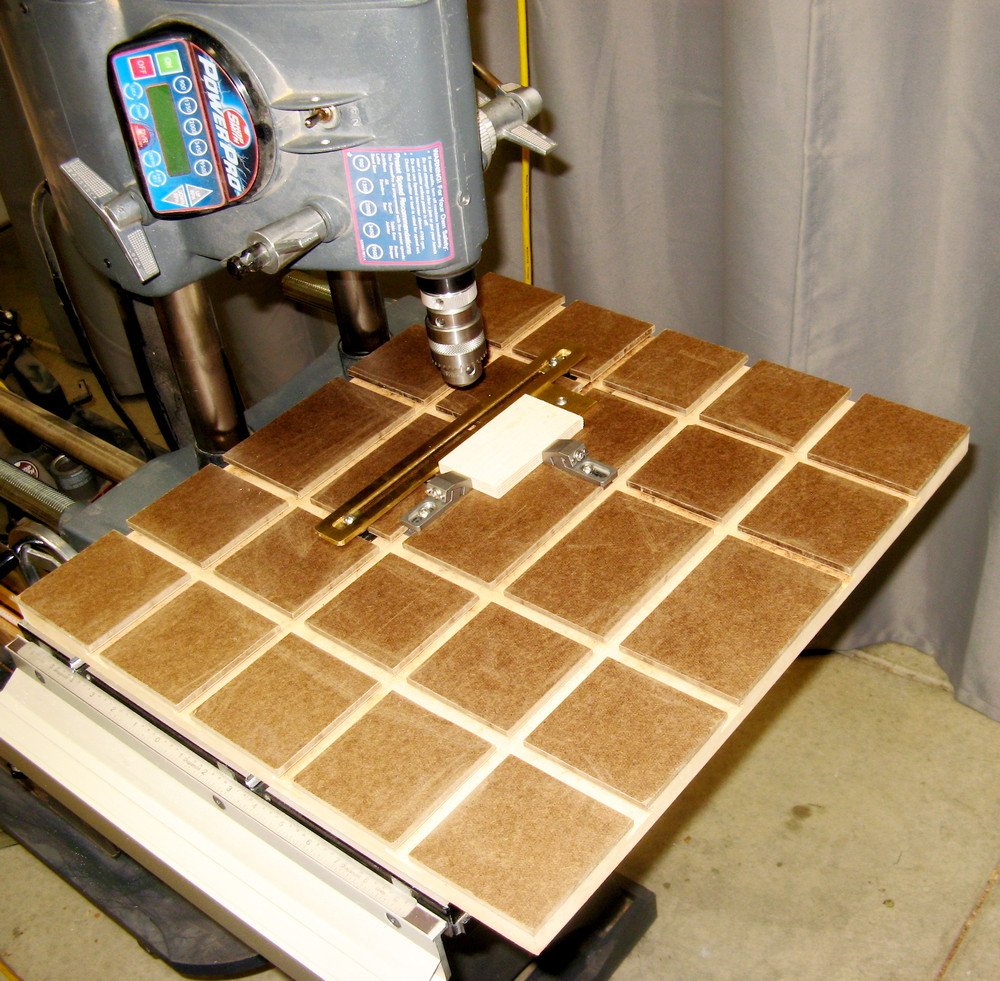
- SmPartDrill2.JPG (230.99 KiB) Viewed 1574 times
Of course this fixture board can also be used with any size parts as shown below using the floating dogs and the Kreg Automaxx clamp.

- LgClampDrill2.JPG (154.8 KiB) Viewed 1574 times
That concludes this installment and also the thread unless there are questions and comments. I hope you have found it to be a helpful discussion of fixture board techniques for machining small parts and how the ToolQuest line of products can be used to enhance your every day woodworking tasks.
Re: A Fixture Board Strategy for Machining Small Parts
Posted: Fri Jul 23, 2021 5:47 pm
by JPG
I am 'amused' at the reference to today's 'tempered' hardboard compared to yesteryear's tempered 'masonite'.
It ain't nowhere as hard!
Re: A Fixture Board Strategy for Machining Small Parts
Posted: Fri Jul 23, 2021 6:05 pm
by sehast
JPG wrote: ↑Fri Jul 23, 2021 5:47 pm
I am 'amused' at the reference to today's 'tempered' hardboard compared to yesteryear's tempered 'masonite'.
It ain't nowhere as hard!
I have found that tempered hardboard that is finished on both sides (smooth) is pretty hard. Much different than the hardboard that is finished on just one side.
Re: A Fixture Board Strategy for Machining Small Parts
Posted: Sat Jul 24, 2021 5:48 pm
by BuckeyeDennis
Steve, thank you very much for this excellent thread! As you know, I've played around with a simple sacrificial fence for miter saws, but this goes well beyond any WoodAnchor application ideas that I've had for them. And I believe the same concepts can be adapted directly for use on radial arm saws. With your permission, I'd like to use some of the content on the ToolQuest website and in our email newsletter.
Guys & gals, I want you to know Steve has done an absolutely phenomenal job as a WoodAnchor Beta tester. When I ship him new hardware, he doesn't just use it, he performs all manner of rigorous testing and evaluation. It's almost like sending stuff off to a commercial product-testing lab.
And better yet, Steve then comes up with clever applications that had never occurred to me. He has a couple of projects already completed that make this one look pretty mundane. But I've asked him to hold off on sharing those for a little while, until the ToolQuest product-line extensions that he used are closer to being released.
Re: A Fixture Board Strategy for Machining Small Parts
Posted: Sun Jul 25, 2021 10:31 am
by sehast
Thanks for the kind words Dennis. I will totally support your newsletter.
Re: A Fixture Board Strategy for Machining Small Parts
Posted: Sat Jul 31, 2021 9:09 am
by rlkeeney
I make small parts all the time as small as 1/4-inch. This looks like massive overkill to me.
Re: A Fixture Board Strategy for Machining Small Parts
Posted: Sat Jul 31, 2021 9:17 am
by Hobbyman2
The options look to be unlimited , for me and the work I have done/do toggle clamps would be enough but options are all ways a asset . thumbs up !