Page 1 of 9
Jointer Cleanup and Repair
Posted: Thu Aug 26, 2021 2:58 am
by Majones1
Jointer Bed Rust Removal
I’m cleaning up my jointer’s bed and fence and after removing a lot of the heavy rust using Scott Markwood’s method, with a green Scotch-brite and WD-40, I’ve found some pitting and deep scratches from what looks like a course sanding disk. Because there was still significant rust left, plus the small pits and deep scratches, I switched to medium Emory cloth, wrapped around a 2”x2”x5” scrap, to see if I could smooth them out a little. After maybe an hour of work the rust was gone, and some of the pits and smaller sanding disk scratches were smoothed out a little bit. I then switched to 400 grit wet/dry sand paper and WD-40, to remove the Emory cloth scratches. But there remains a lot of small pits and the deeper sanding disk scratches.
I began to be concerned about taking too much off, and sanding too unevenly across the bed of the jointer. I checked for flatness with the long leg of a large construction square laying on the jointer bed and saw a few spots where light shows through, so it looks to me like the jointer bed is not completely flat. I don’t know if it was me or the previous cleanup that caused this, but I was careful to wrap my sandpaper around a very flat board and did not linger too long in any one spot.
My questions are, how flat does the jointer table need to be. And, if it does matter, how would you flatten the bed? What are your thoughts?
Here are some before and after photos, with a couple of closer shots.
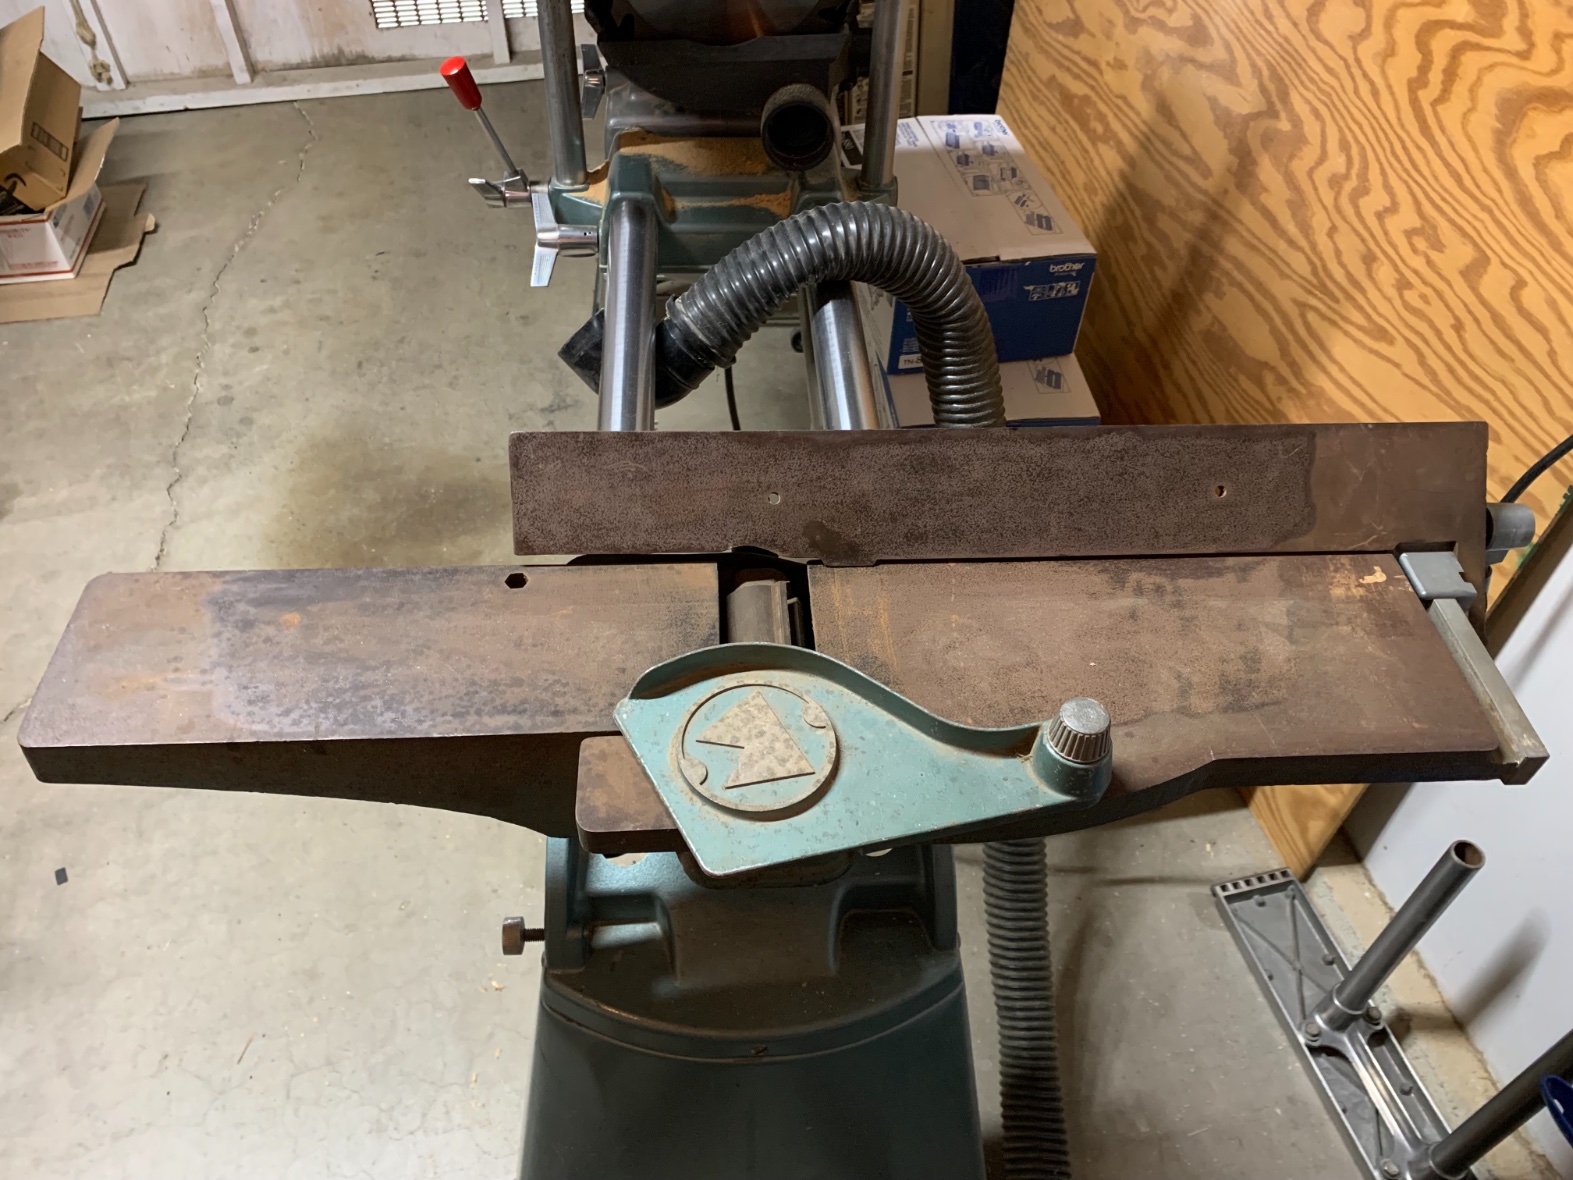
- Jointer, Before
- 4529E148-CC15-41FD-A872-826B092E70DB.jpeg (503.49 KiB) Viewed 2792 times

- Jointer, After
- 9FD0C2AD-909C-40DF-8C46-DD6C0793E7B6.jpeg (476.74 KiB) Viewed 2792 times
Re: Jointer Bed Rust Removal & Cleanup
Posted: Thu Aug 26, 2021 3:02 am
by Majones1
A closer shot of the infeed table.
.

- Infeed Table, with scratches and small pits
- 5B055A9C-975B-4B36-B9F7-22043A5120EB.jpeg (625.57 KiB) Viewed 2791 times
Re: Jointer Bed Rust Removal & Cleanup
Posted: Thu Aug 26, 2021 3:07 am
by Majones1
A closer shot of the outfeed table.
.
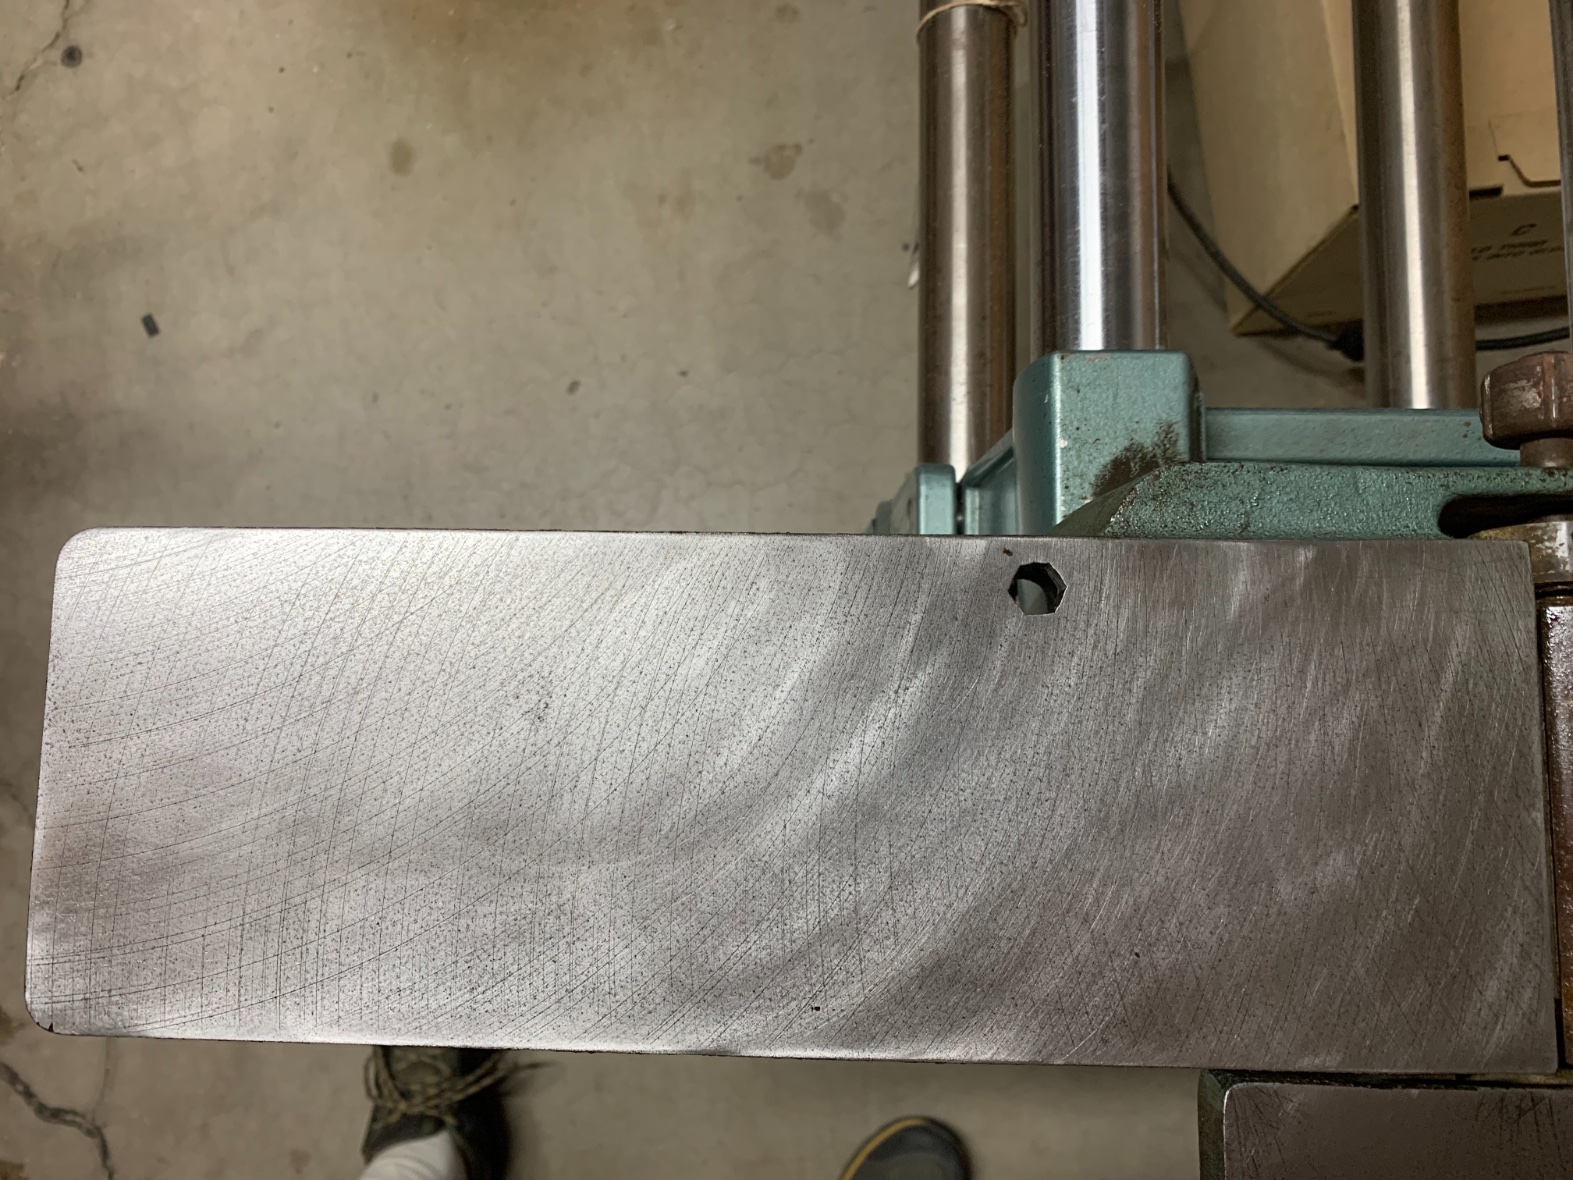
- Outfeed Table, with scratches and small pits
- 3A50B795-9F55-41E9-AC49-3C9AAFC5504B.jpeg (591.13 KiB) Viewed 2790 times
Re: Jointer Bed Rust Removal & Cleanup
Posted: Thu Aug 26, 2021 7:14 am
by BuckeyeDennis
Those tables now look tremendously better!
I believe that the “deep scratches” are actually machining marks from the original factory flattening process, known as “Blanchard grinding”. The brief video below shows the process and resulting finish.
On machine wear surfaces, having machining marks visible is usually considered a good thing, as a lack of them may indicate excessive wear.
It’s dangerous to use a jointer for a too-short workpiece. I forget the recommended minimum length for a Shopsmith, but it’s on the order of a foot, and is equal to the distance between the two bumps atop the jointer fence. As long as a workpiece of that minimum length easily bridges any low spots, they shouldn’t affect accuracy.
The small rust pits are strictly a cosmetic issue, except that rust likes to re-form in them. To prevent that once and for all, apply Penetrol generously to the entire surface, rubbing it well into the pits, and then wipe off the excess. Let it dry for a day or three. Then clean the Penetrol off of the top surface with mineral spirits, but not so aggressively as to clean it out of the pits. Finally top-coat with JPW (Johnson’s Original Paste Wax) or equivalent, and it’s good to go.
If you have any more machined surfaces to de-rust, I highly recommend
Nyalox brushes. Chuck one into a power drill — or onto your Shopsmith spindle for small parts — and they make quick & easy work of de-rusting. The medium and fine grits knock off surface rust while removing almost no solid metal, and they’re much nicer to use than an old-fashioned wire wheel. They also work great for polishing metal after treating it with Evaporust.
Re: Jointer Bed Rust Removal & Cleanup
Posted: Thu Aug 26, 2021 9:36 am
by edma194
IMHO you should stop smoothing now. The pits don't matter as long as you've softened their edges and they don't catch on wood. Flatness is the most important aspect of a joiner table but small pits and scratches don't count. It's flatness on the macro level that matters, not on the micro level. Get a good enough microscope and you'll see that metal actually looks like the surface of the moon.
Thanks for the link on the Nyalox brushes Dennis. I used to get them at the hardware store but haven't seen them for a while.
Re: Jointer Bed Rust Removal & Cleanup
Posted: Thu Aug 26, 2021 11:59 am
by JPG
+1
+1
STOP STRESSING OVER IT.

Re: Jointer Bed Rust Removal & Cleanup
Posted: Thu Aug 26, 2021 12:17 pm
by chapmanruss
I think Dennis and Ed have your questions pretty well covered. The only way now to restore the surface of the infeed and base/outfeed tables to like new would be to have them reground as a set. That is how they are done at the factory, It is also why you want to buy them in pairs and not individual parts. Putting a infeed table, for example, from another Jointer may give you an out of alignment table set. It can be corrected but it is a pain. One final check for your infeed and base/outfeed tables would be alignment. With a flat edge at least the length of the tables check to see that the two are flat to each other from end to end both on the front and back edges. If they are not you will not be able to produce a true flat edge on stock.
When reassembling the tables clean up the points on both the infeed and the base/outfeed tables where they slide on each other and give them a good waxing too. It will protect those bare metal contact points while lubricating them too. Also when painting them keep paint off those contact points. If you had to remove paint from those contact points and it also removes any metal you could change the alignment between the tables.
Re: Jointer Bed Rust Removal & Cleanup
Posted: Fri Aug 27, 2021 9:03 am
by Majones1
Thank you all for your sage advice, I knew I could count on honest and friendly explanations and suggestions. When the scotch brite was having little impact and I switched to sandpaper I was careful to use a wood block and sand in circles, moving evenly across the beds to try to maintain uniformity. I felt I had gotten to the point of potentially causing problems, and hadn’t reached the mirrored surfaces I had seen in videos, so I figured I had better ask you all before continuing.
I will begin working on the jointer’s fence this weekend, and I’m expecting to receive the zyalox brushes today, thank you for that suggestion. I will do the penetrol and JPW treatment to protect the surfaces, and clean and wax the contact points between the beds. At the same time I’ve been cleaning up my Pro Planer, which is in pretty good condition, with only a little surface rust on the bed and cross-rods (don’t know their proper name). I’m looking forward to using them for the project I’m in the middle of.
As always, I’m learning a lot from you guys. It’s much more fun, and a lot less stressful, than working on stupid servers, networks, and cybersecurity!
Re: Jointer Bed Rust Removal & Cleanup
Posted: Fri Aug 27, 2021 9:48 am
by JPG
Wax the CI bed/fence twice.
According to Nick is is slightly porous and it will sink in.
Re: Jointer Bed Rust Removal & Cleanup
Posted: Fri Aug 27, 2021 10:35 am
by RFGuy
BuckeyeDennis wrote: ↑Thu Aug 26, 2021 7:14 am
The small rust pits are strictly a cosmetic issue, except that rust likes to re-form in them. To prevent that once and for all,
apply Penetrol generously to the entire surface, rubbing it well into the pits, and then wipe off the excess. Let it dry for a day or three. Then clean the Penetrol off of the top surface with mineral spirits, but not so aggressively as to clean it out of the pits. Finally top-coat with JPW (Johnson’s Original Paste Wax) or equivalent, and it’s good to go.
Dennis,
Thanks. So, I have been meaning to try out Penetrol since it has been praised so many times on this forum, but I would like to understand the process a bit more though. So, why do the mineral spirits step? On the Penetrol datasheet it lists mineral spirits for cleanup, so I assume it is a solvent to the Penetrol formulation. Won't the mineral spirits step just remove all of the Penetrol applied to the surface? Or is it that Penetrol cures on the surface so after a few days the application of mineral spirits just removes any excess Penetrol that didn't cure? Just curious. It seems like that step may undo what was applied, so I just had to ask.