Page 8 of 9
Re: Jointer Cleanup and Repair
Posted: Sun Oct 17, 2021 1:14 pm
by theinrichs
Thanks for the interesting research and comments. I contacted the EBay seller who sold me the jointer and he said when he acquired it he was told the distinctive pattern on the tables was due to “flaking”. This is consistent with the articles describing hand scraping and frosting. I agree with Dennis that the hand scraping was most likely done for decorative effect. I’ll proceed with Penetrol and JPW as suggested by JPG. Who knew I would have picked up an “unique” jointer!

Re: Jointer Cleanup and Repair
Posted: Fri Oct 29, 2021 12:59 am
by theinrichs
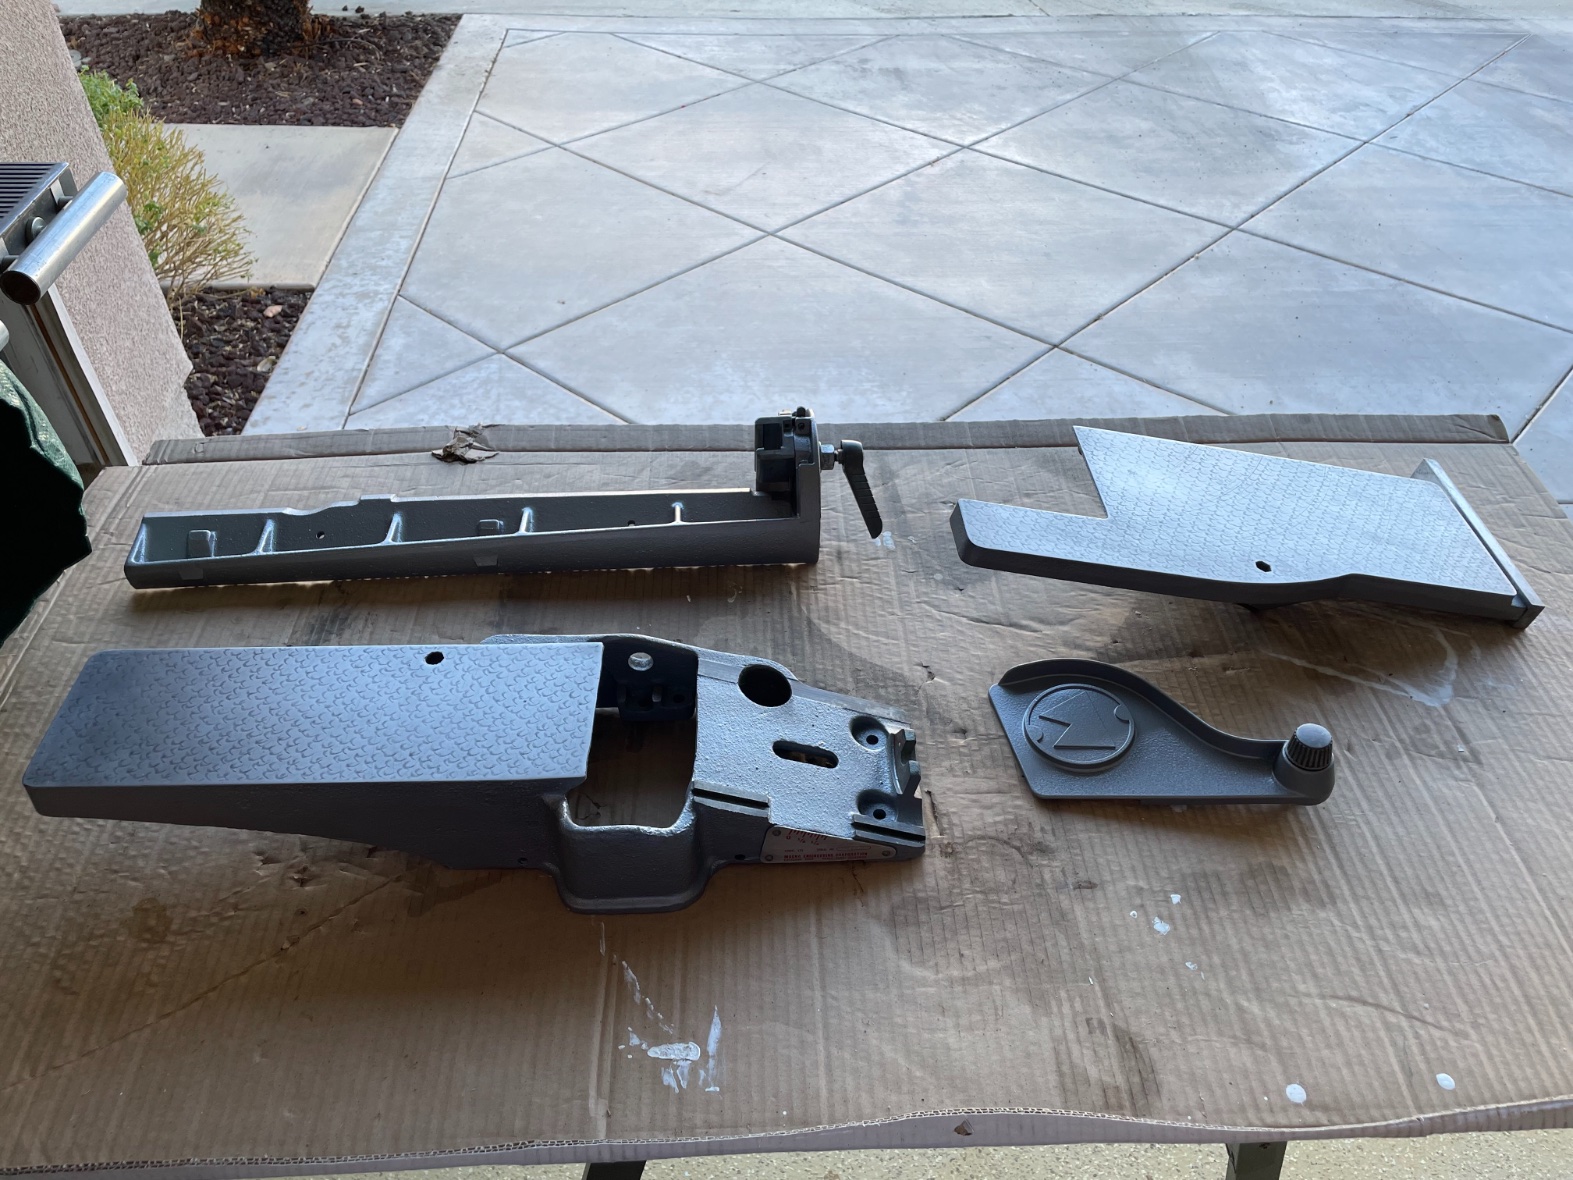
- 1EF42D28-0B56-4FCE-B674-F2D7BB0E8C31.jpeg (605.26 KiB) Viewed 1395 times
Here are some progress photos. I followed the cleaning, penetrol, waxing and painting procedures several of you recommended and this is how it turned out. Installed new bearings on the cutter head and sharpened the jointer knives. Marc Jones graciously let me borrow his bearing puller set and SS knife sharpening jig. I was careful not to get paint on the in-feed and out-feed sliding surfaces. Received the eccentric tube mounts from SS today. After adjusting the jointer knives I’ll be ready to make some test cuts. I definitely would have been lost during this restoration without all of your expert tips and recommendations. Thank you!
Re: Jointer Cleanup and Repair
Posted: Fri Oct 29, 2021 9:07 am
by Majones1
Very nice job Tony. That old jointer looks new, I’m sure you’ll enjoy using it. Can’t wait to see it mounted with some sawdust n it.

Re: Jointer Cleanup and Repair
Posted: Fri Oct 29, 2021 1:22 pm
by chapmanruss
Nice work on your Jointer. The pattern on the tables is unique and the only one I have seen with it. I'm glad you have saved the pattern on the tables. The Jointer I mentioned previously S/N 11458 which was made before your Jointer did not have a pattern like yours (see picture below) and neither did my made earlier Model 4E Jointer S/N 2145.
_

- IMG_0224r.jpg (123.71 KiB) Viewed 1372 times
Re: Jointer Cleanup and Repair
Posted: Fri Oct 29, 2021 6:37 pm
by theinrichs
Thanks, Marc and Russ. I can't wait to try it out. It's been fun learning about this tool through the restoration process.
Re: Jointer Cleanup and Repair
Posted: Thu Nov 04, 2021 1:01 pm
by theinrichs
Here are a couple of pics showing the restored jointer. I made a couple of test cuts and obtained nice square cuts. I have about 1 1/4” snipe on the trailing edge of the test stock. From my review of the forum thread regarding snipe I must have the blades set too high. Will adjust accordingly and try again. I purchased the SS Jointer Retro-Kit , #555077. Got this new kit from an EBay seller and it includes a chip chute, shaft guard and rear cutter guard. The instructions come with templates and call for drilling and tapping small holes through the fence to attach the rear cutter guard and into the side of the outfeed table to attach the shaft guard. I’m curious to see if anyone has used this kit before and to determine if there are alternatives such as using JB Weld epoxy instead of drilling/ tapping holes for mounting screws. Any advice much appreciated. Thanks.
Tony
Re: Jointer Cleanup and Repair
Posted: Thu Nov 04, 2021 1:59 pm
by Majones1
I love it, Tony, you've got the wood chips on the machine! It look great. Once I got everything completely adjusted I don't think I had any snipe on the few boards I ran through it, so it should be fixable.
Re: Jointer Cleanup and Repair
Posted: Thu Nov 04, 2021 3:12 pm
by chapmanruss
I added the Dust Chute Retro-fit kit (555077) to my 1979 Jointer. I installed it by drilling and tapping the holes for the rear cutter guard and shaft guard. 2 holes for each and the dust chute holes are already there. Not a difficult job to do as long as you have the correct size drill bits and taps. The rear cutter guard is all metal and the dust chute and shaft guard are plastic.
Re: Jointer Cleanup and Repair
Posted: Thu Nov 04, 2021 3:40 pm
by JPG
Curmudgeon WARNING!!!
The only time I think a rear guard is needed is when the fence is out away from the shaft edge thus exposing the blades. In that situation, I move the guard to the other hex hole thus covering that up.
Most times when moving the fence that far the guard is not usable(think rabbeting) anyway.
I have two guards for those in between scenarios.
No drill/tapping.
Newer jonters may not have the second hex hole.
Re: Jointer Cleanup and Repair
Posted: Tue Nov 09, 2021 2:59 pm
by theinrichs

- 894AF246-0F03-4483-9FEE-A368B9222490.jpeg (652.08 KiB) Viewed 1124 times

- 1E43C425-E427-467C-A424-9D2098913F94.jpeg (650.11 KiB) Viewed 1124 times
Russ and JPG, thank you for your comments. Since I had already purchased the Dust Chute Retro Kit, I installed the safety guards. With the right drill bit and tap the installation was easier than I anticipated. I realigned the jointer knives which took care of the snipe issue. I bought the Snap Check Digital Guage shown in the photo from Amazon for $27. Scott Markwood recommended it for setting jointer knives in one of his videos and it does a great job. A real time saver.