Part or Tool Tray Options
Moderators: HopefulSSer, admin

Part or Tool Tray Options
In the past questions have been raised regarding possible trays designed to ride on the Shopsmith Way Tubes. The trays I built were first seen at a traveling academy I attended. I adapted these to my desires. I bulit them using the saw to cut the pieces to size. Used the disk sander to sand all pieces to the same sizes. Then used the Jointer to even out three sides on all pieces. My thickness planer did a marvelous job of getting all pieces to the thickness I desired. I used the Shopsmith router table for all router work except the box joints, for those I used a Porter Cable Router and their dovetail jigs. All of these tools made short work for a great first project for my new Shopsmith Shop. I hope you enjoy these pictures which are posted on the ssusers web site http://www.ssusers.org/files/fjimp%20Folder/ Note: They are not posted here as so far I lack the smarts to figure it out. fjimp
Nicely done, fjimp. Nice joinery on the corners.
Two things: If I were to use this for my turning, I might be tempted to put holes in the bottom of the tray so that I could put more tools in one place and still have space for my abrasives.
Second thing. When you want to place a picture in your posts, you have to play a little game. Doesn't cost you money, just a few minutes of your time. There are two ways to do it.
First, you can simply attach files. Just below the composition window where I'm typing right now, there are "post icons" to give your over-all feeling about the thread or your post. Below that are four other little windows. The second window is where you attach files. If I do that, you'll see a little "files attached" note on your post, but no pictures. No effort required on your part, whatsoever. The files come from your computer and rest on the Shopsmith.net server. I've attached one just so you can see the attachment window.
Second, you can open a free account at a site like PhotoBucket.com. They will host pix for you with a few limitations, but nothing awful. at that point, you look in the button bar ABOVE the composition window where I'm typing (or where YOU're typing!!) and you'll see what looks like a yellow icon showing mountains and a little reddish sun. That icon will allow you to insert an image right into your post, like this:
The same pic that's attached.
PhotoBucket even provides all of the necessary info to plug into a variety of different situations, be they IMG, URL, or as an HTML tag, depending on where you're plugging things in.
Hope that helps.
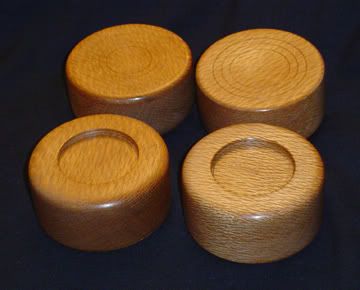
- Attachments
-
- TableFeet-6s.jpg (139.3 KiB) Viewed 13380 times
Dean Thomas
KCMO
520, jointer, bandsaw, stripsander
KCMO
520, jointer, bandsaw, stripsander
Dean,
Thank you for the education. I had tried without success to insert the pictures. Next time I should be able to do so.
Regarding the holes you suggest. I actually considered that idea and couldn't seem to agree with myself on how I would want them. I am currently trying to device a bit different tool holder that won't fill up with shavings.
I still like your furniture cups. I made a very similar set for my Granddaughters bed.
Your input is greatly appreciated. fjimp