Page 1 of 1
6" belt sander #555355
Posted: Mon Dec 26, 2022 12:12 pm
by prt1gue
Hello everyone Shopsmith,
My wife and I have his and her shopsmiths that we purchased used over the years with most all accessories.
We have an older 6" belt sander and were having touble keeping the belt tensioned a running true ( tracking straight ).
So we thought we would buy a brand new one and so we did.
We are exasperated trying to get the new belt sander adjusted properly, you would think being brand new that it would have been close.
Actually it is worse than the old one !
We have watched all the videos we can find, but nothing we have learned/observed has helped.
The best video we found is from the 90's and the video quality is terrible I believe the video is by shopsmith.
In this video the Instructor actually takes the belt sander apart lubes it and explains quite a bit, then reassembles it.
We have been over the instructions time after time and are unable to find the sweet spot (so to speak).
HELP !! Can anyone relate and if so would you share your secrets ?

Thanks,
Lee
Re: 6" belt sander #555355
Posted: Mon Dec 26, 2022 12:44 pm
by edma194
Is this a tracking problem? The tracking adjustment wheel located just below the tensioning knob on the upper right of your first photo may be very far off when you start. In case you didn't realize it you can stick your 5/32 hex wrench into the holes on the wheel to turn it as the sander runs. You should be able to see the belt move side to side on the top roller as you adjust it. Have you gotten this far?
Have you been able to follow the tensioning directions? They can be confusing, if the belt isn't tight enough tracking won't hold, and of course the belt will slip under load.
Re: 6" belt sander #555355
Posted: Mon Dec 26, 2022 1:36 pm
by chapmanruss
prt1gue,
Welcome to the Shopsmith Forum,
I have been frustrated trying to get a Belt Sander properly adjusted too.
As Ed Said, tracking can be tricky. Instructions vary in the different manuals. Early manuals did not go as Indepth as more current manuals do. Problems with tracking may not be as simple as adjusting the Tracking Nut either left or right. If the tension is not properly set to begin with there will be problems. Crowning the belt will also help with tracking. Older Belt Sanders had a label inside on the back of the Back Up Plate with adjustment procedures and some instructions not covered in the manual. Newer Belt Sanders have all that information in the manual.
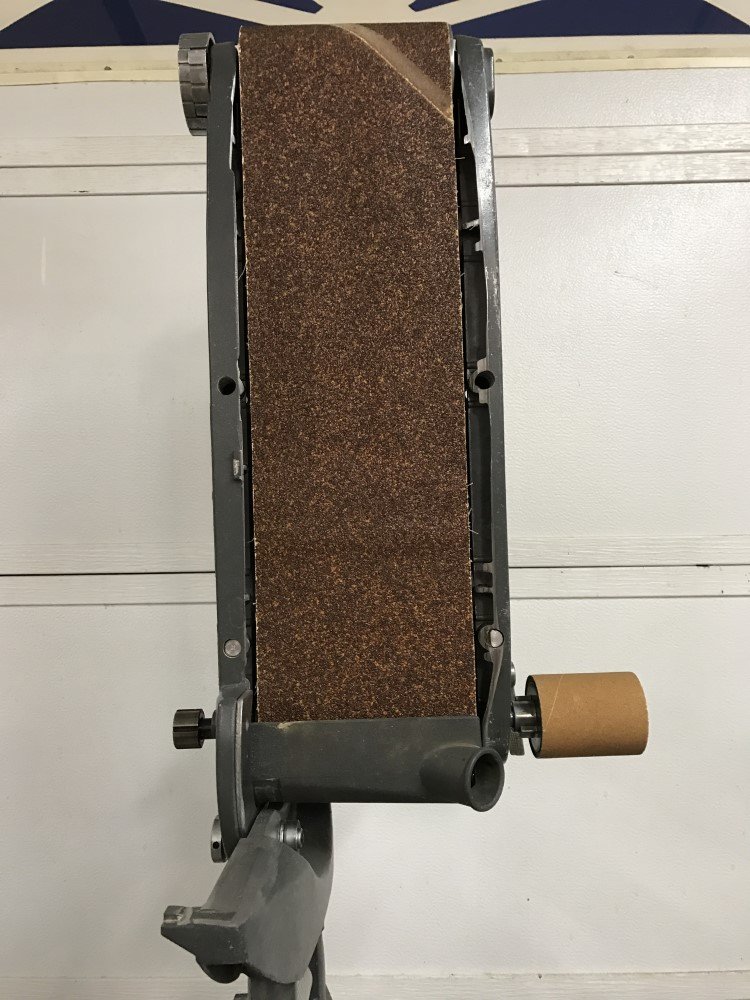
There is a Tracking Screw assembly on the opposite side of the Idler Drum from the Tracking Adjustment Nut and Tensioner. That Tracking Screw (inside the frame on the right side of the picture below) has to be adjusted correctly to have the Idler Drum level. It is the combination of the Tracking Screw and Tracking Adjustment Nut along with the proper tension on and crowning of the belt that keeps the belt tracking correctly. Once done you will have a properly tacking Belt Sander.
Looking at the older Belt Sander it likely has or had the label inside on the Back Up Plate. I don't know what the current manual says for alignment instructions. My newest manual is one dated 01-89. As you may have already noticed there have not been a lot of changes between your older (made in the 70's or 80's) and the new Belt Sander. If interested the PDF below is a replica of the Label from inside the Belt Sander.
.
.
If the Belt Sander is allowed to run with the belt tracking off to the side, it will eventually damage the frame besides wearing off the edge of the belt. The example below is a Belt Sander I got used with such damage to the frame as seen on the right side in the picture.
_
- Belt Sander Damage.jpg (141.52 KiB) Viewed 1820 times
.
It not only wore down that side of the Frame but also cut into the Mounting Post of the Table nearly half way through.
Re: 6" belt sander #555355
Posted: Mon Dec 26, 2022 3:07 pm
by prt1gue
edma194 wrote: Mon Dec 26, 2022 12:44 pm
Is this a tracking problem? The tracking adjustment wheel located just below the tensioning knob on the upper right of your first photo may be very far off when you start. In case you didn't realize it you can stick your 5/32 hex wrench into the holes on the wheel to turn it as the sander runs. You should be able to see the belt move side to side on the top roller as you adjust it. Have you gotten this far?
Have you been able to follow the tensioning directions? They can be confusing, if the belt isn't tight enough tracking won't hold, and of course the belt will slip under load.
Yes we have got that far.
As far as the tensioning directions we have gone thru it multiple times with no success .
The tensioning knob does not turn one full revolution when you depress the lever on the knob.
As far as being able to turn the knob four revolutions, I think we managed to do that once but have not been successful.
Persistence is going to be the key I believe !
Thanks for your input !
Re: 6" belt sander #555355
Posted: Mon Dec 26, 2022 3:21 pm
by prt1gue
edma194 wrote: Mon Dec 26, 2022 12:44 pm
Is this a tracking problem? The tracking adjustment wheel located just below the tensioning knob on the upper right of your first photo may be very far off when you start. In case you didn't realize it you can stick your 5/32 hex wrench into the holes on the wheel to turn it as the sander runs. You should be able to see the belt move side to side on the top roller as you adjust it. Have you gotten this far?
Have you been able to follow the tensioning directions? They can be confusing, if the belt isn't tight enough tracking won't hold, and of course the belt will slip under load.
Yes we have got that far.
As far as the tensioning directions we have gone thru it multiple times with no success .
The tensioning knob does not turn one full revolution when you depress the lever on the knob.
As far as being able to turn the knob four revolutions, I think we managed to do that once but have not been successful.
Persistence is going to be the key I believe !
Thanks for your input !
chapmanruss wrote: Mon Dec 26, 2022 1:36 pm
prt1gue,
Welcome to the Shopsmith Forum,
I have been frustrated trying to get a Belt Sander properly adjusted too.
As Ed Said, tracking can be tricky. Instructions vary in the different manuals. Early manuals did not go as Indepth as more current manuals do. Problems with tracking may not be as simple as adjusting the Tracking Nut either left or right. If the tension is not properly set to begin with there will be problems. Crowning the belt will also help with tracking. Older Belt Sanders had a label inside on the back of the Back Up Plate with adjustment procedures and some instructions not covered in the manual. Newer Belt Sanders have all that information in the manual.
There is a Tracking Screw assembly on the opposite side of the Idler Drum from the Tracking Adjustment Nut and Tensioner. That Tracking Screw (inside the frame on the right side of the picture below) has to be adjusted correctly to have the Idler Drum level. It is the combination of the Tracking Screw and Tracking Adjustment Nut along with the proper tension on and crowning of the belt that keeps the belt tracking correctly. Once done you will have a properly tacking Belt Sander.
Looking at the older Belt Sander it likely has or had the label inside on the Back Up Plate. I don't know what the current manual says for alignment instructions. My newest manual is one dated 01-89. As you may have already noticed there have not been a lot of changes between your older (made in the 70's or 80's) and the new Belt Sander. If interested the PDF below is a replica of the Label from inside the Belt Sander.
.
Belt Sander plate label.pdf
.
If the Belt Sander is allowed to run with the belt tracking off to the side, it will eventually damage the frame besides wearing off the edge of the belt. The example below is a Belt Sander I got used with such damage to the frame as seen on the right side in the picture.
_
Belt Sander Damage.jpg
.
It not only wore down that side of the Frame but also cut into the Mounting Post of the Table nearly half way through.
The documentation we got with the new sander is the latest I believe.
I don't think anything has changed on the design comparing the new to old.
The shopsmith video I described earlier touched on leveling the idler roller and we tried to make adjustments to no avail.
Anyway as mentioned on my previous reply I think perseverance / persistence will be key.
I even told the wife we should call Shopsmith for tech support, but of course they don't give that away.
Thanks for the input !

Re: 6" belt sander #555355
Posted: Mon Dec 26, 2022 4:39 pm
by DLB
prt1gue wrote: Mon Dec 26, 2022 3:21 pm
The documentation we got with the new sander is the latest I believe.
I don't think anything has changed on the design comparing the new to old.
Depending on what is meant by 'old' the one change I can think of that relates to tracking is the change of the drive drum from crowned (old) to flat (new). But this difference, if present, should yield improved tracking on the new one.
The shopsmith video I described earlier touched on leveling the idler roller and we tried to make adjustments to no avail.
Was this a Sawdust Session (http://www.shopsmithacademy.com/SS_Arch ... Tuneup.htm)? IIUC you should not have to change the adjustment if you are using SS branded belts.
Anyway as mentioned on my previous reply I think perseverance / persistence will be key.
I even told the wife we should call Shopsmith for tech support, but of course they don't give that away.
If you are having problems with new equipment and have read/followed the manual I think in this case they do give that away, as warranty support. That has been my experience. You' might start with Customer Service and let them decide.
Thanks for the input !
- David
Re: 6" belt sander #555355
Posted: Tue Dec 27, 2022 3:11 pm
by prt1gue
Hi DLB,
Yes the video I had mentioned was the sawdust session, and it was helpful.
The belt on the new sander is a SS belt.
Thanks for the tip on contacting SS, can't hurt to try.
The only other thing I can think of was that we moved across country in March of this year with our truck and trailer loaded with tools.
Both shopsmiths came with us and possibly all the miles of vibration loosened something up in the new sander ??
Thanks,
Lee
Re: 6" belt sander #555355
Posted: Wed Dec 28, 2022 3:09 pm
by edma194
Russ pointed out one of the things I recall was not well explained in the manual I had. There is a screw on the left side of the belt sander at the end by the idler drum. That screw combined with the tracking screw that has the knurled knob on the right side sets the distance between the idler drum and drive drum. The tracking knob should only be moving the right side slightly to get the belt lined up. I think I found the spot by putting a sanding belt on with the idler drum fully wound and then adjusting those steo crews until the belt was tight enough to drive.
Re: 6" belt sander #555355
Posted: Thu Jan 05, 2023 10:42 pm
by mdiPhotography
This might be of help in getting your belts to run true. From a sticker on an old SS Belt Sander.
"Crowning Belts
Pre-crowning belts assures more efficient tracking and longer belt life. This done by 'over-tensioning' the belt as it is running. Turn the tension knob in direction opposite to that indicated by arrow on knob, until machine or motor labors. This causes belt to conform to crowning on drums by stretching belt fabric. Then turn tension knob in direction indicated by arrow until sander and motor are running smoothly. Do this Before belt is used and occasionally during its use."
I provide these instructions to everyone that I sell a refurbished belt sander to.
Good luck.
Re: 6" belt sander #555355
Posted: Thu Jan 05, 2023 11:12 pm
by JPG
My very limited experience has made me come to the conclusion that proper tensioning is possible only if the non adjustable(except by the internal nut)pin/post that bears against the tensioning cam and the belt circumference are co-cooperating. Too 'loose' and the cam rotates too far and looses tension(by unwinding the spring). Too tight and belt installing/removal is difficult. The adjustable(by external knob/nut) pin must be close to the other one for tracking/adjusting to be acceptable.
